set clock Acura RL 2009 Owner's Manual
[x] Cancel search | Manufacturer: ACURA, Model Year: 2009, Model line: RL, Model: Acura RL 2009Pages: 560, PDF Size: 11.21 MB
Page 156 of 560
Each door has a lock tab above the
inside door handle. Pull the tab to
lock the door and push it to unlock.
Whenyoupullthetabonthedriver’s
door, all the doors lock.To lock any door when getting out of
the vehicle, pull the lock tab and
close the door.
All doors can be locked f rom the
outsidebyusingthebuilt-inkeyin
the driver’s door. To unlock only the
driver’s door, insert the built-in key,
turn it clockwise, and release it. The
remaining doors unlock when you
turn the built-in key a second time
within a f ew seconds.
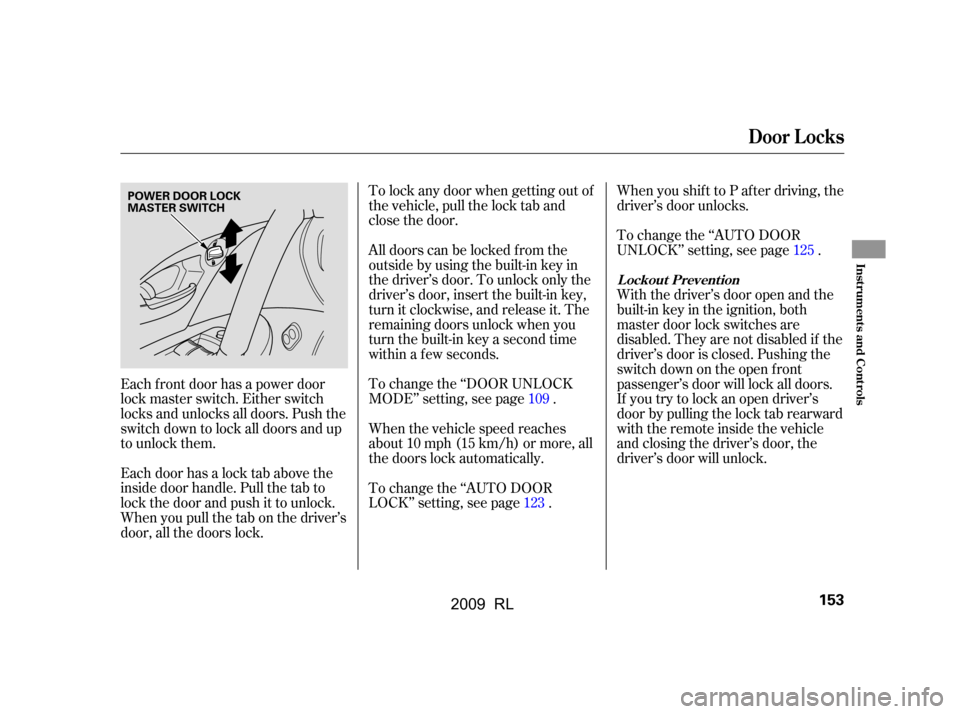
Each f ront door has a power door
lock master switch. Either switch
locks and unlocks all doors. Push the
switch down to lock all doors and up
to unlock them. To change the ‘‘DOOR UNLOCK
MODE’’ setting, see page .
When the vehicle speed reaches
about 10 mph (15 km/h) or more, all
the doors lock automatically.When you shif t to P af ter driving, the
driver’s door unlocks.
To change the ‘‘AUTO DOOR
UNLOCK’’ setting, see page .
With the driver’s door open and the
built-in key in the ignition, both
master door lock switches are
disabled. They are not disabled if the
driver’s door is closed. Pushing the
switch down on the open f ront
passenger’s door will lock all doors.
If you try to lock an open driver’s
door by pulling the lock tab rearward
withtheremoteinsidethevehicle
and closing the driver’s door, the
driver’s door will unlock.
To change the ‘‘AUTO DOOR
LOCK’’ setting, see page . 109 125
123
L ockout Prevent ion
Door L ocks
Inst rument s and Cont rols
153
POWER DOOR LOCK
MASTER SWITCH
2009 RL
Page 206 of 560
The climate control system in your
vehicle provides a comfortable
driving environment in all weather
conditions.
The standard audio system has
many f eatures. This section
describes those f eatures and how to
use them.
Theclimatecontrolsystemandthe
audio system have a voice control
feature.
Your vehicle has an anti-theft audio
system that requires a code number
to enable it.
The security system helps to
discourage vandalism and thef t of
your vehicle................
Climate Control System .204
..............
Climate Control Sensors .212
................................
Audio System .213
......
Playing the AM/FM Radio .214
....
AM/FM Radio Frequencies .224
........
AM/FM Radio Reception .224
.................
Adjusting the Sound .226
Playing the XM
Satellite
......................................
Radio .229
...
Operating the Disc Changer .236
..........................
PlayinganiPod .247
Playing a USB Flash Memory
....................................
Device .256
.....
Playing a Bluetooth
Audio .265
...
Disc Changer Error Messages .271
....................
iPod Error Messages .272
USB Flash Memory Device
........................
Error Messages .273
..................
Protecting Your Discs .274
......................
Auxiliary Input Jack .277
................
Remote Audio Controls .278
.................
Radio Thef t Protection .280
...........................
Compass System .281
................
Voice Control Basics .304
......................
Setting the Clock .313
............................
Security System .315 ...............................
Cruise Control .316
..
Adaptive Cruise Control (ACC) .319
HomeLink
Universal
................................
Transceiver .334
......................................
AcuraLink .338
.......
Bluetooth
HandsFreeLink.355
...
Rearview Camera and Monitor .382
Features
Features
203
2009 RL
Page 296 of 560

Turn the interf ace knob until the
unit you want to convert f rom is
highlighted (kilogram, f or
example), then push the selector
in to select it as it the example
above.The set-up f unctions consist of three
dif f erent screens that allow you to
change and update inf ormation in
the system. To display the
, say ‘‘Set up’’ or press the
SET UP button, and then select an
item. To select more setup items, say
‘‘More,’’ or select MORE at the top
right corner of the screen.
The f irst setup screen allows you to
change the system’s brightness,
contrast, black level, volume,
interf ace dial f eedback, and clock
adjustment. To select a setup item,
turn the interf ace knob until it is
highlighted, then push the interf ace
selector in to select it.
4.
CONT INUED
System Set-up
set up
screenFirst Set up Screen
Compass System (U.S. model without navigation system)
Features
293
2009 RL
Page 298 of 560
Interf ace Dial Feedback
On
Auto
(def ault)
NoThe system always
reads what you select.
The system reads your
selection only while
the vehicle is moving.
The system does not
read your selection.
Clock Adjustment
Changing this setting allows you to
controlwhen(andif)thesystemwill
read the current selection you
choose with the interf ace dial. This
feature can minimize the need to
look at the screen while operating
the dial. The three settings are
explained in the f ollowing table. The
f actory def ault setting is . You can adjust the clock of your
system. When the battery is
disconnected or the f use f or the
compass system is removed, you
need to reset the time. See page
f or more inf ormation on setting
the clock.
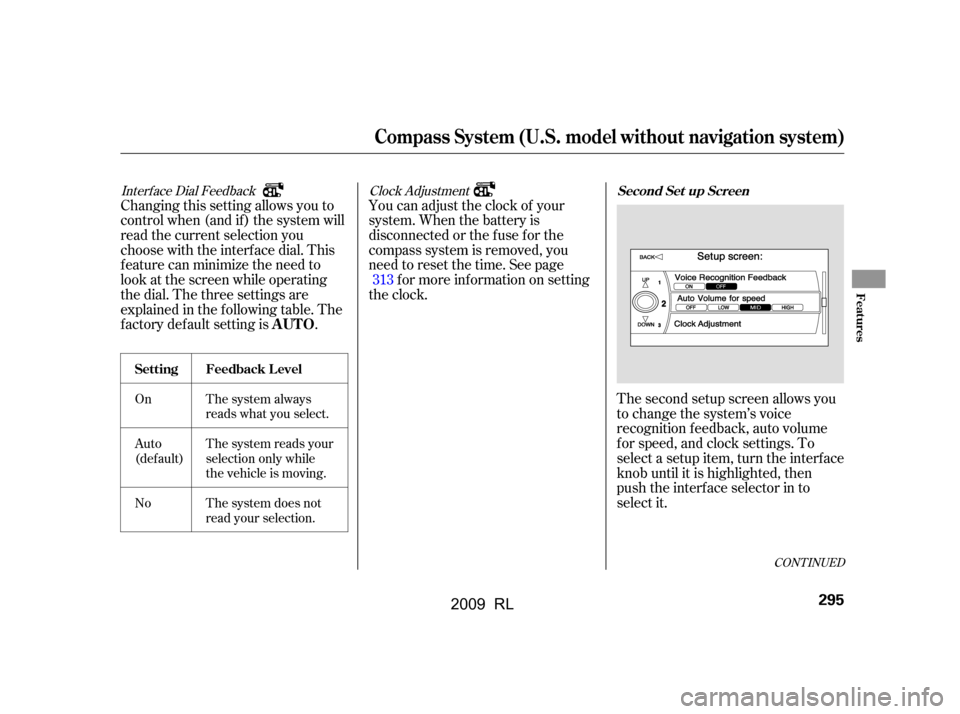
The second setup screen allows you
to change the system’s voice
recognition f eedback, auto volume
f or speed, and clock settings. To
select a setup item, turn the interf ace
knob until it is highlighted, then
push the interf ace selector in to
select it.
313
CONT INUED
AUTO
Set t ing Feedback L evel
Second Set up Screen
Compass System (U.S. model without navigation system)
Features
295
2009 RL
Page 299 of 560
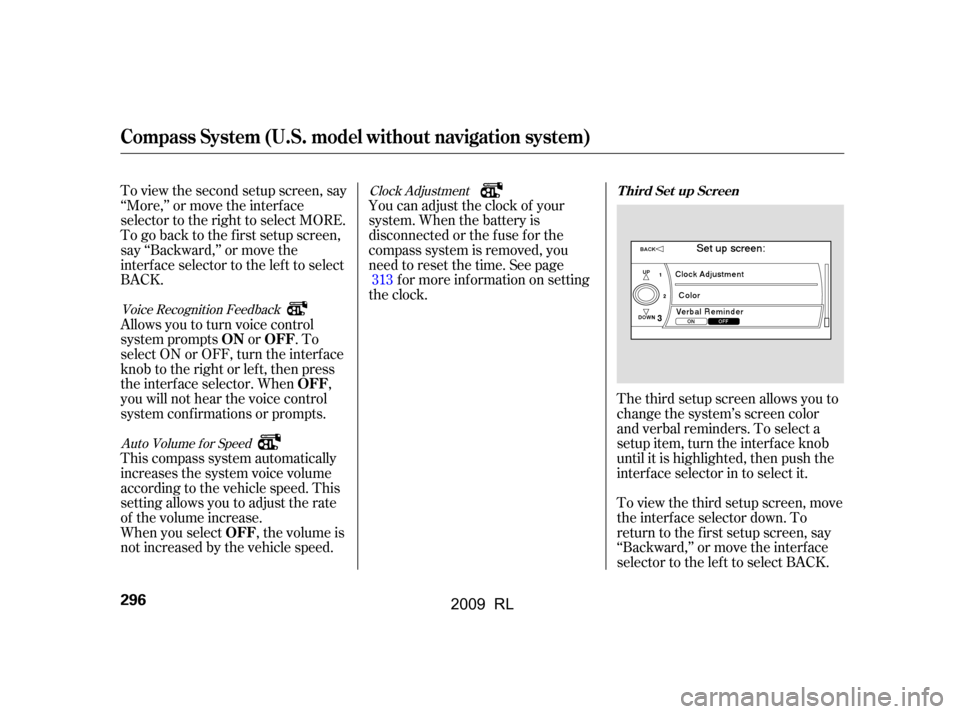
The third setup screen allows you to
change the system’s screen color
and verbal reminders. To select a
setup item, turn the interface knob
until it is highlighted, then push the
interf ace selector in to select it.
To view the third setup screen, move
the interf ace selector down. To
return to the first setup screen, say
‘‘Backward,’’ or move the interface
selector to the lef t to select BACK.
To view the second setup screen, say
‘‘More,’’ or move the interf ace
selector to the right to select MORE.
To go back to the first setup screen,
say ‘‘Backward,’’ or move the
interface selector to the left to select
BACK.
Allowsyoutoturnvoicecontrol
system prompts or . To
select ON or OFF, turn the interface
knob to the right or left, then press
the interf ace selector. When ,
you will not hear the voice control
system conf irmations or prompts.
This compass system automatically
increases the system voice volume
according to the vehicle speed. This
setting allows you to adjust the rate
of the volume increase.
When you select , the volume is
not increased by the vehicle speed.
You can adjust the clock of your
system. When the battery is
disconnected or the f use f or the
compass system is removed, you
need to reset the time. See page
f or more inf ormation on setting
the clock. 313
Voice Recognition Feedback
Auto Volume f or Speed Clock Adjustment
T hird Set up Screen
Compass System (U.S. model without navigation system)
ON OFF
OFF
OFF
296
2009 RL
Page 316 of 560
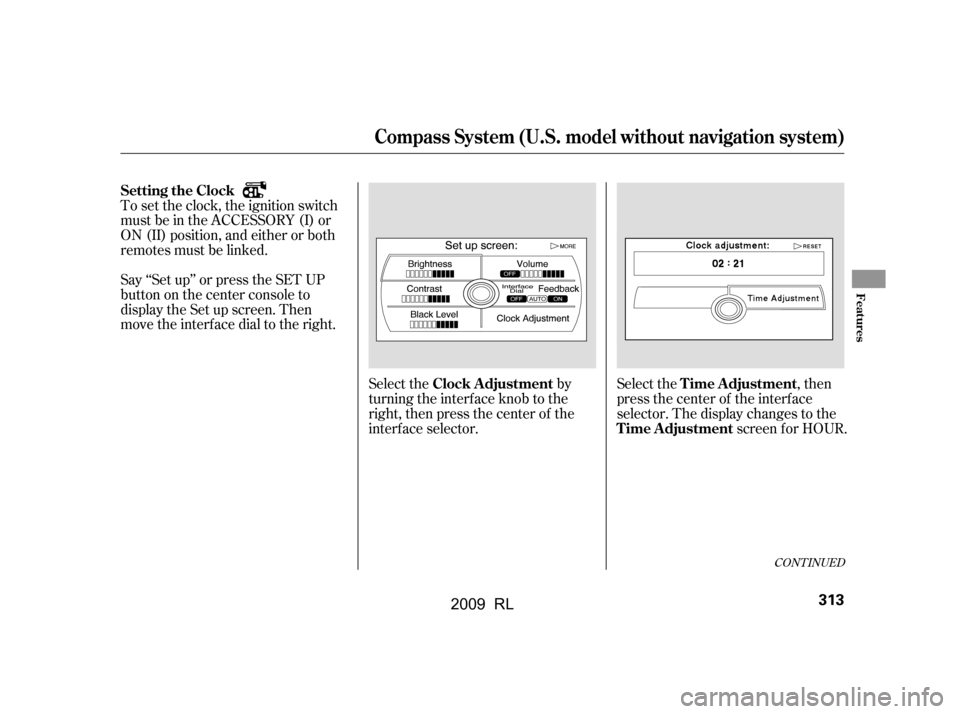
To set the clock, the ignition switch
must be in the ACCESSORY (I) or
ON (II) position, and either or both
remotes must be linked.
Say ‘‘Set up’’ or press the SET UP
button on the center console to
display the Set up screen. Then
move the interface dial to the right.Select the by
turning the interf ace knob to the
right, then press the center of the
interf ace selector.Select the , then
press the center of the interf ace
selector. The display changes to the
screen f or HOUR.
CONT INUED
Setting the Clock
Clock A djustment T ime A djustmentT ime A djustment
Compass System (U.S. model without navigation system)
Features
313
2009 RL
Page 493 of 560

If your vehicle’s battery is
disconnected or goes dead, all stored
driving positions will be lost. To
store the driving positions again, see
the storing procedure on page .
The navigation system will also
disableitself.Thenexttimeyouturn
on the ignition switch, the system
will require you to enter a PIN
bef ore it can be used. Ref er to the
navigation system manual.If your vehicle’s battery is
disconnected or goes dead, the audio
system may disable itself . The next
timeyouturnontheradioyouwill
see ‘‘ ’’ in the f requency
display. Use the preset buttons to
enter the code (see page ).
If your vehicle’s battery is
disconnected or goes dead, the
power tilt and telescopic steering
wheel system will be disabled. The
system needs to be reset af ter
reconnecting the battery (see page
).
The compass system will also disable
itself.Thenexttimeyouturnonthe
ignition switch, the system will
require you to enter a PIN bef ore it
can be used. Enter the f our-digit anti-
theftsecuritycode(seepage).
You will also need to reset the clock
according to the instruction of
setting the clock (see page ).
163
298
313 280
149
On vehicles with navigation system On vehicles without navigation system
Checking the Battery
490
2009 RL
Page 507 of 560

If you do not f ind an obvious leak,
check the coolant level in the
radiator reserve tank. Add coolant
if the level is below the MIN mark.
If there was no coolant in the
reserve tank, you may need to add
coolant to the radiator. Let the
engine cool down until the pointer
reaches the middle of the tempera-
ture gauge, or lower, bef ore check-
ing the radiator.Using gloves or a large heavy
cloth, turn the radiator cap
counterclockwise, without pushing
down, to the f irst stop. Af ter the
pressure releases, push down on
the cap, and turn it until it comes
off.
Put the radiator cap back on
tightly. Run the engine, and check
the temperature gauge. If it goes
back to the red mark, the engine
needs repair (see
on page ).
If the temperature stays normal,
check the coolant level in the
radiator reserve tank. If it has
gone down, add coolant to the
MAX mark. Put the cap back on
tightly.
Start the engine, and set the
interior temperature to maximum
(climate control to FULL AUTO at
‘‘ ’’). Add coolant to the
radiator up to the base of the f iller
neck. If you do not have the
proper coolant mixture available,
you can add plain water.
Remember to have the cooling
system drained and ref illed with
the proper mixture as soon as you
can.
6.
7.
8.
9.10.
11. 519
Emergency
Towing
If theEngineOverheats
504
Removing the radiator cap
while the engine is hot can
cause the coolant to spray out,
seriously scalding you.
Always let the engine and
radiator cool down before
removing the radiator cap.
2009 RL
Page 518 of 560

If thefuseforthedrivingposition
memory system is removed, all
stored driving positions will be lost.
To store the driving positions again,
see page .
If the navigation system f use is
removed, the navigation system will
disableitself.Thenexttimeyouturn
on the ignition switch, the system
will require you to enter a PIN
bef ore it can be used. Ref er to the
navigation system manual.
If the compass system f use is
removed, the compass system will
disableitself.Thenexttimeyouturn
on the ignition switch, the system
will require you to enter a PIN
bef ore it can be used. Enter the f our-
digit anti-thef t security code (see
page ). You will also need to
reset the clock according to the
setting the clock instructions (seepage ).
If the radio f use is removed, the
audio system will disable itself . The
next time you turn on the audio
system you will see ‘‘ ’’ in the
f requency display. Use the preset
buttons to enter the five-digit code
(see page ).
If thefuseforthepowertilt
telescopic steering is removed, the
system will be disabled. The system
needs to be reset af ter reinstalling
thefuse(seepage ).
163
298 313
280 149
On vehicles with navigation system
On vehicles without navigation system
Fuses
T aking Care of t he Unexpect ed
515
2009 RL
Page 547 of 560
...............
DANGER, Explanation of .iii
...................................
Dashboard .4,60
..............
Daytime Running Lights .142
.......................................
Indicator .65
.....................................
Built-in-key .167
..............................
Bulbs, Halogen .469
............................
Capacities Chart .524
.............
Carbon Monoxide Hazard .56
....................
Cargo, How to Carry .395
.............
CAUTION, Explanation of .iii
.........................................
CD Care .274
.......................
CD Error Message .271
...................................
CD Changer .236
................................
Ceiling Lights .200
........................
Certif ication Label .522
.................................
Chains, Tires .487
....................
Changing a Flat Tire .495
Changing Oil
........................................
How to .459
......................................
When to .445
..........
Charging System Indicator .506
............
Checklist, Bef ore Driving .402
.....................................
Child Saf ety .38
..............................
Booster Seats .53
...................................
Child Seats .45
.....
Important Saf ety Reminders .38
..........................................
Inf ants .43 ..........................
Larger Children .52
.........................................
LATCH .47
......................
Risks with Airbags .39
.............................
Small Children .44
.........................................
Tethers .51
.........
Where Should a Child Sit? .39
.......................................
Child Seats .43
.........................................
LATCH .47
..........
Tether Anchorage Points .51
................
Childproof Door Locks .155
Cleaning
...................................
Seat Belts .476
....................
Client Service Of f ice .538
...............
Climate Control System .204
.........................
Clock, Setting the .313
........................
CO in the Exhaust .532
............
Cold Weather, Starting in .403
Collision Mitigation Brake System
(CMBS) .....................................
Indicator .424
...................................
Operation .420
......................
Compact Spare Tire .494
...........................
Compass System .281
.................
Console Compartment .195
.................
Consumer Inf ormation .538
.............
Controls, Instruments and .59 Coolant
........................................
Adding .461
....................................
Checking .389
.........................
Proper Solution .461
...................
Temperature Gauge .70
Crankcase Emissions Control ........................................
System .532
................
Cruise Control Indicator .65
............
Cruise Control Operation .316
...................................
Cup Holders .194
.........................
Customize Settings .81
...................................
ACC Setup .89
................
Door/Window Setup .122
.......
KEYLESS ACCESS Setup .108
...........................
Lighting Setup .115
.................................
Meter Setup .94
...........................
Position Setup .103
........................
Setting to Default .85
...............................
Wiper Setup .133
Index
C
D
II
2009 RL