remote control Acura RLX 2014 Owner's Guide
[x] Cancel search | Manufacturer: ACURA, Model Year: 2014, Model line: RLX, Model: Acura RLX 2014Pages: 518, PDF Size: 15.83 MB
Page 152 of 518
151
uuAdjusting the MirrorsuPower Door Mirrors
Controls
■Folding in the door mirrors
Press the lock button on the keyless access remote, or press the door lock button on
any door.
uThe mirrors start folding in automatically.■Folding out the door mirrors
Press the unlock button on the keyless access remote, or grab the door handle on
any door.
uThe mirrors start folding out automatically.
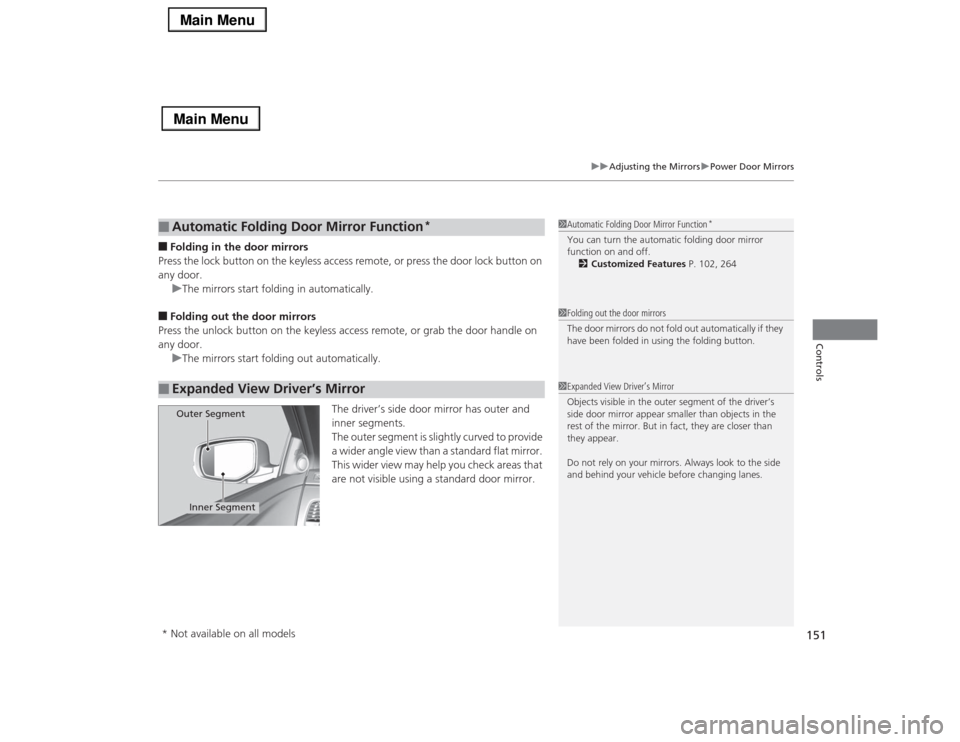
The driver’s side door mirror has outer and
inner segments.
The outer segment is slightly curved to provide
a wider angle view than a standard flat mirror.
This wider view may help you check areas that
are not visible using a standard door mirror.■
Automatic Folding Door Mirror Function
*
■
Expanded View Driver’s Mirror
1Automatic Folding Door Mirror Function
*
You can turn the automatic folding door mirror
function on and off.
2Customized Features P. 102, 2641Folding out the door mirrors
The door mirrors do not fold out automatically if they
have been folded in using the folding button.1Expanded View Driver’s Mirror
Objects visible in the outer segment of the driver’s
side door mirror appear smaller than objects in the
rest of the mirror. But in fact, they are closer than
they appear.
Do not rely on your mirrors. Always look to the side
and behind your vehicle before changing lanes.
Inner Segment
Outer Segment
* Not available on all models
Page 163 of 518
uuInterior Lights/Interior Convenience ItemsuInterior Convenience Items
162Controls
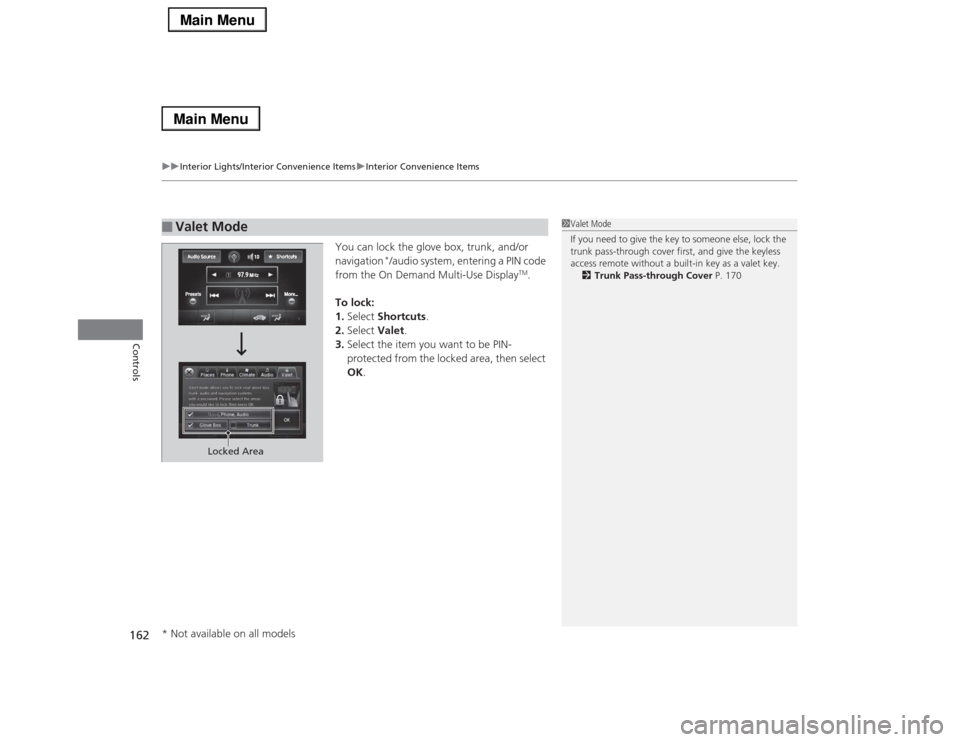
You can lock the glove box, trunk, and/or
navigation
*/audio system, entering a PIN code
from the On Demand Multi-Use Display
TM.
To lock:
1.Select Shortcuts.
2.Select Valet.
3.Select the item you want to be PIN-
protected from the locked area, then select
OK.
■
Valet Mode
1Valet Mode
If you need to give the key to someone else, lock the
trunk pass-through cover first, and give the keyless
access remote without a built-in key as a valet key.
2Trunk Pass-through Cover P. 170
Locked Area
* Not available on all models
Page 164 of 518
Continued
163
uuInterior Lights/Interior Convenience ItemsuInterior Convenience Items
Controls
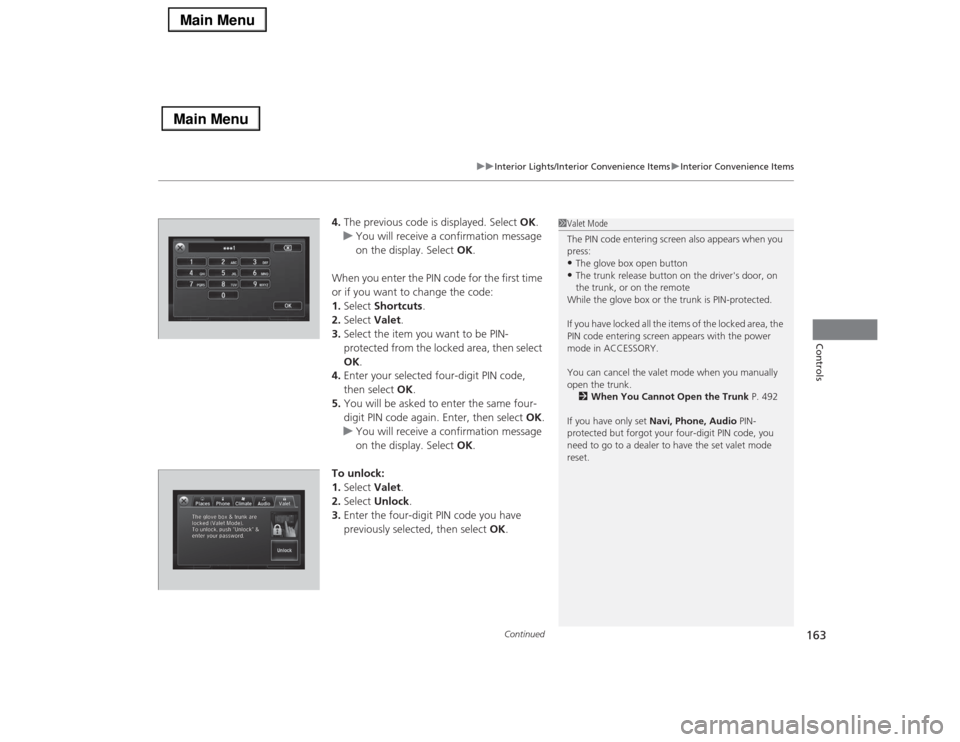
4.The previous code is displayed. Select OK.
uYou will receive a confirmation message
on the display. Select OK.
When you enter the PIN code for the first time
or if you want to change the code:
1.Select Shortcuts.
2.Select Valet.
3.Select the item you want to be PIN-
protected from the locked area, then select
OK.
4.Enter your selected four-digit PIN code,
then select OK.
5.You will be asked to enter the same four-
digit PIN code again. Enter, then select OK.
uYou will receive a confirmation message
on the display. Select OK.
To unlock:
1.Select Valet.
2.Select Unlock.
3.Enter the four-digit PIN code you have
previously selected, then select OK.
1Valet Mode
The PIN code entering screen also appears when you
press:•The glove box open button•The trunk release button on the driver's door, on
the trunk, or on the remote
While the glove box or the trunk is PIN-protected.
If you have locked all the items of the locked area, the
PIN code entering screen appears with the power
mode in ACCESSORY.
You can cancel the valet mode when you manually
open the trunk.
2When You Cannot Open the Trunk P. 492
If you have only set Navi, Phone, Audio PIN-
protected but forgot your four-digit PIN code, you
need to go to a dealer to have the set valet mode
reset.
Page 178 of 518
177
Continued
Controls
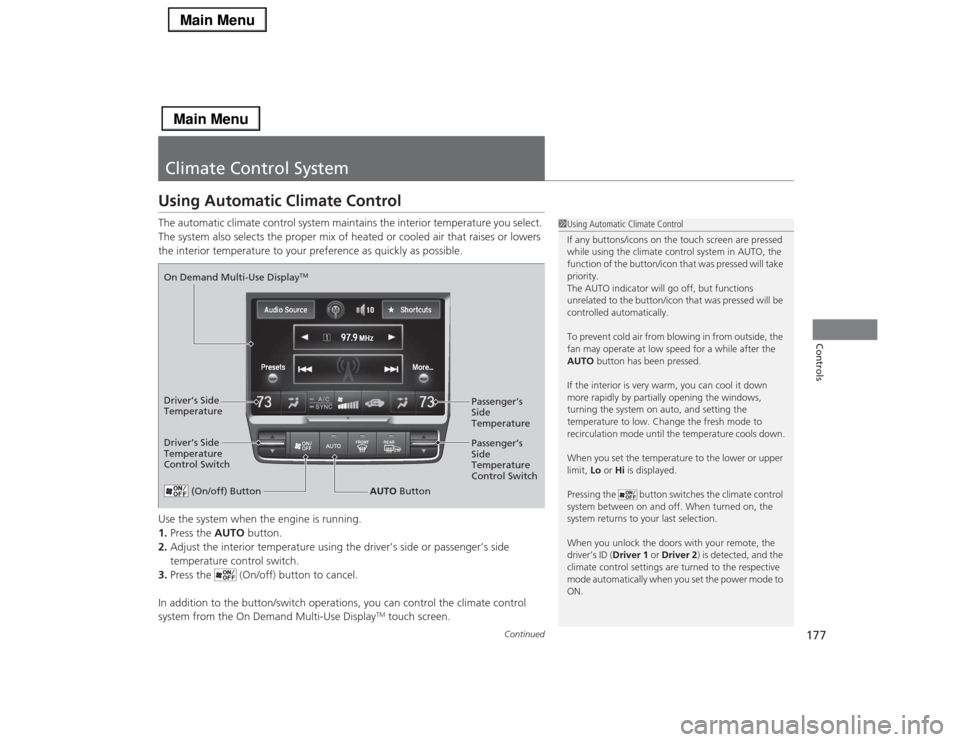
Climate Control SystemUsing Automatic Climate ControlThe automatic climate control system maintains the interior temperature you select.
The system also selects the proper mix of heated or cooled air that raises or lowers
the interior temperature to your preference as quickly as possible.
Use the system when the engine is running.
1.Press the AUTO button.
2.Adjust the interior temperature using the driver’s side or passenger’s side
temperature control switch.
3.Press the (On/off) button to cancel.
In addition to the button/switch operations, you can control the climate control
system from the On Demand Multi-Use Display
TM touch screen.
1Using Automatic Climate Control
If any buttons/icons on the touch screen are pressed
while using the climate control system in AUTO, the
function of the button/icon that was pressed will take
priority.
The AUTO indicator will go off, but functions
unrelated to the button/icon that was pressed will be
controlled automatically.
To prevent cold air from blowing in from outside, the
fan may operate at low speed for a while after the
AUTO button has been pressed.
If the interior is very warm, you can cool it down
more rapidly by partially opening the windows,
turning the system on auto, and setting the
temperature to low. Change the fresh mode to
recirculation mode until the temperature cools down.
When you set the temperature to the lower or upper
limit, Lo or Hi is displayed.
Pressing the button switches the climate control
system between on and off. When turned on, the
system returns to your last selection.
When you unlock the doors with your remote, the
driver’s ID (Driver 1 or Driver 2) is detected, and the
climate control settings are turned to the respective
mode automatically when you set the power mode to
ON.
(On/off) Button
AUTO Button On Demand Multi-Use Display
TM
Driver’s Side
Temperature
Control SwitchPassenger’s
Side
Temperature
Control Switch Passenger’s
Side
Temperature Driver’s Side
Temperature
Page 188 of 518
187
Features
This chapter describes how to operate technology features.
Audio System
About Your Audio System ................ 188
USB Port .......................................... 189
Auxiliary Input Jack .......................... 190
Audio System Theft Protection ......... 191
Audio Remote Controls .................... 192
Audio System Basic Operation........ 193
On Demand Multi-Use Display
TM....... 194
Audio/Information Screen ................ 203
Adjusting the Sound ........................ 207
Display Setup ................................... 208
Voice Control Operation .................. 209
Playing AM/FM Radio ....................... 217Playing XM® Radio ........................... 222
Playing a CD .................................... 225
Playing Hard Disc Drive (HDD) Audio .... 228Playing an iPod®............................... 238
Song By Voice
TM (SBV) ...................... 242
Playing Internet Radio ...................... 246
Playing a USB Flash Drive ................. 249
Playing Bluetooth® Audio................. 252
Audio Error Messages
CD Player ......................................... 254
Hard Disc Drive (HDD) Audio ............ 255
iPod®/USB Flash Drive....................... 256
Pandora®......................................... 257
Aha
TM Radio ..................................... 259
General Information on the Audio SystemXM® Radio Service ........................... 260
Recommended CDs ......................... 261Compatible iPod
®, iPhone
®, and USB Flash
Drives .................................................... 263
Customized Features
............................264
Defaulting All the Settings........................ 283
Deleting all HDD Data .............................. 284HomeLink
® Universal Transceiver
.......285
Bluetooth® HandsFreeLink®
Using HFL ........................................ 287
HFL Menus ...................................... 289AcuraLink
®*...........................................327
* Not available on all models
Page 189 of 518
188Features
Audio SystemAbout Your Audio SystemSee the Navigation System Manual for information on the navigation system.
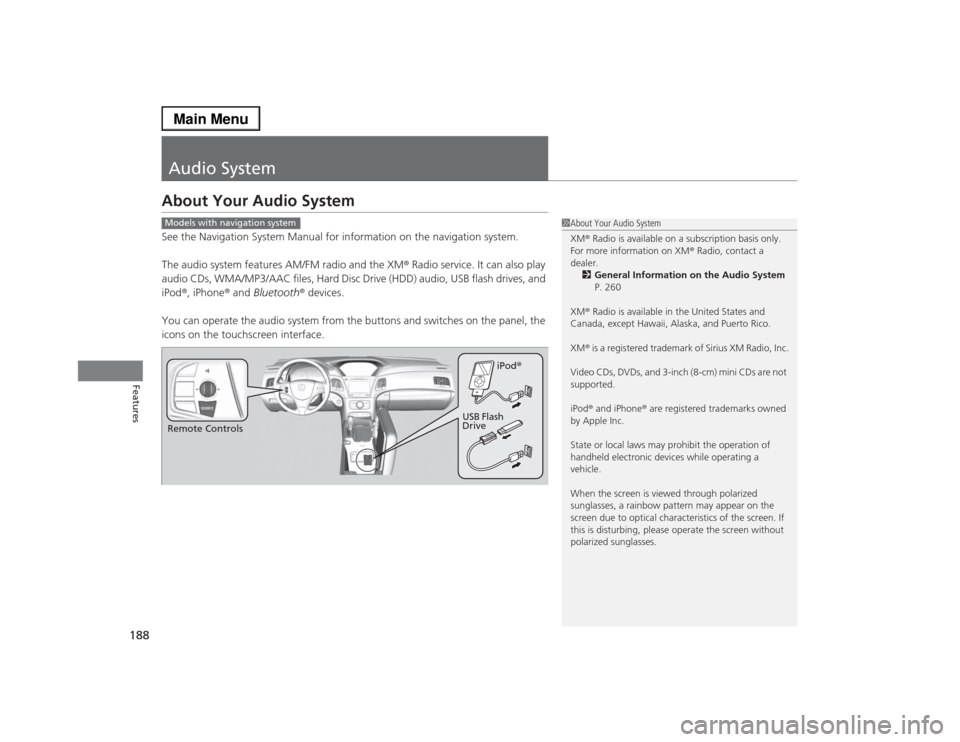
The audio system features AM/FM radio and the XM® Radio service. It can also play
audio CDs, WMA/MP3/AAC files, Hard Disc Drive (HDD) audio, USB flash drives, and
iPod®, iPhone® and Bluetooth® devices.
You can operate the audio system from the buttons and switches on the panel, the
icons on the touchscreen interface.
1About Your Audio System
XM® Radio is available on a subscription basis only.
For more information on XM® Radio, contact a
dealer.
2General Information on the Audio System
P. 260
XM® Radio is available in the United States and
Canada, except Hawaii, Alaska, and Puerto Rico.
XM® is a registered trademark of Sirius XM Radio, Inc.
Video CDs, DVDs, and 3-inch (8-cm) mini CDs are not
supported.
iPod® and iPhone® are registered trademarks owned
by Apple Inc.
State or local laws may prohibit the operation of
handheld electronic devices while operating a
vehicle.
When the screen is viewed through polarized
sunglasses, a rainbow pattern may appear on the
screen due to optical characteristics of the screen. If
this is disturbing, please operate the screen without
polarized sunglasses.
Models with navigation systemRemote ControlsiPod®
USB Flash
Drive
Page 193 of 518
192
uuAudio SystemuAudio Remote Controls
Features
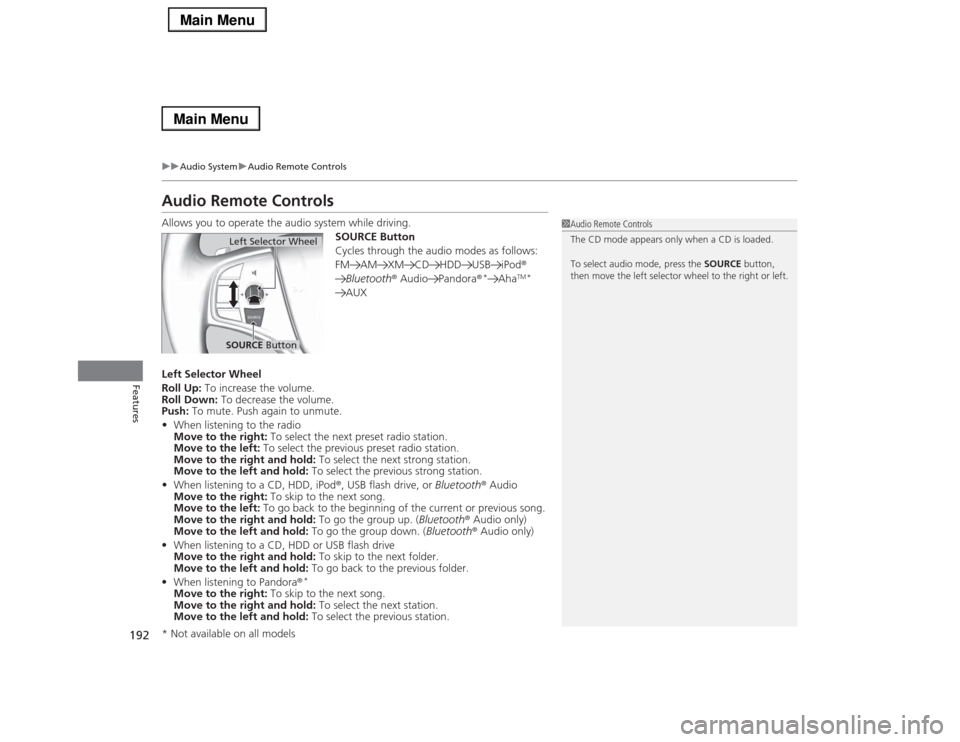
Audio Remote ControlsAllows you to operate the audio system while driving.
SOURCE Button
Cycles through the audio modes as follows:
FM AM XM CD HDD USB iPod®
Bluetooth® Audio Pandora®
*
Aha
TM*
AUX
Left Selector Wheel
Roll Up: To increase the volume.
Roll Down: To decrease the volume.
Push: To mute. Push again to unmute.
•When listening to the radio
Move to the right: To select the next preset radio station.
Move to the left: To select the previous preset radio station.
Move to the right and hold: To select the next strong station.
Move to the left and hold: To select the previous strong station.
•When listening to a CD, HDD, iPod®, USB flash drive, or Bluetooth® Audio
Move to the right: To skip to the next song.
Move to the left: To go back to the beginning of the current or previous song.
Move to the right and hold: To go the group up. (Bluetooth® Audio only)
Move to the left and hold: To go the group down. (Bluetooth® Audio only)
•When listening to a CD, HDD or USB flash drive
Move to the right and hold: To skip to the next folder.
Move to the left and hold: To go back to the previous folder.
•When listening to Pandora®
*
Move to the right: To skip to the next song.
Move to the right and hold: To select the next station.
Move to the left and hold: To select the previous station.
1Audio Remote Controls
The CD mode appears only when a CD is loaded.
To select audio mode, press the SOURCE button,
then move the left selector wheel to the right or left.
Left Selector WheelSOURCE Button
* Not available on all models
Page 194 of 518
193Features
Audio System Basic OperationTo use the audio system function, the power mode must be in ACCESSORY or ON.
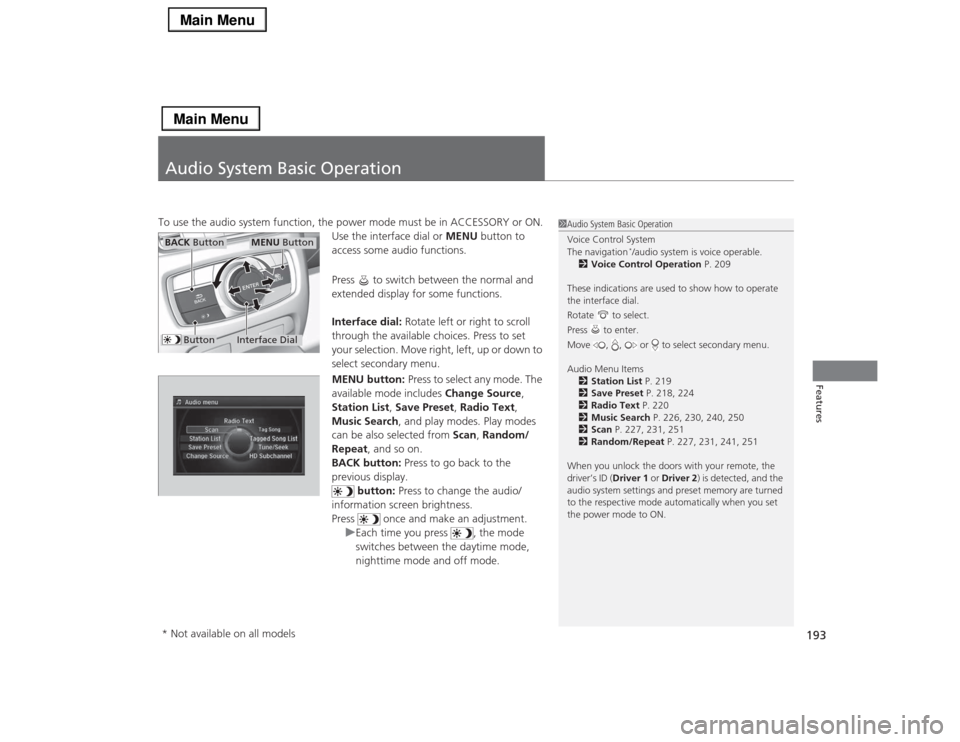
Use the interface dial or MENU button to
access some audio functions.
Press to switch between the normal and
extended display for some functions.
Interface dial: Rotate left or right to scroll
through the available choices. Press to set
your selection. Move right, left, up or down to
select secondary menu.
MENU button: Press to select any mode. The
available mode includes Change Source,
Station List, Save Preset, Radio Text,
Music Search, and play modes. Play modes
can be also selected from Scan, Random/
Repeat, and so on.
BACK button: Press to go back to the
previous display.
button: Press to change the audio/
information screen brightness.
Press once and make an adjustment.
uEach time you press , the mode
switches between the daytime mode,
nighttime mode and off mode.
1Audio System Basic Operation
Voice Control System
The navigation
*/audio system is voice operable.
2Voice Control Operation P. 209
These indications are used to show how to operate
the interface dial.
Rotate to select.
Press to enter.
Move , , or to select secondary menu.
Audio Menu Items
2Station List P. 219
2Save Preset P. 218, 224
2Radio Text P. 220
2Music Search P. 226, 230, 240, 250
2Scan P. 227, 231, 251
2Random/Repeat P. 227, 231, 241, 251
When you unlock the doors with your remote, the
driver’s ID (Driver 1 or Driver 2) is detected, and the
audio system settings and preset memory are turned
to the respective mode automatically when you set
the power mode to ON.
Interface Dial
MENU Button
BACK Button
Button
* Not available on all models
Page 219 of 518
uuAudio System Basic OperationuPlaying AM/FM Radio
218Features
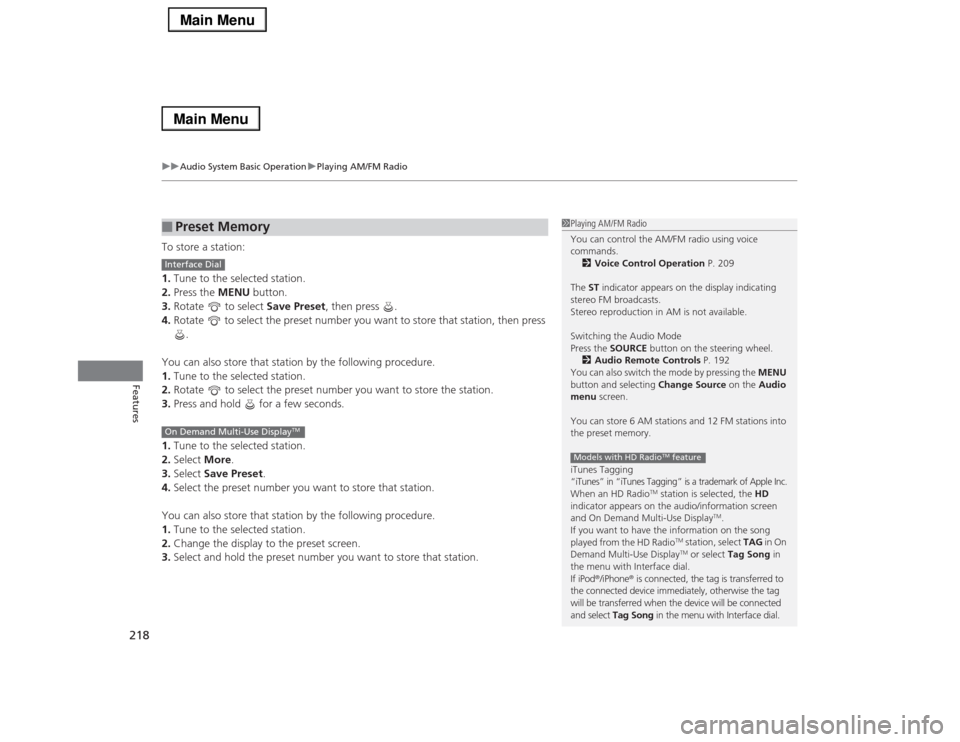
To store a station:
1.Tune to the selected station.
2.Press the MENU button.
3.Rotate to select Save Preset, then press .
4.Rotate to select the preset number you want to store that station, then press
.
You can also store that station by the following procedure.
1.Tune to the selected station.
2.Rotate to select the preset number you want to store the station.
3.Press and hold for a few seconds.
1.Tune to the selected station.
2.Select More.
3.Select Save Preset.
4.Select the preset number you want to store that station.
You can also store that station by the following procedure.
1.Tune to the selected station.
2.Change the display to the preset screen.
3.Select and hold the preset number you want to store that station.■
Preset Memory
1Playing AM/FM Radio
You can control the AM/FM radio using voice
commands.
2Voice Control Operation P. 209
The ST indicator appears on the display indicating
stereo FM broadcasts.
Stereo reproduction in AM is not available.
Switching the Audio Mode
Press the SOURCE button on the steering wheel.
2Audio Remote Controls P. 192
You can also switch the mode by pressing the MENU
button and selecting Change Source on the Audio
menu screen.
You can store 6 AM stations and 12 FM stations into
the preset memory.
iTunes Tagging“iTunes” in “iTunes Tagging” is a trademark of Apple Inc.When an HD Radio
TM station is selected, the HD
indicator appears on the audio/information screen
and On Demand Multi-Use Display
TM.
If you want to have the information on the song
played from the HD Radio
TM station, select TAG in On
Demand Multi-Use DisplayTM or select Tag Song in
the menu with Interface dial.
If iPod®/iPhone® is connected, the tag is transferred to
the connected device immediately, otherwise the tag
will be transferred when the device will be connected
and select Tag Song in the menu with Interface dial.
Models with HD Radio
TM feature
Interface DialOn Demand Multi-Use Display
TM
Page 224 of 518
Continued
223
uuAudio System Basic OperationuPlaying XM® Radio
Features
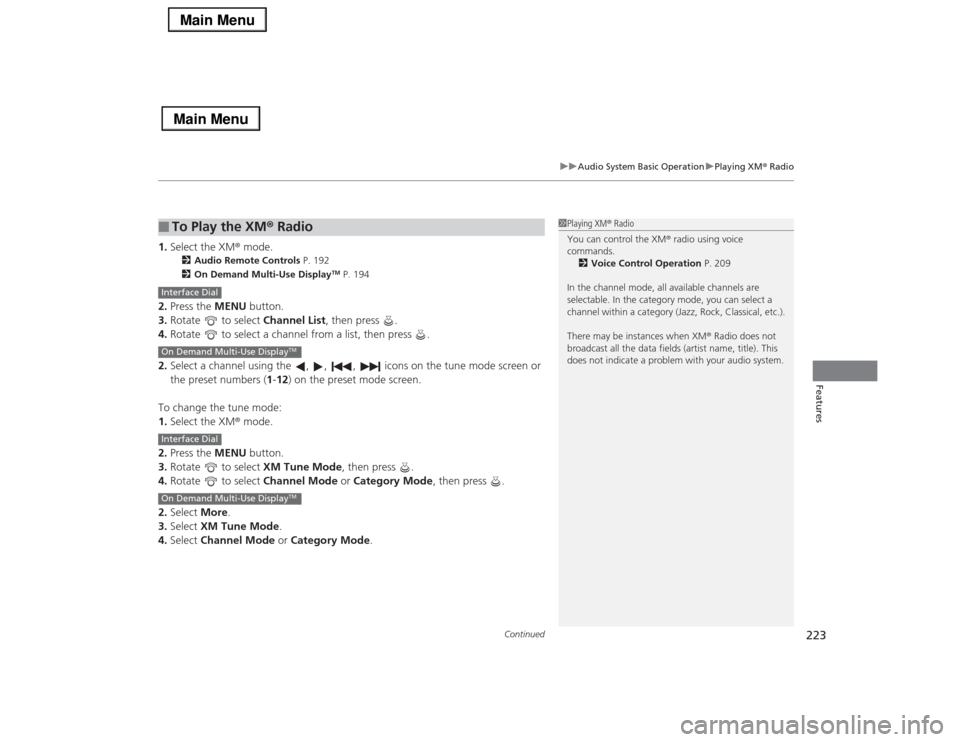
1.Select the XM® mode.
2Audio Remote Controls P. 192
2On Demand Multi-Use Display
TM P. 194
2.Press the MENU button.
3.Rotate to select Channel List, then press .
4.Rotate to select a channel from a list, then press .
2.Select a channel using the , , , icons on the tune mode screen or
the preset numbers (1-12) on the preset mode screen.
To change the tune mode:
1.Select the XM® mode.
2.Press the MENU button.
3.Rotate to select XM Tune Mode, then press .
4.Rotate to select Channel Mode or Category Mode, then press .
2.Select More.
3.Select XM Tune Mode.
4.Select Channel Mode or Category Mode.■
To Play the XM® Radio
1Playing XM® Radio
You can control the XM® radio using voice
commands.
2Voice Control Operation P. 209
In the channel mode, all available channels are
selectable. In the category mode, you can select a
channel within a category (Jazz, Rock, Classical, etc.).
There may be instances when XM® Radio does not
broadcast all the data fields (artist name, title). This
does not indicate a problem with your audio system.
Interface DialOn Demand Multi-Use Display
TM
Interface DialOn Demand Multi-Use Display
TM