plug Acura RLX 2014 Owner's Manual
[x] Cancel search | Manufacturer: ACURA, Model Year: 2014, Model line: RLX, Model: Acura RLX 2014Pages: 518, PDF Size: 15.83 MB
Page 191 of 518
190
uuAudio SystemuAuxiliary Input Jack
Features
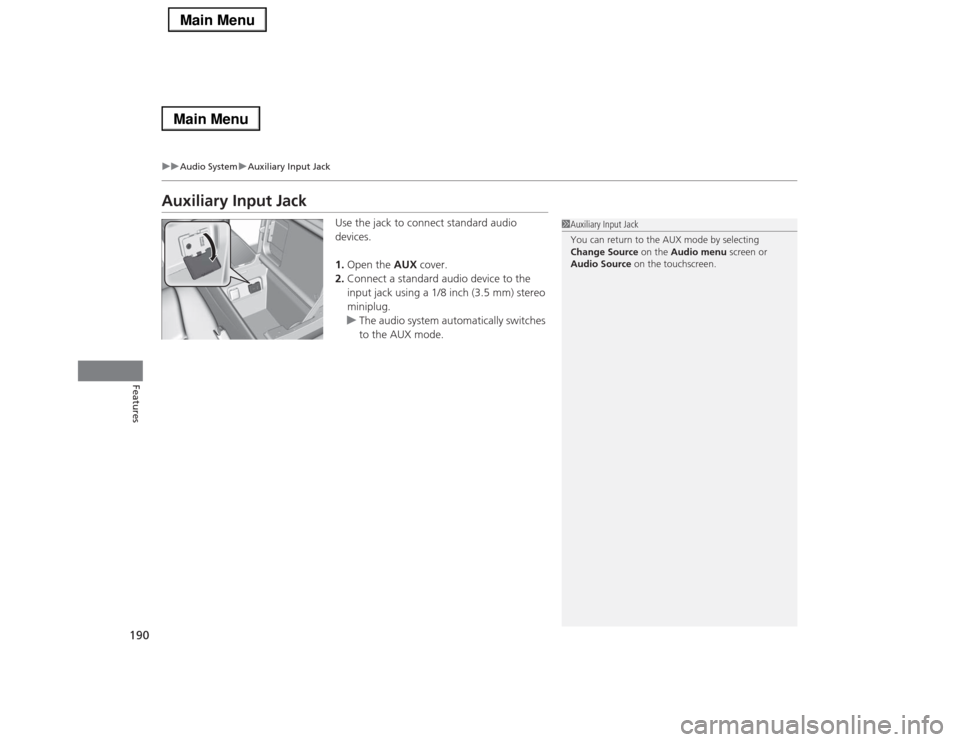
Auxiliary Input Jack
Use the jack to connect standard audio
devices.
1.Open the AUX cover.
2.Connect a standard audio device to the
input jack using a 1/8 inch (3.5 mm) stereo
miniplug.
uThe audio system automatically switches
to the AUX mode.
1Auxiliary Input Jack
You can return to the AUX mode by selecting
Change Source on the Audio menu screen or
Audio Source on the touchscreen.
Page 415 of 518
414
uuMaintenance Minder
TMuTo Use Maintenance Minder
TM
Maintenance
■
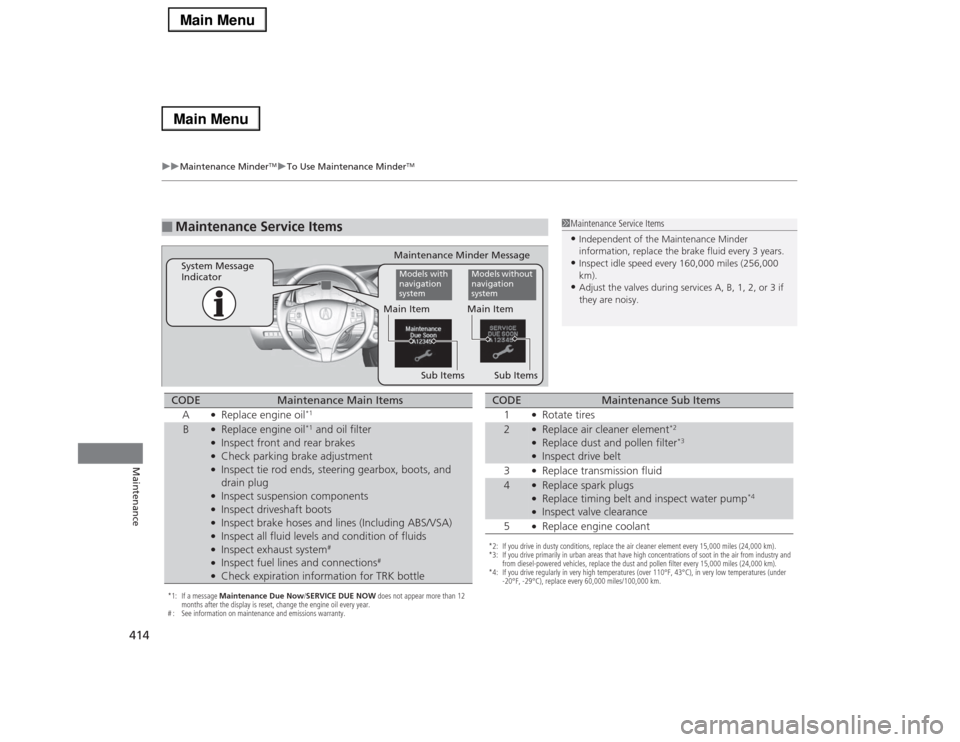
Maintenance Service Items
1Maintenance Service Items•Independent of the Maintenance Minder
information, replace the brake fluid every 3 years.•Inspect idle speed every 160,000 miles (256,000
km).•Adjust the valves during services A, B, 1, 2, or 3 if
they are noisy.
Maintenance Minder Message
System Message
Indicator
Sub Items Main ItemModels with
navigation
system
Models without
navigation
system
Sub ItemsMain Item
*1: If a message Maintenance Due Now/SERVICE DUE NOW does not appear more than 12
months after the display is reset, change the engine oil every year.
# : See information on maintenance and emissions warranty.CODE
Maintenance Main Items
A
●Replace engine oil
*1
B
●Replace engine oil
*1 and oil filter
●Inspect front and rear brakes●Check parking brake adjustment●Inspect tie rod ends, steering gearbox, boots, and
drain plug●Inspect suspension components●Inspect driveshaft boots●Inspect brake hoses and lines (Including ABS/VSA)●Inspect all fluid levels and condition of fluids●Inspect exhaust system
#
●Inspect fuel lines and connections
#
●Check expiration information for TRK bottle
*2: If you drive in dusty conditions, replace the air cleaner element every 15,000 miles (24,000 km).
*3: If you drive primarily in urban areas that have high concentrations of soot in the air from industry and
from diesel-powered vehicles, replace the dust and pollen filter every 15,000 miles (24,000 km).
*4: If you drive regularly in very high temperatures (over 110°F, 43°C), in very low temperatures (under
-20°F, -29°C), replace every 60,000 miles/100,000 km.CODE
Maintenance Sub Items
1
●Rotate tires
2
●Replace air cleaner element
*2
●Replace dust and pollen filter
*3
●Inspect drive belt
3●Replace transmission fluid
4
●Replace spark plugs●Replace timing belt and inspect water pump
*4
●Inspect valve clearance
5●Replace engine coolant
Page 456 of 518

455
Continued
Handling the Unexpected
If a Tire Goes FlatTemporarily Repairing a Flat TireIf the tire has a large cut or is otherwise severely damaged, you will need to have the
vehicle towed. If the tire only has a small puncture, from a nail for instance, you can
use the temporary tire repair kit so that you can drive to the nearest service station
for a more permanent repair.
If a tire goes flat while driving, grasp the steering wheel firmly, and brake gradually
to reduce speed. Then stop in a safe place.
1.Park the vehicle on a firm, level, and non-slippery surface and apply the parking
brake.
2.Move the shift lever to
(P
.
3.Turn on the hazard warning lights and set the power mode to VEHICLE OFF
(LOCK).
■
Getting Ready to Temporarily Repair the Flat Tire
1Temporarily Repairing a Flat Tire
The kit should not be used in the following situations.
Instead, contact a dealer or a roadside assistant to
have the vehicle towed.•The tire sealant has expired.•More than two tires are punctured.•The puncture or cut is larger than 3/16 inch (4mm).•The tire side wall is damaged or the puncture is
outside the contact area.•Damage has been caused by driving with the tire
extremely under inflated.•The tire bead is no longer seated.•The rim is damaged.
Do not remove a nail or screw that punctured the
tire. If you remove it from the tire, you may not be
able to repair the puncture using the kit.NOTICEDo not use a puncture-repairing agent other than the
one provided in the kit that came with your vehicle. If
a different agent is used, you may permanently
damage the tire pressure sensor.
When the puncture is:
Kit Use
Smaller than 3/16 inch
(4 mm)
Yes
Larger than 3/16 inch
(4 mm)
No
Contact
Area
Instruction
Manual
Air Only Hose (Black)Speed Restriction Label Repair Notification Label Pressure Relief
ButtonInflator Switch
Selector Switch
SEALANT/AIR side Sealant/Air Hose (Clear)AIR ONLY side
Power Plug Pressure Gauge
Tire Sealant
Expiration Date
U.S. CanadaU.S. Canada
Page 459 of 518
uuIf a Tire Goes FlatuTemporarily Repairing a Flat Tire
458Handling the Unexpected
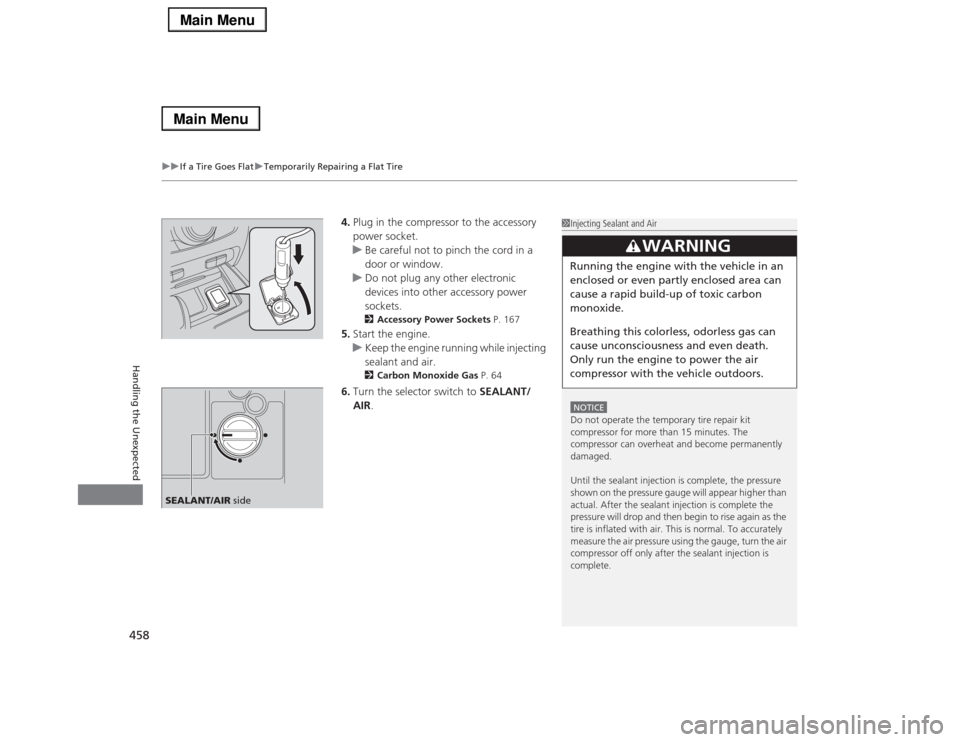
4.Plug in the compressor to the accessory
power socket.
uBe careful not to pinch the cord in a
door or window.
uDo not plug any other electronic
devices into other accessory power
sockets.
2Accessory Power Sockets P. 167
5.Start the engine.
uKeep the engine running while injecting
sealant and air.
2Carbon Monoxide Gas P. 64
6.Turn the selector switch to SEALANT/
AIR.
1Injecting Sealant and AirNOTICEDo not operate the temporary tire repair kit
compressor for more than 15 minutes. The
compressor can overheat and become permanently
damaged.
Until the sealant injection is complete, the pressure
shown on the pressure gauge will appear higher than
actual. After the sealant injection is complete the
pressure will drop and then begin to rise again as the
tire is inflated with air. This is normal. To accurately
measure the air pressure using the gauge, turn the air
compressor off only after the sealant injection is
complete.
3
WARNING
Running the engine with the vehicle in an
enclosed or even partly enclosed area can
cause a rapid build-up of toxic carbon
monoxide.
Breathing this colorless, odorless gas can
cause unconsciousness and even death.
Only run the engine to power the air
compressor with the vehicle outdoors.
SEALANT/AIR side
Page 460 of 518

Continued
459
uuIf a Tire Goes FlatuTemporarily Repairing a Flat Tire
Handling the Unexpected
7.Press the inflator switch to turn on the
compressor.
uThe compressor starts injecting sealant
and air into the tire.
8.When the sealant injection is complete,
continue to add air.
9.
After the air pressure reaches 32 psi (220
kPa), turn off the kit.
After the air pressure reaches front:35 psi
(240 kPa)/rear:33 psi (230 kPa), turn off
the kit.
uTo check the pressure, occasionally turn
off the compressor and read the gauge.
10.Unplug the power plug from the accessory
power socket.
11.Unscrew the sealant/air hose from the tire
valve stem. Reinstall the valve cap.
12.Press the pressure relief button until the
gauge returns to 0 psi (0 kPa).
Pressure Gauge
ON
OFF
Models with P245/45R18 96V tiresModels with 245/40R19 98W tires
1Injecting Sealant and Air
If the required air pressure is not reached within 15
minutes, the tire may be too severely damaged for
the kit to provide the necessary seal and your vehicle
will need to be towed.
See an Acura dealer for a replacement sealant bottle
and proper disposal of an empty bottle.
Sealant/Air Hose
Valve Stem
Page 465 of 518

uuIf a Tire Goes FlatuTemporarily Repairing a Flat Tire
464Handling the Unexpected
7.Plug in the kit to the accessory power
socket.
uBe careful not to pinch the cord in a
door or window.
uDo not plug any other electronic
devices into other accessory power
sockets.
2Accessory Power Sockets P. 167
8.Start the engine.
uKeep the engine running while injecting
air.
2Carbon Monoxide Gas P. 64
9.Turn the selector switch to AIR ONLY.
10.Press the inflator switch to turn on the kit.
uThe compressor starts to inject air into
the tire.
11.Inflate the tire to the specified air pressure.
1Inflating an Under-inflated Tire
3
WARNING
Running the engine with the vehicle in an
enclosed or even partly enclosed area can
cause a rapid build-up of toxic carbon
monoxide.
Breathing this colorless, odorless gas can
cause unconsciousness and even death.
Only run the engine to power the air
compressor with the vehicle outdoors.
AIR ONLY
side
ON
Page 466 of 518

465
uuIf a Tire Goes FlatuTemporarily Repairing a Flat Tire
Handling the Unexpected
12.Turn off the kit.
uCheck the pressure gauge on the air
compressor.
uIf overinflated, press the pressure relief
button.
13.Unplug the kit from the accessory power
socket.
14.Unscrew the air only hose from the tire
valve stem. Reinstall the valve cap.
15.Press the pressure relief button until the
gauge returns to 0 psi (0 kPa).
16.Repackage and properly stow the kit.
Pressure Relief Button
Page 497 of 518
496Information
Specifications■Vehicle SpecificationsModel
Acura RLX
No. of Passengers:
Front 2
Rear 3
Total 5
Weights:Gross Vehicle Weight
Rating
U.S.: 4,993 lbs (2,265 kg)
Canada: 2,265 kg
Gross Axle Weight
Rating (Front)
U.S.: 2,778 lbs (1,260 kg)
Canada: 1,260 kg
Gross Axle Weight
Rating (Rear)
U.S.: 2,271 lbs (1,030 kg)
Canada: 1,030 kg
Air Conditioning:
Refrigerant Type HFC-134a (R-134a)
Charge Quantity 15.8 – 17.6 oz (450 – 500 g)
Lubricant Type ND-OIL 8
■Engine Specifications
■Fuel
■Battery
■Washer FluidDisplacement
212 cu-in (3,471 cm
3)
Spark Plugs NGK DILZKR7B11G
Type
Unleaded premium gasoline, Pump octane
number of 91 or higher
Fuel Tank Capacity 18.5 US gal (70 ℓ)
Capacity/Type
55AH(5)/72AH(20)
Tank Capacity
U.S.: 2.6 US qt (2.5 ℓ)
Canada: 5.3 US qt (5.0 ℓ)
■Light Bulbs*1: Not available on all modelsHeadlights (Low Beam)
LED
Headlights (High Beam) LED
Front Turn Signal/Parking Lights
27/8W (Amber)
Front Side Marker Lights 3CP
Side Turn Signal Lights
(on Door Mirrors)
LED
Brake/Taillights/Rear Side Marker
LightsLED
Taillights
LED
Back-Up Lights 16W
Rear Turn Signal Lights
21W
High-Mount Brake Light LED
Rear License Plate Lights
LED
Door Outer Handle Ambient Lights LED
Interior Lights
Front and Rear Map Lights
LED
Front and Rear Ambient Lights
LED
Vanity Mirror Lights
2.1W
Front Door Pocket Lights
LED
Center Pocket Light
LED
Beverage Holder Light
LED
Door Courtesy Lights
3.4W
Console Compartment Light
LED
Glove Box Light
LED
Front and Rear
*1 Foot Lights
LED
Door Inner Handle Lights
LED
Trunk Lights
5W
Page 517 of 518
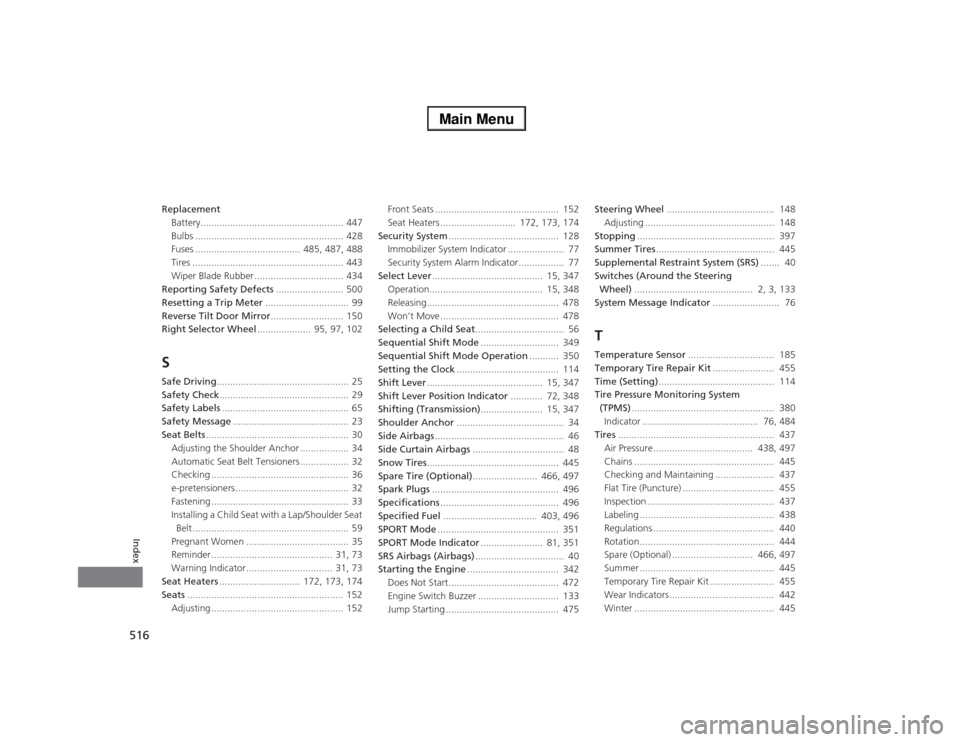
516Index
Replacement
Battery..................................................... 447
Bulbs ....................................................... 428
Fuses ....................................... 485, 487, 488
Tires ........................................................ 443
Wiper Blade Rubber ................................. 434
Reporting Safety Defects......................... 500
Resetting a Trip Meter............................... 99
Reverse Tilt Door Mirror........................... 150
Right Selector Wheel.................... 95, 97, 102SSafe Driving................................................. 25
Safety Check................................................ 29
Safety Labels............................................... 65
Safety Message........................................... 23
Seat Belts..................................................... 30
Adjusting the Shoulder Anchor .................. 34
Automatic Seat Belt Tensioners .................. 32
Checking ................................................... 36
e-pretensioners .......................................... 32
Fastening ................................................... 33
Installing a Child Seat with a Lap/Shoulder Seat
Belt .......................................................... 59
Pregnant Women ...................................... 35
Reminder ............................................. 31, 73
Warning Indicator ................................ 31, 73
Seat Heaters.............................. 172, 173, 174
Seats.......................................................... 152
Adjusting ................................................. 152Front Seats .............................................. 152
Seat Heaters ............................ 172, 173, 174
Security System......................................... 128
Immobilizer System Indicator ..................... 77
Security System Alarm Indicator................. 77
Select Lever......................................... 15, 347
Operation.......................................... 15, 348
Releasing................................................. 478
Won’t Move ............................................ 478
Selecting a Child Seat................................. 56
Sequential Shift Mode............................. 349
Sequential Shift Mode Operation........... 350
Setting the Clock...................................... 114
Shift Lever........................................... 15, 347
Shift Lever Position Indicator............ 72, 348
Shifting (Transmission)....................... 15, 347
Shoulder Anchor........................................ 34
Side Airbags................................................ 46
Side Curtain Airbags.................................. 48
Snow Tires................................................. 445
Spare Tire (Optional)........................ 466, 497
Spark Plugs............................................... 496
Specifications............................................ 496
Specified Fuel................................... 403, 496
SPORT Mode............................................. 351
SPORT Mode Indicator....................... 81, 351
SRS Airbags (Airbags)................................. 40
Starting the Engine.................................. 342
Does Not Start......................................... 472
Engine Switch Buzzer .............................. 133
Jump Starting .......................................... 475Steering Wheel........................................ 148
Adjusting ................................................ 148
Stopping................................................... 397
Summer Tires............................................ 445
Supplemental Restraint System (SRS)....... 40
Switches (Around the Steering
Wheel)............................................ 2, 3, 133
System Message Indicator......................... 76
TTemperature Sensor................................ 185
Temporary Tire Repair Kit....................... 455
Time (Setting)........................................... 114
Tire Pressure Monitoring System
(TPMS)..................................................... 380
Indicator ........................................... 76, 484
Tires.......................................................... 437
Air Pressure..................................... 438, 497
Chains .................................................... 445
Checking and Maintaining ...................... 437
Flat Tire (Puncture) .................................. 455
Inspection ............................................... 437
Labeling .................................................. 438
Regulations ............................................. 440
Rotation.................................................. 444
Spare (Optional) .............................. 466, 497
Summer .................................................. 445
Temporary Tire Repair Kit ........................ 455
Wear Indicators....................................... 442
Winter .................................................... 445