tow Acura RLX 2015 Owner's Manual
[x] Cancel search | Manufacturer: ACURA, Model Year: 2015, Model line: RLX, Model: Acura RLX 2015Pages: 521, PDF Size: 22.24 MB
Page 3 of 521
ContentsThis owner’s manual should be considered a permanent part of the
vehicle and should remain with the vehicle when it is sold.
This owner’s manual covers all models of your vehicle. You may find
descriptions of equipment and features that are not on your
particular model.
Images throughout this owner’s manual (including the front cover)
represent features and equipment that are available on some, but
not all, models. Your particular model may not have some of these
features.
This owner’s manual is for vehicles sold in the United States and
Canada.
The information and specifications included in this publication were
in effect at the time of approval for printing. Honda Motor Co., Ltd.
reserves the right, however, to discontinue or change specifications
or design at any time without notice and without incurring any
obligation.
2Safe Driving P. 25For Safe Driving P. 26 Seat Belts P. 30 Airbags P. 372Instrument Panel P. 67Indicators P. 68 Gauges and Multi-Information Display P. 942Controls P. 113Setting the Clock P. 114 Locking and Unlocking the Doors P. 115
Opening and Closing the Moonroof P. 132
Adjusting the Seats P. 1522Features P. 187Audio System P. 188 Audio System Basic Operation P. 193
Customized Features P. 263 HomeLink® Universal Transceiver P. 2842 Driving P. 333Before Driving P. 334 Towing a Trailer P. 339
Multi-View Rear Camera P. 403 Refueling P. 4042Maintenance P. 409Before Performing Maintenance P. 410 Maintenance Minder
TM P. 413
Checking and Maintaining Wiper Blades P. 436
Climate Control System Maintenance P. 450
2 Handling the Unexpected P. 455Tools P. 456 If a Tire Goes Flat P. 457
Overheating P. 481 Indicator, Coming On/Blinking P. 483
When You Cannot Open the Trunk P. 4942 Information P. 497Specifications P. 498 Identification Numbers P. 500
Emissions Testing P. 503 Warranty Coverages P. 505
Page 4 of 521
Contents
Child Safety P. 52Exhaust Gas Hazard P. 64Safety Labels P. 65Opening and Closing the Trunk P. 125 Security System P. 128 Opening and Closing the Windows P. 130
Operating the Switches Around the Steering Wheel P. 133 Adjusting the Mirrors P. 149
Interior Lights/Interior Convenience Items P. 159 Climate Control System P. 177Audio Error Messages P. 253General Information on the Audio System P. 259
Bluetooth® HandsFreeLink ® P. 286 AcuraLink ®
* P. 326
When Driving P. 340 Braking P. 385Parking Your Vehicle P. 398
Fuel Economy P. 406 Accessories and Modifications P. 407Maintenance Under the Hood P. 418 Replacing Light Bulbs P. 430
Checking and Maintaining Tires P. 439 Battery P. 448 Remote Transmitter Care P. 449
Cleaning P. 451Engine Does Not Start P. 474 Jump Starting P. 477 Shift Lever Does Not Move P. 480
Fuses P. 487 Emergency Towing P. 492 When You Cannot Unlock the Fuel Fill Door P. 493
Refueling P. 495Devices that Emit Radio Waves P. 501 Reporting Safety Defects P. 502
Authorized Manuals P. 507 Client Service Information P. 508
Quick Reference Guide
P. 4
Safe Driving
P. 25
Instrument Panel
P. 67
Controls
P. 113
Features
P. 187
Driving
P. 333
Maintenance
P. 409
Handling the Unexpected
P. 455
Information
P. 497
Index
P. 512
Page 13 of 521
12Quick Reference Guide
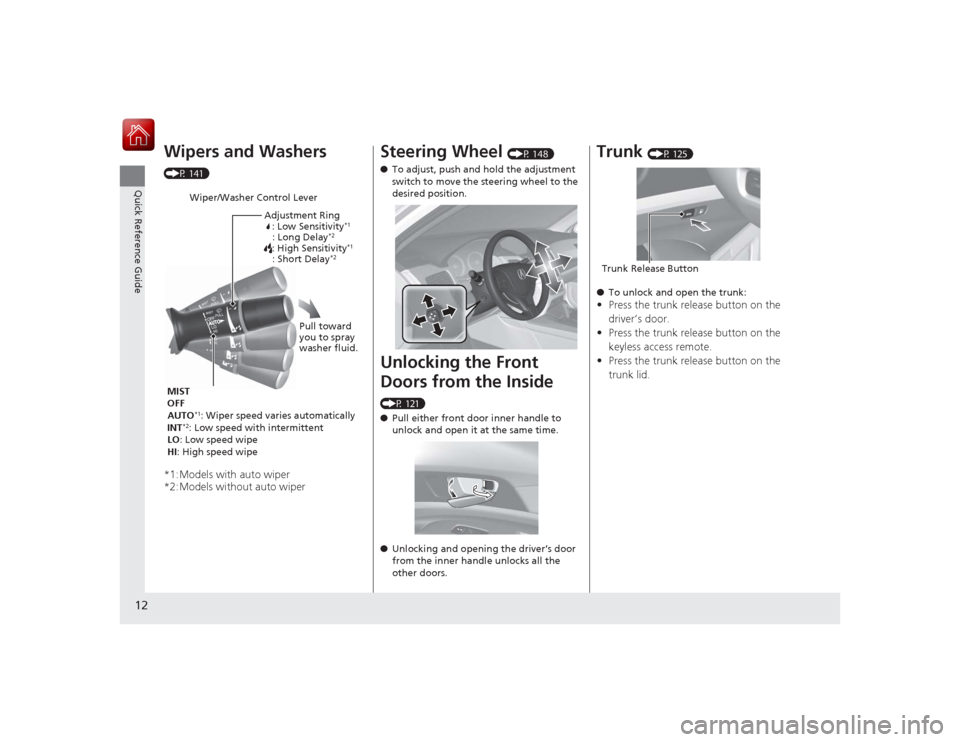
Wipers and Washers (P 141)*1:Models with auto wiper
*2:Models without auto wiper
Wiper/Washer Control LeverAdjustment Ring: Low Sensitivity
*1
: Long Delay
*2
: High Sensitivity
*1
: Short Delay
*2
MIST
OFF
AUTO
*1: Wiper speed varies automatically
INT
*2: Low speed with intermittent
LO: Low speed wipe
HI : High speed wipe Pull toward
you to spray
washer fluid.
Steering Wheel
(P 148)
● To adjust, push and hold the adjustment
switch to move the steering wheel to the
desired position.
Unlocking the Front
Doors from the Inside (P 121)
●Pull either front door inner handle to
unlock and open it at the same time.
● Unlocking and opening the driver’s door
from the inner handle unlocks all the
other doors.
Trunk
(P 125)
● To unlock and open the trunk:
•Press the trunk release button on the
driver’s door.
• Press the trunk release button on the
keyless access remote.
• Press the trunk release button on the
trunk lid.Trunk Release Button
Page 21 of 521
20Quick Reference Guide
Handling the Unexpected
(P 455)
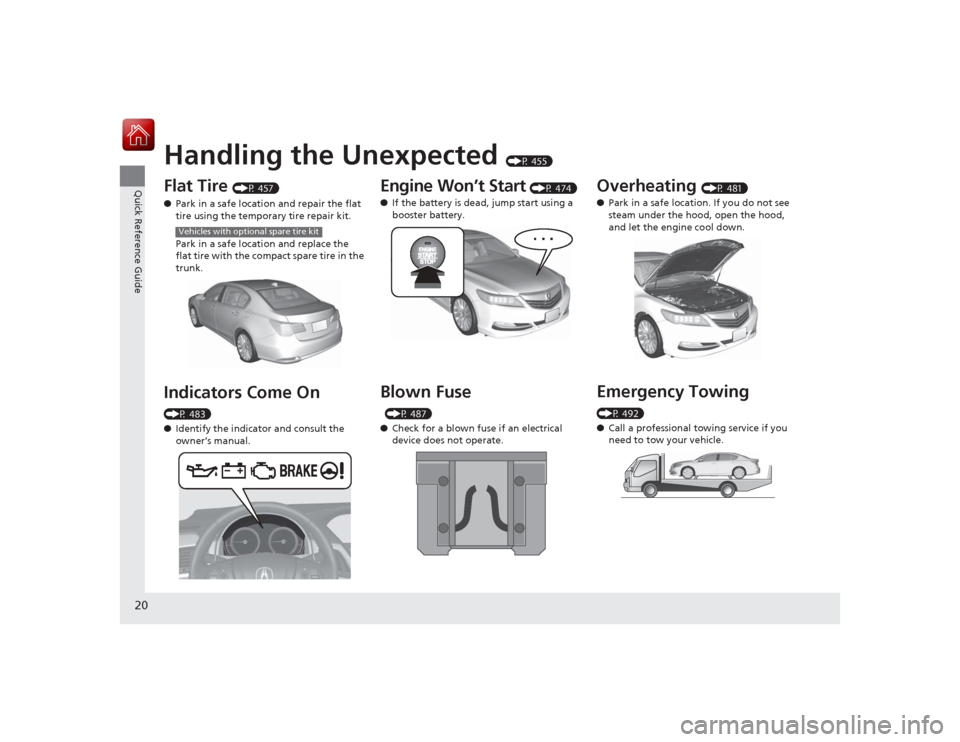
Flat Tire
(P 457)
● Park in a safe location and repair the flat
tire using the temporary tire repair kit.
Park in a safe location and replace the
flat tire with the compact spare tire in the
trunk.
Indicators Come On (P 483)
●Identify the indicator and consult the
owner’s manual.
Vehicles with optional spare tire kit
Engine Won’t Start
(P 474)
● If the battery is dead, jump start using a
booster battery.
Blown Fuse
(P 487)
● Check for a blown fuse if an electrical
device does not operate.
Overheating
(P 481)
● Park in a safe location. If you do not see
steam under the hood, open the hood,
and let the engine cool down.
Emergency Towing (P 492)
●Call a professional towing service if you
need to tow your vehicle.
Page 43 of 521
42
uuAirbags uFront Airbags (SRS)
Safe Driving
■When front airbags should not deploy
Minor frontal crashes: Front airbags were designed to supplement seat belts and
help save lives, not to prevent minor scrapes, or even broken bones that might occur
during a less than moderate-to-severe frontal crash.
Side impacts: Front airbags can provide protection when a sudden deceleration
causes a driver or front passen ger to move toward the front of the vehicle. Side
airbags and side curtain airbags have been specifically designed to help reduce the
severity of injuries that can occur during a moderate-to-severe side impact which
can cause the driver or passenger to mov e toward the side of the vehicle.
Rear impacts: Head restraints and seat belts are your best protection during a rear
impact. Front airbags cannot provide any sig nificant protection and are not designed
to deploy in such collisions.
Rollovers: Seat belts, and in vehicles equipped with a rollover sensor, side airbags,
and side curtain airbags offer the best protection in a rollover. Because front airbags
could provide little if any protection, they are not designed to deploy during a
rollover.■When front airbags deploy with little or no visible damage
Because the airbag system senses s udden deceleration, a strong impact to the
vehicle framework or suspension might cause one or more of the airbags to deploy.
Examples include running into a curb, the edge of a hole, or other low fixed object
that causes a sudden deceleration in the vehicle chassis. Since the impact is
underneath the vehicle, damage may not be readily apparent.■When front airbags may not deploy, even though exterior damage
appears severe
Since crushable body parts absorb crash energy during an impact, the amount of
visible damage does not always indicate proper airbag operation. In fact, some
collisions can result in severe damage but no airbag deployment because the airbags
would not have been needed or would not have provided protection even if they
had deployed.
Page 48 of 521
47
uuAirbags uSide Airbags
Safe Driving
■When a side airbag deploys with little or no visible damage
Because the airbag system senses sudden acceleration, a strong impact to the side
of the vehicle’s framework can cause a side airbag to deploy. In such cases, there
may be little or no damage, but the side impact sensors detected a severe enough
impact to deploy the airbag.■When a side airbag may not deploy, even though visible damage appears
severe
It is possible for a side airbag to not deploy during an impact that results in
apparently severe damage. This can occur when the point of impact was toward the
far front or rear of the vehicle, or when the vehicle’s crushable body parts absorbed
most of the crash energy. In either case, the side airbag would not have been
needed nor provided protection even if it had deployed.
Page 142 of 521
141
uuOperating the Switches Around the Steering Wheel uWipers and Washers
Continued
Controls
Wipers and Washers
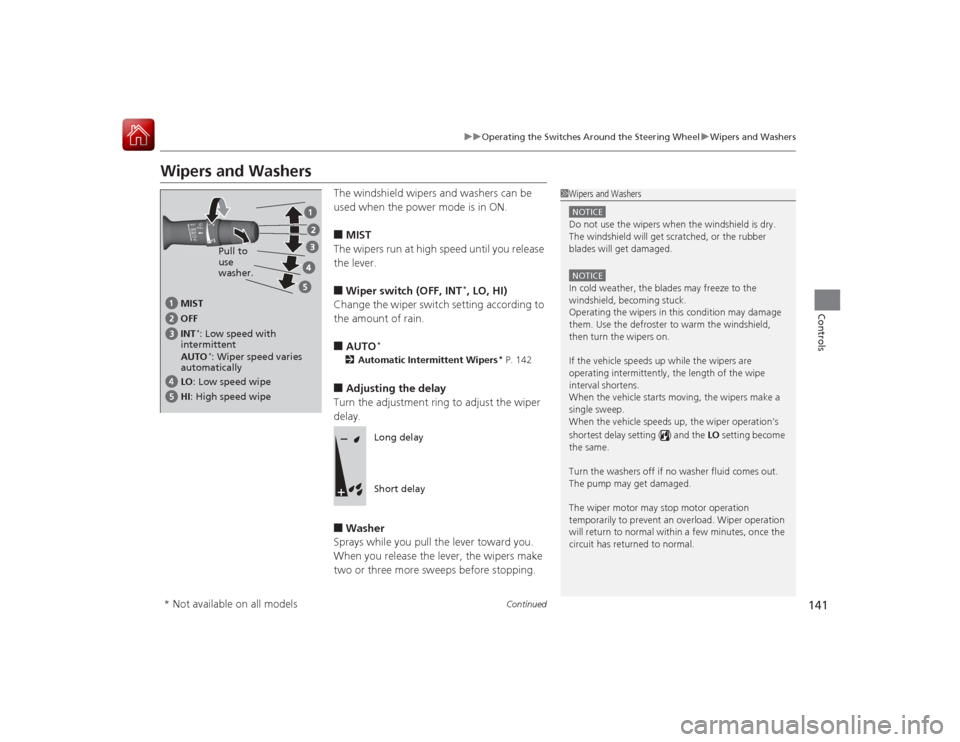
The windshield wipers and washers can be
used when the power mode is in ON.■MIST
The wipers run at high speed until you release
the lever.■Wiper switch (OFF, INT
*, LO, HI)
Change the wiper switch setting according to
the amount of rain.
■AUTO
*
2 Automatic Intermittent Wipers
* P. 142
■Adjusting the delay
Turn the adjustment ring to adjust the wiper
delay.■Washer
Sprays while you pull the lever toward you.
When you release the lever, the wipers make
two or three more sweeps before stopping.
1 Wipers and WashersNOTICEDo not use the wipers when the windshield is dry.
The windshield will get scratched, or the rubber
blades will get damaged.NOTICEIn cold weather, the blades may freeze to the
windshield, becoming stuck.
Operating the wipers in this condition may damage
them. Use the defroster to warm the windshield,
then turn the wipers on.
If the vehicle speeds up while the wipers are
operating intermitte ntly, the length of the wipe
interval shortens.
When the vehicle starts moving, the wipers make a
single sweep.
When the vehicle speeds up, the wiper operation’s
shortest delay setting ( ) and the LO setting become
the same.
Turn the washers off if no washer fluid comes out.
The pump may get damaged.
The wiper motor may stop motor operation
temporarily to prevent an overload. Wiper operation
will return to normal within a few minutes, once the
circuit has returned to normal.
MIST
INT
*: Low speed with
intermittent OFF
LO : Low speed wipe
HI: High speed wipe Pull to
use
washer.
AUTO*: Wiper speed varies
automatically
Long delay
Short delay
* Not available on all models
Page 334 of 521
333
Driving
This chapter discusses driving, refueling, and information on items such as accessories.
Before DrivingDriving Preparation .......................... 334
Maximum Load Limit........................ 337
Towing a Trailer
Towing Your Vehicle ........................ 339
When Driving Starting the Engine .......................... 340
Precautions While Driving................. 343
Automatic Transmission ................... 344
Shifting ............................................ 345
SPORT Mode.................................... 349
Cruise Control
*................................ 350
Adaptive Cruise Control (ACC) with Low
Speed Follow (LSF)
*........................ 353
Forward Collision Warning (FCW)
*... 364 Lane Departure Warning (LDW) ....... 367
Lane Keeping Assist System (LKAS)
*.... 371
Vehicle Stability Assist (VSA
®), aka Electronic
Stability Control (ESC), System ............... 376
Agile Handling Assist System............ 378
Precision All Wheel Steer System ...... 378Blind Spot Information (BSI) System
*.... 379
Tire Pressure Monitoring System (TPMS) ... 381Tire Pressure Monitoring System (TPMS) - Required Federal Explanation ......... 383
Braking
Brake System ................................... 385
Anti-lock Brake System (ABS) ........... 390
Brake Assist System.......................... 391 Collision Mitigation Braking System
TM
(CMBS
TM)*..................................... 392
Parking Your Vehicle
When Stopped ................................ 398
Parking Sensor System
*................... 399
Multi-View Rear Camera .................. 403
Refueling Fuel Information .............................. 404
How to Refuel ................................. 405
Fuel Economy .................................... 406
Improving Fuel Economy .................. 406
Accessories and Modifications
Accessories ...................................... 407
Modifications................................... 407
* Not available on all models
Page 338 of 521
337
uuBefore Driving uMaximum Load Limit
Continued
Driving
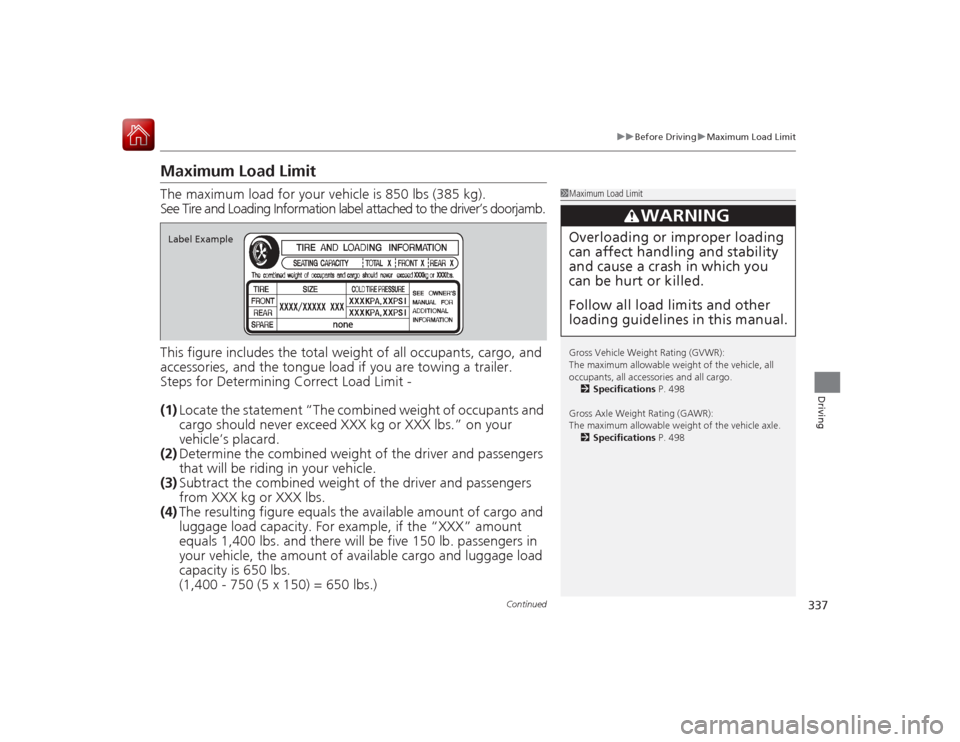
Maximum Load LimitThe maximum load for your vehicle is 850 lbs (385 kg).
See Tire and Loading Information label attached to the driver’s doorjamb.
This figure includes the total weight of all occupants, cargo, and
accessories, and the tongue lo ad if you are towing a trailer.
Steps for Determining Correct Load Limit -
(1) Locate the statement “The combined weight of occupants and
cargo should never exceed XXX kg or XXX lbs.” on your
vehicle’s placard.
(2) Determine the combined weight of the driver and passengers
that will be riding in your vehicle.
(3) Subtract the combined weight of the driver and passengers
from XXX kg or XXX lbs.
(4) The resulting figure equals th e available amount of cargo and
luggage load capacity. For example, if the “XXX” amount
equals 1,400 lbs. an d there will be five 150 lb. passengers in
your vehicle, the amount of available cargo and luggage load
capacity is 650 lbs.
(1,400 - 750 (5 x 150) = 650 lbs.)
1 Maximum Load Limit
Gross Vehicle Weight Rating (GVWR):
The maximum allowable weight of the vehicle, all
occupants, all accessories and all cargo.
2 Specifications P. 498
Gross Axle Weight Rating (GAWR):
The maximum allowable weight of the vehicle axle. 2 Specifications P. 498
3
WARNING
Overloading or improper loading
can affect handling and stability
and cause a crash in which you
can be hurt or killed.
Follow all load limits and other
loading guidelines in this manual.
Label Example
Page 339 of 521
338
uuBefore Driving uMaximum Load Limit
Driving
(5) Determine the combined weight of luggage and cargo being
loaded on the vehicle. That weight may not safely exceed the
available cargo and luggage load capacity calculated in step 4.
(6) If your vehicle will be towing a trailer, load from your trailer will
be transferred to your vehicle. Co nsult this manual to
determine how this reduces the available cargo and luggage
load capacity of your vehicle.
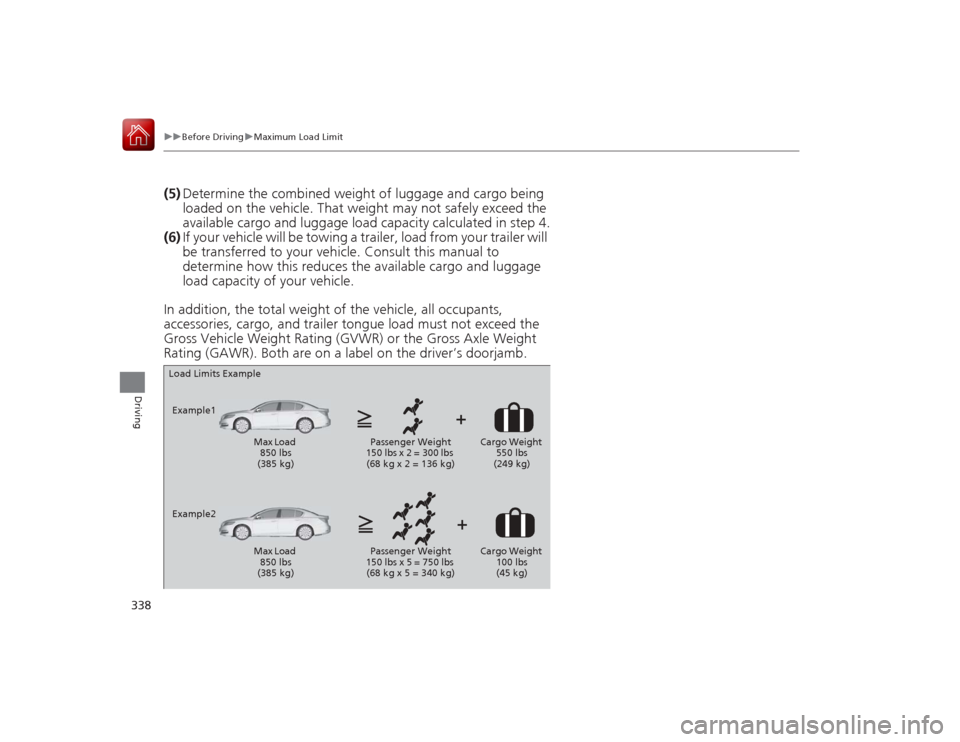
In addition, the total weight of the vehicle, all occupants,
accessories, cargo, and trailer tongue load must not exceed the
Gross Vehicle Weight Rating (GVWR) or the Gross Axle Weight
Rating (GAWR). Both are on a label on the driver’s doorjamb.Load Limits Example
Example1 Max Load 850 lbs
(385 kg) Passenger Weight
150 lbs x 2 = 300 lbs (68 kg x 2 = 136 kg) Cargo Weight
550 lbs
(249 kg)
Example2 Max Load 850 lbs
(385 kg) Passenger Weight
150 lbs x 5 = 750 lbs (68 kg x 5 = 340 kg) Cargo Weight
100 lbs
(45 kg)