audio Acura RLX 2016 User Guide
[x] Cancel search | Manufacturer: ACURA, Model Year: 2016, Model line: RLX, Model: Acura RLX 2016Pages: 581, PDF Size: 31.43 MB
Page 133 of 581
132
Controls
Clock
Adjusting the Clock
The clock is automatically updated through the navigation system, so the time does
not need to be adjusted.
You can also adjust the time manually in the audio/information screen, with the
power mode in ON.
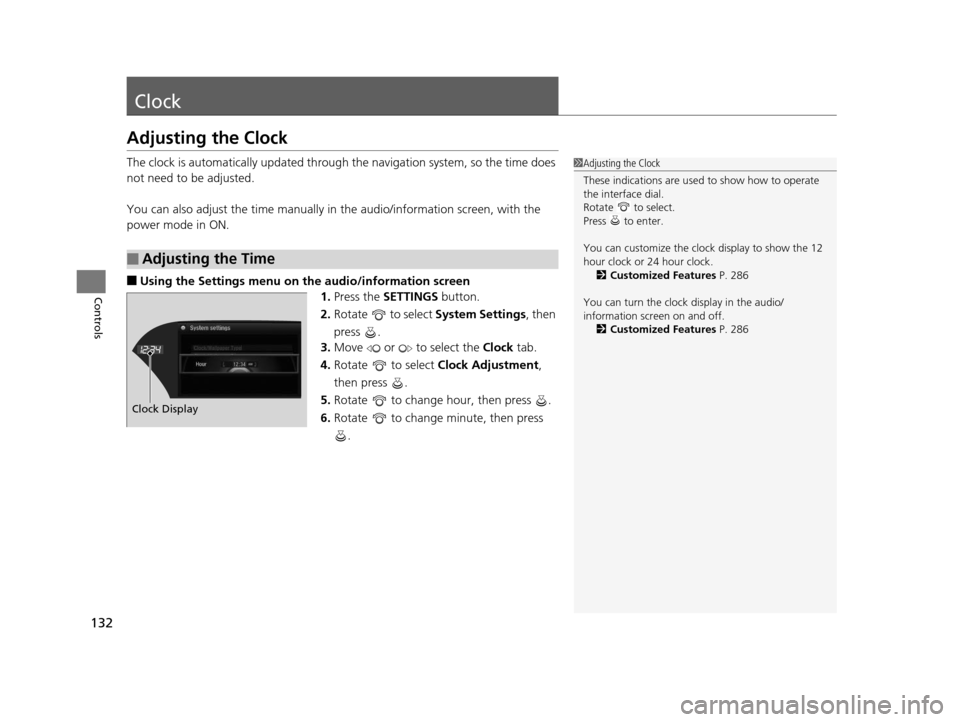
■Using the Settings menu on th e audio/information screen
1. Press the SETTINGS button.
2. Rotate to select System Settings, then
press .
3. Move or to select the Clock tab.
4. Rotate to select Clock Adjustment,
then press .
5. Rotate to change hour, then press .
6. Rotate to change minute, then press
.
■Adjusting the Time
1Adjusting the Clock
These indications are used to show how to operate
the interface dial.
Rotate to select.
Press to enter.
You can customize the clock display to show the 12
hour clock or 24 hour clock. 2 Customized Features P. 286
You can turn the clock display in the audio/
information screen on and off. 2 Customized Features P. 286
Hour
Clock/Wallpaper Type
System settings
Clock Display
16 ACURA RLX E-AWD-31TY36200.book 132 ページ 2015年5月22日 金曜日 午後3時
50分
Page 140 of 581
Continued139
uuLocking and Unlocking the Doors uLocking/Unlocking the Doors from the Outside
Controls
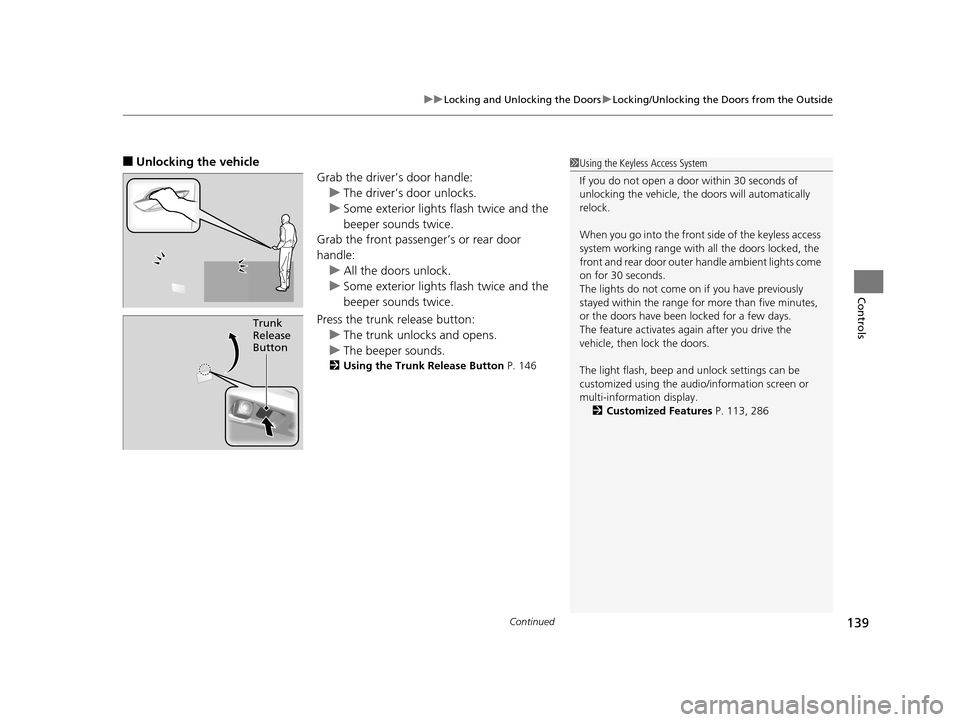
■Unlocking the vehicle
Grab the driver’s door handle:u The driver’s door unlocks.
u Some exterior lights flash twice and the
beeper sounds twice.
Grab the front passenger’s or rear door
handle:
u All the doors unlock.
u Some exterior lights flash twice and the
beeper sounds twice.
Press the trunk release button: u The trunk unlocks and opens.
u The beeper sounds.
2 Using the Trunk Release Button P. 146
Trunk
Release
Button
1Using the Keyless Access System
If you do not open a door within 30 seconds of
unlocking the vehicle, th e doors will automatically
relock.
When you go into the front side of the keyless access
system working range with all the doors locked, the
front and rear door outer handle ambient lights come
on for 30 seconds.
The lights do not come on if you have previously
stayed within the range for more than five minutes,
or the doors have been locked for a few days.
The feature activates again after you drive the
vehicle, then lock the doors.
The light flash, beep a nd unlock settings can be
customized using the audio/information screen or
multi-information display.
2 Customized Features P. 113, 286
16 ACURA RLX E-AWD-31TY36200.book 139 ページ 2015年5月22日 金曜日 午後3時 50分
Page 144 of 581
Continued143
uuLocking and Unlocking the Doors uLocking/Unlocking the Doors from the Inside
Controls
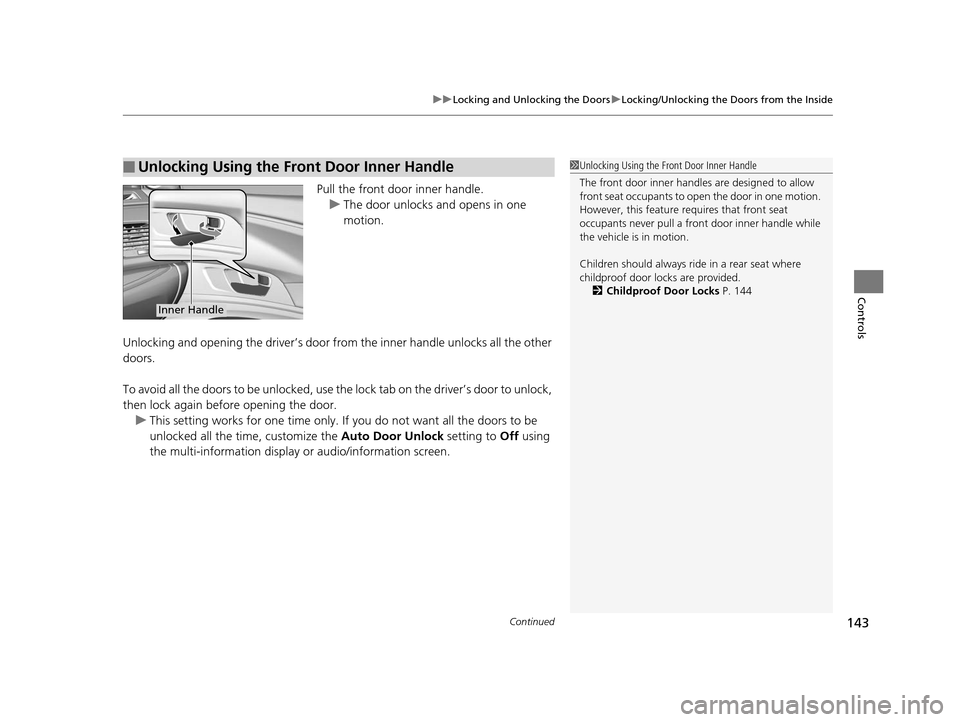
Pull the front door inner handle.
u The door unlocks and opens in one
motion.
Unlocking and opening the driver’s door from the inner handle unlocks all the other
doors.
To avoid all the doors to be unlocked, use the lock tab on the driver’s door to unlock,
then lock again before opening the door. u This setting works for one time only. If you do not want all the doors to be
unlocked all the time, customize the Auto Door Unlock setting to Off using
the multi-information display or audio/information screen.
■Unlocking Using the Front Door Inner Handle1 Unlocking Using the Front Door Inner Handle
The front door inne r handles are designed to allow
front seat occupants to open the door in one motion.
However, this feature requires that front seat
occupants never pull a front door inner handle while
the vehicle is in motion.
Children should always ride in a rear seat where
childproof door locks are provided. 2 Childproof Door Locks P. 144
Inner Handle
16 ACURA RLX E-AWD-31TY36200.book 143 ページ 2015年5月22日 金曜日 午後3時 50分
Page 146 of 581
145
uuLocking and Unlocking the Doors uAuto Door Locking/Unlocking
Controls
Auto Door Locking/Unlocking
Your vehicle locks all doors and unlocks the driver’s door automatically when a
certain condition is met.
■Drive lock mode
All doors lock when the vehicle’s speed reaches about 10 mph (15 km/h).
■Driver’s door open mode
All doors unlock when the driver’s door is opened.
■Auto Door Locking
■Auto Door Unlocking
1 Auto Door Locking/Unlocking
You can turn off or cha nge to another auto door
locking/unlocking sett ing using the audio/
information screen or mu lti-information display.
2 Customized Features P. 113, 286
16 ACURA RLX E-AWD-31TY36200.book 145 ページ 2015年5月22日 金曜日 午後3時 50分
Page 156 of 581
155Continued
Controls
Operating the Switches Around the Steering Wheel
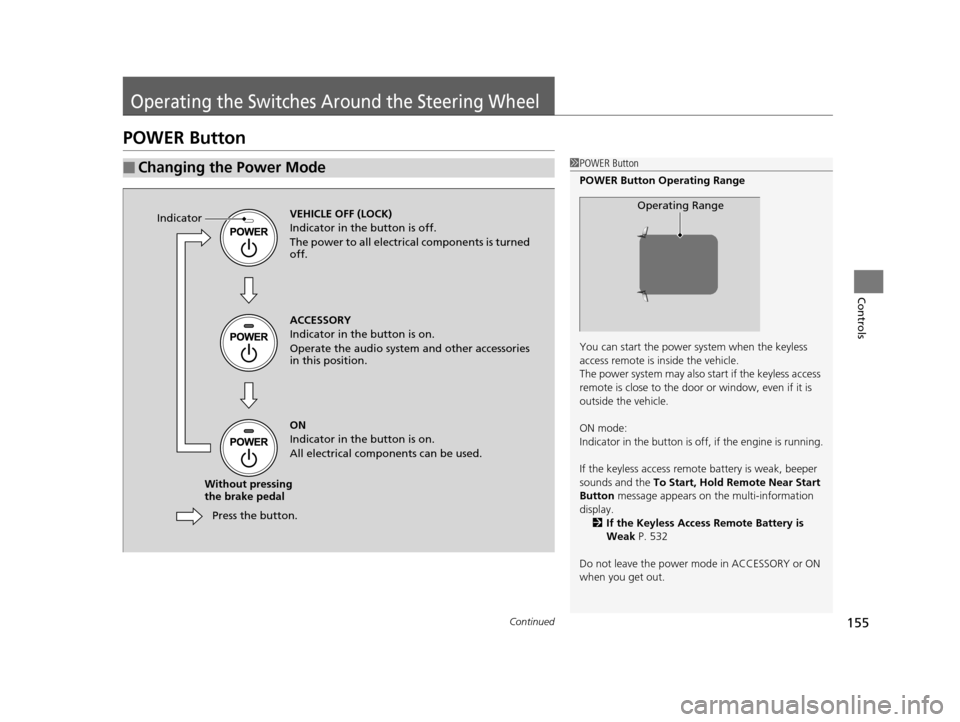
POWER Button
■Changing the Power Mode1POWER Button
POWER Button Operating Range
You can start the power system when the keyless
access remote is inside the vehicle.
The power system may also start if the keyless access
remote is close to the door or window, even if it is
outside the vehicle.
ON mode:
Indicator in the button is of f, if the engine is running.
If the keyless access remote battery is weak, beeper
sounds and the To Start, Hold Remote Near Start
Button message appears on the multi-information
display. 2 If the Keyless Access Remote Battery is
Weak P. 532
Do not leave the power mode in ACCESSORY or ON
when you get out.
Operating RangeVEHICLE OFF (LOCK)
Indicator in th e button is off.
The power to all electrical components is turned
off.
Press the button.
Without pressing
the brake pedal ACCESSORY
Indicator in the button is on.
Operate the audio system and other accessories
in this position.
ON
Indicator in the button is on.
All electrical components can be used.
Indicator
16 ACURA RLX E-AWD-31TY36200.book 155 ページ 2015年5月22日 金曜日 午後3時
50分
Page 170 of 581

169
uuOperating the Switches Around the Steering Wheel uDriving Position Memory System
Continued
Controls
Driving Position Memory System
You can store two driver’s seat (except for power lumbar), steering wheel and door
mirror positions with the driv ing position memory system.
When you unlock and open the driver’s door with a remote transmitter, or keyless
access system, the seat and door mirrors adjust automatically to one of the two
preset positions.
The steering wheel will move to the stored position when you set the power mode
to ACCESSORY.
The multi-information display shows you which remote transmitter you used to
unlock the vehicle when you enter.
• DRIVER 1 transmitter is linked to memory button 1.
• DRIVER 2 transmitter is linked to memory button 2.1Driving Position Memory System
Using the audio/information screen or multi-
information display, you can disable the automatic
seat, steering wheel and door mirrors adjustment
function. 2 Customized Features P. 113, 286
DRIVER 1 DRIVER 2
16 ACURA RLX E-AWD-31TY36200.book 169 ページ 2015年5月22日 金曜日 午後3時 50分
Page 187 of 581
uuInterior Lights/Interior Convenience Items uInterior Convenience Items
186
Controls
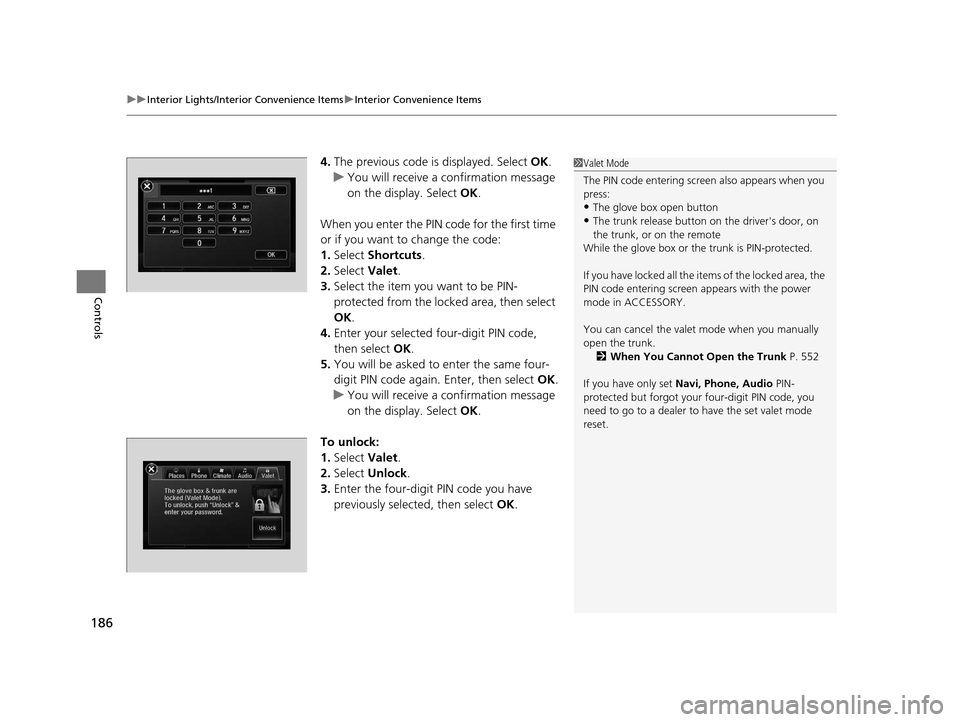
4. The previous code is displayed. Select OK.
u You will receive a confirmation message
on the display. Select OK.
When you enter the PIN code for the first time
or if you want to change the code:
1. Select Shortcuts .
2. Select Valet.
3. Select the item you want to be PIN-
protected from the locked area, then select
OK .
4. Enter your selected four-digit PIN code,
then select OK.
5. You will be asked to enter the same four-
digit PIN code again. Enter, then select OK.
u You will receive a confirmation message
on the display. Select OK.
To unlock:
1. Select Valet.
2. Select Unlock .
3. Enter the four-digit PIN code you have
previously selected, then select OK.1Valet Mode
The PIN code entering screen also appears when you
press:
•The glove box open button
•The trunk release button on the driver's door, on
the trunk, or on the remote
While the glove box or the trunk is PIN-protected.
If you have locked all the items of the locked area, the
PIN code entering screen appears with the power
mode in ACCESSORY.
You can cancel the valet mode when you manually
open the trunk. 2 When You Cannot Open the Trunk P. 552
If you have only set Navi, Phone, Audio PIN-
protected but forgot your four-digit PIN code, you
need to go to a dealer to have the set valet mode
reset.
16 ACURA RLX E-AWD-31TY36200.book 186 ページ 2015年5月22日 金曜日 午後3時 50分
Page 212 of 581
211
Features
This chapter describes how to operate technology features.
Audio SystemAbout Your Audio System ................ 212
USB Port .......................................... 213
Auxiliary Input Jack .......................... 213
Audio System Theft Protection ......... 214
Audio Remote Controls .................... 215
Audio System Basic Operation ........ 216
On Demand Multi-Use Display
TM....... 217
Audio/Information Screen ................ 225
Adjusting the Sound ........................ 230
Display Setup ................................... 231
Voice Control Operation .................. 232
Playing AM/FM Radio ....................... 240 Playing SiriusXM
® Radio ................... 245
Playing a CD .................................... 248
Playing Hard Disk Drive (HDD) Audio .... 251Playing an iPod ................................ 261
Song By VoiceTM (SBV) ...................... 265
Playing Internet Radio ...................... 269
Playing a USB Flash Drive ................. 272
Playing Bluetooth ® Audio................. 275
Audio Error Messages CD Player ......................................... 277
Hard Disk Drive (HDD) Audio............ 278
iPod/USB Flash Drive ........................ 279
Pandora ®......................................... 280
Aha
TM Radio ..................................... 281
General Information on the Audio SystemSiriusXM ® Radio Service ................... 282
Recommended CDs ......................... 283
Compatible iPod, iPhone, and USB Flash
Drives ................................................. 285
Customized Features............................286Defaulting All th e Settings........................ 309
Deleting all HDD Data .............................. 310
HomeLink® Universal Transceiver.......311Bluetooth® HandsFreeLink®
Using HFL ........................................ 313
HFL Menus ...................................... 315
AcuraLink®............................................352
16 ACURA RLX E-AWD-31TY36200.book 211 ページ 2015年5月22日 金曜日 午後3時 50分
Page 213 of 581
212
Features
Audio System
About Your Audio System
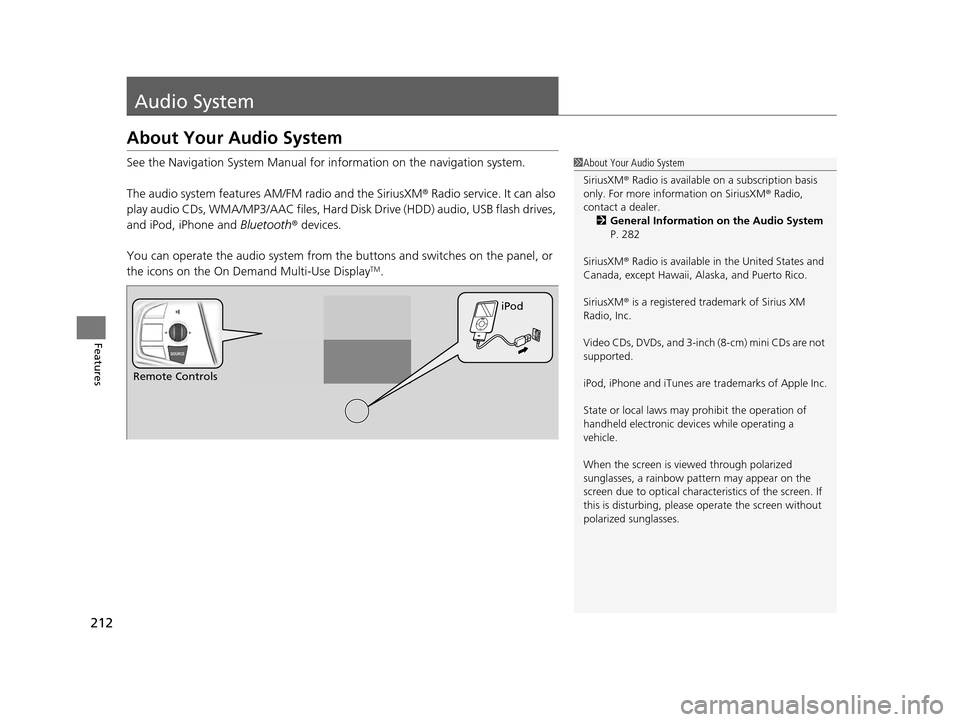
See the Navigation System Manual for information on the navigation system.
The audio system features AM/FM radio and the SiriusXM ® Radio service. It can also
play audio CDs, WMA/MP3/AAC files, Hard Di sk Drive (HDD) audio, USB flash drives,
and iPod, iPhone and Bluetooth® devices.
You can operate the audio system from the buttons and switches on the panel, or
the icons on the On Demand Multi-Use Display
TM.
1 About Your Audio System
SiriusXM ® Radio is available on a subscription basis
only. For more information on SiriusXM ® Radio,
contact a dealer.
2 General Information on the Audio System
P. 282
SiriusXM ® Radio is available in the United States and
Canada, except Ha waii, Alaska, and Puerto Rico.
SiriusXM ® is a registered trademark of Sirius XM
Radio, Inc.
Video CDs, DVDs, and 3-inch (8-cm) mini CDs are not
supported.
iPod, iPhone and iTunes are trademarks of Apple Inc.
State or local laws may pr ohibit the operation of
handheld electronic devi ces while operating a
vehicle.
When the screen is vi ewed through polarized
sunglasses, a rainbow pa ttern may appear on the
screen due to optical characteristics of the screen. If
this is disturbing, please operate the screen without
polarized sunglasses.
Remote Controls iPod
16 ACURA RLX E-AWD-31TY36200.book 212 ページ 2015年5月22日 金曜日 午後3時
50分
Page 214 of 581
213
uuAudio System uUSB Port
Features
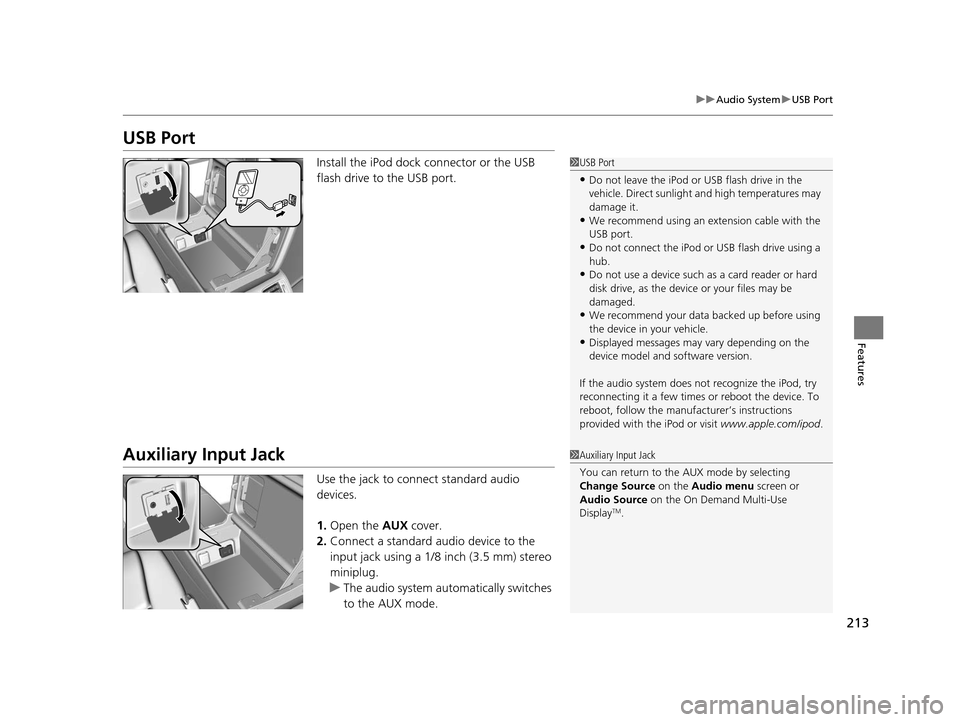
USB Port
Install the iPod dock connector or the USB
flash drive to the USB port.
Auxiliary Input Jack
Use the jack to connect standard audio
devices.
1. Open the AUX cover.
2. Connect a standard audio device to the
input jack using a 1/8 inch (3.5 mm) stereo
miniplug.
u The audio system auto matically switches
to the AUX mode.
1 USB Port
•Do not leave the iPod or USB flash drive in the
vehicle. Direct sunlight and high temperatures may
damage it.
•We recommend using an ex tension cable with the
USB port.
•Do not connect the iPod or USB flash drive using a
hub.
•Do not use a device such as a card reader or hard
disk drive, as the device or your files may be
damaged.
•We recommend your data backed up before using
the device in your vehicle.
•Displayed messages may vary depending on the
device model and software version.
If the audio system does not recognize the iPod, try
reconnecting it a few times or reboot the device. To
reboot, follow the manufac turer’s instructions
provided with the iPod or visit www.apple.com/ipod.
1Auxiliary Input Jack
You can return to the AUX mode by selecting
Change Source on the Audio menu screen or
Audio Source on the On Demand Multi-Use
Display
TM.
16 ACURA RLX E-AWD-31TY36200.book 213 ページ 2015年5月22日 金曜日 午後3時 50分