Acura RLX 2017 Owner's Manual
Manufacturer: ACURA, Model Year: 2017, Model line: RLX, Model: Acura RLX 2017Pages: 557, PDF Size: 37.97 MB
Page 151 of 557
150
uuOperating the Switches Around the Steering Wheel uDriving Position Memory System
Controls
Driving Position Memory System
You can store two driver’s seat (except fo r power lumbar), steering wheel and door
mirror positions with the driving position memory system.
When you unlock and open th e driver’s door with a remote transmitter, or keyless
access system, the seat and door mirrors adjust automatically to one of the two
preset positions.
The steering wheel will move to the stored position when you set the power mode
to ACCESSORY.
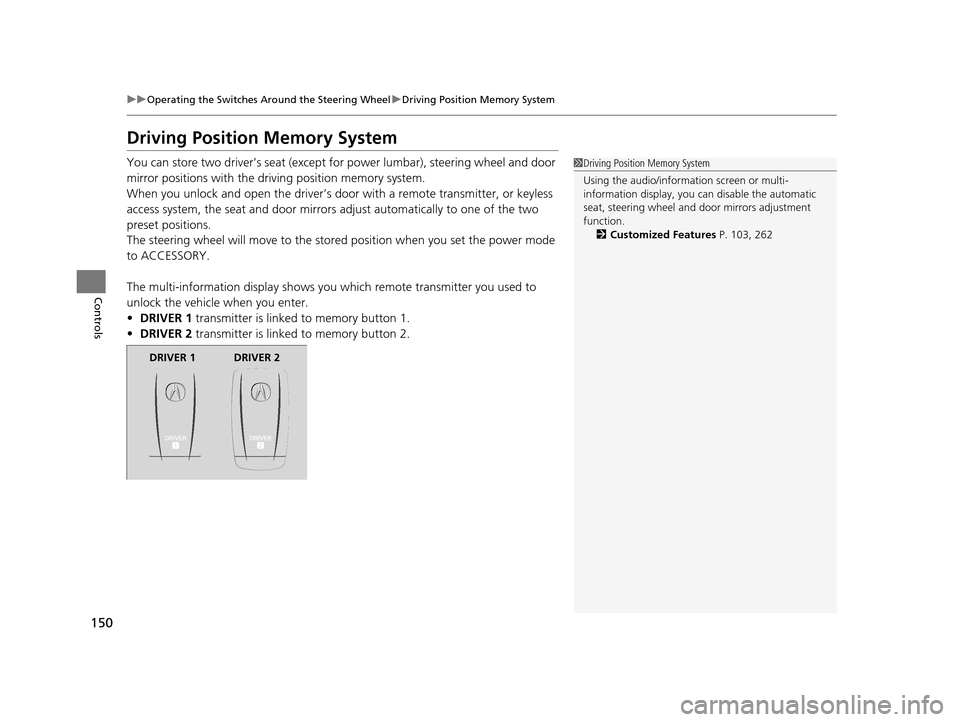
The multi-information display shows you which remote transmitter you used to
unlock the vehicle when you enter.
• DRIVER 1 transmitter is linked to memory button 1.
• DRIVER 2 transmitter is linked to memory button 2.1Driving Position Memory System
Using the audio/information screen or multi-
information display, you can disable the automatic
seat, steering wheel and door mirrors adjustment
function. 2 Customized Features P. 103, 262
DRIVER 1 DRIVER 2
17 ACURA RLX-31TY26300.book 150 ページ 2016年6月17日 金曜日 午前8時12分
Page 152 of 557
151
uuOperating the Switches Around the Steering Wheel uDriving Position Memory System
Controls
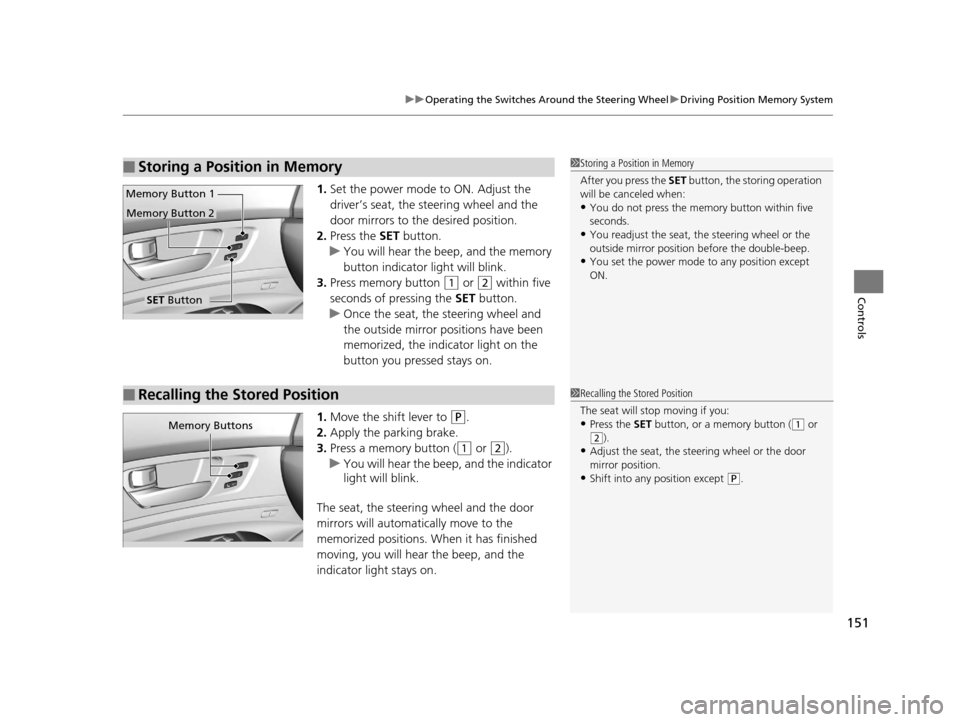
1. Set the power mode to ON. Adjust the
driver’s seat, the steering wheel and the
door mirrors to the desired position.
2. Press the SET button.
u You will hear the beep, and the memory
button indicator light will blink.
3. Press memory button
(1 or (2 within five
seconds of pressing the SET button.
u Once the seat, the steering wheel and
the outside mirror positions have been
memorized, the indicator light on the
button you pressed stays on.
1. Move the shift lever to
(P.
2. Apply the parking brake.
3. Press a memory button (
(1 or (2).
u You will hear the beep, and the indicator
light will blink.
The seat, the steering wheel and the door
mirrors will automatically move to the
memorized positions. When it has finished
moving, you will hear the beep, and the
indicator light stays on.
■Storing a Position in Memory1 Storing a Position in Memory
After you press the SET button, the storing operation
will be canceled when:
•You do not press the memory button within five
seconds.
•You readjust the seat, the steering wheel or the
outside mirror position before the double-beep.
•You set the power mode to any position except
ON.
SET Button
Memory Button 1
Memory Button 2
■Recalling the Stored Position1
Recalling the Stored Position
The seat will st op moving if you:
•Press the SET button, or a memory button ((1 or
(2).
•Adjust the seat, the st eering wheel or the door
mirror position.
•Shift into any position except ( P.
Memory Buttons
17 ACURA RLX-31TY26300.book 151 ページ 2016年6月17日 金曜日 午前8時12分
Page 153 of 557
152
uuOperating the Switches Around the Steering Wheel uAdjusting the Steering Wheel
Controls
Adjusting the Steering Wheel
The steering wheel height and distance from your body can be adjusted so that you
can comfortably grip the steering wheel in an appropriate driving posture.
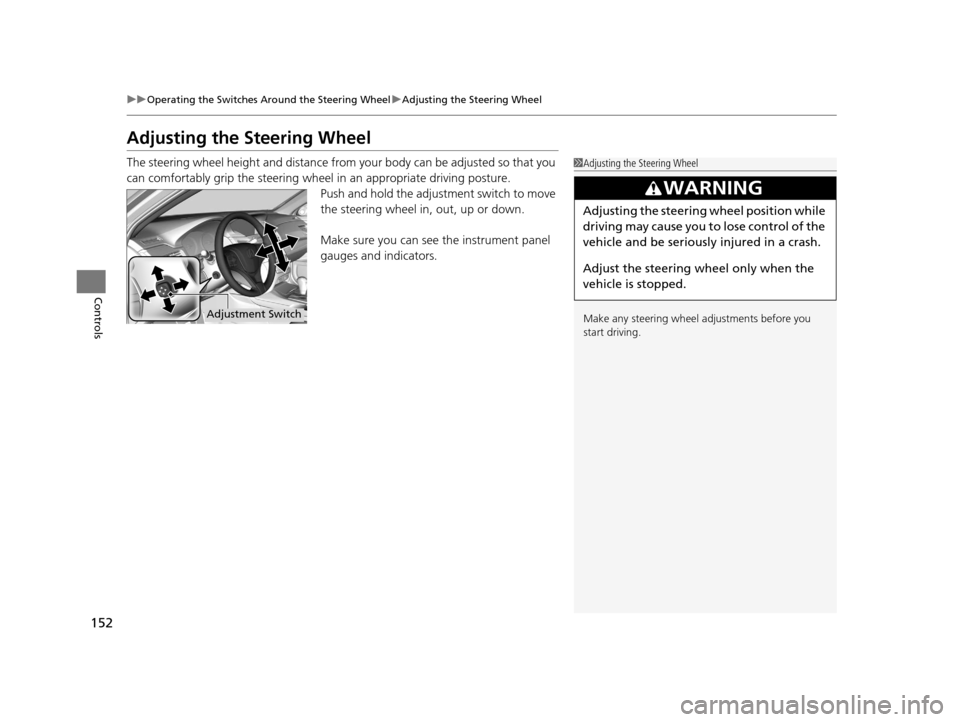
Push and hold the adjustment switch to move
the steering wheel in, out, up or down.
Make sure you can see the instrument panel
gauges and indicators.1Adjusting the Steering Wheel
Make any steering wheel adjustments before you
start driving.
3WARNING
Adjusting the steering wheel position while
driving may cause you to lose control of the
vehicle and be seriously injured in a crash.
Adjust the steering wheel only when the
vehicle is stopped.
Adjustment Switch
17 ACURA RLX-31TY26300.book 152 ページ 2016年6月17日 金曜日 午前8時12分
Page 154 of 557
153
Controls
Adjusting the Mirrors
Interior Rearview Mirror
Adjust the angle of the rearview mirror when you are sitting in the correct driving
position.
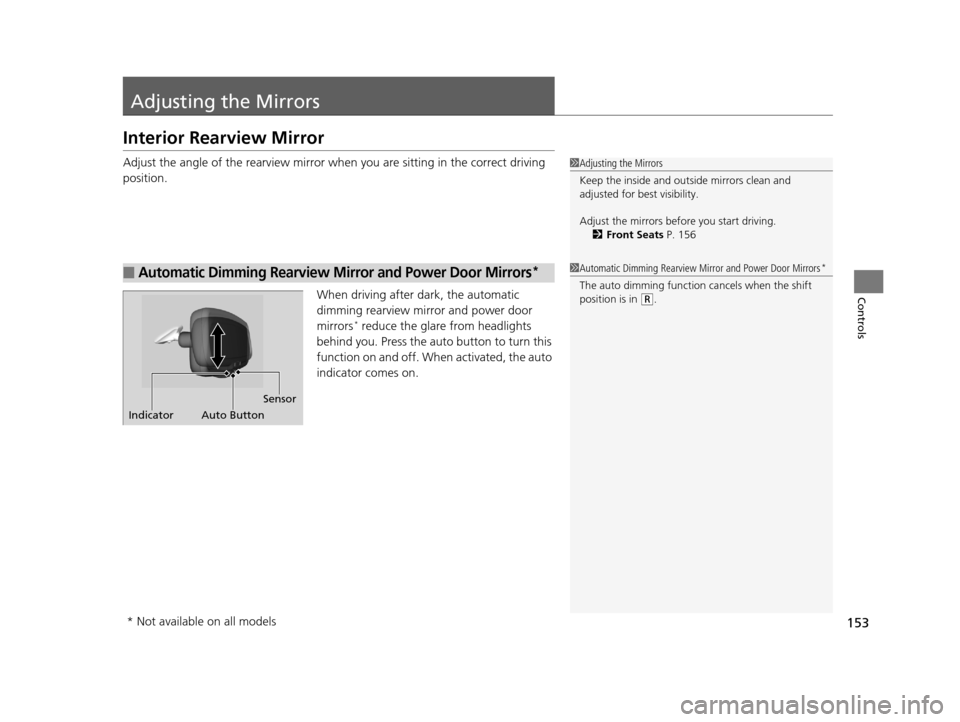
When driving after dark, the automatic
dimming rearview mirror and power door
mirrors
* reduce the glare from headlights
behind you. Press the auto button to turn this
function on and off. When activated, the auto
indicator comes on.
■Automatic Dimming Rearview Mi rror and Power Door Mirrors*
1Adjusting the Mirrors
Keep the inside and out side mirrors clean and
adjusted for best visibility.
Adjust the mirrors befo re you start driving.
2 Front Seats P. 156
1Automatic Dimming Rearview Mirror and Power Door Mirrors*
The auto dimming function cancels when the shift
position is in (R.
Sensor
Auto Button
Indicator
* Not available on all models
17 ACURA RLX-31TY26300.book 153 ページ 2016年6月17日 金曜日 午前8時12分
Page 155 of 557
154
uuAdjusting the Mirrors uPower Door Mirrors
Controls
Power Door Mirrors
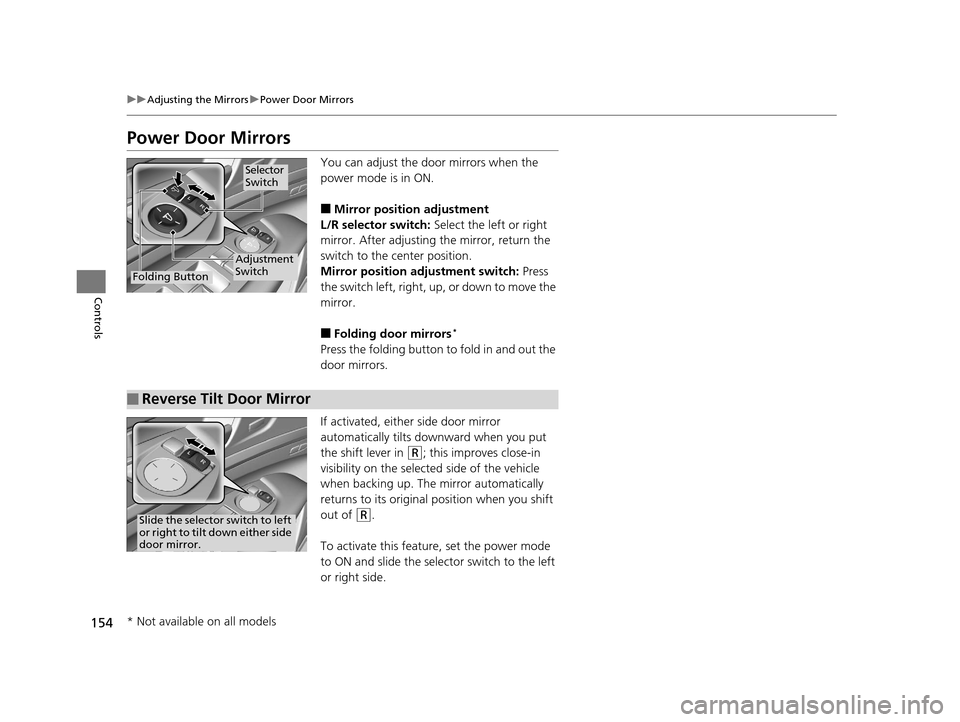
You can adjust the door mirrors when the
power mode is in ON.
■Mirror position adjustment
L/R selector switch: Select the left or right
mirror. After adjusting the mirror, return the
switch to the center position.
Mirror position adjustment switch: Press
the switch left, right, up, or down to move the
mirror.
■Folding door mirrors*
Press the folding button to fold in and out the
door mirrors.
If activated, either side door mirror
automatically tilts do wnward when you put
the shift lever in
(R; this improves close-in
visibility on the selected side of the vehicle
when backing up. The mirror automatically
returns to its original position when you shift
out of
(R.
To activate this feature, set the power mode
to ON and slide the selector switch to the left
or right side.
Selector
Switch
Folding Button
Adjustment
Switch
■Reverse Tilt Door Mirror
Slide the selector switch to left
or right to tilt down either side
door mirror.
* Not available on all models
17 ACURA RLX-31TY26300.book 154 ページ 2016年6月17日 金曜日 午前8時12分
Page 156 of 557
155
uuAdjusting the Mirrors uPower Door Mirrors
Controls
■Folding in th e door mirrors
Press the lock button on the keyless access remote, or press the door lock button on
any door. u The mirrors start folding in automatically.
■Folding out the door mirrors
Press the unlock button on the keyless acce ss remote, or grab the door handle on
any door.
u The mirrors start folding out automatically.
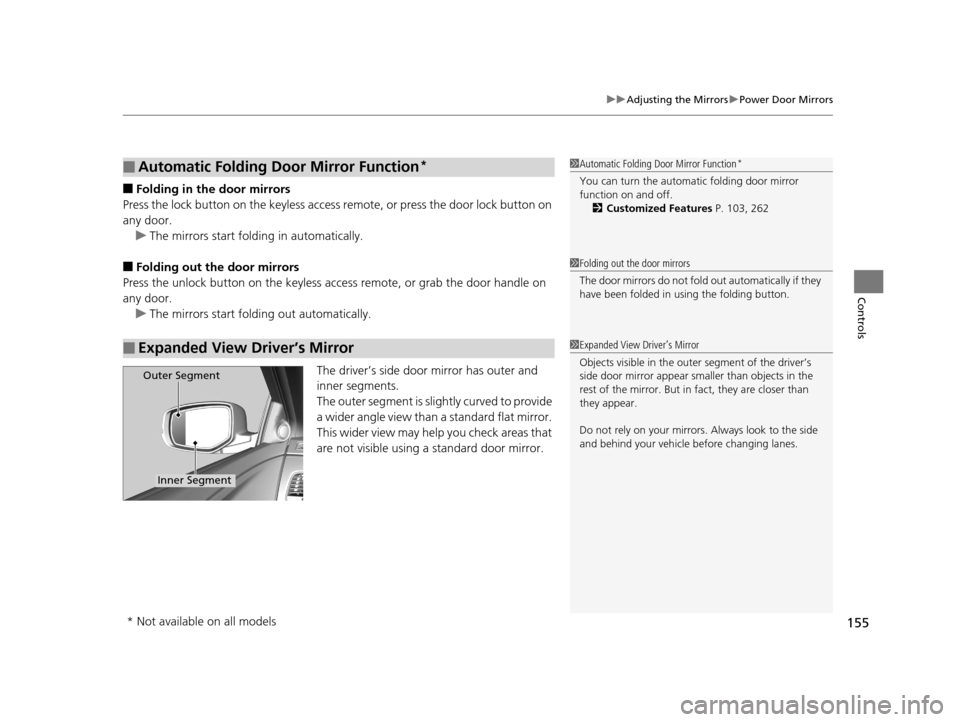
The driver’s side door mirror has outer and
inner segments.
The outer segment is slightly curved to provide
a wider angle view than a standard flat mirror.
This wider view may help you check areas that
are not visible using a standard door mirror.
■Automatic Folding Door Mirror Function*
■Expanded View Driver’s Mirror
1 Automatic Folding Door Mirror Function*
You can turn the automa tic folding door mirror
function on and off.
2 Customized Features P. 103, 262
1Folding out the door mirrors
The door mirrors do not fold out automatically if they
have been folded in using the folding button.
1 Expanded View Driver’s Mirror
Objects visible in the outer segment of the driver’s
side door mirror a ppear smaller than objects in the
rest of the mirror. But in fact, they are closer than
they appear.
Do not rely on your mirrors. Always look to the side
and behind your vehicle before changing lanes.
Inner Segment
Outer Segment
* Not available on all models
17 ACURA RLX-31TY26300.book 155 ページ 2016年6月17日 金曜日 午前8時12分
Page 157 of 557
156
Controls
Adjusting the Seats
Front Seats
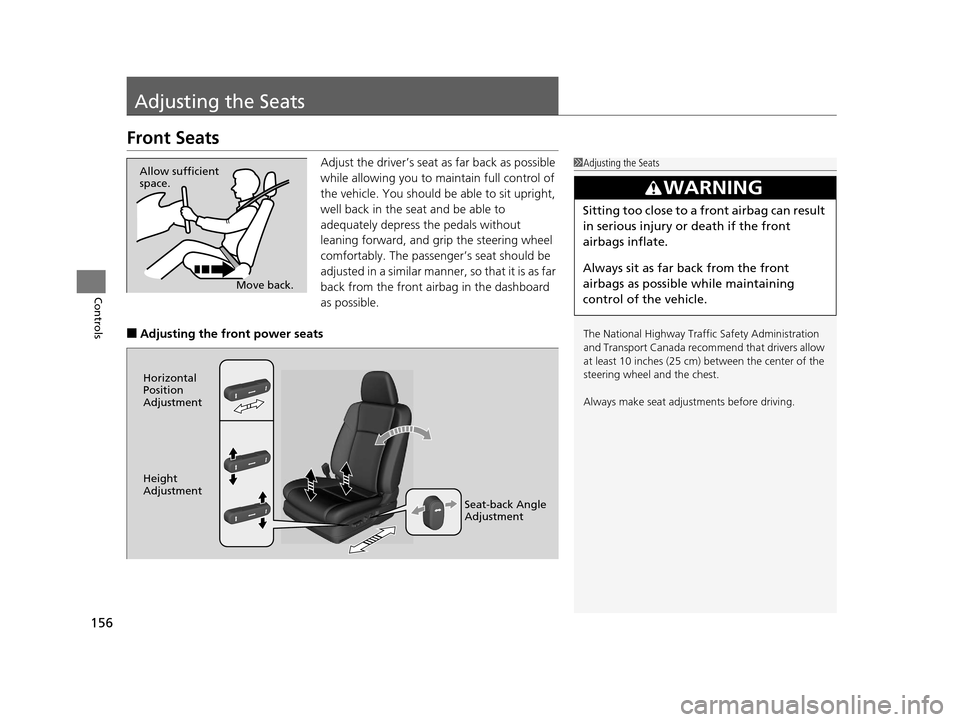
Adjust the driver’s seat as far back as possible
while allowing you to maintain full control of
the vehicle. You should be able to sit upright,
well back in the seat and be able to
adequately depress the pedals without
leaning forward, and grip the steering wheel
comfortably. The passenger’s seat should be
adjusted in a similar manner, so that it is as far
back from the front airbag in the dashboard
as possible.
■Adjusting the front power seats
1Adjusting the Seats
The National Highway Traffic Safety Administration
and Transport Cana da recommend that drivers allow
at least 10 inches (25 cm) between the center of the
steering wheel and the chest.
Always make seat adjustments before driving.
3WARNING
Sitting too close to a front airbag can result
in serious injury or death if the front
airbags inflate.
Always sit as far back from the front
airbags as possible while maintaining
control of the vehicle.
Move back.
Allow sufficient
space.
Horizontal
Position
Adjustment
Height
Adjustment
Seat-back Angle
Adjustment
17 ACURA RLX-31TY26300.book 156 ページ 2016年6月17日 金曜日 午前8時12分
Page 158 of 557
157
uuAdjusting the Seats uFront Seats
Continued
Controls
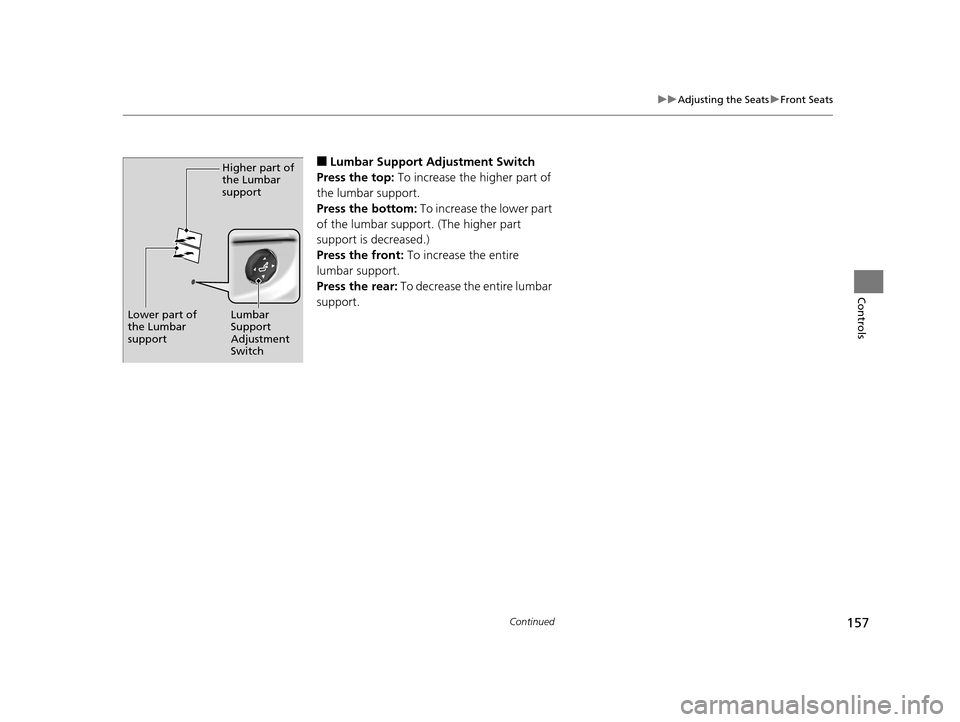
■Lumbar Support Adjustment Switch
Press the top: To increase the higher part of
the lumbar support.
Press the bottom: To increase the lower part
of the lumbar support. (The higher part
support is decreased.)
Press the front: To increase the entire
lumbar support.
Press the rear: To decrease the entire lumbar
support.Higher part of
the Lumbar
support
Lumbar
Support
Adjustment
Switch
Lower part of
the Lumbar
support
17 ACURA RLX-31TY26300.book 157 ページ 2016年6月17日 金曜日 午前8時12分
Page 159 of 557
uuAdjusting the Seats uFront Seats
158
Controls
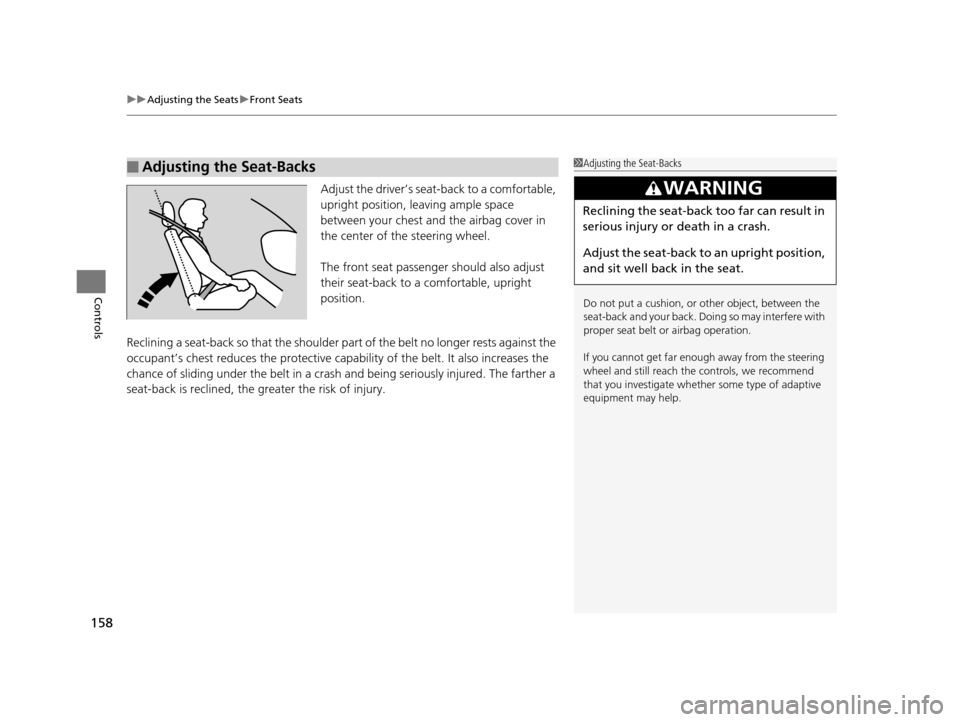
Adjust the driver’s sea t-back to a comfortable,
upright position, leaving ample space
between your chest and the airbag cover in
the center of the steering wheel.
The front seat passenger should also adjust
their seat-back to a comfortable, upright
position.
Reclining a seat-back so that the shoulder pa rt of the belt no longer rests against the
occupant’s chest reduces the protective capa bility of the belt. It also increases the
chance of sliding under the belt in a crash and being seriously injured. The farther a
seat-back is reclined, the greater the risk of injury.
■Adjusting the Seat-Backs1 Adjusting the Seat-Backs
Do not put a cushion, or other object, between the
seat-back and your back. Do ing so may interfere with
proper seat belt or airbag operation.
If you cannot get far e nough away from the steering
wheel and still reach th e controls, we recommend
that you investigate whether some type of adaptive
equipment may help.
3WARNING
Reclining the seat-back too far can result in
serious injury or death in a crash.
Adjust the seat-back to an upright position,
and sit well back in the seat.
17 ACURA RLX-31TY26300.book 158 ページ 2016年6月17日 金曜日 午前8時12分
Page 160 of 557
159
uuAdjusting the Seats uHead Restraints
Continued
Controls
Head Restraints
Your vehicle is equipped with head restraints
in all seating positions.
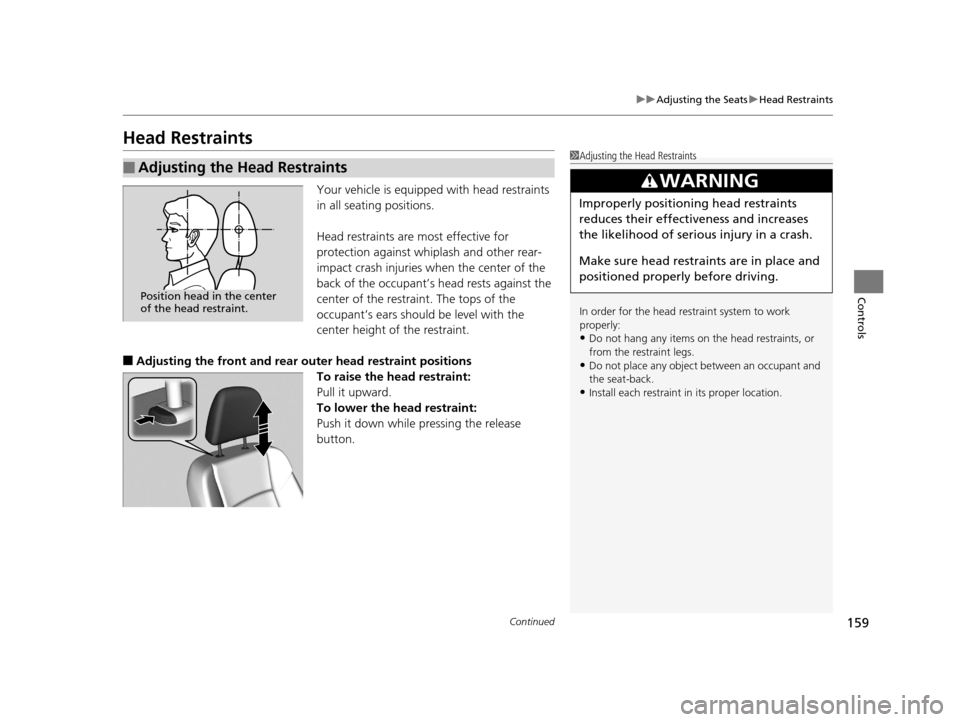
Head restraints are most effective for
protection against whiplash and other rear-
impact crash injuries when the center of the
back of the occupant’s head rests against the
center of the restraint. The tops of the
occupant’s ears should be level with the
center height of the restraint.
■Adjusting the front and rear outer head restra int positions
To raise the head restraint:
Pull it upward.
To lower the head restraint:
Push it down while pressing the release
button.
■Adjusting the Head Restraints1 Adjusting the Head Restraints
In order for the head restraint system to work
properly:
•Do not hang any items on the head restraints, or
from the restraint legs.
•Do not place any object be tween an occupant and
the seat-back.
•Install each restraint in its proper location.
3WARNING
Improperly positioning head restraints
reduces their effectiveness and increases
the likelihood of serious injury in a crash.
Make sure head restraints are in place and
positioned properly before driving.
Position head in the center
of the head restraint.
17 ACURA RLX-31TY26300.book 159 ページ 2016年6月17日 金曜日 午前8時12分