change time Acura RLX HYBRID 2018 User Guide
[x] Cancel search | Manufacturer: ACURA, Model Year: 2018, Model line: RLX HYBRID, Model: Acura RLX HYBRID 2018Pages: 609, PDF Size: 48.11 MB
Page 161 of 609
160
uuOperating the Switches Around the Steering Wheel uAuto High-Beam
Controls
Auto High-Beam
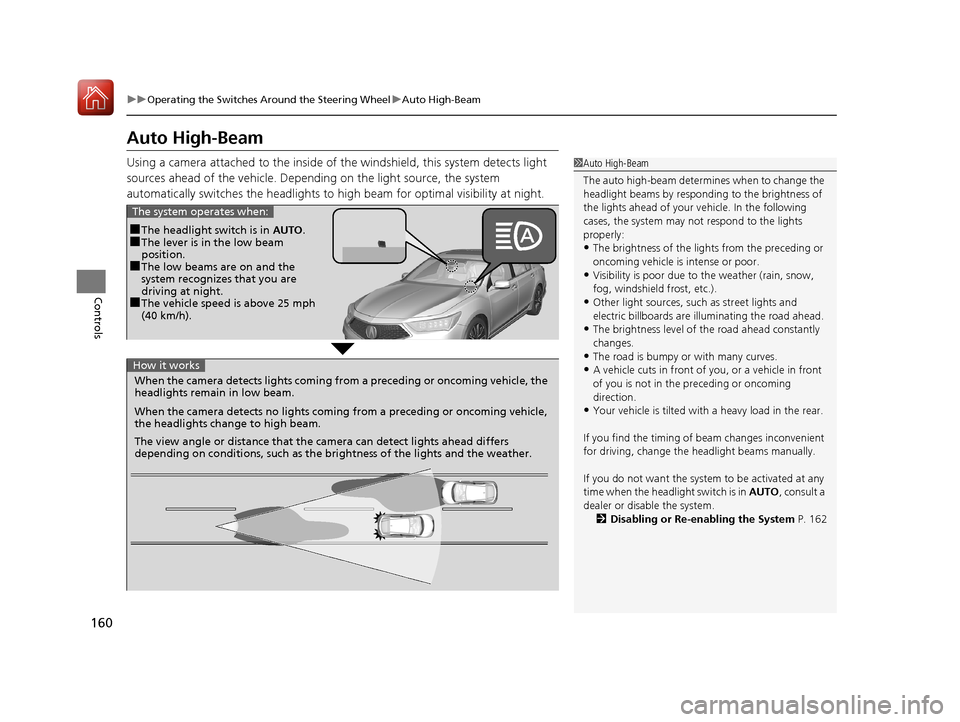
Using a camera attached to the inside of the windshield, this system detects light
sources ahead of the vehicle. Depend ing on the light source, the system
automatically switches the headlights to hi gh beam for optimal visibility at night.1Auto High-Beam
The auto high-beam determines when to change the
headlight beams by responding to the brightness of
the lights ahead of your vehicle. In the following
cases, the system may not respond to the lights
properly:
•The brightness of the lights from the preceding or
oncoming vehicle is intense or poor.
•Visibility is poor due to the weather (rain, snow,
fog, windshield frost, etc.).
•Other light sources, such as street lights and
electric billboards are illuminating the road ahead.
•The brightness level of th e road ahead constantly
changes.
•The road is bumpy or with many curves.
•A vehicle cuts in front of you, or a vehicle in front
of you is not in the preceding or oncoming
direction.
•Your vehicle is tilted with a heavy load in the rear.
If you find the timing of beam changes inconvenient
for driving, change the headlight beams manually.
If you do not want the system to be activated at any
time when the headlight switch is in AUTO, consult a
dealer or disable the system. 2 Disabling or Re-enabling the System P. 162
■The headlight switch is in AUTO.■The lever is in the low beam
position.
■The low beams are on and the
system recognizes that you are
driving at night.
■The vehicle speed is above 25 mph
(40 km/h).
The system operates when:
When the camera detects lig hts coming from a preceding or oncoming vehicle, the
headlights remain in low beam.
When the camera detects no lights coming from a preceding or oncoming vehicle,
the headlights change to high beam.
The view angle or distance that the camera can detect lights ahead differs
depending on conditions, such as the brightness of the lights and the weather.
How it works
18 ACURA RLX E-AWD-31TY36400.book 160 ページ 2017年7月20日 木曜日 午後6時 8分
Page 164 of 609
163
uuOperating the Switches Around the Steering Wheel uWipers and Washers
Continued
Controls
Wipers and Washers
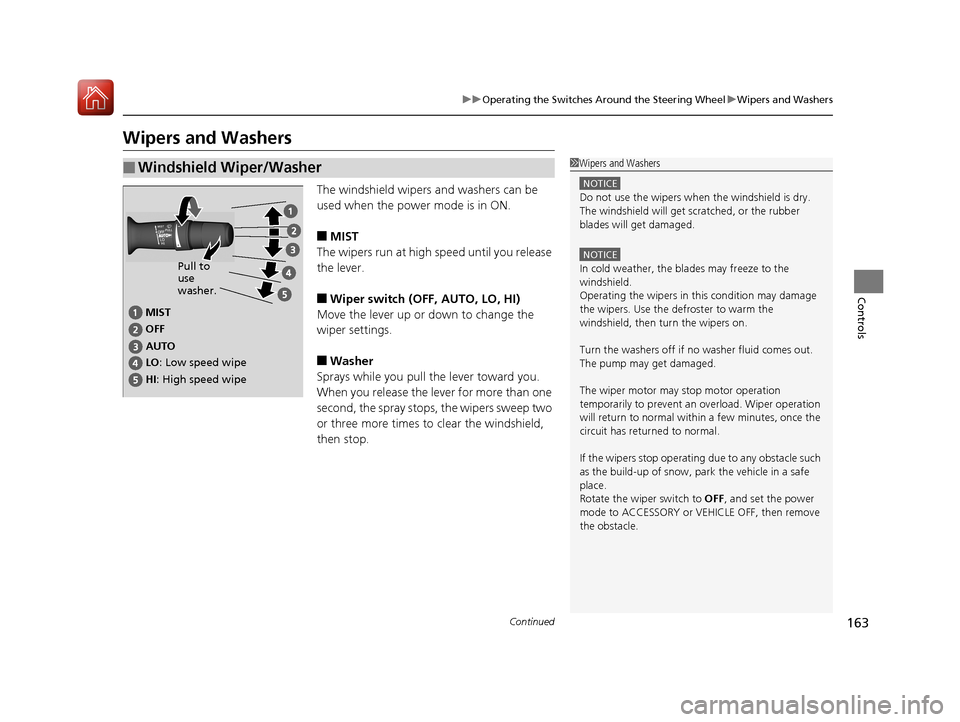
The windshield wipers and washers can be
used when the power mode is in ON.
■MIST
The wipers run at high speed until you release
the lever.
■Wiper switch (OFF, AUTO, LO, HI)
Move the lever up or down to change the
wiper settings.
■Washer
Sprays while you pull the lever toward you.
When you release the le ver for more than one
second, the spray stops, the wipers sweep two
or three more times to clear the windshield,
then stop.
■Windshield Wiper/Washer1 Wipers and Washers
NOTICE
Do not use the wipers when the windshield is dry.
The windshield will get sc ratched, or the rubber
blades will get damaged.
NOTICE
In cold weather, the blades may freeze to the
windshield.
Operating the wipers in th is condition may damage
the wipers. Use the defroster to warm the
windshield, then turn the wipers on.
Turn the washers off if no washer fluid comes out.
The pump may get damaged.
The wiper motor may stop motor operation
temporarily to prevent an overload. Wiper operation
will return to normal within a few minutes, once the
circuit has returned to normal.
If the wipers stop operating due to any obstacle such
as the build-up of snow, park the vehicle in a safe
place.
Rotate the wiper switch to OFF, and set the power
mode to ACCESSORY or VEHICLE OFF, then remove
the obstacle.
MIST
OFF
LO : Low speed wipe
HI: High speed wipe Pull to
use
washer.
AUTO
18 ACURA RLX E-AWD-31TY36400.book 163 ページ 2017年7月20日 木曜日 午後6時 8分
Page 165 of 609
uuOperating the Switches Around the Steering Wheel uWipers and Washers
164
Controls
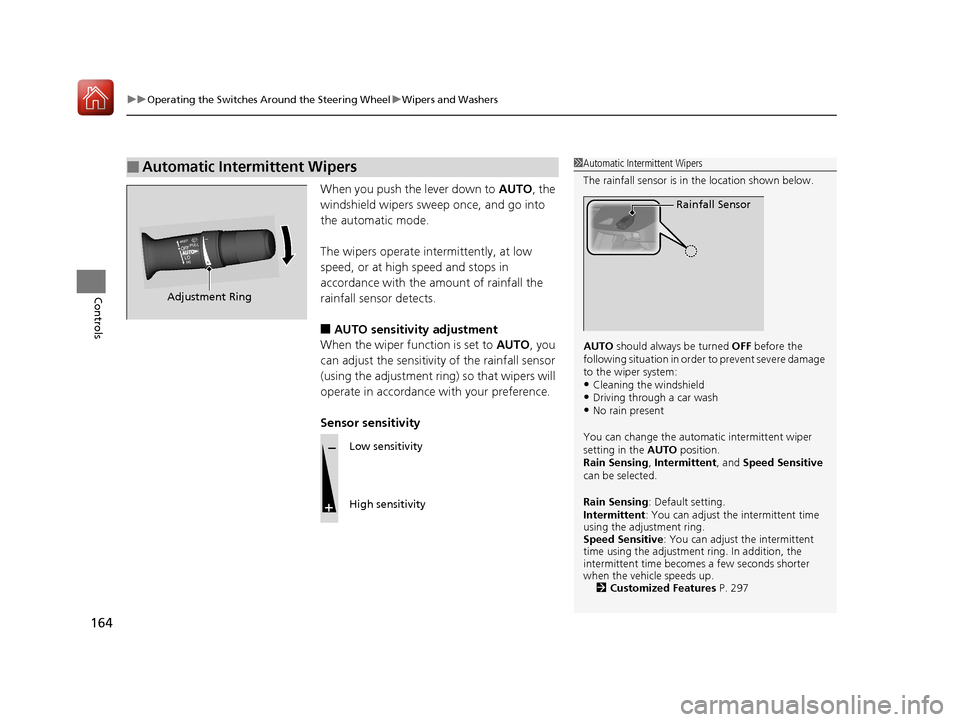
When you push the lever down to AUTO, the
windshield wipers sweep once, and go into
the automatic mode.
The wipers operate intermittently, at low
speed, or at high speed and stops in
accordance with the am ount of rainfall the
rainfall sensor detects.
■AUTO sensitivity adjustment
When the wiper function is set to AUTO, you
can adjust the sensitivity of the rainfall sensor
(using the adjustment ring) so that wipers will
operate in accordance with your preference.
Sensor sensitivity
■Automatic Intermittent Wipers1 Automatic Intermittent Wipers
The rainfall sensor is in the location shown below.
AUTO should always be turned OFF before the
following situation in order to prevent severe damage
to the wiper system:
•Cleaning the windshield•Driving through a car wash•No rain present
You can change the automatic intermittent wiper
setting in the AUTO position.
Rain Sensing , Intermittent , and Speed Sensitive
can be selected.
Rain Sensing : Default setting.
Intermittent : You can adjust the intermittent time
using the adjustment ring.
Speed Sensitive : You can adjust the intermittent
time using the adjustment ring. In addition, the
intermittent time become s a few seconds shorter
when the vehicle speeds up. 2 Customized Features P. 297
Rainfall Sensor
Adjustment Ring
Low sensitivity
High sensitivity
18 ACURA RLX E-AWD-31TY36400.book 164 ページ 2017年7月20日 木曜日 午後6時 8分
Page 183 of 609
182
Controls
Interior Lights/Interior Convenience Items
Interior Lights
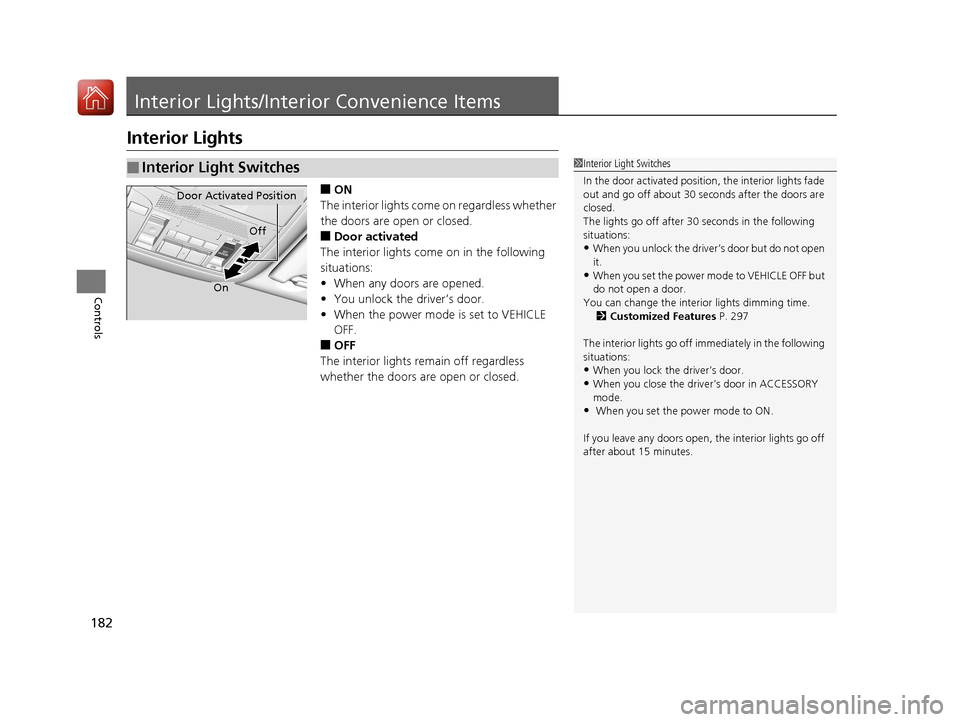
■ON
The interior lights come on regardless whether
the doors are open or closed.
■Door activated
The interior lights come on in the following
situations:
• When any doors are opened.
• You unlock the driver’s door.
• When the power mode is set to VEHICLE
OFF.
■OFF
The interior lights remain off regardless
whether the doors are open or closed.
■Interior Light Switches1 Interior Light Switches
In the door activated position, the interior lights fade
out and go off about 30 se conds after the doors are
closed.
The lights go off after 30 seconds in the following
situations:
•When you unlock the driver’s door but do not open
it.
•When you set the power mode to VEHICLE OFF but
do not open a door.
You can change the interi or lights dimming time.
2 Customized Features P. 297
The interior lights go off i mmediately in the following
situations:
•When you lock the driver’s door.
•When you close the driver’s door in ACCESSORY
mode.
• When you set the power mode to ON.
If you leave any doors open, the interior lights go off
after about 15 minutes.
Door Activated Position
Off
On
18 ACURA RLX E-AWD-31TY36400.book 182 ページ 2017年7月20日 木曜日 午後6時 8分
Page 187 of 609
uuInterior Lights/Interior Convenience Items uInterior Convenience Items
186
Controls
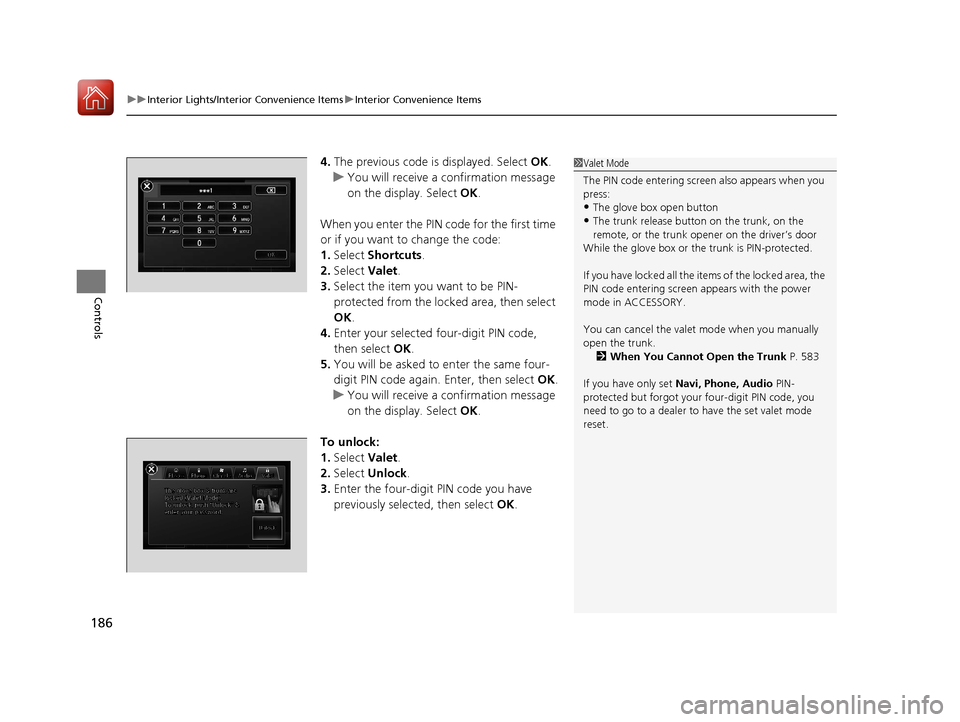
4. The previous code is displayed. Select OK.
u You will receive a confirmation message
on the display. Select OK.
When you enter the PIN code for the first time
or if you want to change the code:
1. Select Shortcuts .
2. Select Valet.
3. Select the item you want to be PIN-
protected from the locked area, then select
OK .
4. Enter your selected four-digit PIN code,
then select OK.
5. You will be asked to enter the same four-
digit PIN code again. Enter, then select OK.
u You will receive a confirmation message
on the display. Select OK.
To unlock:
1. Select Valet.
2. Select Unlock .
3. Enter the four-digit PIN code you have
previously selected, then select OK.1Valet Mode
The PIN code entering screen also appears when you
press:
•The glove box open button
•The trunk release button on the trunk, on the
remote, or the trunk ope ner on the driver’s door
While the glove box or the trunk is PIN-protected.
If you have locked all the items of the locked area, the
PIN code entering screen appears with the power
mode in ACCESSORY.
You can cancel the valet mode when you manually
open the trunk. 2 When You Cannot Open the Trunk P. 583
If you have only set Navi, Phone, Audio PIN-
protected but forgot your four-digit PIN code, you
need to go to a dealer to have the set valet mode
reset.
18 ACURA RLX E-AWD-31TY36400.book 186 ページ 2017年7月20日 木曜日 午後6時 8分
Page 203 of 609
uuClimate Control System uUsing Automatic Climate Control
202
Controls
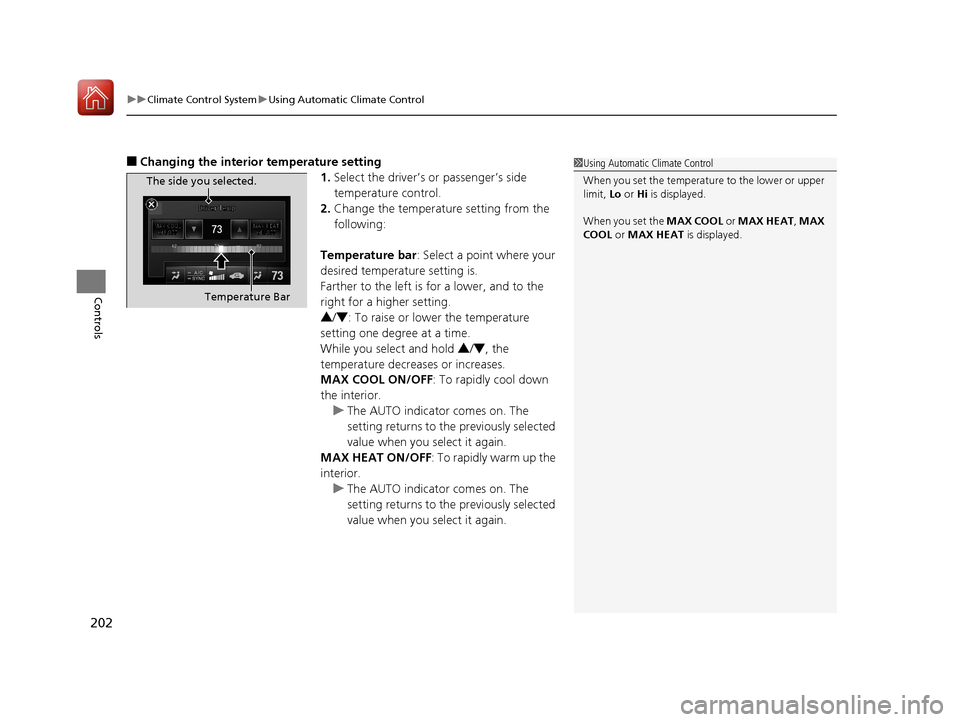
■Changing the interior temperature setting
1.Select the driver’s or passenger’s side
temperature control.
2. Change the temperature setting from the
following:
Temperature bar : Select a point where your
desired temperature setting is.
Farther to the left is for a lower, and to the
right for a higher setting.
3 /4 : To raise or lower the temperature
setting one degree at a time.
While you select and hold 3/4 , the
temperature decreases or increases.
MAX COOL ON/OFF : To rapidly cool down
the interior. u The AUTO indicator comes on. The
setting returns to the previously selected
value when you select it again.
MAX HEAT ON/OFF : To rapidly warm up the
interior.
u The AUTO indicator comes on. The
setting returns to the previously selected
value when you select it again.1Using Automatic Climate Control
When you set the temperat ure to the lower or upper
limit, Lo or Hi is displayed.
When you set the MAX COOL or MAX HEAT , MAX
COOL or MAX HEAT is displayed.
The side you selected.
Temperature Bar
18 ACURA RLX E-AWD-31TY36400.book 202 ページ 2017年7月20日 木曜日 午後6時 8分
Page 205 of 609
uuClimate Control System uUsing Automatic Climate Control
204
Controls
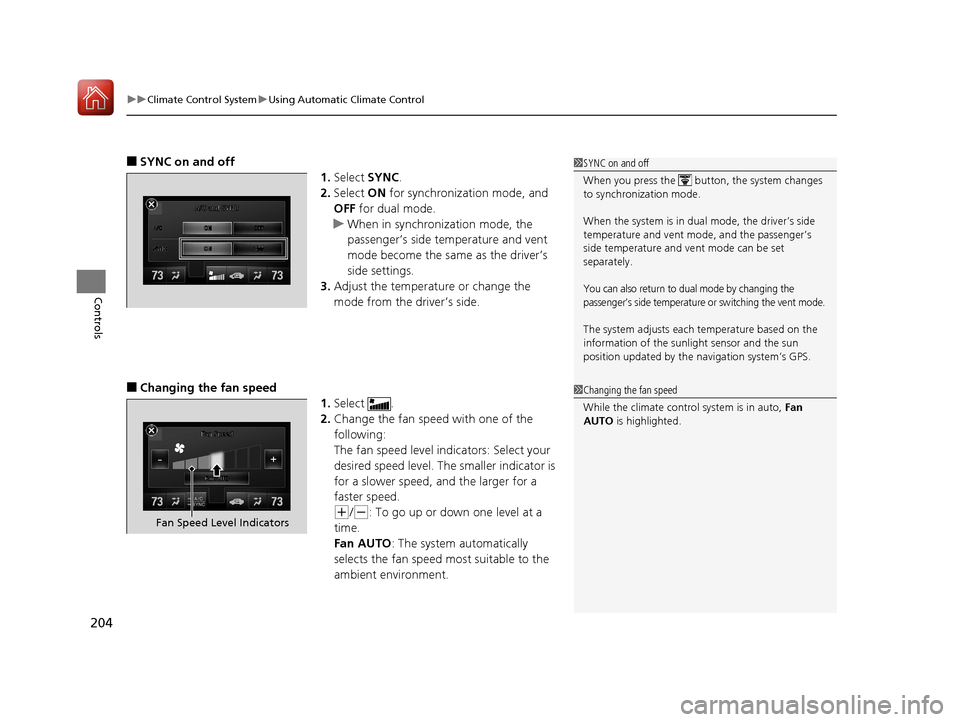
■SYNC on and off
1.Select SYNC.
2. Select ON for synchronization mode, and
OFF for dual mode.
u When in synchronization mode, the
passenger’s side temperature and vent
mode become the same as the driver’s
side settings.
3. Adjust the temperature or change the
mode from the driver’s side.
■Changing the fan speed
1.Select .
2. Change the fan speed with one of the
following:
The fan speed level indicators: Select your
desired speed level. The smaller indicator is
for a slower speed, an d the larger for a
faster speed.
(+/(-: To go up or down one level at a
time.
Fan AUTO: The system automatically
selects the fan speed most suitable to the
ambient environment.
1 SYNC on and off
When you press the button, the system changes
to synchronization mode.
When the system is in dua l mode, the driver’s side
temperature and vent mo de, and the passenger’s
side temperature and ve nt mode can be set
separately.
You can also return to du al mode by changing the
passenger’s side temperature or switching the vent mode.
The system adjusts each temperature based on the
information of the sunli ght sensor and the sun
position updated by the na vigation system’s GPS.
1Changing the fan speed
While the climate control system is in auto, Fan
AUTO is highlighted.
Fan Speed Level Indicators
18 ACURA RLX E-AWD-31TY36400.book 204 ページ 2017年7月20日 木曜日 午後6時 8分
Page 214 of 609
213
uuAudio System uUSB Port
Features
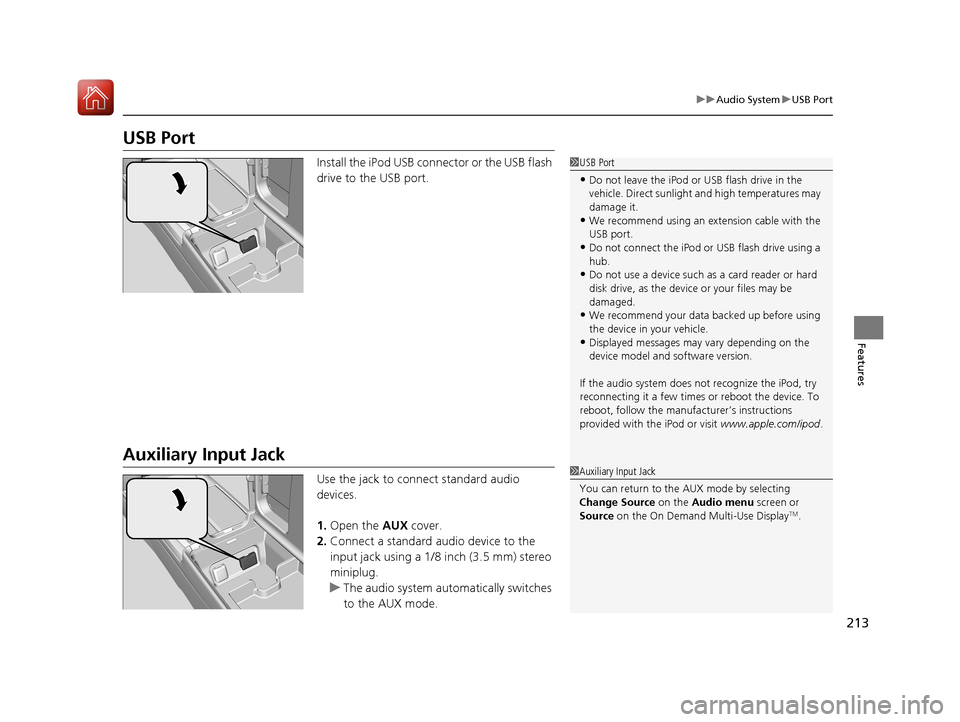
USB Port
Install the iPod USB connector or the USB flash
drive to the USB port.
Auxiliary Input Jack
Use the jack to connect standard audio
devices.
1. Open the AUX cover.
2. Connect a standard audio device to the
input jack using a 1/8 inch (3.5 mm) stereo
miniplug.
u The audio system auto matically switches
to the AUX mode.
1 USB Port
•Do not leave the iPod or USB flash drive in the
vehicle. Direct sunlight and high temperatures may
damage it.
•We recommend using an ex tension cable with the
USB port.
•Do not connect the iPod or USB flash drive using a
hub.
•Do not use a device such as a card reader or hard
disk drive, as the device or your files may be
damaged.
•We recommend your data backed up before using
the device in your vehicle.
•Displayed messages may vary depending on the
device model and software version.
If the audio system does not recognize the iPod, try
reconnecting it a few times or reboot the device. To
reboot, follow the manufac turer’s instructions
provided with the iPod or visit www.apple.com/ipod.
1Auxiliary Input Jack
You can return to the AUX mode by selecting
Change Source on the Audio menu screen or
Source on the On Demand Multi-Use Display
TM.
18 ACURA RLX E-AWD-31TY36400.book 213 ページ 2017年7月20日 木曜日 午後6時 8分
Page 217 of 609
216
Features
Audio System Basic Operation
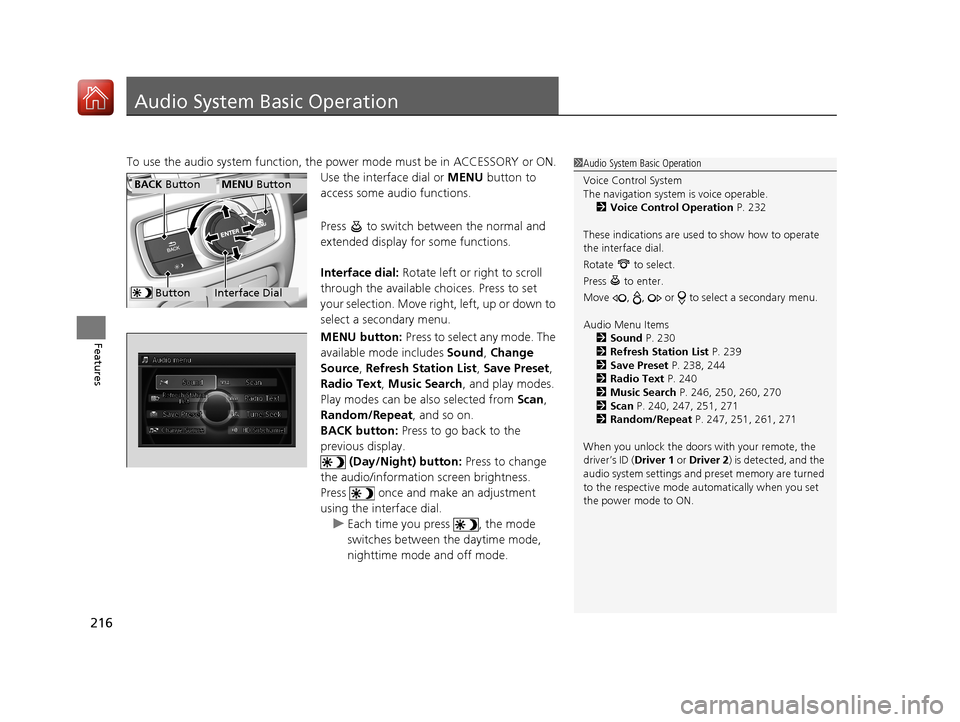
To use the audio system function, the power mode must be in ACCESSORY or ON.
Use the interface dial or MENU button to
access some audio functions.
Press to switch between the normal and
extended display fo r some functions.
Interface dial: Rotate left or right to scroll
through the available choices. Press to set
your selection. Move right, left, up or down to
select a secondary menu.
MENU button: Press to select any mode. The
available mode includes Sound, Change
Source , Refresh Station List , Save Preset ,
Radio Text , Music Search , and play modes.
Play modes can be also selected from Scan ,
Random/Repeat , and so on.
BACK button: Press to go back to the
previous display. (Day/Night) button: Press to change
the audio/information screen brightness.
Press once and make an adjustment
using the interface dial. u Each time you press , the mode
switches between the daytime mode,
nighttime mode and off mode.1Audio System Basic Operation
Voice Control System
The navigation system is voice operable.
2 Voice Control Operation P. 232
These indications are used to show how to operate
the interface dial.
Rotate to select.
Press to enter.
Move , , or to se lect a secondary menu.
Audio Menu Items 2 Sound P. 230
2 Refresh Station List P. 239
2 Save Preset P. 238, 244
2 Radio Text P. 240
2 Music Search P. 246, 250, 260, 270
2 Scan P. 240, 247, 251, 271
2 Random/Repeat P. 247, 251, 261, 271
When you unlock the doors with your remote, the
driver’s ID ( Driver 1 or Driver 2) is detected, and the
audio system settings and pr eset memory are turned
to the respective mode automatically when you set
the power mode to ON.
Interface Dial
MENU ButtonBACK Button
Button
18 ACURA RLX E-AWD-31TY36400.book 216 ページ 2017年7月20日 木曜日 午後6時 8分
Page 225 of 609
uuAudio System Basic Operation uOn Demand Multi-Use DisplayTM
224
Features
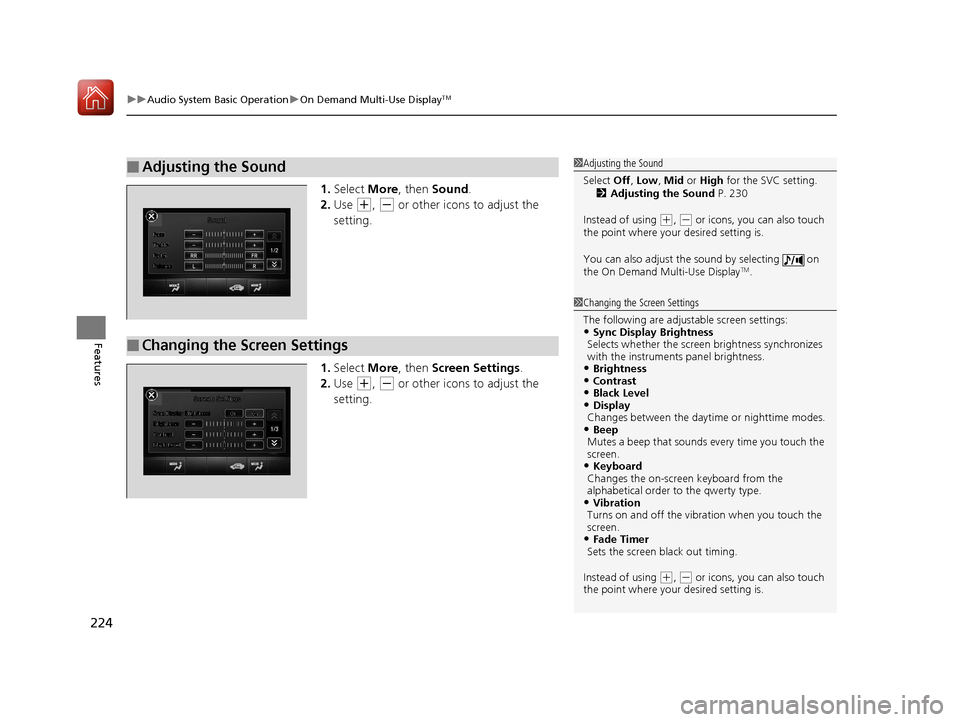
1. Select More, then Sound .
2. Use
(+, (- or other icons to adjust the
setting.
1. Select More, then Screen Settings .
2. Use
(+, (- or other icons to adjust the
setting.
■Adjusting the Sound1 Adjusting the Sound
Select Off, Low , Mid or High for the SVC setting.
2 Adjusting the Sound P. 230
Instead of using
( +, (- or icons, you can also touch
the point where your desired setting is.
You can also adjust the sound by selecting on
the On Demand Multi-Use Display
TM.
■Changing the Screen Settings
1 Changing the Screen Settings
The following are adjustable screen settings:
•Sync Display Brightness
Selects whether the screen brightness synchronizes
with the instruments panel brightness.
•Brightness•Contrast•Black Level•Display
Changes between the dayt ime or nighttime modes.
•Beep
Mutes a beep that sounds every time you touch the
screen.
•Keyboard
Changes the on-screen keyboard from the
alphabetical order to the qwerty type.
•Vibration
Turns on and off the vibrat ion when you touch the
screen.
•Fade Timer
Sets the screen black out timing.
Instead of using
( +, (- or icons, you can also touch
the point where your desired setting is.
18 ACURA RLX E-AWD-31TY36400.book 224 ページ 2017年7月20日 木曜日 午後6時 8分