bulb Acura RSX 2002 Owner's Manual
[x] Cancel search | Manufacturer: ACURA, Model Year: 2002, Model line: RSX, Model: Acura RSX 2002Pages: 320, PDF Size: 4.38 MB
Page 65 of 320
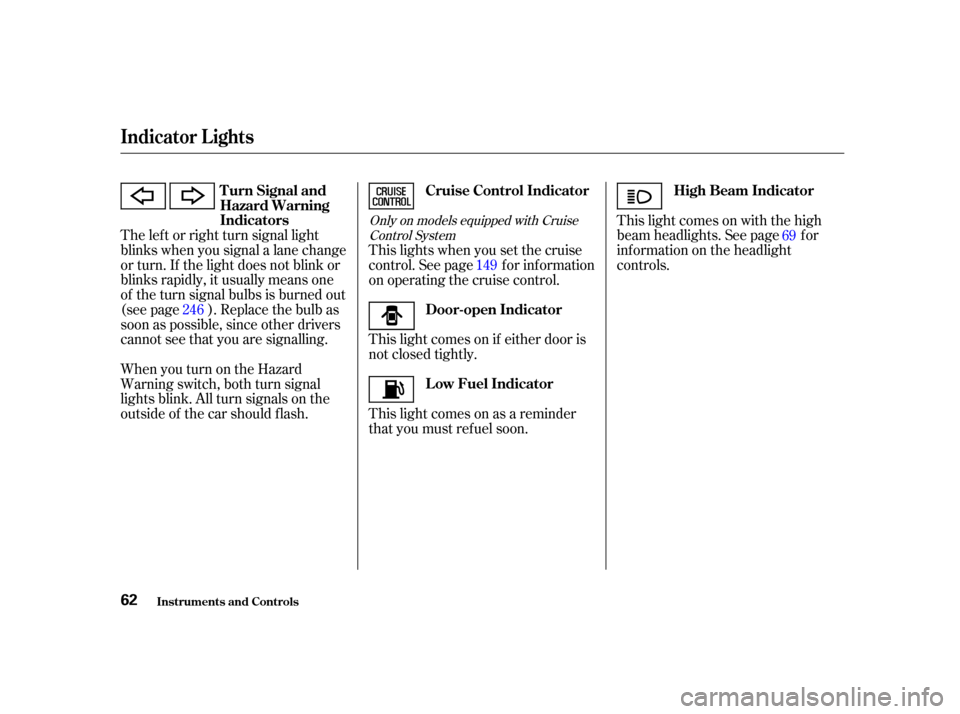
The lef t or right turn signal light
blinks when you signal a lane change
or turn. If the light does not blink or
blinks rapidly, it usually means one
of the turn signal bulbs is burned out
(see page ). Replace the bulb as
soon as possible, since other drivers
cannot see that you are signalling.
WhenyouturnontheHazard
Warning switch, both turn signal
lights blink. All turn signals on the
outside of the car should f lash.This lights when you set the cruise
control. See page f or inf ormation
on operating the cruise control.
This light comes on if either door is
not closed tightly.
This light comes on as a reminder
that you must ref uel soon.This light comes on with the high
beam headlights. See page f or
inf ormation on the headlight
controls.
246 69
149
Only on models equipped with Cruise Control System
Indicator L ights
Inst rument s and Cont rols
Turn Signal and
Hazard Warning
Indicators Cruise Control Indicator
Door-open Indicator
Low Fuel Indicator High Beam Indicator
62
Page 196 of 320
This section also includes
Maintenance Schedules f or normal
driving and severe driving conditions,
a Maintenance Record, and instruc-
tions f or simple maintenance tasks
you may want to take care of
yourself .
If you have the skills and tools to per-
f orm more complex maintenance
tasks on your Acura, you may want
to purchase the Service Manual. See
page f or inf ormation on how to
obtain a copy, or see your Acura
dealer. This section explains why it is
important to keep your car well
maintained and to f ollow basic
maintenance saf ety precautions.......................
Maintenance Saf ety .194
.
Important Safety Precautions . 195
.................
Maintenance Schedule . 196
...
Required Maintenance Record . 203
.......
Owner Maintenance Checks . 205
..............................
Fluid Locations .206
......................................
Engine Oil .207
..................................
Adding Oil .207
....................
Recommended Oil .207
..............................
Synthetic Oil .209
....................................
Additives .209
.....
Changing the Oil and Filter . 209
.............................
Cooling System .212
............
Adding Engine Coolant . 212
.......
Replacing Engine Coolant . 214
....................
Windshield Washers .216
.......................
Transmission Fluid .217
Automatic .........................
Transmission .217
..............
Manual Transmission . 219
................
Brake and Clutch Fluid . 219
............................
Brake System .220
...........................
Clutch System .220
..............................
Power Steering .221
.....................
Air Cleaner Element .222
....................................
Hood Latch .224 ....................................
Spark Plugs .224
..............................
Replacement .224
............................
Specif ications .226
...........................................
Battery .226
.................................
Wiper Blades .229
..............
Air Conditioning System . 231
..................
DustandPollenFilter . 232
.....................................
Drive Belts .234
...............................................
Tires .235
......................................
Inf lation .235
..................................
Inspection .236
..............................
Maintenance .237
.............................
Tire Rotation .238
...
Replacing Tires and Wheels . 239
......................
Wheels and Tires .240
..........................
Winter Driving .240
.............................
Snow Tires .241
............................
Tire Chains .241
.............................................
Lights .242
.....................
Headlight Aiming .244
........................
Replacing Bulbs .244
...........................
Storing Your Car .252
306
Maintenance
Maint enance193
Page 245 of 320

Check the operation of your car’s
exterior lights at least once a month.
A burned out bulb can create an
unsaf e condition by reducing your
car’s visibility and the ability to
signal your intentions to other
drivers.
Lights
Maint enance242
H HE
EA
A D
DL
LIIGGH HT
T L
LOOW W B
BEEA
A M
M
H
H E
EA
A D
DL
LIIGGH HT
T H
HI
IGGH H
B
BE EA
A M
M
P
PA
A R
RKKIINNG G L
LIIGGH HT
T
T
T U
UR RNN S
SIIGGN NAAL
L L
LIIGGH HT
T
Page 246 of 320
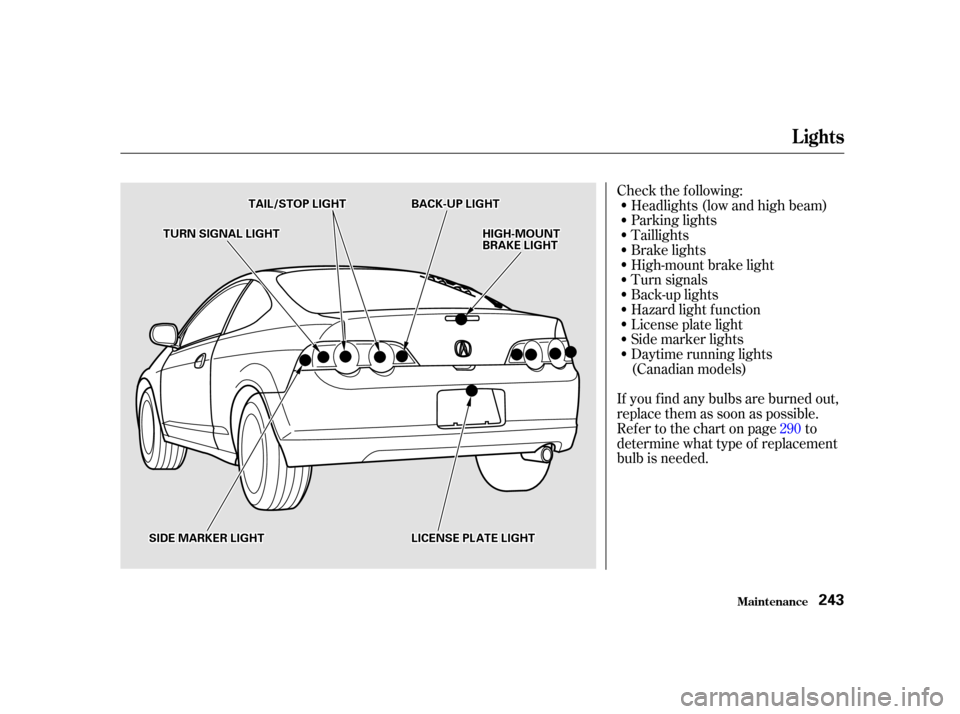
Check the f ollowing:Headlights (low and high beam)
Parking lights
Taillights
Brake lights
High-mount brake light
Turn signals
Back-up lights
Hazard light f unction
License plate light
Side marker lights
Daytime running lights
(Canadian models)
If youfindanybulbsareburnedout,
replace them as soon as possible.
Refer to the chart on page to
determinewhattypeof replacement
bulb is needed. 290
Lights
Maint enance243
T T
U
UR RNN S
SIIGGN NAAL
L L
LIIGGH HT
T
S
SI IDD E
E M
M A
AR
RKKEER
R L
LIIGGH HT
T H
H
I
IGGH H-
-M
M O
OUUNNTT
B
BR RAA K
KEE L
LIIGGH HT
T
B
BA
A C
CKK--U
UP P L
LIIGGH HT
T
T
T A
A I
ILL/ /S
ST TO
OP P L
LIIGGH HT
T
L
LIICCE EN
NS SEE P
PL
LAA T
TE
E L
LIIGGH HT
T
Page 247 of 320
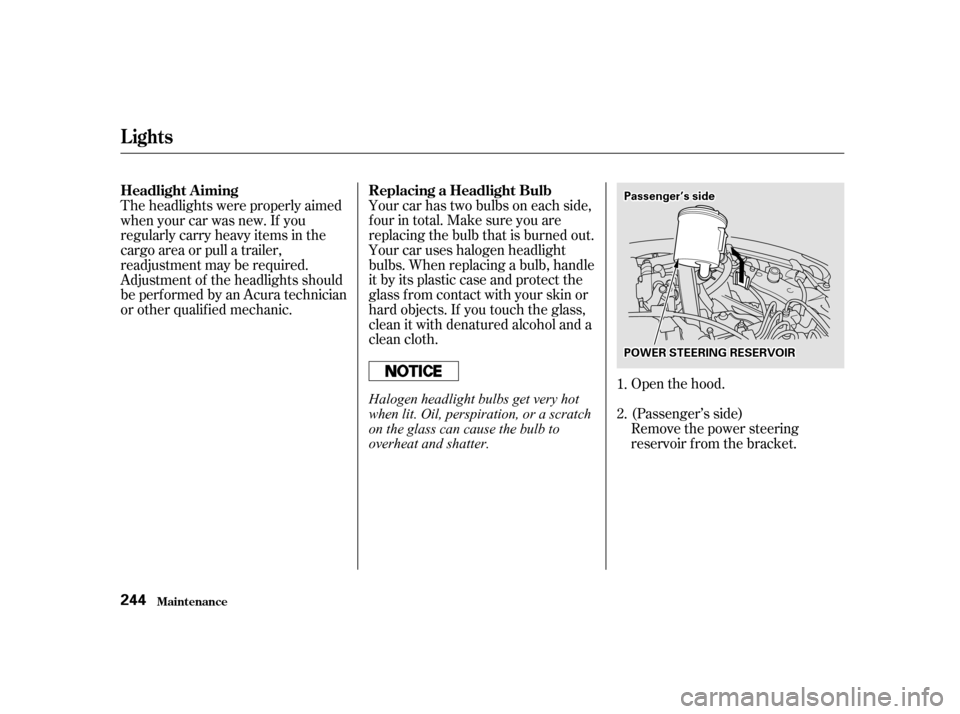
Open the hood.
Your car has two bulbs on each side,
four in total. Make sure you are
replacing the bulb that is burned out.
Your car uses halogen headlight
bulbs. When replacing a bulb, handle
it by its plastic case and protect the
glass from contact with your skin or
hard objects. If you touch the glass,
clean it with denatured alcohol and a
clean cloth.
(Passenger’s side)
Theheadlightswereproperlyaimed
when your car was new. If you
regularly carry heavy items in the
cargo area or pull a trailer,
readjustment may be required.
Adjustment of the headlights should
be perf ormed by an Acura technician
or other qualif ied mechanic.
Remove the power steering
reservoir f rom the bracket.
1.
2.
Replacing a Headlight Bulb
Headlight A iming
Lights
Maint enance244
P P O
OW WE ER
R S
STTE
EE
ER
RI INNG G R
REES
SE ER
RV V O
OI IRR
P
P
a
asssseen n g
ge
err’’ss s
siidd e
e
Halogen headlight bulbs get very hot
when lit. Oil, perspiration, or a scratch
on the glass can cause the bulb to
overheat and shatter.
Page 248 of 320
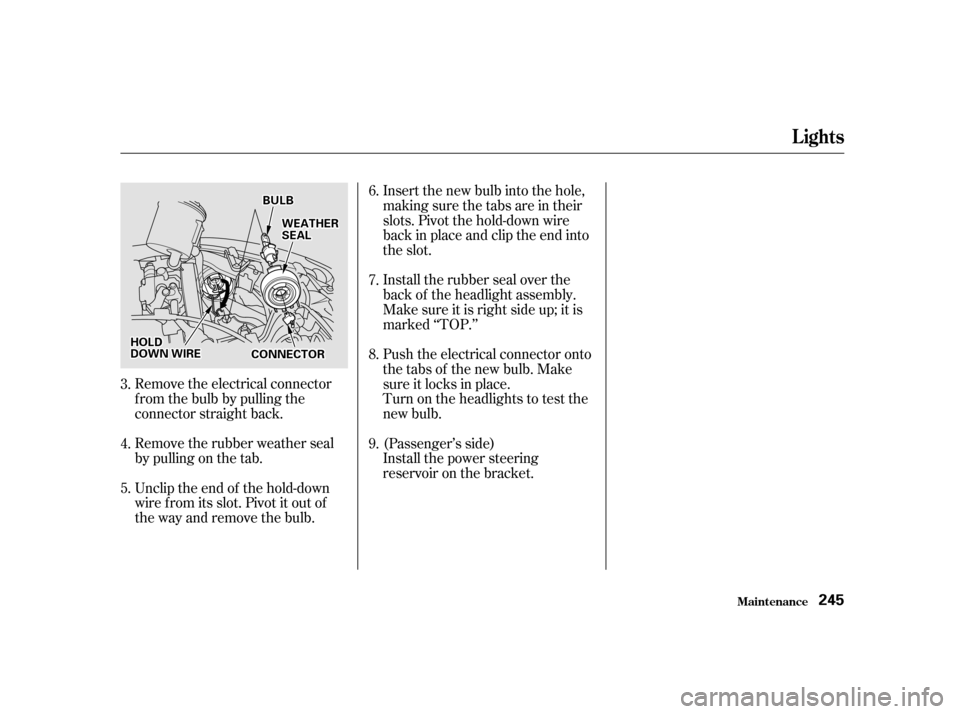
Remove the electrical connector
f rom the bulb by pulling the
connector straight back.
Remove the rubber weather seal
by pulling on the tab.
Unclip the end of the hold-down
wire f rom its slot. Pivot it out of
the way and remove the bulb.Insert the new bulb into the hole,
making sure the tabs are in their
slots. Pivot the hold-down wire
back in place and clip the end into
the slot.
Install the rubber seal over the
back of the headlight assembly.
Make sure it is right side up; it is
marked ‘‘TOP.’’
Push the electrical connector onto
the tabs of the new bulb. Make
sure it locks in place.
Turn on the headlights to test the
new bulb.
(Passenger’s side)
Install the power steering
reservoir on the bracket.
3.
4.
5. 6.
7.
8.
9.
Lights
Maint enance245
H H
O
OL LDD
D
D O
OW WN N W
WIIRRE E B
BU
UL LBB
W
WE EA
A T
TH
H E
ER
R
S
SE EA
A L
L
C
CO ON NNNEEC
CT TO
OR R
Page 249 of 320
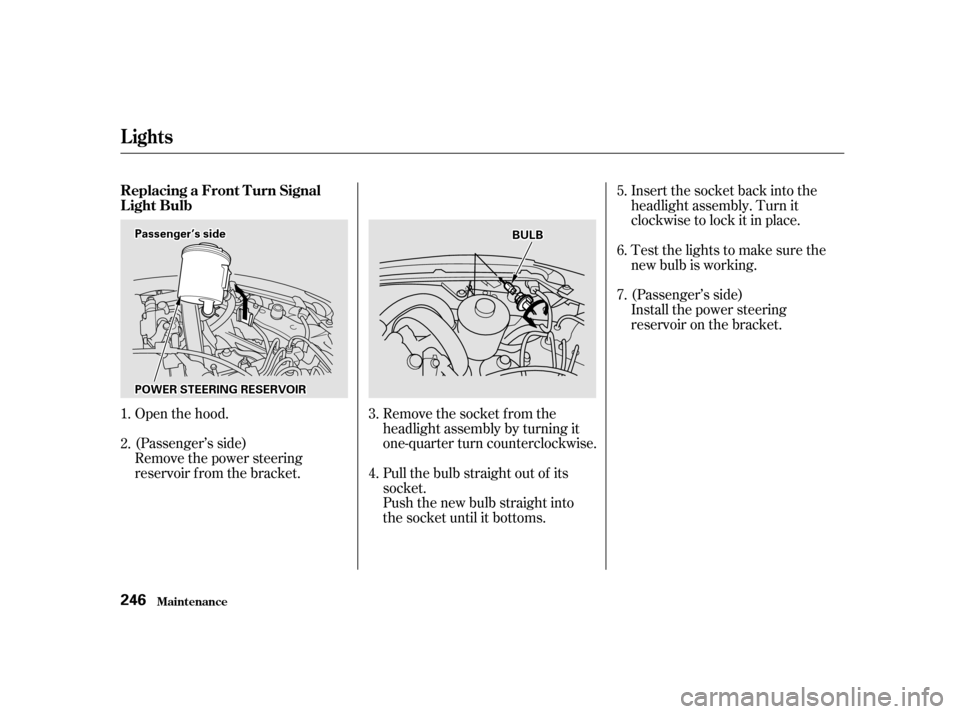
Insert the socket back into the
headlight assembly. Turn it
clockwise to lock it in place.
Testthelightstomakesurethe
new bulb is working.
Install the power steering
reservoir on the bracket.
Open the hood.
(Passenger’s side)
Remove the power steering
reservoir f rom the bracket. Remove the socket from the
headlight assembly by turning it
one-quarter turn counterclockwise.
Pull the bulb straight out of its
socket.
Push the new bulb straight into
the socket until it bottoms.
1.
2.
3.
4.5.
6.
7. (Passenger’s side)
Lights
Maint enance
Replacing a Front T urn Signal
Light Bulb
246
P P
O
OW WE ER
R S
STTE
EE
ER
RI INNG G R
REES
SE ER
RV V O
OI IRR
P
P
a
asssseen n g
ge
err’’ss s
siidd e
e
B
BUUL LBB
Page 250 of 320
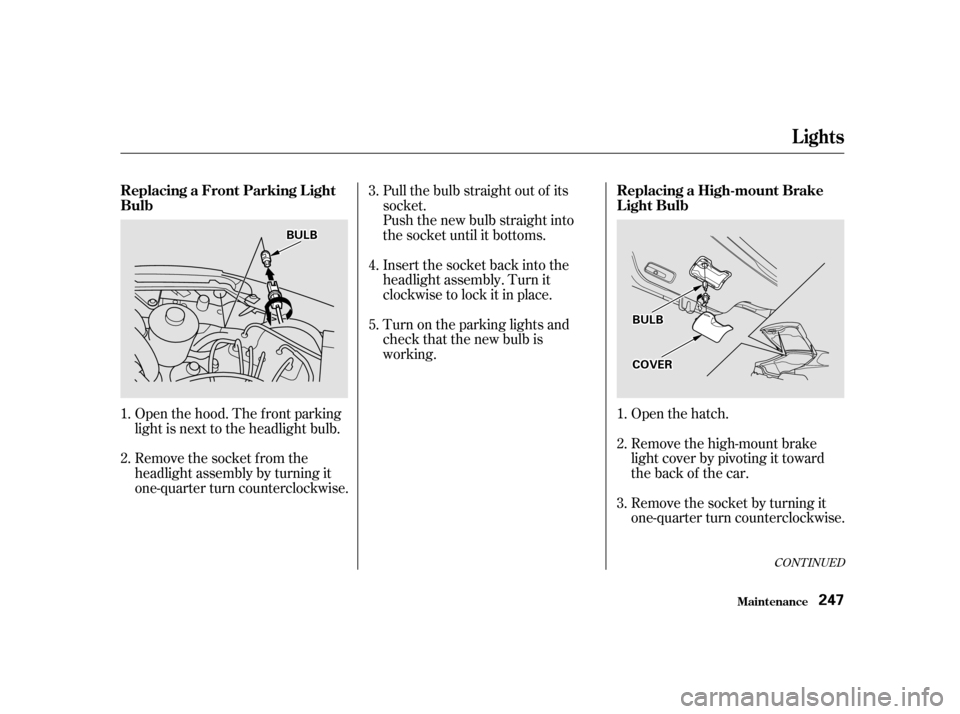
Open the hood. The f ront parking
light is next to the headlight bulb.
Remove the socket from the
headlight assembly by turning it
one-quarter turn counterclockwise.Pull the bulb straight out of its
socket.
Push the new bulb straight into
the socket until it bottoms.
Insert the socket back into the
headlight assembly. Turn it
clockwise to lock it in place.
Turn on the parking lights and
check that the new bulb is
working.
Open the hatch.
Remove the high-mount brake
light cover by pivoting it toward
the back of the car.
Remove the socket by turning it
one-quarter turn counterclockwise.
1.
3.
2. 3.
4.
5.
1.
2.
CONT INUED
Lights
Maint enance
Replacing a High-mount Brake
Light Bulb
Replacing a Front Parking L ight
Bulb
247
B BU
UL LBB
C
CO OV VE
ER
R
B
BU
UL LBB
Page 251 of 320

Pull the bulb straight out of its
socket.
Push the new bulb straight into
the socket until it bottoms.
Insert the socket back into the
light assembly. Turn it clockwise
to lock it in place.
Testthelightstomakesurethe
new bulb is working.
Reinstall the high-mount brake
light cover.Insert a flat-tip screwdriver
between the lef t edge of the lens
and the housing. The lens will
come down.Pull the bulb straight out of its
socket. Push the new bulb in until
it bottoms in the socket.
Testthelightstomakesurethe
new bulb is working.
Put the lens back into the light
assembly, right side f irst. Push on
the lef t edge until it snaps into
place.
4.
5.
6.
7.
1.2.
3.
4.
Lights
Maint enance
Replacing a Rear License Plate
Bulb
248
B BUUL LBB
Page 252 of 320

Determinewhichof thefivebulbs
is burned out: stop/taillight, turn
signal light, side marker light,
back-up light, or taillight.
Remove the socket by turning it
one-quarter turn counterclockwise.
Pull the bulb straight out of its
socket.
Push the new bulb straight into
the socket until it bottoms.Reinstall the socket into the light
assembly by turning it clockwise
until it locks.
Install the light assembly cover.
Make sure it locks in place. Testthelightstomakesurethe
new bulb is working.
Open the hatch. Remove the light
assembly cover by pulling on the
tabontheoutsideedge. 2.
3.
1.
4.5.
6.
7.
Lights
Maint enance
Replacing Rear Bulbs
249
C CO
OV VE
ER
R