dashboard Acura RSX 2003 User Guide
[x] Cancel search | Manufacturer: ACURA, Model Year: 2003, Model line: RSX, Model: Acura RSX 2003Pages: 320, PDF Size: 4.24 MB
Page 71 of 320
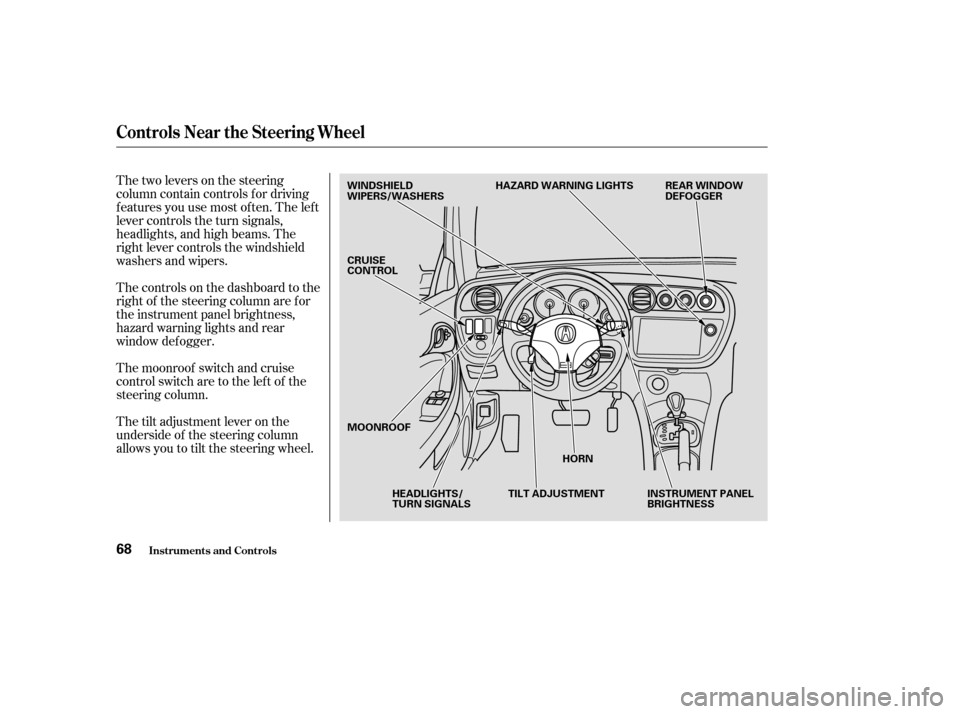
Thetwoleversonthesteering
column contain controls f or driving
f eatures you use most of ten. The lef t
lever controls the turn signals,
headlights, and high beams. The
right lever controls the windshield
washers and wipers.
The controls on the dashboard to the
right of the steering column are f or
the instrument panel brightness,
hazard warning lights and rear
window def ogger.
The moonroof switch and cruise
control switch are to the left of the
steering column.
The tilt adjustment lever on the
underside of the steering column
allows you to tilt the steering wheel.
Controls Near the Steering Wheel
Inst rument s and Cont rols68
WINDSHIELD
WIPERS/WASHERSHAZARD WARNING LIGHTS REAR WINDOW
DEFOGGER
INSTRUMENT PANEL
BRIGHTNESS
HORN
TILT ADJUSTMENT
HEADLIGHTS/
TURN SIGNALS
MOONROOF CRUISE
CONTROL
Page 96 of 320
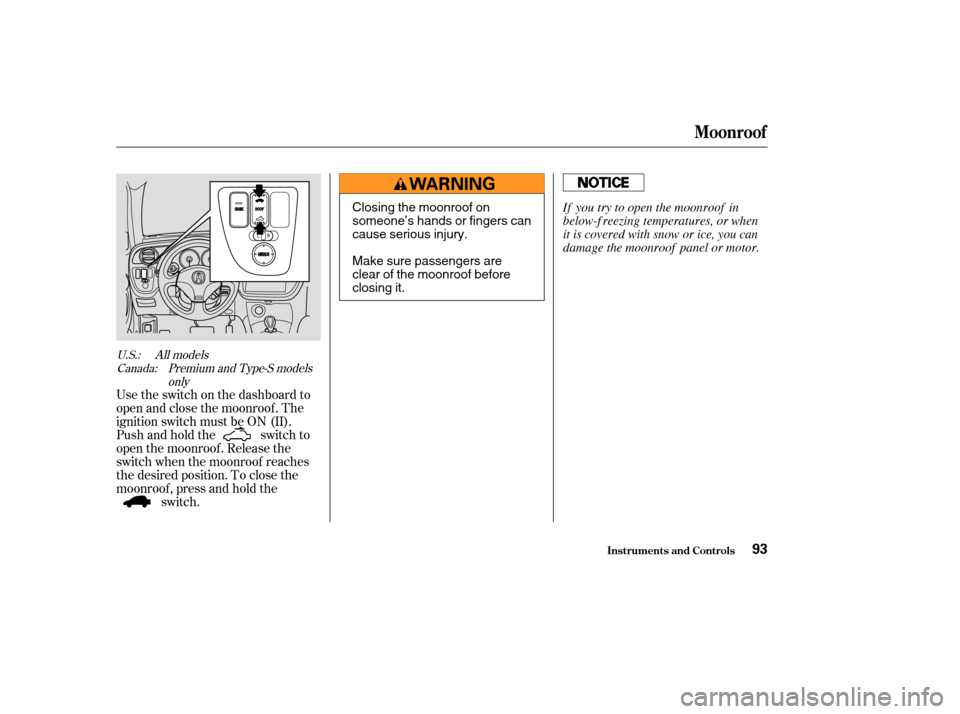
Usetheswitchonthedashboardto
open and close the moonroof . The
ignition switch must be ON (II).
Pushandholdthe switchto
open the moonroof . Release the
switch when the moonroof reaches
the desired position. To close the
moonroof , press and hold theswitch.
U.S.:
Canada: All models
Premium and Type-S modelsonly
Inst rument s and Cont rols
Moonroof
93
Closing the moonroof on
someone’s hands or fingers can
cause serious injury.
Make sure passengers are
clear of the moonroof before
closing it. If you try to open the moonroof in
below-f reezing temperatures, or when
it is covered with snow or ice, you can
damage the moonroof panel or motor.
Page 97 of 320

Keeptheinsideandoutsidemirrors
clean and adjusted f or best visibility.
Be sure to adjust the mirrors bef ore
you start driving.
The inside mirror has day and night
positions. The night position reduces
glare f rom headlights behind you.
Flip the tab on the bottom edge of
the mirror to select the day or night
position.Adjust the outside mirrors with the
adjustment switch on the lef t side of
the dashboard:
Turn the ignition switch ON (II).
Move the selector switch to L
(driver’s side) or R (passenger’s
side). Push the appropriate edge of the
adjustment switch to move the
mirrorright,left,up,ordown.
When you f inish, move the
selector switch to the center (off)
position. This turns of f the
adjustment switch so you can’t
move a mirror out of position by
accidentally bumping the switch.
1.
2. 3.
4.
Adjusting the Power Mirrors
Mirrors
Inst rument s and Cont rols94
TAB
SELECTOR SWITCH ADJUSTMENT SWITCH
Page 105 of 320
The engine must be running f or the
heater and air conditioning to
generate hot and cold air. The heater
uses engine coolant to warm the air.
If the engine is cold, it will be several
minutes bef ore you f eel warm air
coming from the system.
The heating and cooling system
draws air through the exterior vents
at the bottom of the windshield.
Keep these vents clear of leaves and
other debris.
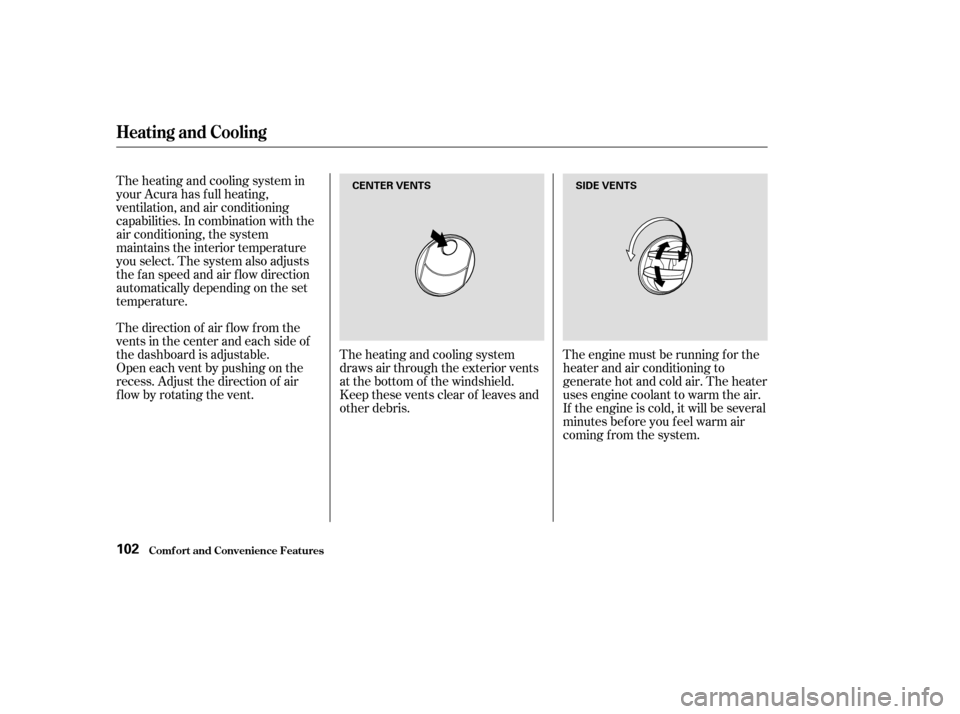
The direction of air f low f rom the
vents in the center and each side of
the dashboard is adjustable.
Open each vent by pushing on the
recess. Adjust the direction of air
flow by rotating the vent. The heating and cooling system in
your Acura has f ull heating,
ventilation, and air conditioning
capabilities. In combination with the
air conditioning, the system
maintains the interior temperature
you select. The system also adjusts
the fan speed and air flow direction
automatically depending on the set
temperature.
Comf ort and Convenience Feat ures
Heating and Cooling
102
SIDE VENTS
CENTER VENTS
Page 110 of 320

CONT INUED
The main air flow comes out
of the dashboard vents.
The main air f low is directed
to the floor vents. In AUTO mode, the system controls
the air f low direction automatically
between the dashboard vents and
the f loor vents. The main air f low is divided
between the f loor vents and
defroster vents at the base of the
windshield.
The main air f low is directed
to the windshield for faster defrost-
ing or def ogging. To def rost or def og
more quickly, turn the temperature
control dial to maximum. Select and set the f an speed to high.
If there is actual frost on the win-
dows, f irst select the Recirculation
mode. If the windows are f ogged,
select the Fresh Air mode. Warmed
air will then flow from the wind-
shield and side def roster vents. When you select or ,
the A/C turns on automatically to
help dehumidif y the air and def og
the windshield. When you select
another mode, the A/C stays on. If
you do not want to use the A/C in
that mode, press the button to turn it
of f .
Comf ort and Convenience Feat ures
Heating and Cooling
107
Page 111 of 320

Theheatingandcoolingsystemhas
temperature sensors located next to
the steering column and in the top of
the dashboard. Do not cover the
sensors or spill any liquid on them. T emperature Sensors
Heating and Cooling
Comf ort and Convenience Feat ures108
Page 151 of 320
Once the security system is set,
opening either door (without using
the key or the remote transmitter),
or the hood, will cause it to alarm. It
also alarms if the radio is removed
f rom the dashboard or the wiring is
cut.Do not attempt to alter this system
or add other devices to it.
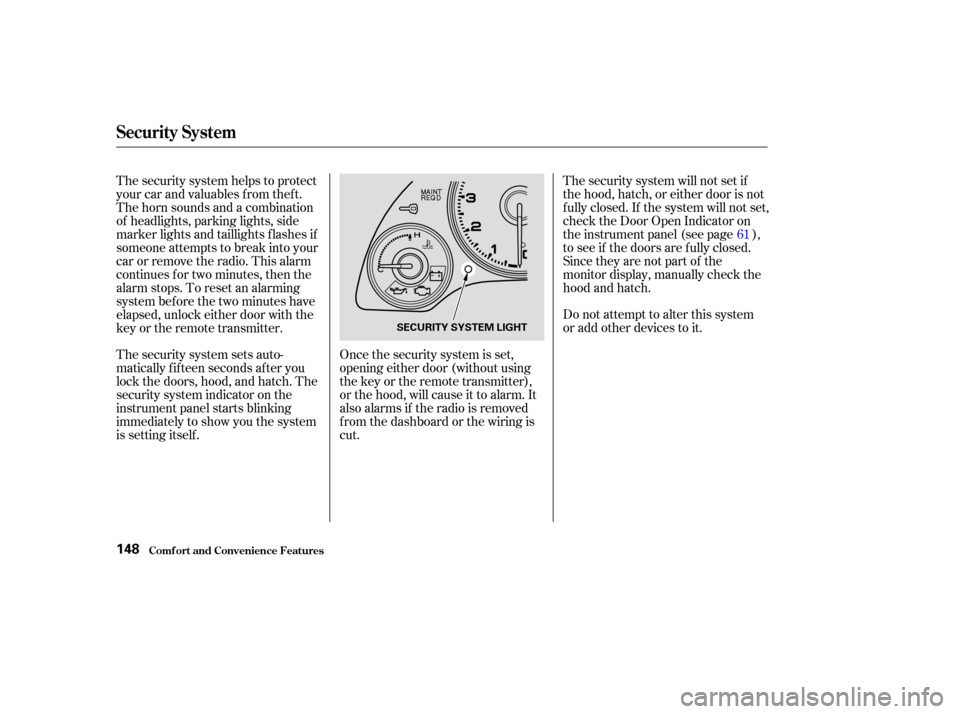
The security system sets auto-
matically fifteen seconds after you
lock the doors, hood, and hatch. The
security system indicator on the
instrument panel starts blinking
immediately to show you the system
is setting itself . The security system will not set if
the hood, hatch, or either door is not
f ully closed. If the system will not set,
check the Door Open Indicator on
the instrument panel (see page ),
to see if the doors are f ully closed.
Since they are not part of the
monitor display, manually check the
hood and hatch.
The security system helps to protect
your car and valuables f rom thef t.
The horn sounds and a combination
of headlights, parking lights, side
marker lights and taillights f lashes if
someone attempts to break into your
carorremovetheradio.Thisalarm
continues f or two minutes, then the
alarm stops. To reset an alarming
system bef ore the two minutes have
elapsed, unlock either door with the
key or the remote transmitter.
61
Security System
Comf ort and Convenience Feat ures148
SECURITY SYSTEM LIGHT
Page 160 of 320
CONT INUED
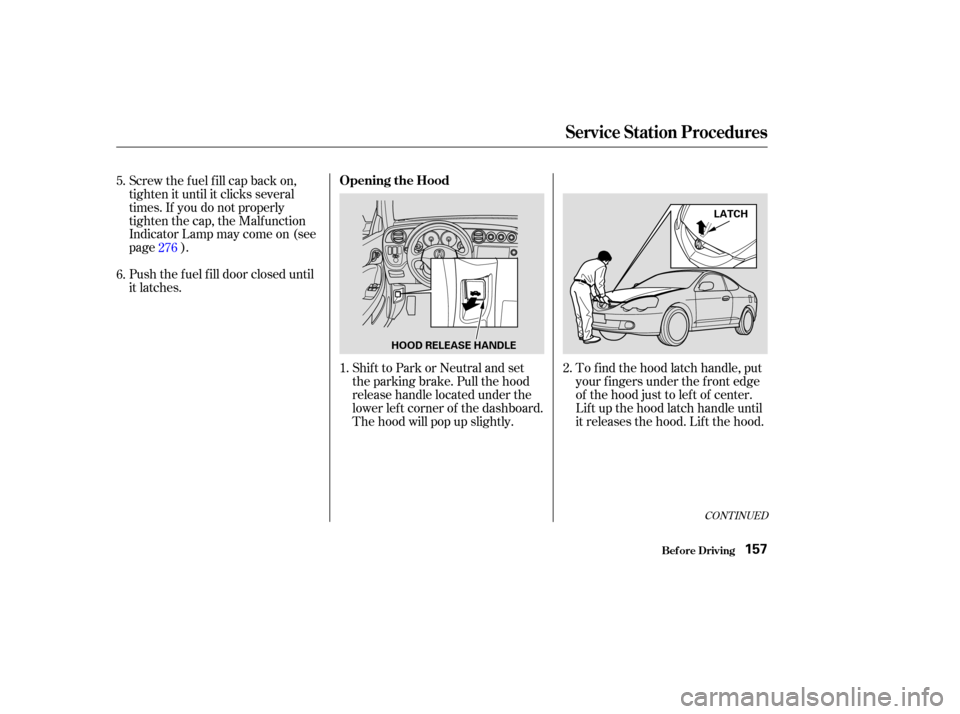
Shift to Park or Neutral and set
the parking brake. Pull the hood
release handle located under the
lower lef t corner of the dashboard.
The hood will pop up slightly.
Screw the f uel f ill cap back on,
tighten it until it clicks several
times. If you do not properly
tighten the cap, the Malfunction
Indicator Lamp may come on (see
page ).
Push the f uel f ill door closed until
it latches.
To f ind the hood latch handle, put
your f ingers under the f ront edge
of the hood just to lef t of center.
Lif t up the hood latch handle until
it releases the hood. Lif t the hood.
1.
2.
5.
6.
276
Service Station Procedures
Bef ore Driving
Opening the Hood
157
HOOD RELEASE HANDLE LATCH
Page 166 of 320

If a side airbag
inflates,acupholderorotherhard
object attached on or near the
door could be propelled inside the
car and hurt someone.
Covering the outside edge of a
f ront seat-back, with a non-Acura
seat cover for example, could
prevent the airbag from inflating
properly.
Removing parts f rom your vehicle,
or replacing components with non-
Acura (aftermarket) components
could seriously af f ect your vehicle’s
handling, stability, and reliability.
Some examples are:
Lowering the vehicle with an
aftermarket suspension kit that
signif icantly reduces ground
clearance can allow the
undercarriage to impact speed
bumps or other raised objects,
which could cause the airbags to
deploy.
Raising the vehicle with an
af termarket suspension kit can
af f ect the handling and stability.
Af termarket wheels, because they
are a universal design, can cause
excessive stress on suspension
components. Any object
attached to or placed on the covers
marked ‘‘SRS AIRBAG’’ in the
center of the steering wheel and
on top of the dashboard could
interf ere with the proper operation
of the airbags. Or, if the airbags
inf late, the objects could be
propelled inside the car and hurt
someone. Larger or smaller wheels and tires
can interf ere with the operation of
your vehicle’s anti-lock brakes and
other systems.
Do not modif y your steering wheel
or any other part of your
Supplemental Restraint System.
Modif ications could make the
system inef f ective.
If you plan to modif y your vehicle,
consult with your Acura dealer.
Modif ications
Additional Saf ety Precautions
A ccessories and Modif ications
Bef ore Driving
Do not at t ach hard object s on ornear a door.
Do not place any object s over t heoutsideedgeof afront seat-back.
Do not at t ach or place object s on the f ront airbag covers.
163
Page 256 of 320

Regular cleaning and polishing of
your Acura helps to keep it ‘‘new’’
looking. This section gives you hints
on how to clean your car and
preserve its appearance: the paint,
brightwork, wheels and interior. Also
included are several things you can
do to help prevent corrosion..................................
Exterior Care .254
.....................................
Washing .254
.......................................
Waxing .255
....................
Aluminum Wheels .255
..........................
Paint Touch-up .255
..................................
Interior Care .256
...................................
Carpeting .256
.................................
Floor Mats .256
.........................................
Fabric .257
...........................................
Vinyl .257
.......................................
Leather .257
...................................
Seat Belts .257
....................................
Windows .258
..........................
Air Fresheners .258
.................................
Dashboard .258
....................
Corrosion Protection .259
.................................
Body Repairs .260
Appearance Care
Appearance Care253