lock Acura RSX 2003 Service Manual
[x] Cancel search | Manufacturer: ACURA, Model Year: 2003, Model line: RSX, Model: Acura RSX 2003Pages: 320, PDF Size: 4.24 MB
Page 117 of 320

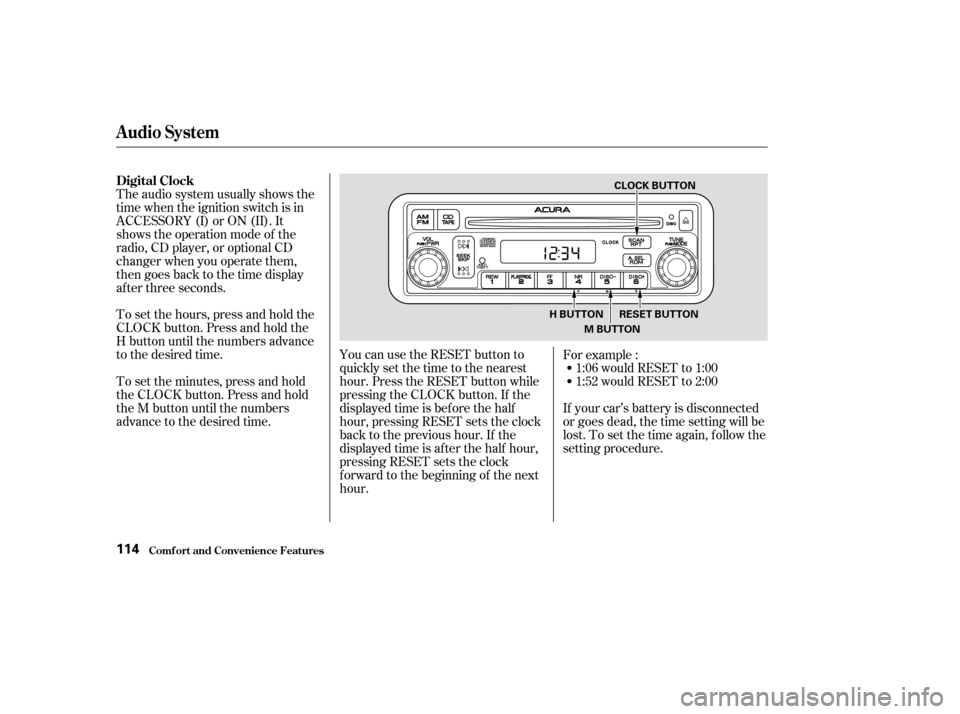
To set the hours, press and hold the
CLOCK button. Press and hold the
H button until the numbers advance
to the desired time.
To set the minutes, press and hold
the CLOCK button. Press and hold
the M button until the numbers
advance to the desired time.1:06 would RESET to 1:00
1:52 would RESET to 2:00
If your car’s battery is disconnected
or goes dead, the time setting will be
lost. To set the time again, f ollow the
setting procedure.
The audio system usually shows the
time when the ignition switch is in
ACCESSORY (I) or ON (II). It
shows the operation mode of the
radio, CD player, or optional CD
changer when you operate them,
then goes back to the time display
af ter three seconds.
You can use the RESET button to
quickly set the time to the nearest
hour. Press the RESET button while
pressing the CLOCK button. If the
displayed time is bef ore the half
hour, pressing RESET sets the clock
back to the previous hour. If the
displayed time is af ter the half hour,
pressing RESET sets the clock
f orward to the beginning of the next
hour.For example :
Digital Clock
Audio System
Comf ort and Convenience Feat ures114
CLOCK BUTTON
M BUTTON RESET BUTTON
H BUTTON
Page 133 of 320

The audio system display usually
shows the time when the ignition
switch is in ACCESSORY (I) or ON
(II). It shows the operation mode of
the radio, cassette player, or CD
changer when you operate them,
then goes back to the time display
af ter f ive seconds.
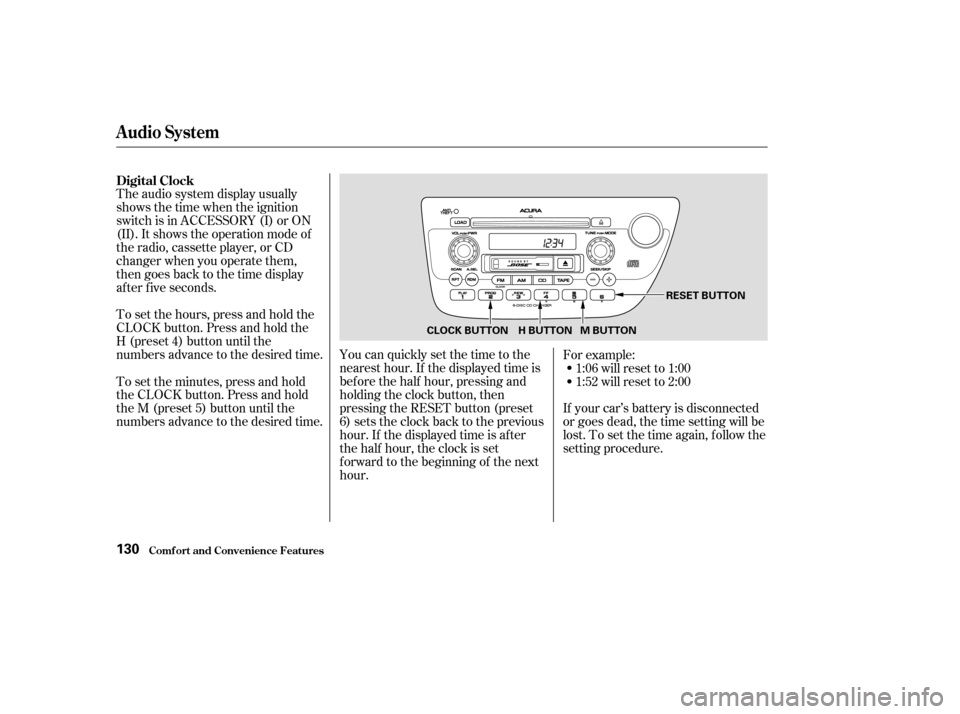
To set the hours, press and hold the
CLOCK button. Press and hold the
H (preset 4) button until the
numbers advance to the desired time. You can quickly set the time to thenearest hour. If the displayed time is
bef ore the half hour, pressing and
holding the clock button, then
pressing the RESET button (preset
6) sets the clock back to the previous
hour. If the displayed time is af ter
the half hour, the clock is set
f orward to the beginning of the next
hour.If your car’s battery is disconnected
or goes dead, the time setting will be
lost. To set the time again, f ollow the
setting procedure. For example:
1:06 will reset to 1:00
1:52 will reset to 2:00
To set the minutes, press and hold
the CLOCK button. Press and hold
the M (preset 5) button until the
numbers advance to the desired time. Digital Clock
Audio System
Comf ort and Convenience Feat ures130
CLOCK BUTTON RESET BUTTON
H BUTTON M BUTTON
Page 151 of 320

Once the security system is set,
opening either door (without using
the key or the remote transmitter),
or the hood, will cause it to alarm. It
also alarms if the radio is removed
f rom the dashboard or the wiring is
cut.Do not attempt to alter this system
or add other devices to it.
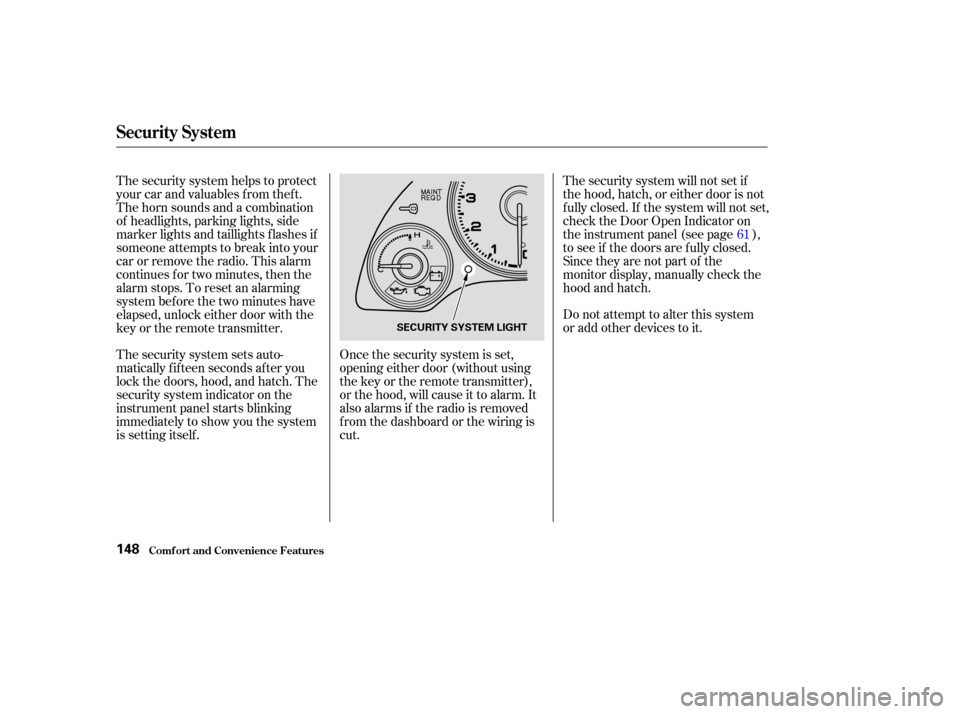
The security system sets auto-
matically fifteen seconds after you
lock the doors, hood, and hatch. The
security system indicator on the
instrument panel starts blinking
immediately to show you the system
is setting itself . The security system will not set if
the hood, hatch, or either door is not
f ully closed. If the system will not set,
check the Door Open Indicator on
the instrument panel (see page ),
to see if the doors are f ully closed.
Since they are not part of the
monitor display, manually check the
hood and hatch.
The security system helps to protect
your car and valuables f rom thef t.
The horn sounds and a combination
of headlights, parking lights, side
marker lights and taillights f lashes if
someone attempts to break into your
carorremovetheradio.Thisalarm
continues f or two minutes, then the
alarm stops. To reset an alarming
system bef ore the two minutes have
elapsed, unlock either door with the
key or the remote transmitter.
61
Security System
Comf ort and Convenience Feat ures148
SECURITY SYSTEM LIGHT
Page 165 of 320

Be sure electronic accessories do
not overload electrical circuits
(see page ).
If possible, have your dealer inspect
the f inal installation. Bef ore installing any accessory:
Have the installer contact your
Acura dealer f or assistance bef ore
installing any electronic accessory.
Modif ying your car, or installing
some non-Acura accessories, can
make your car unsaf e. Bef ore you
make any modif ications or add any
accessories,besuretoreadthe
f ollowing inf ormation.
Your dealer has Acura accessories
that allow you to personalize your car.
These accessories have been
designed and approved f or your car,
and are covered by warranty.
When properly installed, cellular
phones, alarms, two-way radios, and
low-powered audio systems should
not interf ere with your car’s
computer-controlled systems, such
as the SRS and anti-lock brake
system.
However, if electronic accessories
are improperly installed, or exceed
your car’s electrical system capacity,
they can interfere with the operationof your car, or even cause the
airbags to deploy.
Make sure the accessory does not
obscure any lights, or interf ere
with proper car operation or
perf ormance.
Non-Acura accessories are usually
designed f or universal applications.
Although aftermarket accessories
may f it on your car, they may not
meet f actory specif ications, and
could adversely af f ect your car’s
handling and stability. (See
‘‘Modif ications’’ on page f or
additional information.) 280
163
A ccessories
A ccessories and Modif ications
Bef ore Driving162
Improper accessories or
modifications can affect your
car’s handling, stability, and
performance, and cause a
crash in which you can be hurt
or killed.
Follow all instructions in this
owner’s manual regarding
accessories and modifications.
Page 166 of 320

If a side airbag
inflates,acupholderorotherhard
object attached on or near the
door could be propelled inside the
car and hurt someone.
Covering the outside edge of a
f ront seat-back, with a non-Acura
seat cover for example, could
prevent the airbag from inflating
properly.
Removing parts f rom your vehicle,
or replacing components with non-
Acura (aftermarket) components
could seriously af f ect your vehicle’s
handling, stability, and reliability.
Some examples are:
Lowering the vehicle with an
aftermarket suspension kit that
signif icantly reduces ground
clearance can allow the
undercarriage to impact speed
bumps or other raised objects,
which could cause the airbags to
deploy.
Raising the vehicle with an
af termarket suspension kit can
af f ect the handling and stability.
Af termarket wheels, because they
are a universal design, can cause
excessive stress on suspension
components. Any object
attached to or placed on the covers
marked ‘‘SRS AIRBAG’’ in the
center of the steering wheel and
on top of the dashboard could
interf ere with the proper operation
of the airbags. Or, if the airbags
inf late, the objects could be
propelled inside the car and hurt
someone. Larger or smaller wheels and tires
can interf ere with the operation of
your vehicle’s anti-lock brakes and
other systems.
Do not modif y your steering wheel
or any other part of your
Supplemental Restraint System.
Modif ications could make the
system inef f ective.
If you plan to modif y your vehicle,
consult with your Acura dealer.
Modif ications
Additional Saf ety Precautions
A ccessories and Modif ications
Bef ore Driving
Do not at t ach hard object s on ornear a door.
Do not place any object s over t heoutsideedgeof afront seat-back.
Do not at t ach or place object s on the f ront airbag covers.
163
Page 169 of 320

Distribute cargo evenly on the
f loor of the cargo area, placing the
heaviest items on the bottom and
as far forward as possible.If you carry large items that
prevent you f rom closing the
hatch, exhaust gas can enter the
passenger area. To avoid the
possibility of carbon monoxide
poisoning, f ollow the instructions
on page .
If you can carry any items on a
roof rack,besurethetotalweight
of the rack and the items does not
exceed the maximum allowable
weight. Please contact your Acura
dealer f or f urther inf ormation.
If youfolddownthebackseat,tie
down items that could be thrown
about the car during a crash or
sudden stop.
Do not place items on the cargo
area cover, or stack objects higher
than the top of the back seat. They
could block your view and be
thrown about the car during a
crash or sudden stop. 49
Carrying Cargo in the Cargo A rea
or on a Roof Rack
Carrying Cargo
Bef ore Driving166
Page 170 of 320

This section gives you tips on
starting the engine under various
conditions, and how to operate the
5-speed and 6-speed manual
transmissions and automatic
transmission. It also the includes
important inf ormation on parking
your car, the braking system, and
f acts you need if you are planning to
tow a trailer.........................
Preparing to Drive .168
.......................
Starting the Engine .169
Starting in Cold Weather ....................
at High Altitude .169
5-speed and 6-speed .........
Manual Transmissions . 170
.....
Recommended Shif t Points . 171
..............
Engine Speed Limiter . 171
.......................
Reverse Lockout .172
..............
Automatic Transmission . 173
.
Shif t Lever Position Indicator . 173
................
Shif t Lever Positions . 173
..............
Engine Speed Limiter . 178
....................
Shif t Lock Release . 179
...........................................
Parking .180
.....................
The Braking System .181
.............
Brake Wear Indicators . 181
...............
Brake System Design . 182
.......................
Anti-lock Brakes .182
Important Saf ety .........................
Reminders .183
........................
ABS Indicator .183
...............
Driving in Bad Weather . 184
...........................
Towing a Trailer .186
Driving
Driving167
Page 171 of 320

Make sure all windows, mirrors,
and outside lights are clean and
unobstructed. Remove f rost, snow,
or ice.Check the adjustment of the seat
(see page ).
Check the adjustment of the
inside and outside mirrors (see
page ).
Check the adjustment of the
steering wheel (see page ).
Fasten your seat belt. Check that
your passengers have f astened
their seat belts (see page ).Turn the ignition switch ON (II).
Check the indicator lights in the
instrument panel.
Start the engine (see page ).
Check the gauges and indicator
lights in the instrument panel (see
page ).
Check that the hood and hatch are
f ully closed.
Visually check the tires. If a tire
looks low, use a gauge to check its
pressure.
Check that any items you may be
carrying with you inside are stored
properly or f astened down
securely.
Youshoulddothefollowingchecks
and adjustments every day bef ore
you drive your car.
Make sure the doors and hatch
are securely closed and locked.
1.
2.
3.
9. 8.
7. 6. 5.
4. 10.
11.
12.
16
86
95 74 169
59
Preparing to Drive
Driving168
Page 173 of 320

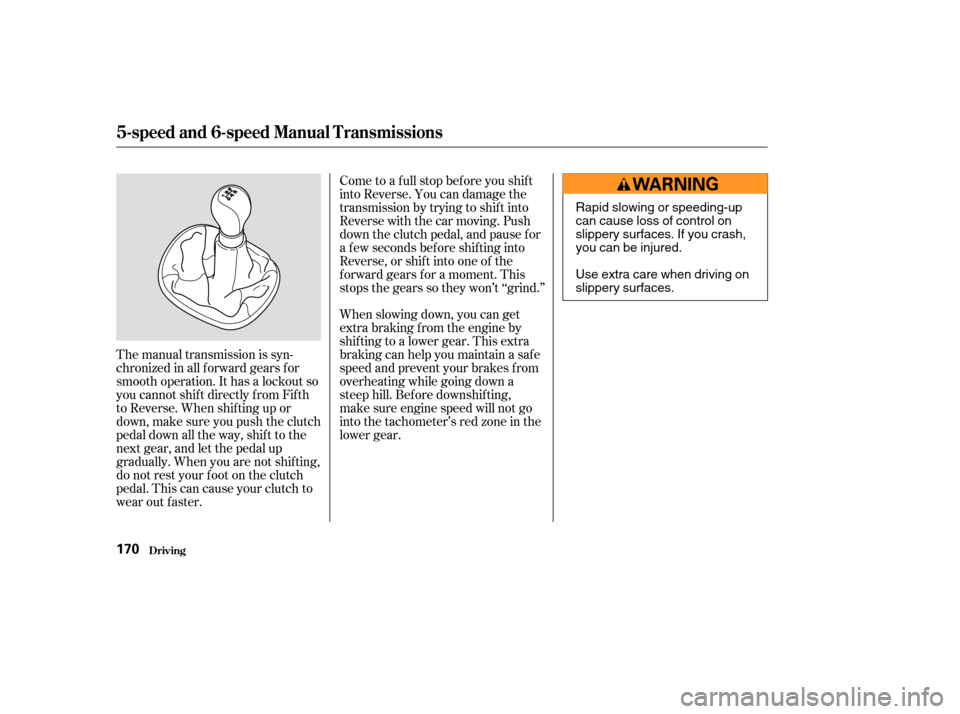
The manual transmission is syn-
chronizedinallforwardgearsfor
smooth operation. It has a lockout so
you cannot shift directly from Fifth
to Reverse. When shif ting up or
down,makesureyoupushtheclutch
pedal down all the way, shift to the
next gear, and let the pedal up
gradually. When you are not shif ting,
do not rest your f oot on the clutch
pedal. This can cause your clutch to
wear out faster.When slowing down, you can get
extra braking f rom the engine by
shifting to a lower gear. This extra
braking can help you maintain a safe
speed and prevent your brakes f rom
overheating while going down a
steep hill. Bef ore downshif ting,
make sure engine speed will not go
into the tachometer’s red zone in the
lower gear. Come to a full stop before you shift
into Reverse. You can damage the
transmission by trying to shif t into
Reverse with the car moving. Push
down the clutch pedal, and pause f or
a f ew seconds bef ore shif ting into
Reverse, or shif t into one of the
f orward gears f or a moment. This
stops the gears so they won’t ‘‘grind.’’
Driving
5-speed and 6-speed Manual T ransmissions
170
Rapid slowing or speeding-up
can cause loss of control on
slippery surfaces. If you crash,
you can be injured.
Use extra care when driving on
slippery surfaces.
Page 175 of 320

The 6-speed manual transmission
has an electric lockout so you cannot
accidentally shif t f rom Fif th to
Reverse instead of Sixth. If you
cannot shif t to Reverse when the car
is stopped:If you are still unable to shif t to
Reverse, apply the parking brake
and turn the ignition key to
ACCESSORY (I) or LOCK (0).
Depress the clutch pedal and shif t
to Reverse.
With the clutch pedal still de-
pressed, start the engine.
If you need to use this procedure to
shif t to Reverse, your car may be
developing a problem. Have the car
checked by your Acura dealer.
With the clutch pedal depressed,
move the shift lever to the First/
Second gear side of the Neutral
gate, then shif t to Reverse.
1. 2.
3.
4.
Driving
5-speed and 6-speed Manual T ransmissions
Reverse Lockout
172