drain bolt Acura TL 2006 Owner's Manual
[x] Cancel search | Manufacturer: ACURA, Model Year: 2006, Model line: TL, Model: Acura TL 2006Pages: 295, PDF Size: 3.89 MB
Page 220 of 295

Always change the oil and f ilter
according to the maintenance
messages shown on the multi-
inf ormation display. The oil and f ilter
collect contaminants that can
damage your engine if they are not
removed regularly.
Changing the oil and f ilter requires
special tools and access f rom
underneath the vehicle. The vehicle
should be raised on a service station-
type hydraulic lif t f or this service.
Unless you have the knowledge and
proper equipment, you should have
this maintenance done by a skilled
mechanic.Run the engine until it reaches
normal operating temperature,
then shut it off.
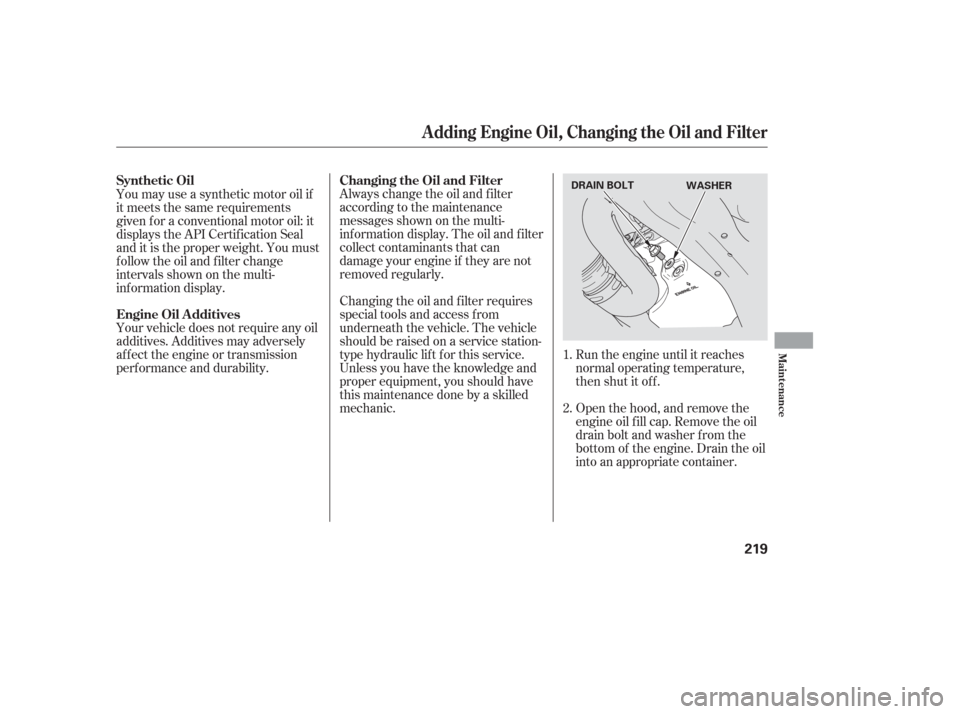
Open the hood, and remove the
engine oil f ill cap. Remove the oil
drain bolt and washer f rom the
bottom of the engine. Drain the oil
into an appropriate container.
You may use a synthetic motor oil if
it meets the same requirements
given f or a conventional motor oil: it
displays the API Certif ication Seal
and it is the proper weight. You must
f ollow the oil and f ilter change
intervals shown on the multi-
inf ormation display.
Your vehicle does not require any oil
additives. Additives may adversely
af f ect the engine or transmission
perf ormance and durability.
2. 1.
A dding Engine Oil, Changing the Oil and Filter
Synthetic Oil
Engine Oil A dditivesChanging the Oil and Filter
Maint enance
219
DRAIN BOLT
WASHER
Page 221 of 295

Let the engine run f or several
minutes, then check the drain bolt
and oil f ilter f or leaks. Reinstall the engine oil f ill cap.
Start the engine. The oil pressure
indicator should go out within 5
seconds. If it does not, turn of f the
engine and check your work.
Engine oil change capacity
(including f ilter): Refill the engine with the
recommended oil. Put a new washer on the drain bolt,
then reinstall the drain bolt.
Tighten the drain bolt to: Install a new oil f ilter according to
the instructions that come with it.
Remove the oil f ilter, and let the
remaining oil drain. A special
wrench (available from your
dealer) is required. Turn of f the engine and let it sit
f or several minutes, then check
the oil level on the dipstick. If
necessary, add more oil.
Make sure the oil f ilter gasket is
not stuck to the engine block. If it
is, remove it bef ore installing a
new oil f ilter.
3. 7.
8.
9.
5.
6. 4.
Changing the Oil and Filter
220
OIL FILTER
4.5 US qt (4.3)
29 lbf·ft (39 N·m , 4.0 kgf·m)
Improper disposal of engine oil can be
harmf ul to the environment. If you
change your own oil, please dispose of
the used oil properly. Put it in a sealed
container, and take it to a recycling
center. Do not discard it in a trash bin
or dump it on the ground.
Page 225 of 295

Check the f luid level with the
transmission at normal operating
temperature and the vehicle sitting
on level ground. Remove the check
bolt, and look f or transmission f luid
coming out of the bolt hole. If a small
amount of f luid drips out of the bolt
hole, reinstall the check bolt.If no f luid comes out, remove the
f iller bolt. Slowly add Honda Manual
Transmission Fluid (MTF) until it
starts to run out of the check bolt
hole. Let the f luid run out until it
stops, then reinstall the check bolt
and the f iller bolt.
If Honda MTF is not available, you
may use an SAE 10W-30 or 10W-40
viscosity motor oil with the API
Certif ication seal that says ‘‘FOR
GASOLINE ENGINES’’ as a
temporary replacement. However,
motor oil does not contain the proper
additives, and continued use can
cause stiffer shifting. Replace as
soon as it is convenient.
The transmission should be drained
and ref illed with new f luid when this
service is shown on a maintenance
message in the multi-inf ormation
display.
Manual T ransmission Fluid
Manual Transmission Fluid
224
CHECK BOLT
DRAIN BOLT FILLER BOLT