climate settings Acura TL 2010 Owner's Manual
[x] Cancel search | Manufacturer: ACURA, Model Year: 2010, Model line: TL, Model: Acura TL 2010Pages: 612, PDF Size: 15.02 MB
Page 157 of 612

When you unlock the driver’s door
with your remote transmitter, each
remote transmitter activates the
customized settings related to that
remote.When you unlock and open the
driver’s door with the remote, the
driver’s seat (except power lumbar)
and outside mirrors move to the
positions stored in memory. An
indicator on one of the driving
position memory buttons on the
driver’s door also comes on.
You will also see the ‘‘DRIVER 1’’ or
‘‘DRIVER 2’’ message on the multi-
inf ormation display, depending on
which linked remote transmitter is
used.
Driving position memory
(see page ). Customized settings
(see page ).
Here are the settings activated with
the remote: The driving position memory
activated (Driver 1, Driver 2) is
shownonthebackof each
transmitter. Make sure you store
your desired driving position in the
memory that is activated by the
transmitter you normally carry.
Audio system settings
(see page ).
Climate control settings
(see page ). 164
97
226 216
Remote Transmitter
Recalling a Memorized Driving
Position
154
Driver 1 Driver 2
09/07/29 17:08:13 31TK4610_159
2010 TL
Page 179 of 612

Here are the settings activated with
the remote:Driving position memory
(see page ).
Audio system settings
(see page ).
Climate control settings
(see page ).
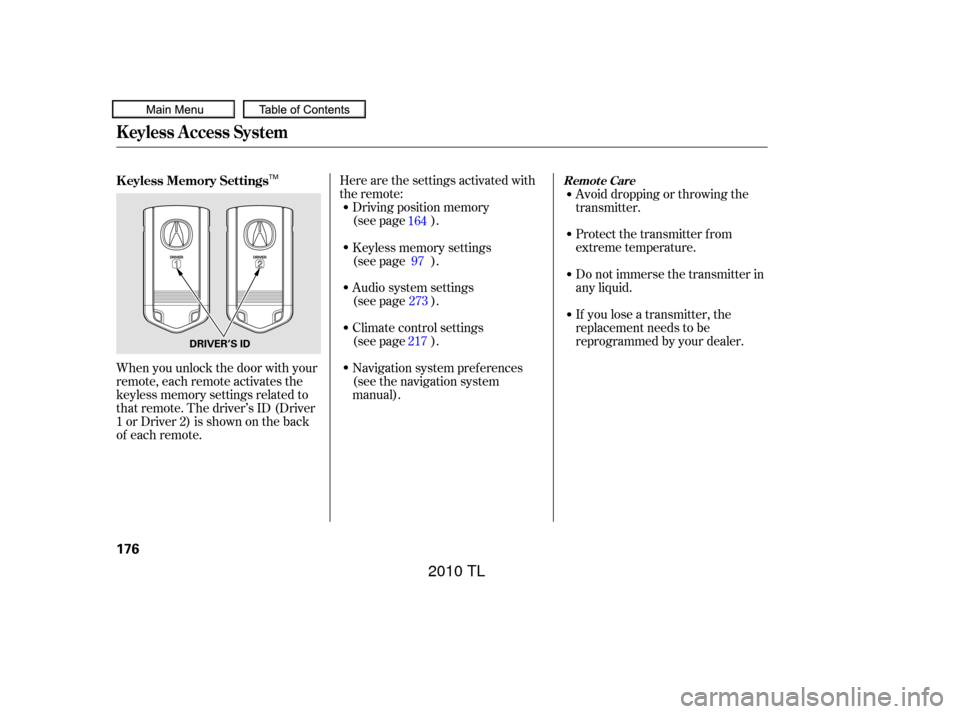
When you unlock the door with your
remote, each remote activates the
keyless memory settings related to
that remote. The driver’s ID (Driver
1orDriver2)isshownontheback
of each remote. Navigation system pref erences
(see the navigation system
manual).Avoid dropping or throwing the
transmitter.
Protect the transmitter from
extreme temperature.
Do not immerse the transmitter in
any liquid.
If you lose a transmitter, the
replacement needs to be
reprogrammed by your dealer.
Keyless memory settings
(see page ).
164
97
273
217
K eyless Memory Settings
K eyless A ccess System
Remot e Care
176
DRIVER’S ID
TM
09/07/29 17:12:29 31TK4610_181
2010 TL
Page 221 of 612

On models with navigation systemThe automatic climate control
system in your vehicle picks the
proper combination of air
conditioning, heating, and ventilation
to maintain the interior temperature
you select, and to remove moisture
from the air and make the interior
dry. The system also adjusts the f an
speed and airf low levels.The system automatically selects
the proper mix of conditioned
and/or heated air that will, as
quickly as possible, raise or lower
the interior temperature to your
pref erence. The system also
dehumidif ies the interior.
The driver’s side temperature and
the passenger’s side temperature can
be set separately. Push up the switch
of the appropriate temperature
control to increase the temperature
of airflow. Push down the switch to
decrease it. Each set temperature is
showninthedisplay(inthecenter
display on models with navigation
system).
Set the desired temperature with
the temperature control switch.
You can set the driver’s side
temperature and the passenger’s
side temperature separately. Press the Driver’s or Passenger’s
AUTO button. You will see AUTO
and the selected temperature on
the appropriate side of the display
(in the center display on models
with navigation system).
The climate control system f or your
vehicle can also be operated using
the voice control system. See the
navigation system manual f or
complete details.
When you unlock the doors with
your remote transmitter (keyless
access remote on models with
navigation system), the driver’s ID
(Driver 1 or Driver 2) is detected,
and the climate control settings are
turned to the respective mode
automatically with the ignition
switch in the ON (II) position, or the
power mode ON.
1.
2. Using A utomatic Climate Control
Voice Control System
Personalization Setting
Climate Control System
T emperat ure Cont rol
218
09/07/31 14:03:21 31TK4610_223
2010 TL
Page 224 of 612

Pushing this button also turns the
power mirror heaters on and of f .This button directs the main airflow
to the windshield for faster
def rosting. It also overrides any
mode selection you may have made.
Air f lows f rom the f loor
vents.
This button turns the rear window
def ogger on and of f (see page ).
Thedriver’ssidemodeandthe
passenger’s side mode can be
selected separately. Use the
appropriate mode control button to
select the vents the air flows from.
Some air will flow from the
dashboard vents in all modes.
Airf low is divided between
the f loor and corner vents and the
defroster vents at the base of the
windshield.
This mode can only be selected f rom
the driver’s side, however the
passenger’s side controls can still
change the temperature. When you select , the system
automatically switches to f resh air
mode and turns on the A/C. For
f aster def rosting, the f an speed
automatically increases. You can also
increase airf low to the windshield by
closing the corner vents on the
dashboard. To close the vents, rotate
the wheel on the side of each corner
vent.
When you turn of f by
pressing the button again, the
system returns to its former settings. Select to help clear the rear
window.
Airf low is divided between
the vents in the dashboard and the
back of the center console, and the
f loor vents.
Air flows from the center
and corner vents in the dashboard,
and the vents on the back of the
center console.
Each time you press the mode
control button, the display shows the
mode selected.
139
CONT INUED
Rear Window Def ogger But t on
Windshield Def rost er But t on
Mode Cont rols
Climate Control System
Features
221
09/07/29 17:20:10 31TK4610_226
2010 TL