Rear heat Acura TLX 2015 Owner's Manual
[x] Cancel search | Manufacturer: ACURA, Model Year: 2015, Model line: TLX, Model: Acura TLX 2015Pages: 545, PDF Size: 19.64 MB
Page 3 of 545
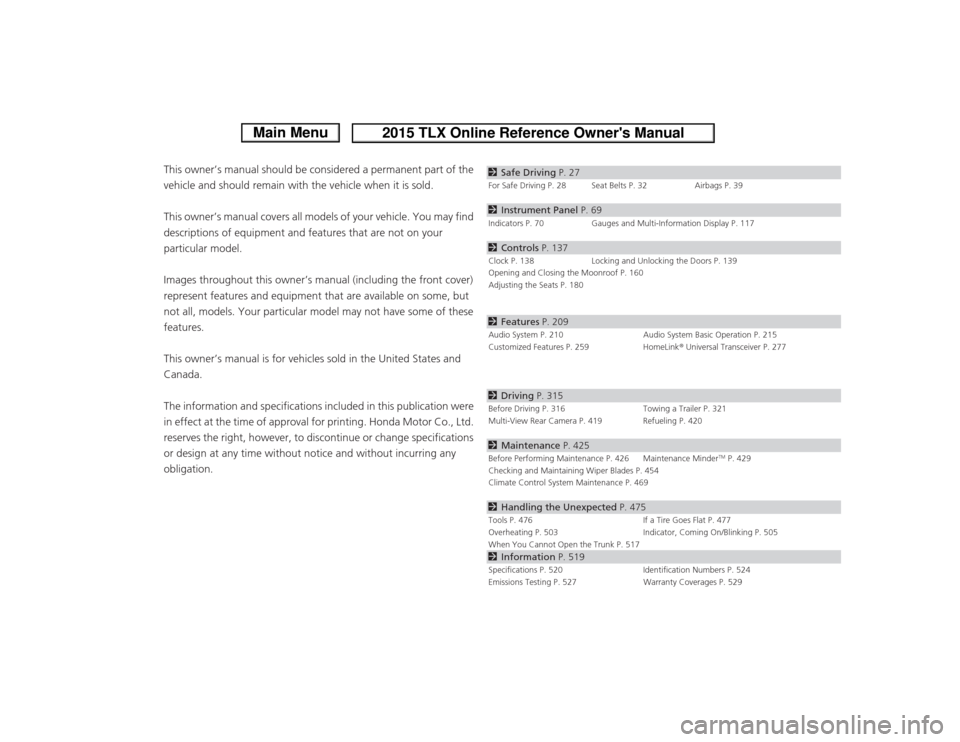
ContentsThis owner’s manual should be considered a permanent part of the
vehicle and should remain with the vehicle when it is sold.
This owner’s manual covers all models of your vehicle. You may find
descriptions of equipment and features that are not on your
particular model.
Images throughout this owner’s manual (including the front cover)
represent features and equipment that are available on some, but
not all, models. Your particular model may not have some of these
features.
This owner’s manual is for vehicles sold in the United States and
Canada.
The information and specifications included in this publication were
in effect at the time of approval for printing. Honda Motor Co., Ltd.
reserves the right, however, to discontinue or change specifications
or design at any time without notice and without incurring any
obligation.
2Safe Driving P. 27For Safe Driving P. 28 Seat Belts P. 32 Airbags P. 392Instrument Panel P. 69Indicators P. 70 Gauges and Multi-Information Display P. 1172Controls P. 137Clock P. 138 Locking and Unlocking the Doors P. 139
Opening and Closing the Moonroof P. 160
Adjusting the Seats P. 1802 Features P. 209Audio System P. 210 Audio System Basic Operation P. 215
Customized Features P. 259 HomeLink® Universal Transceiver P. 2772 Driving P. 315Before Driving P. 316 Towing a Trailer P. 321
Multi-View Rear Camera P. 419 Refueling P. 4202 Maintenance P. 425Before Performing Maintenance P. 426 Maintenance Minder
TM P. 429
Checking and Maintaining Wiper Blades P. 454
Climate Control System Maintenance P. 469
2 Handling the Unexpected P. 475Tools P. 476 If a Tire Goes Flat P. 477
Overheating P. 503 Indicator, Coming On/Blinking P. 505
When You Cannot Open the Trunk P. 5172 Information P. 519Specifications P. 520 Identification Numbers P. 524
Emissions Testing P. 527 Warranty Coverages P. 529
Page 5 of 545
4Quick Reference Guide
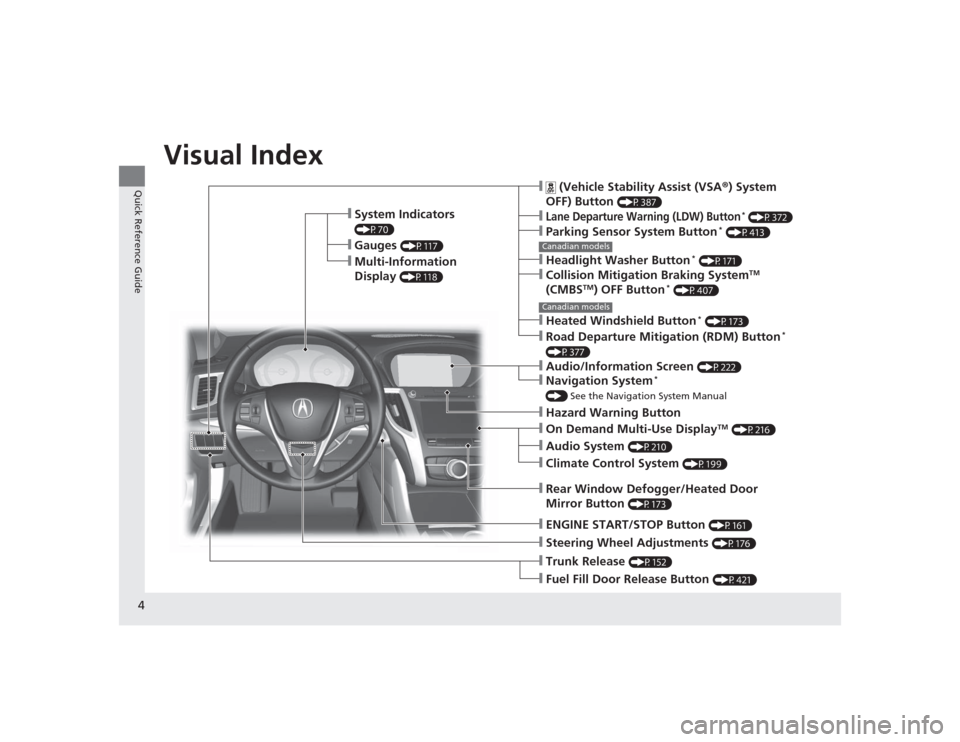
Quick Reference GuideVisual Index
❙System Indicators (P70)❙Gauges
(P117)
❙Multi-Information
Display
(P118)
❙Steering Wheel Adjustments
(P176)
❙ENGINE START/STOP Button
(P161)
❙Hazard Warning Button❙Rear Window Defogger/Heated Door
Mirror Button
(P173)
Canadian models❙
(Vehicle Stability Assist (VSA ®) System
OFF) Button
(P387)
❙Lane Departure Warning (LDW) Button
* (P372)
❙Parking Sensor System Button
* (P413)
❙Collision Mitigation Braking System
TM
(CMBS
TM) OFF Button
* (P407)
❙Headlight Washer Button
* (P171)
❙Heated Windshield Button
* (P173)
❙Road Departure Mitigation (RDM) Button
*
(P377)❙On Demand Multi-Use Display
TM (P216)
❙Audio System
(P210)
❙Climate Control System
(P199)
❙Trunk Release
(P152)
❙Fuel Fill Door Release Button
(P421)
Canadian models❙Navigation System
*
() See the Navigation System Manual❙Audio/Information Screen
(P222)
Page 97 of 545
96
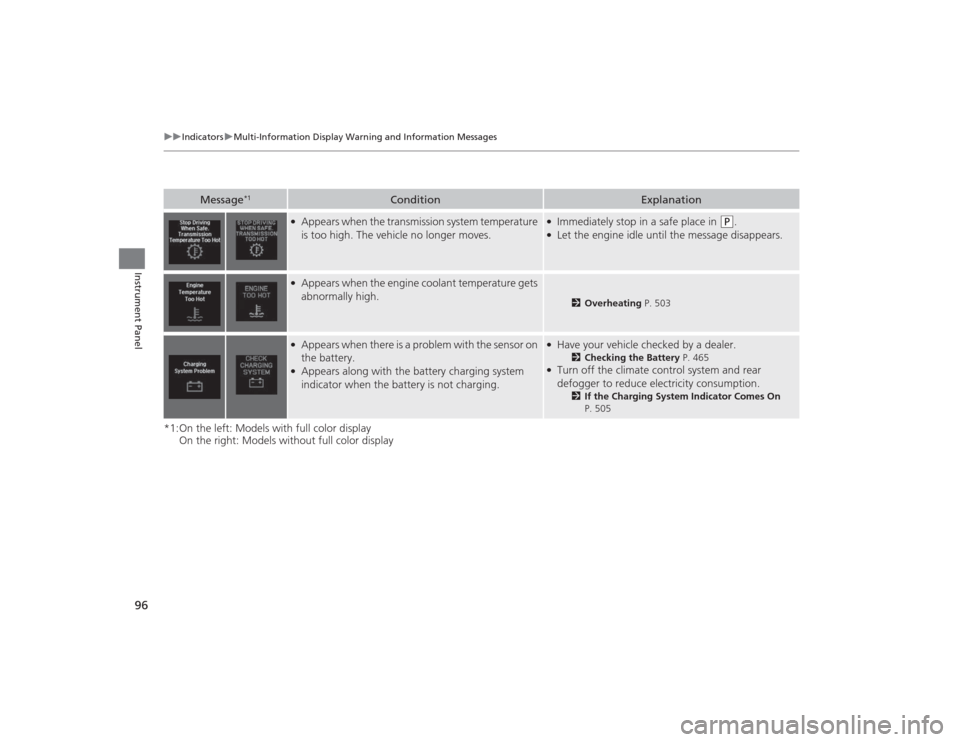
uuIndicators uMulti-Information Display Warn ing and Information Messages
Instrument Panel
*1:On the left: Models with full color display
On the right: Models without full color display
Message
*1
Condition
Explanation
●Appears when the transmission system temperature
is too high. The vehicle no longer moves.
●Immediately stop in a safe place in
(P
.
●Let the engine idle until the message disappears.
●Appears when the engine coolant temperature gets
abnormally high.
2Overheating P. 503
●Appears when there is a problem with the sensor on
the battery.●Appears along with the battery charging system
indicator when the battery is not charging.
●Have your vehicle checked by a dealer.
2Checking the Battery P. 465
●Turn off the climate control system and rear
defogger to reduce electricity consumption.
2If the Charging System Indicator Comes On
P. 505
Page 138 of 545
137
Controls
This chapter explains how to operate the various controls necessary for driving.
Clock.................................................. 138
Locking and Unlocking the Doors
Key Types and Functions .................. 139
Low Keyless Access Remote Signal Strength ......................................... 141
Locking/Unlocking the Doors from the Outside .......................................... 142
Locking/Unlocking the Doors from the
Inside ............................................. 148
Childproof Door Locks ..................... 150
Auto Door Locking/Unlocking .......... 151
Opening and Closing the Trunk....... 152
Security System ................................ 155
Immobilizer System .......................... 155 Security System Alarm...................... 155
Opening and Closing the Windows
.... 158Opening and Closing the Moonroof
....... 160
Operating the Switches Around the
Steering Wheel
ENGINE START/STOP Button............. 161
Turn Signals ..................................... 164
Light Switches.................................. 165
Fog Lights
*...................................... 168
Daytime Running Lights ................... 168
Wipers and Washers ........................ 169
Brightness Control ........................... 172
Defogger/Heated Door Mirror .......... 173
Driving Position Memory System ...... 174 Adjusting the Steering Wheel .......... 176
Adjusting the Mirrors ....................... 177
Interior Rearview Mirror ................... 177
Power Door Mirrors ......................... 178
Adjusting the Seats .......................... 180
Adjusting the Seat Positions ............. 180
Interior Lights/Interior Convenience Items ................................................ 187
Interior Lights .................................. 187
Interior Convenience Items .............. 189
Climate Control System ................... 199
Using Automatic Climate Control .... 199
Automatic Climate Control Sensors......207
* Not available on all models
Page 174 of 545
173
uuOperating the Switches Around the Steering Wheel uDefogger/Heated Door Mirror
Controls
Defogger/Heated Door MirrorThis system consumes a lot of power, so turn it off when the window has been
defogged or deiced.
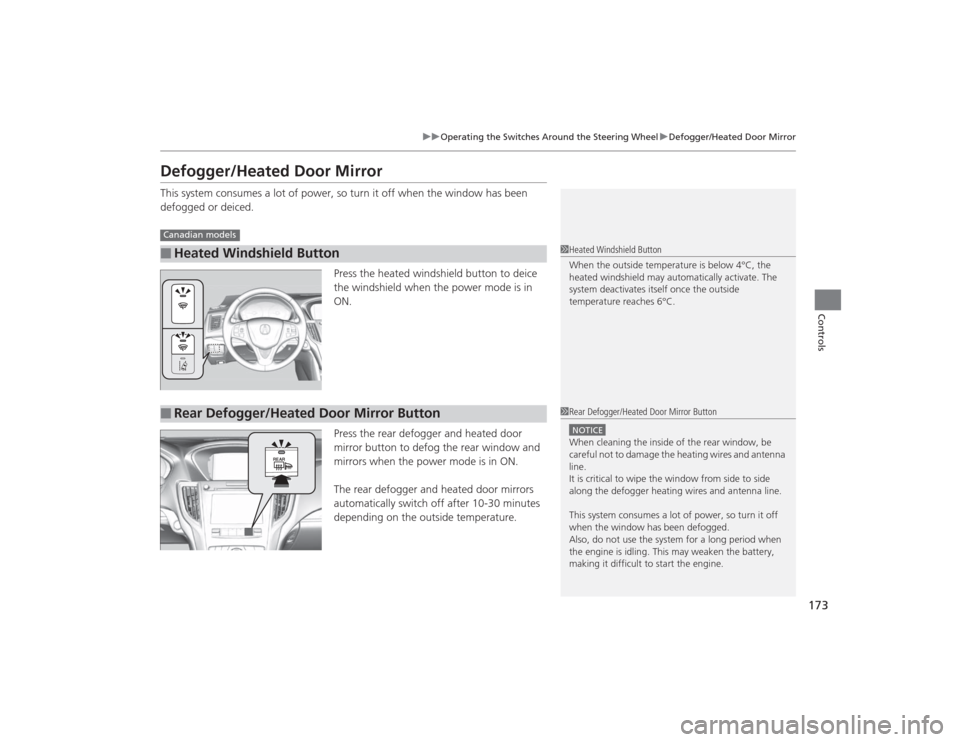
Press the heated windshield button to deice
the windshield when the power mode is in
ON.
Press the rear defogger and heated door
mirror button to defog the rear window and
mirrors when the power mode is in ON.
The rear defogger and heated door mirrors
automatically switch off after 10-30 minutes
depending on the outside temperature.■
Heated Windshield ButtonCanadian models
1Heated Windshield Button
When the outside temperature is below 4°C, the
heated windshield may automaticall y activate. The
system deactivates itself once the outside
temperature reaches 6°C.
■
Rear Defogger/Heated Door Mirror Button
1 Rear Defogger/Heated Door Mirror ButtonNOTICEWhen cleaning the inside of the rear window, be
careful not to damage the heating wires and antenna
line.
It is critical to wipe the window from side to side
along the defogger heating wires and antenna line.
This system consumes a lot of power, so turn it off
when the window has been defogged.
Also, do not use the system for a long period when
the engine is idling. This may weaken the battery,
making it difficult to start the engine.
Page 199 of 545
uuInterior Lights/Interior Convenience Items uInterior Convenience Items
198Controls
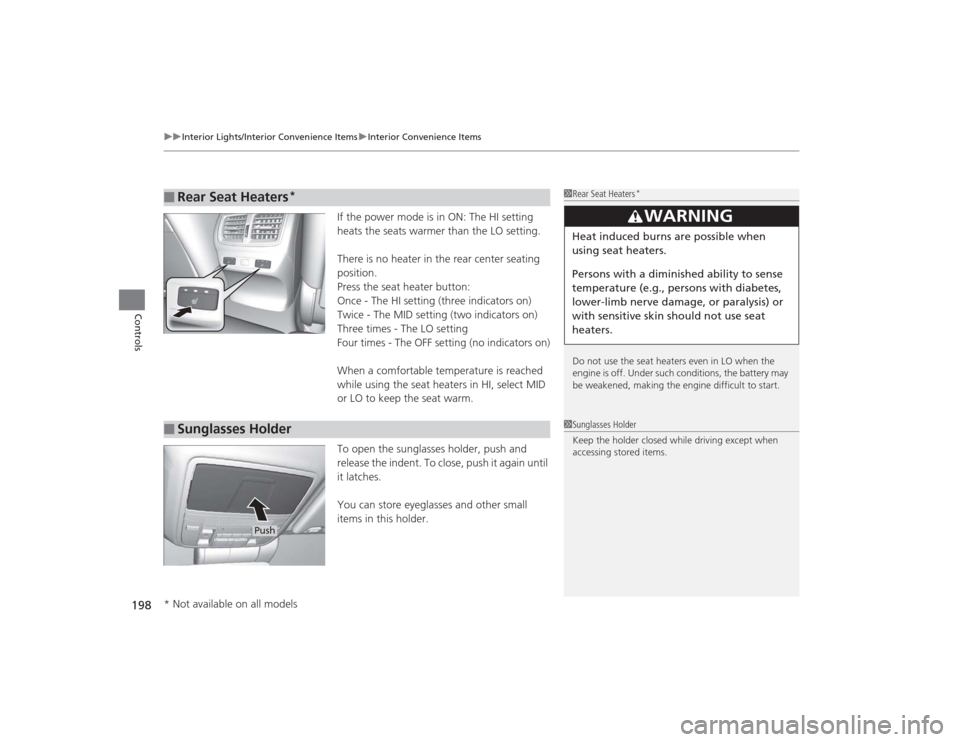
If the power mode is in ON: The HI setting
heats the seats warmer than the LO setting.
There is no heater in the rear center seating
position.
Press the seat heater button:
Once - The HI setting (three indicators on)
Twice - The MID setting (two indicators on)
Three times - The LO setting
Four times - The OFF setting (no indicators on)
When a comfortable temperature is reached
while using the seat heaters in HI, select MID
or LO to keep the seat warm.
To open the sunglasses holder, push and
release the indent. To close, push it again until
it latches.
You can store eyeglasses and other small
items in this holder.
■
Rear Seat Heaters
*
1Rear Seat Heaters
*
Do not use the seat heaters even in LO when the
engine is off. Under such conditions, the battery may
be weakened, making the engine difficult to start.
3
WARNING
Heat induced burns are possible when
using seat heaters.
Persons with a diminished ability to sense
temperature (e.g., persons with diabetes,
lower-limb nerve damage, or paralysis) or
with sensitive skin should not use seat
heaters.
■
Sunglasses Holder
1Sunglasses Holder
Keep the holder closed while driving except when
accessing stored items.
Push
* Not available on all models
Page 323 of 545
322Driving
When DrivingStarting the Engine
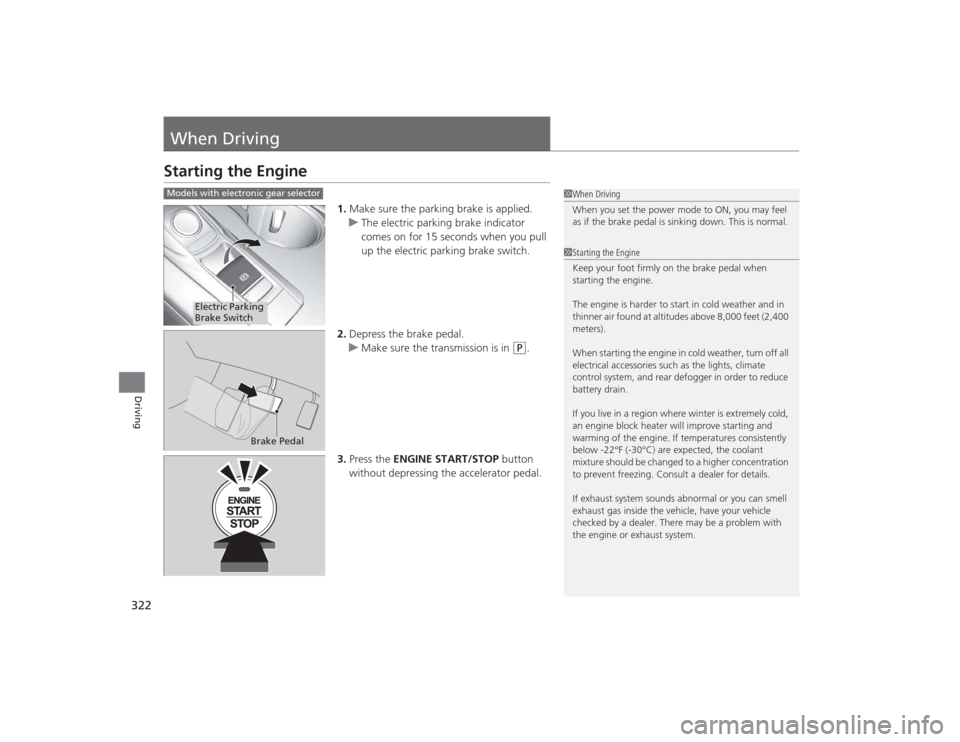
1.Make sure the parking brake is applied.
u The electric parking brake indicator
comes on for 15 seconds when you pull
up the electric parking brake switch.
2. Depress the brake pedal.
u Make sure the transmission is in
(P
.
3. Press the ENGINE START/STOP button
without depressing the accelerator pedal.
1 When Driving
When you set the power mode to ON, you may feel
as if the brake pedal is sinking down. This is normal.1Starting the Engine
Keep your foot firmly on the brake pedal when
starting the engine.
The engine is harder to start in cold weather and in
thinner air found at altitudes above 8,000 feet (2,400
meters).
When starting the engine in cold weather, turn off all
electrical accessories such as the lights, climate
control system, and rear defogger in order to reduce
battery drain.
If you live in a region where winter is extremely cold,
an engine block heater will improve starting and
warming of the engine. If temperatures consistently
below -22°F (-30°C) are expected, the coolant
mixture should be changed to a higher concentration
to prevent freezing. Consult a dealer for details.
If exhaust system sounds abnormal or you can smell
exhaust gas inside the vehicle, have your vehicle
checked by a dealer. There may be a problem with
the engine or exhaust system.
Models with electronic gear selector
Electric Parking
Brake Switch
Brake Pedal
Page 327 of 545
uuWhen Driving uStarting the Engine
326Driving
■To stop the engine
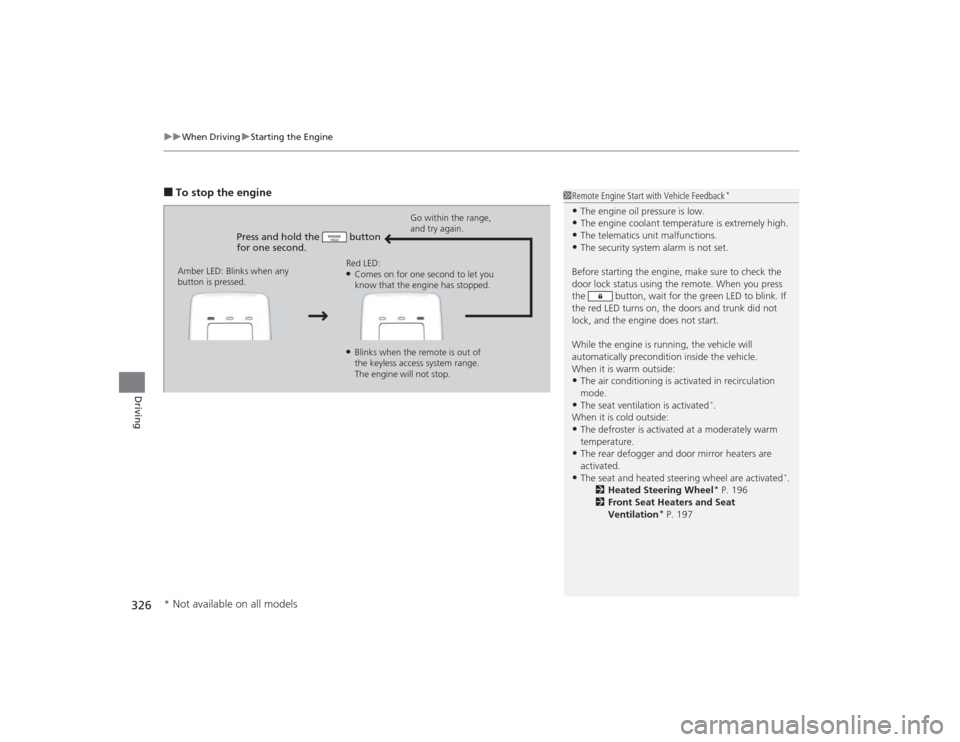
Press and hold the button
for one second.
Go within the range,
and try again.
Amber LED: Blinks when any
button is pressed. Red LED:
●Comes on for one second to let you
know that the engine has stopped.●Blinks when the remote is out of
the keyless access system range.
The engine will not stop.
1
Remote Engine Start with Vehicle Feedback
*
•The engine oil pressure is low.•The engine coolant temperature is extremely high.•The telematics unit malfunctions.•The security system alarm is not set.
Before starting the engine, make sure to check the
door lock status using the remote. When you press
the button, wait for the green LED to blink. If
the red LED turns on, the doors and trunk did not
lock, and the engine does not start.
While the engine is running, the vehicle will
automatically precondition inside the vehicle.
When it is warm outside:•The air conditioning is activated in recirculation
mode.•The seat ventilation is activated
*.
When it is cold outside:
•The defroster is activated at a moderately warm
temperature.•The rear defogger and door mirror heaters are
activated.•The seat and heated steering wheel are activated
*.
2 Heated Steering Wheel
* P. 196
2 Front Seat Heaters and Seat
Ventilation
* P. 197
* Not available on all models
Page 352 of 545
351
uuWhen Driving uFront Sensor Camera
*
Driving
Front Sensor Camera
*
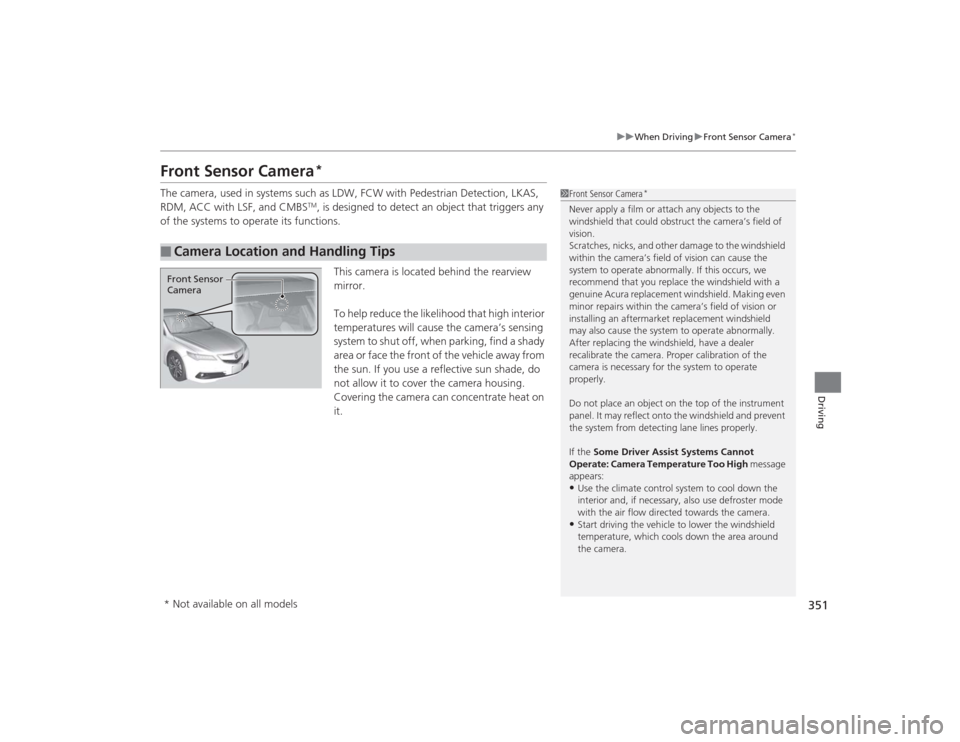
The camera, used in systems such as LDW, FCW with Pedestrian Detection, LKAS,
RDM, ACC with LSF, and CMBS
TM, is designed to detect an object that triggers any
of the systems to operate its functions.
This camera is located behind the rearview
mirror.
To help reduce the likelihood that high interior
temperatures will cause the camera’s sensing
s y s t e m t o s h u t o f f , w h e n p a r k i n g , f i n d a s h a d y
area or face the front of the vehicle away from
the sun. If you use a reflective sun shade, do
not allow it to cover the camera housing.
Covering the camera can concentrate heat on
it.
■
Camera Location and Handling Tips
1Front Sensor Camera
*
Never apply a film or attach any objects to the
windshield that could obstruct the camera’s field of
vision.
Scratches, nicks, and other damage to the windshield
within the ca mera’s field of vision can cause the
system to operate abnormally. If this occurs, we
recommend that you replace the windshield with a
genuine Acura replacement windshield. Making even
minor repairs withi n the camera’s field of vision or
installing an aftermarket replacement windshield
may also cause the system to operate abnormally.
After replacing the windshield, have a dealer
recalibrate the camera. Proper calibration of the
camera is necessary for the system to operate
properly.
Do not place an object on the top of the instrument
panel. It may reflect onto the windshield and prevent
the system from detecting lane lines properly.
If the Some Driver Assist Systems Cannot
Operate: Camera Temperature Too High message
appears:•Use the climate control system to cool down the
interior and, if necessary, also use defroster mode
with the air flow directed towards the camera.•Start driving the vehicle to lower the windshield
temperature, which cools down the area around
the camera.
Front Sensor
Camera* Not available on all models
Page 422 of 545
421
uuRefueling uHow to Refuel
Driving
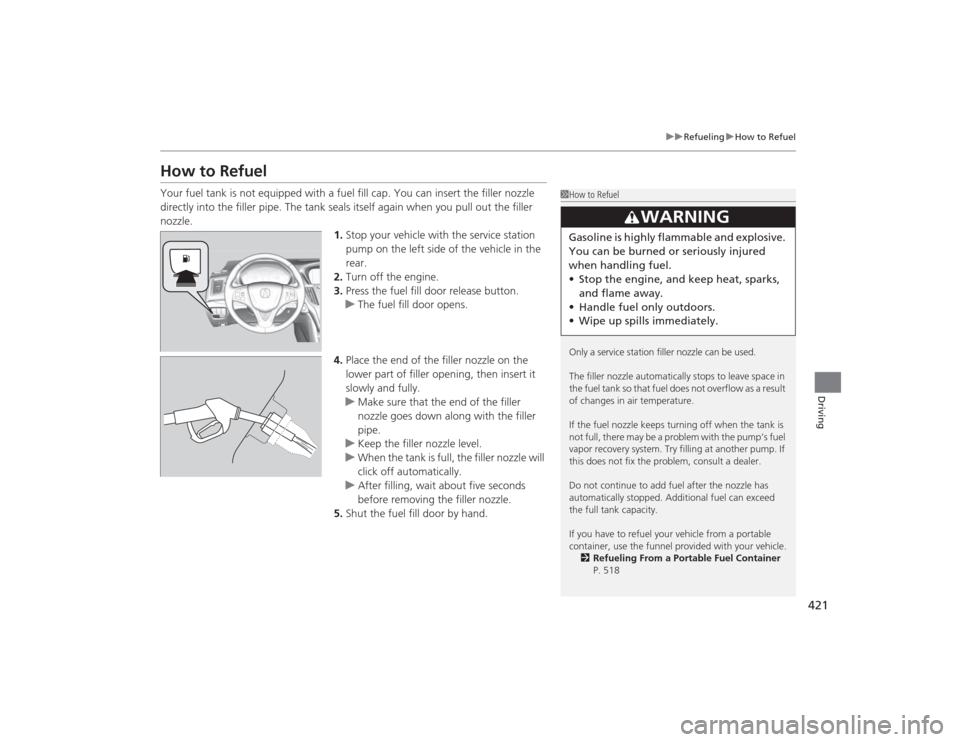
How to RefuelYour fuel tank is not equipped with a fuel fill cap. You can insert the filler nozzle
directly into the filler pipe. The tank seals itself again when you pull out the filler
nozzle.
1.Stop your vehicle with the service station
pump on the left side of the vehicle in the
rear.
2. Turn off the engine.
3. Press the fuel fill door release button.
u The fuel fill door opens.
4. Place the end of the filler nozzle on the
lower part of filler opening, then insert it
slowly and fully.
u Make sure that the end of the filler
nozzle goes down along with the filler
pipe.
u Keep the filler nozzle level.
u When the tank is full, the filler nozzle will
click off automatically.
u After filling, wait about five seconds
before removing the filler nozzle.
5. Shut the fuel fill door by hand.
1How to Refuel
Only a service station filler nozzle can be used.
The filler nozzle automatically stops to leave space in
the fuel tank so that fuel does not overflow as a result
of changes in air temperature.
If the fuel nozzle keeps turning off when the tank is
not full, there may be a problem with the pump’s fuel
vapor recovery system. Try filling at another pump. If
this does not fix the problem, consult a dealer.
Do not continue to add fuel af ter the nozzle has
automatically stopped. Additional fuel can exceed
the full tank capacity.
If you have to refuel your vehicle from a portable
container, use the funnel provided with your vehicle. 2 Refueling From a Portable Fuel Container
P. 518
3
WARNING
Gasoline is highly flammable and explosive.
You can be burned or seriously injured
when handling fuel.
• Stop the engine, and keep heat, sparks,
and flame away.
• Handle fuel only outdoors.
• Wipe up spills immediately.