service Acura TSX 2004 Owner's Manual
[x] Cancel search | Manufacturer: ACURA, Model Year: 2004, Model line: TSX, Model: Acura TSX 2004Pages: 364, PDF Size: 5.35 MB
Page 1 of 364
2004 TSX Online Reference Owner's Manual Use these links (and links throughout this manual) to navigate through this reference.
For a printed owner's manual, click on authorized manuals or go to www.helminc.com.
Contents
Owner's Identification Form
Introduction ........................................................................\
............................................................................. i
A Few Words About Safety ........................................................................\
.................................................. ii
Your Vehicle at a Glance ........................................................................\
....................................................... 2
Driver and Passenger Safety ........................................................................\
............................................... 5
Proper use and care of your vehicle's seat belts, and Supplemental Restraint System.
Instruments and Controls........................................................................\
.................................................. .57
Instrument panel indica tor and gauge, and how to use dashboard and steering column controls.
Comfort and Convenience Features........................................................................\
.............................. .113
How to operate the climate control system, the audio system, and other convenience features.
Before Driving ........................................................................\
...................................................... ...............183
What gasoline to use, how to break-in your new vehicle, and how to load luggage and other cargo.
Driving........................................................................\
...................................................................................197
The proper way to start the engine, shift the tr ansmission, and park, plus towing a trailer.
Maintenance........................................................................\
...................................................... ...................229
The Maintenance Schedule shows you when you need to take your vehicle to the dealer.
Appearance Care........................................................................\
...................................................... ...........295
Tips on cleaning and protecting your vehicle. Things to look for if your car ever needs body repairs.
Taking Care of the Unexpected........................................................................\
.......................................303
This section covers several problems motorists someti mes experience, and how to handle them.
Technical Information........................................................................\
...................................................... .331
ID numbers, dimensions, capaciti es, and technical information.
Warranty and Customer Relations (U.S. and Canada)..................................................................... .347
A summary of the warranties covering your new Honda, and how to contact us.
Authorized Manuals (U.S. only )........................................................................\
......................................
.351
How to order manuals and other technical literature.
Index ........................................................................\
......................................................................................... I
Service Information Summary
A summary of information you need when you pull up to the fuel pump.
Page 8 of 364
This section gives you important
inf ormation about how to protect
yourself and your passengers. It
shows you how to use seat belts
properly. It explains your Supple-
mental Restraint System. And it tells
you how to properly restrain inf ants
andchildreninyourcar..........
Important Safety Precautions . 6
.............
Your Car’s Saf ety Features . 7
.......................................
Seat Belts .8
...........................................
Airbags .9
..................
Seats and Seat-Backs . 10
..........................
Head Restraints .11
..................................
Door Locks .11
........
Pre-Drive Saf ety Checklist . 11
............................
Protecting Adults .12
.....
1. Close and Lock the Doors . 12
...........
2. Adjust the Front Seats . 13 ............
3. Adjust the Seat-Backs . 14
...
4. Adjust the Head Restraints . 15
5. Fasten and Position the Seat .....................................
Belts .15
....
6. Adjust the Steering Wheel . 18
7. Maintain a Proper Sitting ................................
Position .18
.....
Advice f or Pregnant Women . 19
...
Additional Safety Precautions . 20
........................
Protecting Children .21
All Children Must Be ...............................
Restrained .21
Children Should Sit in the Back ...........................................
Seat .22
The Passenger’s Front Airbag Poses Serious Risks to ...............................
Children .22
If You Must Drive with Several ...................................
Children .24
If a Child Requires Close ..................................
Attention .25
...
Additional Safety Precautions . 25
General Guidelines f or Using ...............................
Child Seats .26
.......................
Protecting Inf ants .30
.........
Protecting Small Children . 33 .......
Protecting Larger Children . 36
Using Child Seats with .....................................
Tethers .39
.............................
Using LATCH .41
Additional Inf ormation About Your .................................
Seat Belts .43
..
Seat Belt System Components . 43
......................
Lap/Shoulder Belt .43
Automatic Seat Belt ...............................
Tensioners .44
...............
Seat Belt Maintenance . 45
Additional Inf ormation About ...........................
Your Airbags .46
........................
SRS Components .46
How Your Front Airbags .........................................
Work .46
...
How Your Side Airbags Work . 48
How Your Side Curtain ..........................
Airbags Work .49
..
How the SRS Indicator Works . 49
How the Side Airbag Cutof f ...........
Indicator Light Works . 50
.............................
Airbag Service .51
...
Additional Safety Precautions . 52
.............
Carbon Monoxide Hazard . 53
...................................
Saf ety Labels .54
Driver and Passenger Saf ety
Driver and Passenger Saf ety
5
Page 54 of 364

A f ront seat passenger should not
use a cushion or other object as a
backrest. It may prevent the cutof f
system f rom working properly.
When you turn the ignition switch to
ON (II), the indicator should light
brief ly and go out (see page ). If it
doesn’t light, stays on, or comes on
while driving without a passenger in
the front seat, have the system
checked.
If a small-statured adult leans
sideways, or larger adult slouches
and leans sideways into the
deployment path of the side airbag,
the system may also shut of f the side
airbag.
If the side airbag cutof f indicator
light comes on, you should have the
passenger sit upright. Once the
passenger is out of the deployment
path of the side airbag, the system
will turn the airbag back on and the
light will go out. Although Acura does not encourage
children to ride in the f ront seat, this
system is designed to shut of f the
side airbag if a child leans sideways
and the child’s head is in the side
airbag deployment path. Your airbag systems are virtually
maintenance-f ree, and there are no
parts you can saf ely service.
However, you must have your car
serviced if :
Any
airbag that has deployed must be
replaced along with the control
unit, automatic seat belt
tensioners and other related parts.
Do not try to remove or replace
anyairbagbyyourself.Thismust
be done by an Acura dealer or a
knowledgeable body shop.
Take your car to an
authorized Acura dealer as soon as
possible. If you ignore this
indication, the airbags might not
inf late when you need them.
61
Additional Inf ormation About Your Airbags
Driver and Passenger Saf ety
Airbag Service
Your airbags ever inf late.
T he SRS indicat or light alert s yout o a problem.
51
Page 186 of 364

Bef ore you begin driving your Acura,
youshouldknowwhatgasolineto
use, and how to check the levels of
important f luids. You also need to
know how to properly store luggage
or packages. The inf ormation in this
section will help you. If you plan to
add any accessories to your car,
please read the inf ormation in this
section f irst..............................
Break-in Period .184
.........................................
Gasoline .184
.........
Service Station Procedures . 184
................
Filling the Fuel Tank . 184
....................
Opening the Hood .186
...............................
Oil Check .187
.........
Engine Coolant Check . 189
...............................
Fuel Economy .190
............................
Car Condition .190
...........................
Driving Habits .190
...
Accessories and Modif ications . 191
.............................
Carrying Cargo .193
Bef ore Driving
Bef ore Driving183
Page 187 of 364
During this period:Avoid full-throttle starts and rapid
acceleration. We recommend gasolines containing
detergent additives that help prevent
f uel system and engine deposits.
Avoidhardbraking.Newbrakes
need to be broken-in by moderate
use f or the f irst 200 miles (300
km).
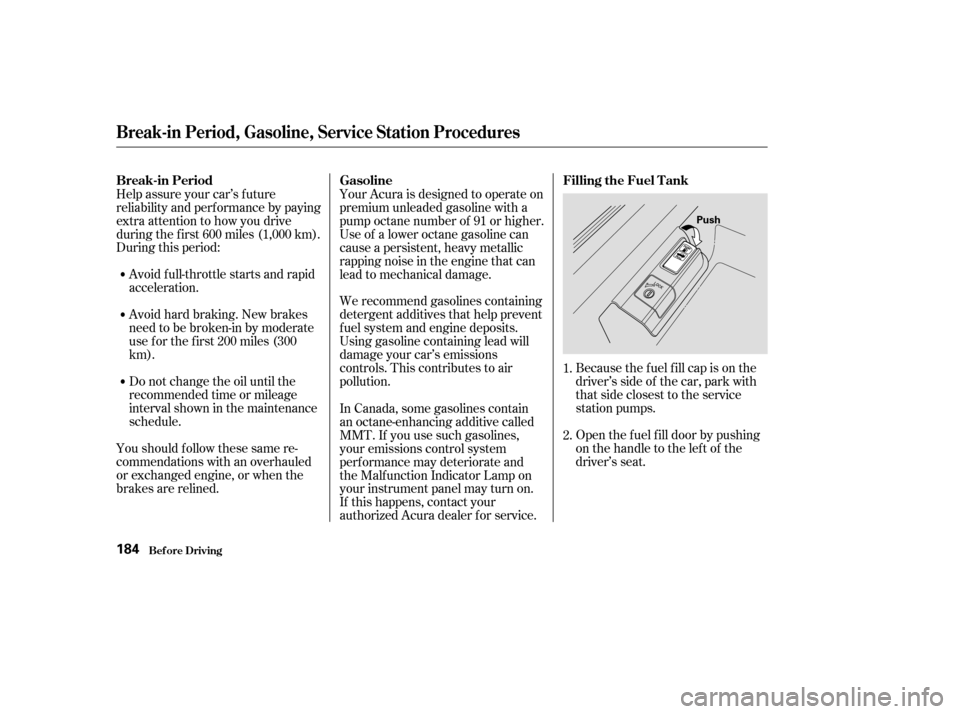
Open the f uel f ill door by pushing
onthehandletotheleftof the
driver’s seat.
Help assure your car’s f uture
reliability and perf ormance by paying
extra attention to how you drive
during the f irst 600 miles (1,000 km).
Because the f uel f ill cap is on the
driver’s side of the car, park with
that side closest to the service
station pumps.
Using gasoline containing lead will
damage your car’s emissions
controls. This contributes to air
pollution.
Youshouldfollowthesesamere-
commendations with an overhauled
or exchanged engine, or when the
brakes are relined. Do not change the oil until the
recommended time or mileage
intervalshowninthemaintenance
schedule. Your Acura is designed to operate on
premium unleaded gasoline with a
pump octane number of 91 or higher.
Useof aloweroctanegasolinecan
cause a persistent, heavy metallic
rapping noise in the engine that can
lead to mechanical damage.
In Canada, some gasolines contain
an octane-enhancing additive called
MMT. If you use such gasolines,
your emissions control system
perf ormance may deteriorate and
the Malf unction Indicator Lamp on
your instrument panel may turn on.
If this happens, contact your
authorized Acura dealer f or service.
1.
2.
Bef ore Driving
Break-in Period
GasolineFilling the Fuel Tank
Break-in Period, Gasoline, Service Station Procedures
184
Push
Page 188 of 364
Push the f uel f ill door closed until
it latches.
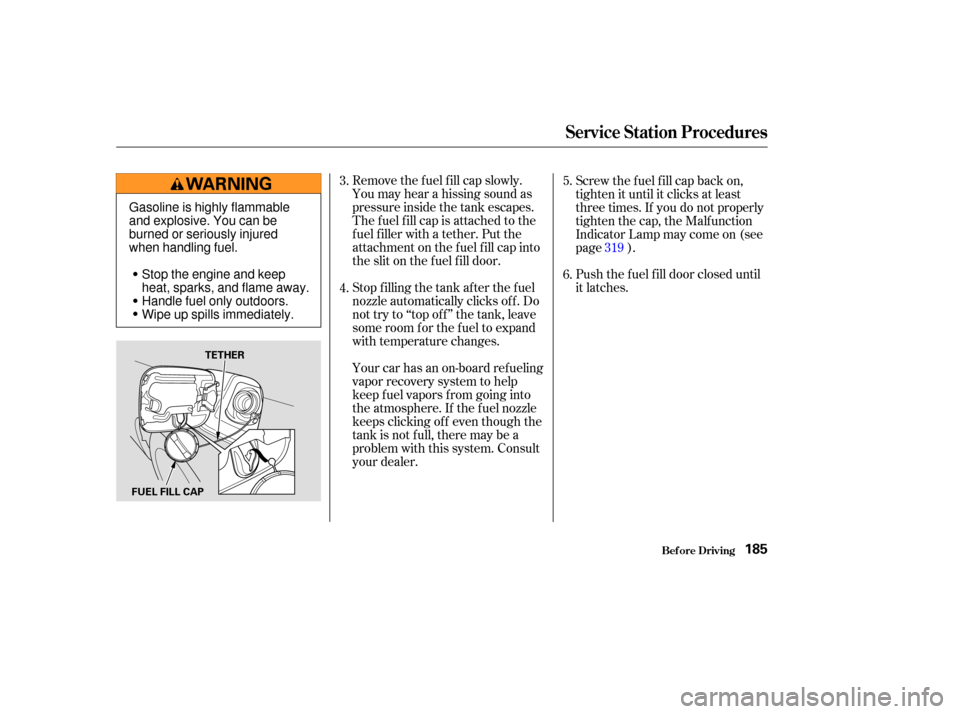
Remove the f uel f ill cap slowly.
You may hear a hissing sound as
pressure inside the tank escapes.
The fuel fill cap is attached to the
f uel f iller with a tether. Put the
attachment on the f uel f ill cap into
the slit on the f uel f ill door.
Stop f illing the tank af ter the f uel
nozzle automatically clicks of f . Do
not try to ‘‘top off’’ the tank, leave
some room f or the f uel to expand
with temperature changes.
Your car has an on-board ref ueling
vapor recovery system to help
keep f uel vapors f rom going into
the atmosphere. If the fuel nozzle
keeps clicking of f even though the
tank is not f ull, there may be a
problem with this system. Consult
your dealer. Screw the f uel f ill cap back on,
tighten it until it clicks at least
three times. If you do not properly
tighten the cap, the Malfunction
Indicator Lamp may come on (see
page ).
3.
4. 5.
6.
319
Service Station Procedures
Bef ore Driving185
FUEL FILL CAP TETHER
Gasoline is highly flammable
and explosive. You can be
burned or seriously injured
when handling fuel.
Stop the engine and keep
heat, sparks, and flame away.
Handle fuel only outdoors.
Wipe up spills immediately.
Page 189 of 364
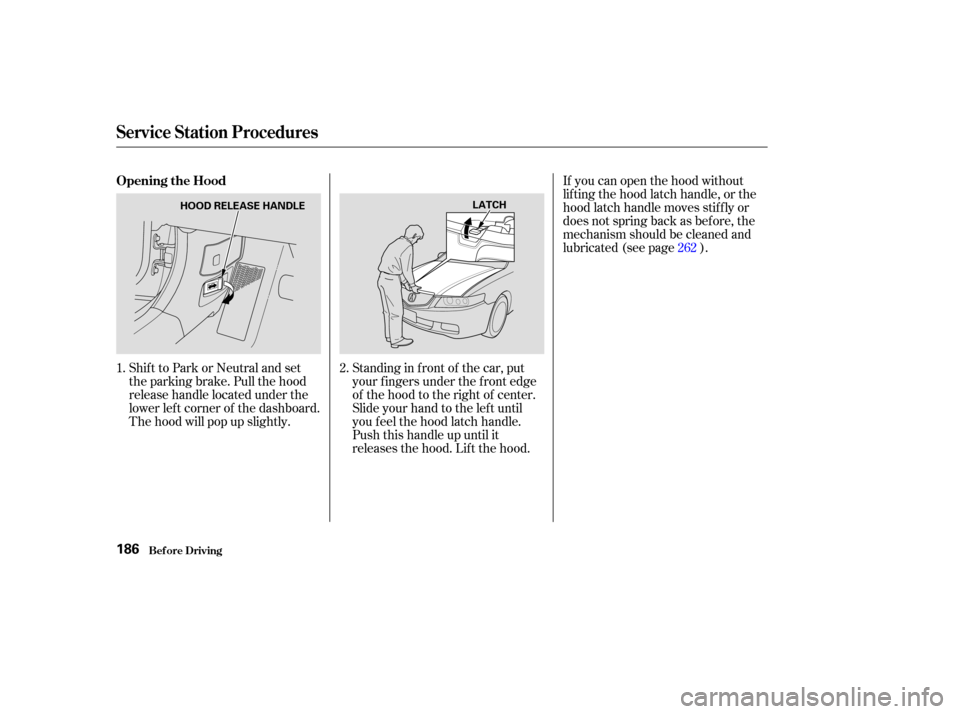
Shift to Park or Neutral and set
the parking brake. Pull the hood
release handle located under the
lower lef t corner of the dashboard.
The hood will pop up slightly.Standing in f ront of the car, put
your f ingers under the f ront edge
of the hood to the right of center.
Slide your hand to the lef t until
you f eel the hood latch handle.
Push this handle up until it
releases the hood. Lif t the hood.If you can open the hood without
lifting the hood latch handle, or the
hood latch handle moves stif f ly or
does not spring back as bef ore, the
mechanism should be cleaned and
lubricated (see page ).
1. 2. 262
Opening the Hood
Service Station Procedures
Bef ore Driving186
HOOD RELEASE HANDLE
LATCH
Page 190 of 364
CONT INUED
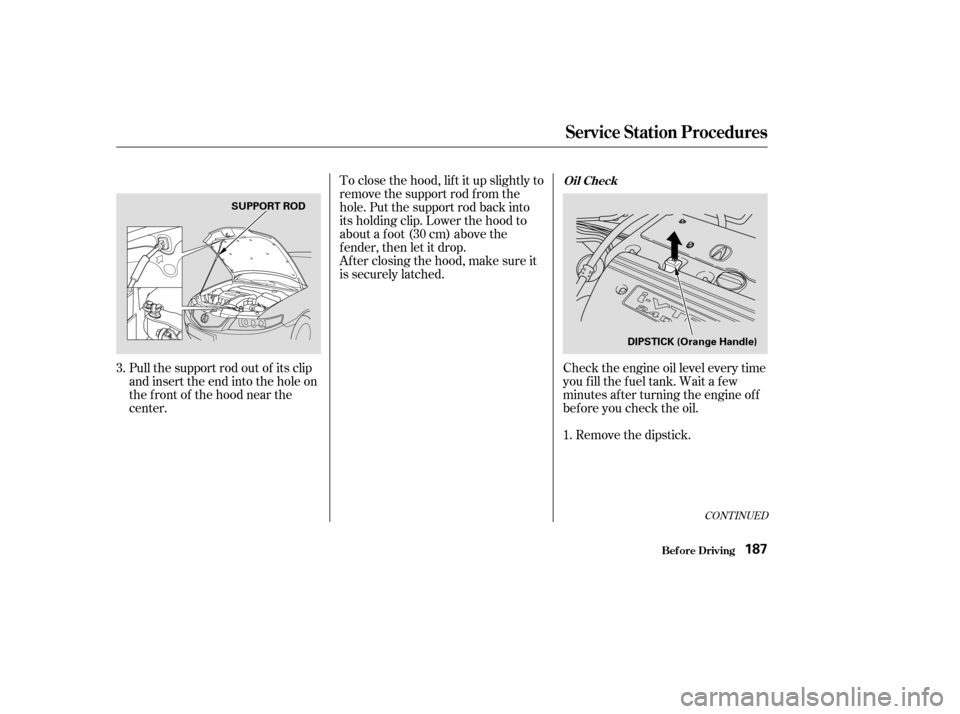
To close the hood, lif t it up slightly to
remove the support rod f rom the
hole. Put the support rod back into
its holding clip. Lower the hood to
about a f oot (30 cm) above the
fender,thenletitdrop.
After closing the hood, make sure it
is securely latched.
Pull the support rod out of its clip
and insert the end into the hole on
the front of the hood near the
center. Remove the dipstick.
Check the engine oil level every time
you f ill the f uel tank. Wait a f ew
minutes af ter turning the engine of f
bef ore you check the oil.
3.
1.
Bef ore Driving
Service Station Procedures
Oil Check
187
SUPPORT ROD
DIPSTICK (Orange Handle)
Page 191 of 364
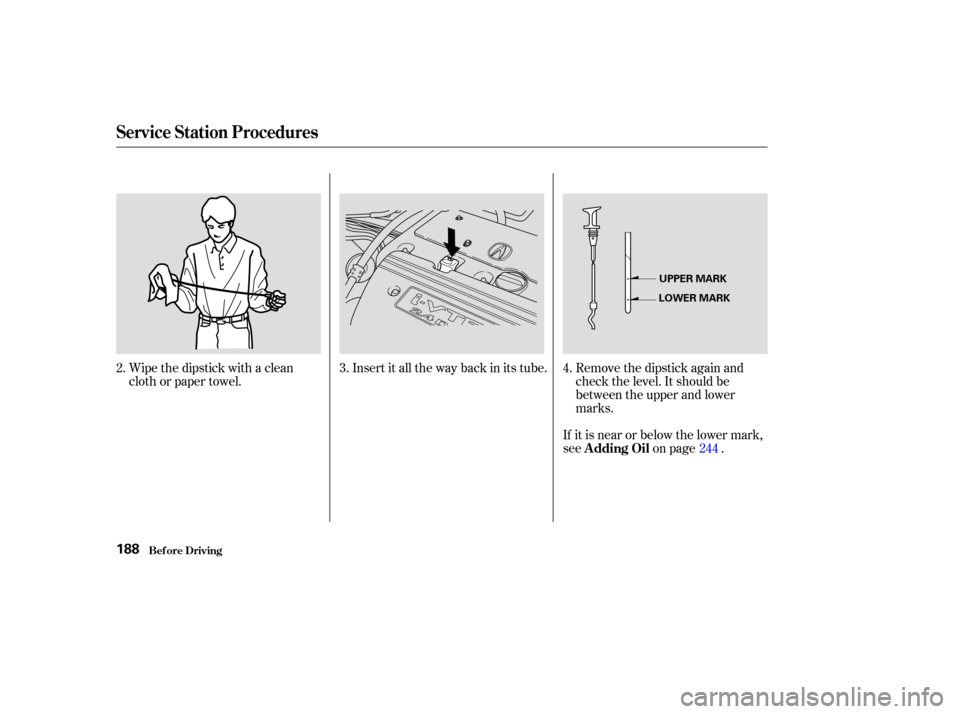
Remove the dipstick again and
check the level. It should be
between the upper and lower
marks.
If it is near or below the lower mark,
see on page .
Insert it all the way back in its tube.
Wipe the dipstick with a clean
cloth or paper towel. 3.
4.
2.
244
A dding Oil
Service Station Procedures
Bef ore Driving188
UPPER MARK
LOWER MARK
Page 192 of 364
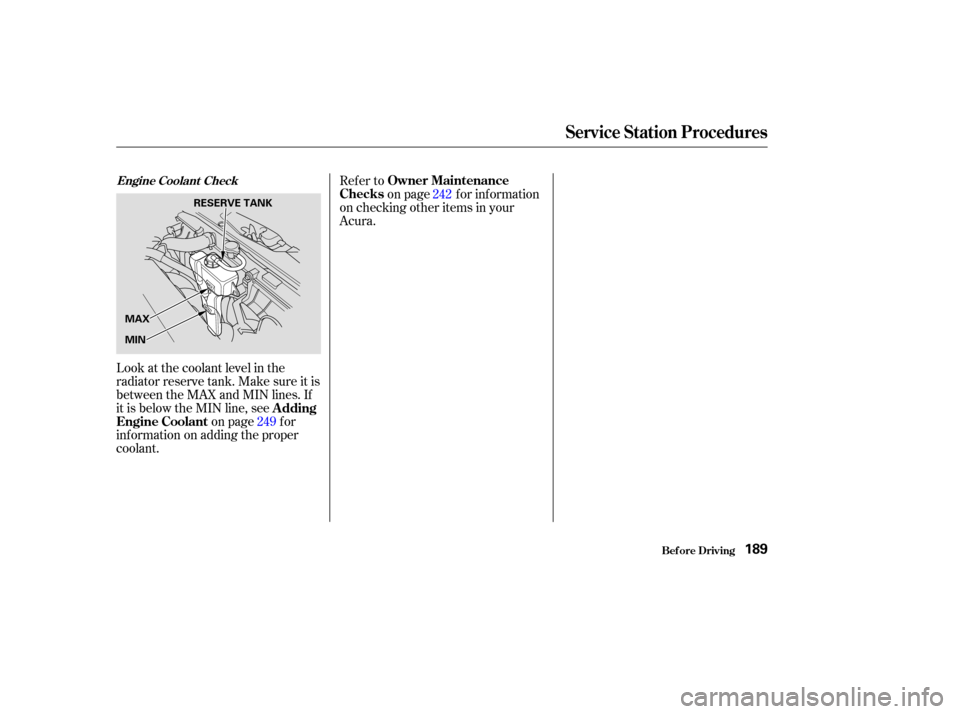
Look at the coolant level in the
radiator reserve tank. Make sure it is
between the MAX and MIN lines. If
it is below the MIN line, seeon page f or
inf ormation on adding the proper
coolant. Refer to
on page f or inf ormation
on checking other items in your
Acura.
249 242
Engine Coolant Check
A dding
Engine Coolant Owner Maintenance
Checks
Service Station Procedures
Bef ore Driving189
RESERVE TANK
MIN MAX