spare wheel Acura TSX 2005 Owner's Manual
[x] Cancel search | Manufacturer: ACURA, Model Year: 2005, Model line: TSX, Model: Acura TSX 2005Pages: 288, PDF Size: 4.14 MB
Page 183 of 288

If the indicator does not come on
when the ignition switch is turned to
ON(II),theremaybeaproblem
with the VSA system. Have your
dealer inspect your vehicle as soon
as possible.
Without VSA, your vehicle will have
normal braking and cornering ability,
but it will not have VSA traction and
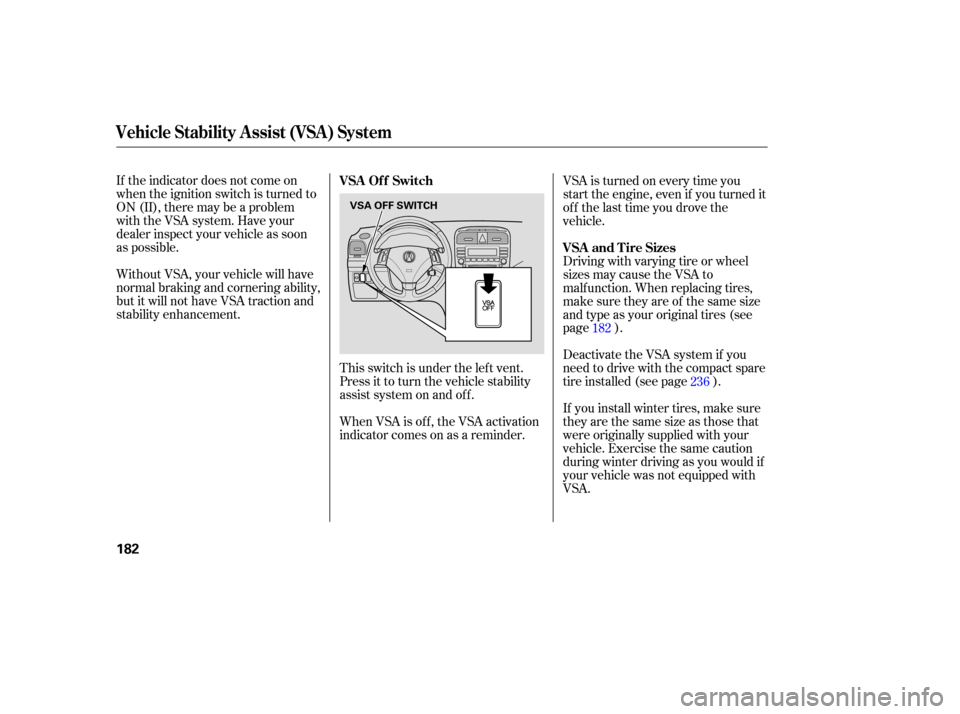
stability enhancement.This switch is under the lef t vent.
Press it to turn the vehicle stability
assist system on and of f .VSA is turned on every time you
start the engine, even if you turned it
off the last time you drove the
vehicle.
Driving with varying tire or wheel
sizes may cause the VSA to
malf unction. When replacing tires,
make sure they are of the same size
and type as your original tires (see
page ).
Deactivate the VSA system if you
need to drive with the compact spare
tire installed (see page ).
If you install winter tires, make sure
they are the same size as those that
were originally supplied with your
vehicle. Exercise the same caution
during winter driving as you would if
your vehicle was not equipped with
VSA.
When VSA is off, the VSA activation
indicator comes on as a reminder. 182
236
VSA Of f Switch
VSA and Tire Sizes
Vehicle Stability Assist (VSA) System
182
VSA OFF SWITCH
Page 188 of 288

When preparing to tow, and bef ore
driving away, be sure to check the
f ollowing:The vehicle has been properly
serviced, and the tires, brakes,
suspension, cooling system, and
lights are in good operating
condition. Your vehicle tires and spare are
properly inf lated (see page ),
and the trailer tires and spare are
trailer maker.
Crosswinds and air turbulence
caused by passing trucks can disrupt
your steering and cause trailer
swaying. When being passed by a
large vehicle, keep a constant speed,
and steer straight ahead. Do not try
to make quick steering or braking
corrections. Always drive slowly and have
someone guide you when backing up.
Grip the of the steering
wheel; then turn the wheel to the lef t
to get the trailer to move to the lef t,
andturnthewheelrighttomovethe
trailer to the right.
Follow all normal precautions when
parking, including f irmly setting the
parking brake and putting the
transmission in Park (automatic) or
in 1st or Reverse (manual). Also,
place wheel chocks at each of the
trailer’s tires.
The lights and brakes on your
vehicle and the trailer are working
properly. All items in or on the trailer are
properly secured and cannot shif t
while you drive. Thehitch,safetychains,andany
other attachments are secure. All weights and loads are within
limits (see pages and ). 183 184 227
bottom
Pre-T ow Checklist
Handling Crosswinds and Buf f et ing
Backing Up
Parking
Towing a Trailer
Driving
187
Page 237 of 288

Check the inf lation pressure of the
compact spare tire every time you
check the other tires. It should be
inf lated to:
Follow these precautions:Never exceed 50 mph (80 km/h).
This tire gives a harsher ride and
less traction on some road sur-
f aces. Use greater caution while
driving. Do not mount snow chains on the
compact spare tire.
Do not use the compact spare tire
if you are towing a trailer.
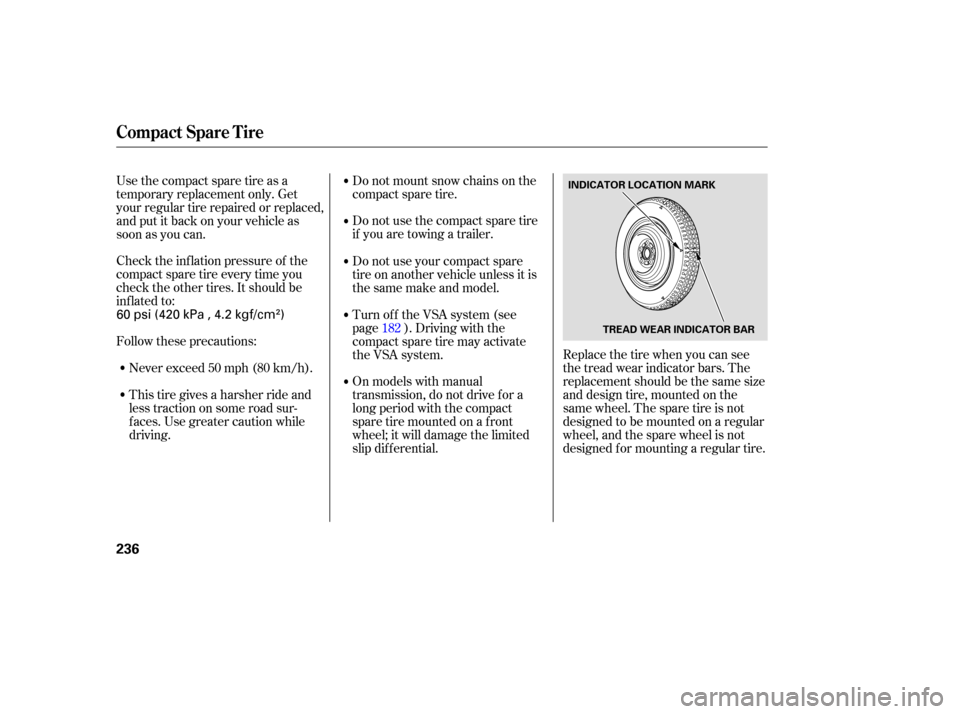
Replace the tire when you can see
the tread wear indicator bars. The
replacement should be the same size
and design tire, mounted on the
same wheel. The spare tire is not
designed to be mounted on a regular
wheel, and the spare wheel is not
designed f or mounting a regular tire.
Use the compact spare tire as a
temporary replacement only. Get
your regular tire repaired or replaced,
and put it back on your vehicle as
soon as you can.
Do not use your compact spare
tire on another vehicle unless it is
thesamemakeandmodel.
On models with manual
transmission, do not drive f or a
long period with the compact
spare tire mounted on a f ront
wheel; it will damage the limited
slip dif f erential. Turn of f the VSA system (see
page ). Driving with the
compact spare tire may activate
the VSA system.182
Compact Spare Tire
236
INDICATOR LOCATION MARK
TREAD WEAR INDICATOR BAR
60 psi (420 kPa , 4.2 kgf/cm)
Page 239 of 288

Placethejackunderthejacking
point nearest the tire you need to
change. Turn the end bracket
clockwise until the top of the jack
contacts the jacking point. Make
sure the jacking point tab is
restinginthejacknotch.
Unscrew the wing bolt and take
the spare tire out of the trunk.
Loosen each wheel nut 1/2 turn
with the wheel wrench.
Open the trunk. Raise the trunk
f loor by lif ting up on the back edge.
Take the tool tray out of the trunk,
and remove the tools and the jack. 7.
3.
4. 5.
6.
Changing a Flat T ire
238
JACKING POINT
TOOL TRAY
Page 240 of 288

CONT INUED
Bef ore mounting the spare tire,
wipe any dirt of f the mounting
surface of the wheel and hub with
a clean cloth. Wipe the hub
carefully;itmaybehotfrom
driving.
Remove the wheel nuts and f lat
tire. Place the f lat tire on the
ground with the outside surf ace of
the wheel f acing up.
Use the extension and the wheel
nut wrench as shown to raise the
vehicle until the f lat tire is of f the
ground.
8. 9.
10.
Changing a Flat T ire
T aking Care of t he Unexpect ed
239
EXTENSION
BRAKE HUB
WHEEL NUT WRENCH
Page 241 of 288

Tighten the wheel nuts securely in
the same crisscross pattern. Have
the wheel nut torque checked at
the nearest automotive service
f acility.
Tighten the wheel nuts to:
Put on the spare tire. Put the
wheel nuts back on f inger-tight,
then tighten them in a crisscross
pattern with the wheel nut wrench
until the wheel is f irmly against
the hub. Do not try to tighten
them f ully.
Lower the vehicle to the ground
and remove the jack. Remove the center cap before
storing the f lat tire in the trunk
well.
Place the flat tire face down in the
spare tire well.
Remove the spacer cone f rom the
wing bolt, turn it over, and put it
back on the bolt.
Secure the f lat tire by screwing
the wing bolt back into its hole.
Store the jack and tools in the tool
tray, and place the tool tray back
in the trunk.
11.
12. 13.14.
15.
16.
17.
18.
Changing a Flat T ire
240
WING BOLT
SPACER CONEFor
normal
tire
For
spare
tire
80 lbf·ft (108 N·m , 11 kgf·m)
Page 285 of 288

.........................................
Seat Belts .10
...............
Additional Information . 20
Automatic Seat Belt ...............................
Tensioners .21
......................
Lap/Shoulder Belt .20
................................
Maintenance .21
Reminder Light and ................................
Beeper .20, 54
...................
System Components . 20
...............
Use During Pregnancy . 18
...
Wearing a Lap/Shoulder Belt . 20
........................
Seats, Adjusting the .83
............................
Security System .142
.....................
Selecting a Child Seat .37
...................
Select/Reset Knob . 63,68
...............................
Serial Number .260
....................
Service Intervals .193-196
.............................
Service Manual .277
...........
Service Station Procedure . 154
..........................
Setting the Clock .141
........
Sequential SportShif t Mode . 172
.....
Shif t Lever Position Indicator . 170
........................
Shif t Lock Release .175
..............................
Side Airbags .11, 26
...
How Your Side Airbags Work . 26How the Side Airbag Of f
......................
Indicator Works .28
................
Side Curtain Airbags . 11,27
How Your Side Curtain ..........................
Airbags Work .27
...............................
Signaling Turns .66
.....................................
Snow Tires .230
.......
Sound System . 112,120,128,133
Spare Tire ......................................
Inf lating .236
............................
Specif ications .264
....................
Specif ications Charts . 262
................................
Speed Control .143
........................
Speed Limiter .169, 174
...................................
Speedometer .60
..........
SRS, Additional Inf ormation . 20
...
Additional Safety Precautions . 29
.............................
Airbag Service .28
How Your SRS Indicator .......................................
Works .27
How Your Front Airbags .........................................
Work .24
How Your Side Airbags .........................................
Work .26
........................
SRS Components .20
.............................
SRS Indicator .27 ,55 ....
START (Ignition Key Position) . 73
.......................
Starting the Engine .167
................
With a Dead Battery . 243
........
Steam Coming f rom Engine . 245
Steering Wheel ..................................
Adjustment .70
.............
Anti-theft Column Lock . 73
Stereo Sound ...............
System . 112,120,128,133
..........................................
Sun Visor .94
..........................
Sunglasses Holder .98
Supplemental Restraint ................................
System .11, 23
......................................
Servicing .28
.........................
SRS Indicator .27 ,55
...................
System Components . 23
..................................
Synthetic Oil .203
.....................................
Tachometer .60
......
Taillights, Changing Bulbs in . 219
.
Taking Care of the Unexpected . 235
Technical Descriptions ......
DOT Tire Quality Grading . 265
.....
Emissions Control Systems . 268
Index
T
VI
Page 287 of 288

Wheels...............
Adjusting the Steering . 70
............
Alignment and Balance . 228
..........................
Compact Spare .236
......................................
Wrench .237
Windows ..................
Operating the Power . 89
...........................
Rear, Def ogger .69
Windshield .......................................
Cleaning .65
.......................................
Washers .65
Wipers, Windshield .......................
Changing Blades .224
.....................................
Operation .65
....................................
Worn Tires .228
.....
Wrecker, Emergency Towing . 252
Index
VIII