ignition Acura TSX 2012 Service Manual
[x] Cancel search | Manufacturer: ACURA, Model Year: 2012, Model line: TSX, Model: Acura TSX 2012Pages: 324, PDF Size: 9.45 MB
Page 130 of 324
Continued
129
uuInterior Lights/Interior Convenience ItemsuInterior Convenience Items
Controls
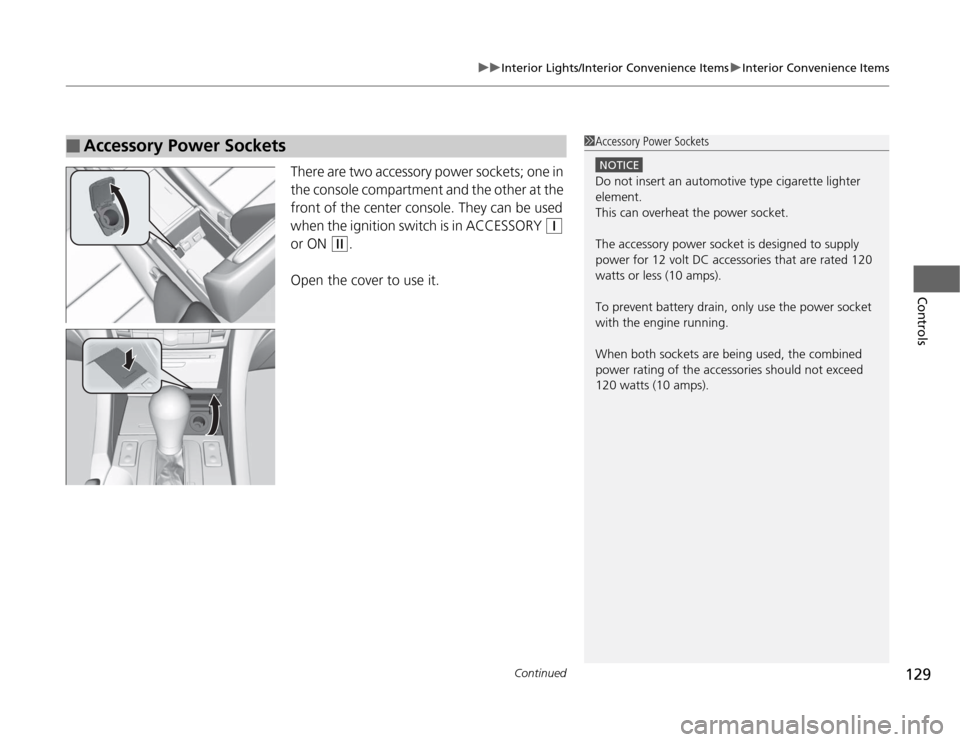
There are two accessory power sockets; one in
the console compartment and the other at the
front of the center console. They can be used
when the ignition switch is in ACCESSORY
(q
or ON
(w
.
Open the cover to use it.
■
Accessory Power Sockets
1Accessory Power Sockets
NOTICEDo not insert an automotive type cigarette lighter
element.
This can overheat the power socket.
The accessory power socket is designed to supply
power for 12 volt DC accessories that are rated 120
watts or less (10 amps).
To prevent battery drain, only use the power socket
with the engine running.
When both sockets are being used, the combined
power rating of the accessories should not exceed
120 watts (10 amps).
Page 133 of 324
uuInterior Lights/Interior Convenience ItemsuInterior Convenience Items
132Controls
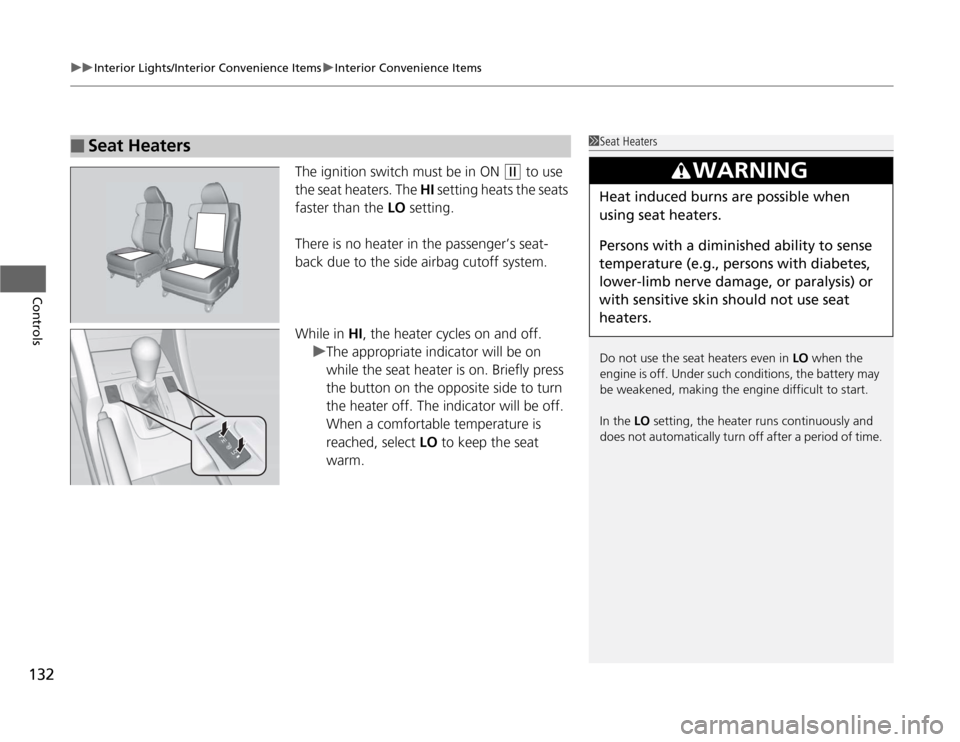
The ignition switch must be in ON
(w
to use
the seat heaters. The HI setting heats the seats
faster than the LO setting.
There is no heater in the passenger’s seat-
back due to the side airbag cutoff system.
While in HI, the heater cycles on and off.
uThe appropriate indicator will be on
while the seat heater is on. Briefly press
the button on the opposite side to turn
the heater off. The indicator will be off.
When a comfortable temperature is
reached, select LO to keep the seat
warm.
■
Seat Heaters
1Seat Heaters
Do not use the seat heaters even in LO when the
engine is off. Under such conditions, the battery may
be weakened, making the engine difficult to start.
In the LO setting, the heater runs continuously and
does not automatically turn off after a period of time.
3
WARNING
Heat induced burns are possible when
using seat heaters.
Persons with a diminished ability to sense
temperature (e.g., persons with diabetes,
lower-limb nerve damage, or paralysis) or
with sensitive skin should not use seat
heaters.
Page 142 of 324

141
Features
Audio System Basic OperationTo use the audio system function, the ignition switch must be in ACCESSORY
(q
or
ON
(w
.
Use the selector knob or MENU button to
access some audio functions.
Press to switch between the normal and
extended display for some functions. The
extended display has three segments to
display detailed information.
Selector knob: Rotate left or right to scroll
through the available choices. Press to set
your selection.
MENU button: Press to select any setting
such as the clock, sound control, or the
compass. Press this button again to cancel the
menu display mode.
RETURN button: Press to go back to the
previous display.
1Audio System Basic Operation
These indications are used to show how to operate
the selector knob.
Rotate to select.
Press to ENTER.
RETURN
Button
Selector
Knob
MENU
Button
Menu Display
Page 170 of 324

169
uuBluetooth® HandsFreeLink®uHFL Menus
Continued
Features
HFL MenusThe ignition switch must be in ACCESSORY
(q
or ON
(w
to use HFL.
To use HFL, you must first pair your Bluetooth-compatible cell phone to the system while the vehicle is parked.
Press the (HFL Talk) button each time you give a command
“Set pairing code”
Pair a phone to the system.
Edit the name of a paired phone.
Delete a paired phone from the system.
Hear a list of all phones paired to the system.
Hear which paired phone is linked, and its remaining battery life.
Search for another phone that has been paired.
Set the pairing code to either “Fixed” or “Random.”
Say a phone number.
Say a name after a phonebook entry is stored.
Redial the last number called.
Transfer a call from HFL to your phone or from your phone to HFL.
Mute your voice to the person at the other end of the call.
Send numbers or names during a call.“Pair”
“Edit”“Delete”“List”“Status”“Next phone”e.g.: “123-456-####”e.g.: “Jim Smith”
“Phone setup”“Call”/“Dial”“Transfer”“Mute”“Send”“Redial”
Page 174 of 324
Continued
173
uuBluetooth® HandsFreeLink®uHFL Menus
Features
You can make calls using any phone number or a name in the HFL phonebook, and
redial the last number called.■
Direct dialing a phone number
1.Say “Call” or “Dial.”
2.Say the number you want to dial after the prompts.
3.Say “Call” or “Dial” after the prompts.
■
From the HFL phonebook
1.Say “Call” or “Dial.”
2.Say the name stored in the HFL phonebook after the prompts.
3.Follow the HFL prompts.
■
To redial the last number called by HFL
Say “Redial.”
■
To end a call
Press the (HFL back) button.
■
Making a Call
1Making a Call
Press the button and wait for a beep before
giving a command.
HFL uses a Class 2 Bluetooth, with has a maximum
range of about 30 feet (10 meters).
HFL allows you to talk up to 30 minutes after you
remove the key from the ignition switch. However,
this may weaken the vehicle’s battery.
Page 179 of 324

uuBluetooth® HandsFreeLink®uHFL Menus
178Features
■
To activate or deactivate the auto transfer function
The call on your cell phone can be automatically transferred to HFL when you get
into the vehicle and turn on the ignition.
1.Say “System Setup.”
2.Say “Auto Transfer” after the prompts. HFL lets you know the current status.
3.Follow the HFL prompts to change the setting.
■
To clear the system
Paired phones, all stored or imported phonebook data, and any passcodes are
erased.
1.Say “System Setup.”
2.Say “Clear” after the prompts.
3.Follow the HFL prompts.
You can set the system language to French or English.
1.Say “Change Language.”
2.Follow the HFL prompts.
If you have not named your paired phone in the selected language, HFL will ask you
to name it in that language.
■
Change Language
*
1System Setup
Press the button before a command.
You can clear the system when you have forgotten
the passcode and cannot access HFL.
When HFL asks you for the passcode, say “System
Clear.”1Change Language
*
Press the button before a command.
Quick Language Selection
If you want to change the language, to French for
example, say “Français,” and follow the prompt.
* Not available on all models
Page 180 of 324
179
Features
Compass
*
When you turn the ignition switch to ON
(w
, the compass self-calibrates, and the
compass display appears.
Compass CalibrationIf the compass indicates the wrong direction, or the CAL indicator blinks, you need
to manually calibrate the system.
1.Turn the ignition switch to ON
(w
.
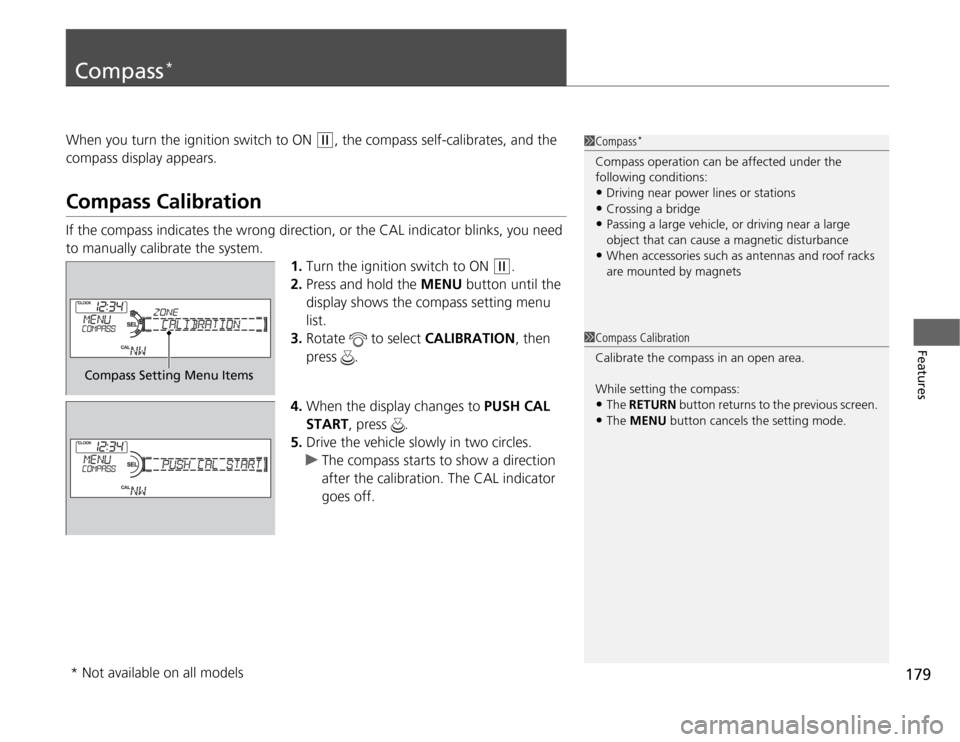
2.Press and hold the MENU button until the
display shows the compass setting menu
list.
3.Rotate to select CALIBRATION, then
press .
4.When the display changes to PUSH CAL
START, press .
5.Drive the vehicle slowly in two circles.
uThe compass starts to show a direction
after the calibration. The CAL indicator
goes off.
1Compass
*
Compass operation can be affected under the
following conditions:•Driving near power lines or stations•Crossing a bridge•Passing a large vehicle, or driving near a large
object that can cause a magnetic disturbance•When accessories such as antennas and roof racks
are mounted by magnets
1Compass Calibration
Calibrate the compass in an open area.
While setting the compass:•The RETURN button returns to the previous screen.•The MENU button cancels the setting mode.
Compass Setting Menu Items
* Not available on all models
Page 181 of 324

180
uuCompass
*uCompass Zone Selection
Features
Compass Zone Selection
1.Turn the ignition switch to ON
(w
.
2.Press and hold the MENU button until the
display shows the compass setting menu
list.
3.Rotate to select ZONE, then press .
The display shows the current zone
number.
4.Rotate to select the zone number of
your area (See Zone Map), then press .
1Compass Zone Selection
The zone selection is done to compensate the
variation between magnetic north and true north.
If the calibration starts while the audio system is in
use, the display returns to normal after the calibration
is completed.
Zone Number
1
2
3
4
5
6
7891011121314 15
Zone Map
Guam Island: Zone 8
Puerto Rico: Zone 11
Page 193 of 324
uuWhen DrivinguStarting the Engine
192Driving
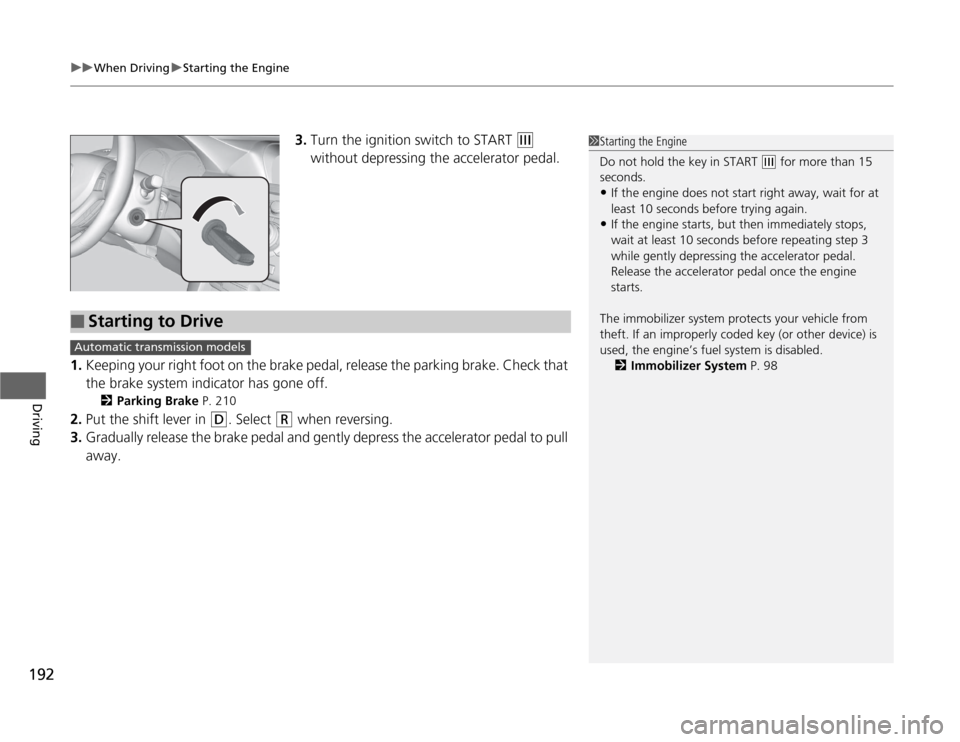
3.Turn the ignition switch to START
(e
without depressing the accelerator pedal.
1.Keeping your right foot on the brake pedal, release the parking brake. Check that
the brake system indicator has gone off.
2Parking Brake P. 210
2.Put the shift lever in
(D
. Select
(R
when reversing.
3.Gradually release the brake pedal and gently depress the accelerator pedal to pull
away.
1Starting the Engine
Do not hold the key in START
(e
for more than 15
seconds.
•If the engine does not start right away, wait for at
least 10 seconds before trying again.•If the engine starts, but then immediately stops,
wait at least 10 seconds before repeating step 3
while gently depressing the accelerator pedal.
Release the accelerator pedal once the engine
starts.
The immobilizer system protects your vehicle from
theft. If an improperly coded key (or other device) is
used, the engine’s fuel system is disabled.
2Immobilizer System P. 98
■
Starting to Drive
Automatic transmission models
Page 194 of 324
193
uuWhen DrivinguPrecautions While Driving
Driving
Precautions While DrivingAvoid driving in deep water and on flooded roads. This can damage the engine or
cause electrical component failure.
If there is a strong impact with something under the vehicle, stop in a safe location.
Check the underside of the vehicle for damage or any fluid leaks.■
In Rain
■
Other Precautions
1Precautions While Driving
NOTICEDo not operate the shift lever while pressing the
accelerator pedal. You could damage the
transmission.
If the ignition switch is turned to ACCESSORY
(q
or
LOCK
(0
while driving, the engine will shut down
and all steering and brake power assist functions will
stop, making it difficult to control the vehicle.
Do not put the shift lever in
(N
, as you will lose
engine braking (and acceleration) performance.
During the first 600 miles (1,000 km) of operation,
avoid sudden acceleration or full throttle operation so
as to not damage the engine or powertrain.
Avoid hard braking for the first 200 miles (300 km).
You should also follow this when the brakes are
replaced.