steering Alfa Romeo 147 2007 Owner handbook (in English)
[x] Cancel search | Manufacturer: ALFA ROMEO, Model Year: 2007, Model line: 147, Model: Alfa Romeo 147 2007Pages: 291, PDF Size: 5.52 MB
Page 17 of 291
GETTING TO KNOW YOUR CAR
15
If the ignition device is
tampered with (for exam-
ple an attempted theft)
have it checked over by Alfa
Romeo Authorised Services before
travelling again.
STEERING LOCK
Engaging:
– move the key to STOPorPARK, then
remove the key and turn the steering wheel
slightly to facilitate the locking action.
Disengaging:
– turn the key to MARgently rocking the
steering wheel from side to side.
DOORS
OPENING/CLOSING FROM
OUTSIDE
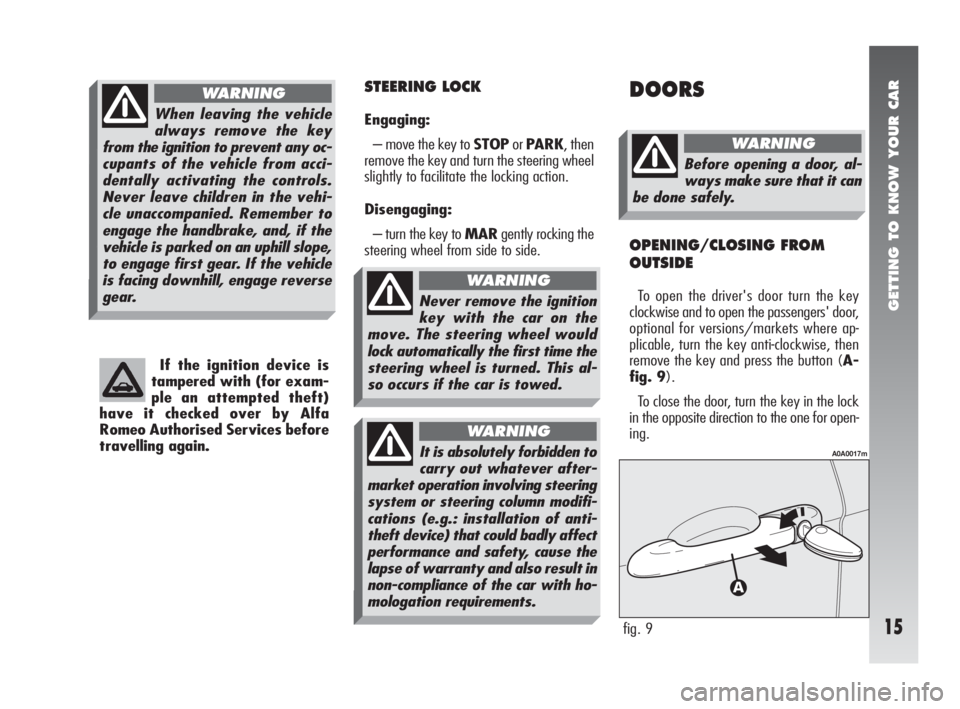
To open the driver's door turn the key
clockwise and to open the passengers' door,
optional for versions/markets where ap-
plicable, turn the key anti-clockwise, then
remove the key and press the button (A-
fig. 9).
To close the door, turn the key in the lock
in the opposite direction to the one for open-
ing.
fig. 9
A0A0017m
Before opening a door, al-
ways make sure that it can
be done safely.
WARNING
Never remove the ignition
key with the car on the
move. The steering wheel would
lock automatically the first time the
steering wheel is turned. This al-
so occurs if the car is towed.
WARNING
When leaving the vehicle
always remove the key
from the ignition to prevent any oc-
cupants of the vehicle from acci-
dentally activating the controls.
Never leave children in the vehi-
cle unaccompanied. Remember to
engage the handbrake, and, if the
vehicle is parked on an uphill slope,
to engage first gear. If the vehicle
is facing downhill, engage reverse
gear.
WARNING
It is absolutely forbidden to
carry out whatever after-
market operation involving steering
system or steering column modifi-
cations (e.g.: installation of anti-
theft device) that could badly affect
performance and safety, cause the
lapse of warranty and also result in
non-compliance of the car with ho-
mologation requirements.
WARNING
Page 24 of 291
GETTING TO KNOW YOUR CAR
22
STEERING WHEEL
ADJUSTMENTS
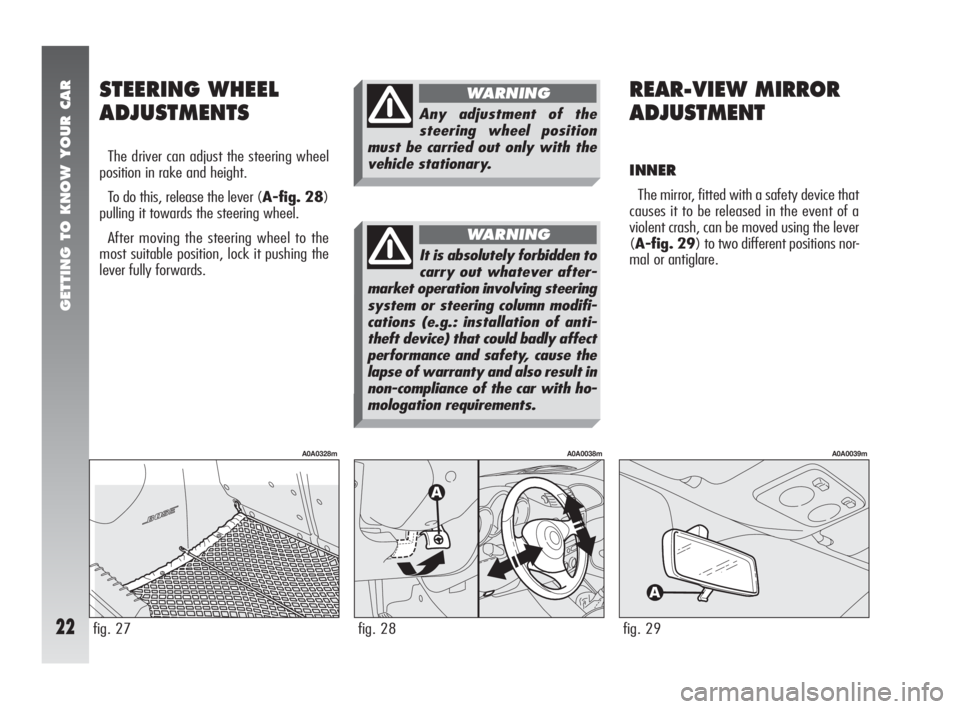
The driver can adjust the steering wheel
position in rake and height.
To do this, release the lever (A-fig. 28)
pulling it towards the steering wheel.
After moving the steering wheel to the
most suitable position, lock it pushing the
lever fully forwards.
REAR-VIEW MIRROR
ADJUSTMENT
INNER
The mirror, fitted with a safety device that
causes it to be released in the event of a
violent crash, can be moved using the lever
(A-fig. 29) to two different positions nor-
mal or antiglare.
fig. 27
A0A0328m
fig. 28
A0A0038m
fig. 29
A0A0039m
Any adjustment of the
steering wheel position
must be carried out only with the
vehicle stationary.
WARNING
It is absolutely forbidden to
carry out whatever after-
market operation involving steering
system or steering column modifi-
cations (e.g.: installation of anti-
theft device) that could badly affect
performance and safety, cause the
lapse of warranty and also result in
non-compliance of the car with ho-
mologation requirements.
WARNING
Page 38 of 291
GETTING TO KNOW YOUR CAR
36
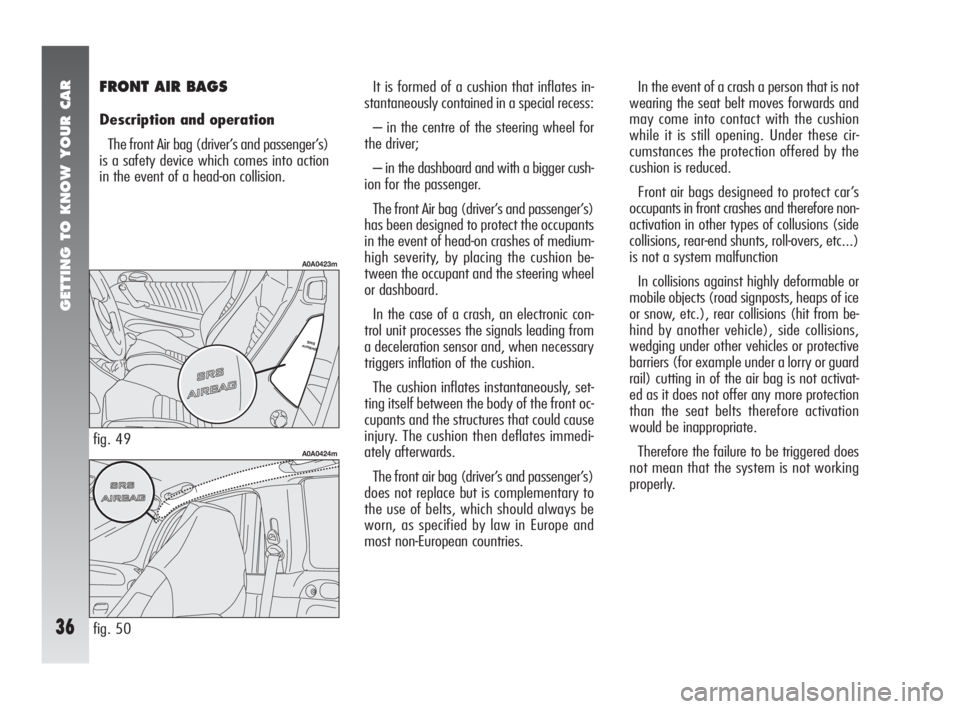
It is formed of a cushion that inflates in-
stantaneously contained in a special recess:
– in the centre of the steering wheel for
the driver;
– in the dashboard and with a bigger cush-
ion for the passenger.
The front Air bag (driver’s and passenger’s)
has been designed to protect the occupants
in the event of head-on crashes of medium-
high severity, by placing the cushion be-
tween the occupant and the steering wheel
or dashboard.
In the case of a crash, an electronic con-
trol unit processes the signals leading from
a deceleration sensor and, when necessary
triggers inflation of the cushion.
The cushion inflates instantaneously, set-
ting itself between the body of the front oc-
cupants and the structures that could cause
injury. The cushion then deflates immedi-
ately afterwards.
The front air bag (driver’s and passenger’s)
does not replace but is complementary to
the use of belts, which should always be
worn, as specified by law in Europe and
most non-European countries.In the event of a crash a person that is not
wearing the seat belt moves forwards and
may come into contact with the cushion
while it is still opening. Under these cir-
cumstances the protection offered by the
cushion is reduced.
Front air bags designeed to protect car’s
occupants in front crashes and therefore non-
activation in other types of collusions (side
collisions, rear-end shunts, roll-overs, etc...)
is not a system malfunction
In collisions against highly deformable or
mobile objects (road signposts, heaps of ice
or snow, etc.), rear collisions (hit from be-
hind by another vehicle), side collisions,
wedging under other vehicles or protective
barriers (for example under a lorry or guard
rail) cutting in of the air bag is not activat-
ed as it does not offer any more protection
than the seat belts therefore activation
would be inappropriate.
Therefore the failure to be triggered does
not mean that the system is not working
properly.FRONT AIR BAGS
Description and operation
The front Air bag (driver’s and passenger’s)
is a safety device which comes into action
in the event of a head-on collision.
fig. 49
A0A0423m
fig. 50
A0A0424m
Page 39 of 291
GETTING TO KNOW YOUR CAR
37
PASSENGER’S FRONT
AIR BAG
The passenger’s front air bag has been de-
signed to improve the protection of a per-
son wearing a seat belt.
Its volume at maximum inflation fills most
of the space between the dashboard and the
passenger.
MANUAL DEACTIVATION
OF PASSENGER’S FRONT
AIR BAG
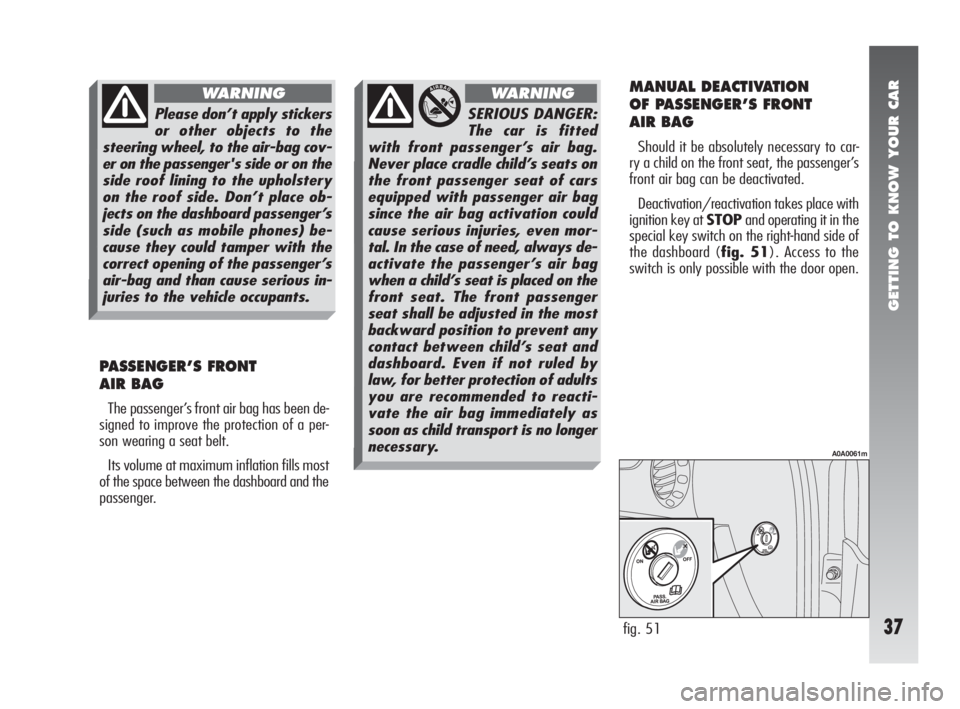
Should it be absolutely necessary to car-
ry a child on the front seat, the passenger’s
front air bag can be deactivated.
Deactivation/reactivation takes place with
ignition key at STOPand operating it in the
special key switch on the right-hand side of
the dashboard (fig. 51). Access to the
switch is only possible with the door open.
fig. 51
A0A0061m
SERIOUS DANGER:
The car is fitted
with front passenger’s air bag.
Never place cradle child’s seats on
the front passenger seat of cars
equipped with passenger air bag
since the air bag activation could
cause serious injuries, even mor-
tal. In the case of need, always de-
activate the passenger’s air bag
when a child’s seat is placed on the
front seat. The front passenger
seat shall be adjusted in the most
backward position to prevent any
contact between child’s seat and
dashboard. Even if not ruled by
law, for better protection of adults
you are recommended to reacti-
vate the air bag immediately as
soon as child transport is no longer
necessary.
WARNING
Please don’t apply stickers
or other objects to the
steering wheel, to the air-bag cov-
er on the passenger's side or on the
side roof lining to the upholstery
on the roof side. Don’t place ob-
jects on the dashboard passenger’s
side (such as mobile phones) be-
cause they could tamper with the
correct opening of the passenger’s
air-bag and than cause serious in-
juries to the vehicle occupants.
WARNING
Page 42 of 291
GETTING TO KNOW YOUR CAR
40
GENERAL CAUTIONS
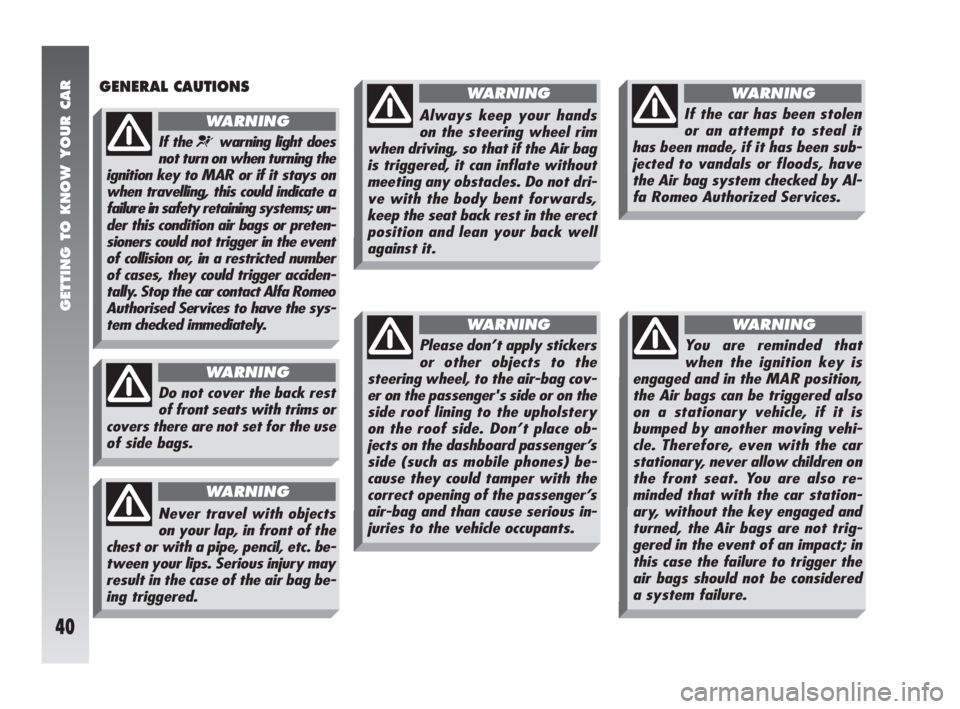
You are reminded that
when the ignition key is
engaged and in the MAR position,
the Air bags can be triggered also
on a stationary vehicle, if it is
bumped by another moving vehi-
cle. Therefore, even with the car
stationary, never allow children on
the front seat. You are also re-
minded that with the car station-
ary, without the key engaged and
turned, the Air bags are not trig-
gered in the event of an impact; in
this case the failure to trigger the
air bags should not be considered
a system failure.
WARNING
Do not cover the back rest
of front seats with trims or
covers there are not set for the use
of side bags.
WARNING
If the ¬warning light does
not turn on when turning the
ignition key to MAR or if it stays on
when travelling, this could indicate a
failure in safety retaining systems; un-
der this condition air bags or preten-
sioners could not trigger in the event
of collision or, in a restricted number
of cases, they could trigger acciden-
tally. Stop the car contact Alfa Romeo
Authorised Services to have the sys-
tem checked immediately.
WARNING
Never travel with objects
on your lap, in front of the
chest or with a pipe, pencil, etc. be-
tween your lips. Serious injury may
result in the case of the air bag be-
ing triggered.
WARNING
If the car has been stolen
or an attempt to steal it
has been made, if it has been sub-
jected to vandals or floods, have
the Air bag system checked by Al-
fa Romeo Authorized Services.
WARNING
Always keep your hands
on the steering wheel rim
when driving, so that if the Air bag
is triggered, it can inflate without
meeting any obstacles. Do not dri-
ve with the body bent forwards,
keep the seat back rest in the erect
position and lean your back well
against it.
WARNING
Please don’t apply stickers
or other objects to the
steering wheel, to the air-bag cov-
er on the passenger's side or on the
side roof lining to the upholstery
on the roof side. Don’t place ob-
jects on the dashboard passenger’s
side (such as mobile phones) be-
cause they could tamper with the
correct opening of the passenger’s
air-bag and than cause serious in-
juries to the vehicle occupants.
WARNING
Page 44 of 291
GETTING TO KNOW YOUR CAR
42
STEERING
WHEEL LEVERS
The devices and services controlled by the
levers on the steering wheel can only be ac-
tivated with the ignition key at MAR.
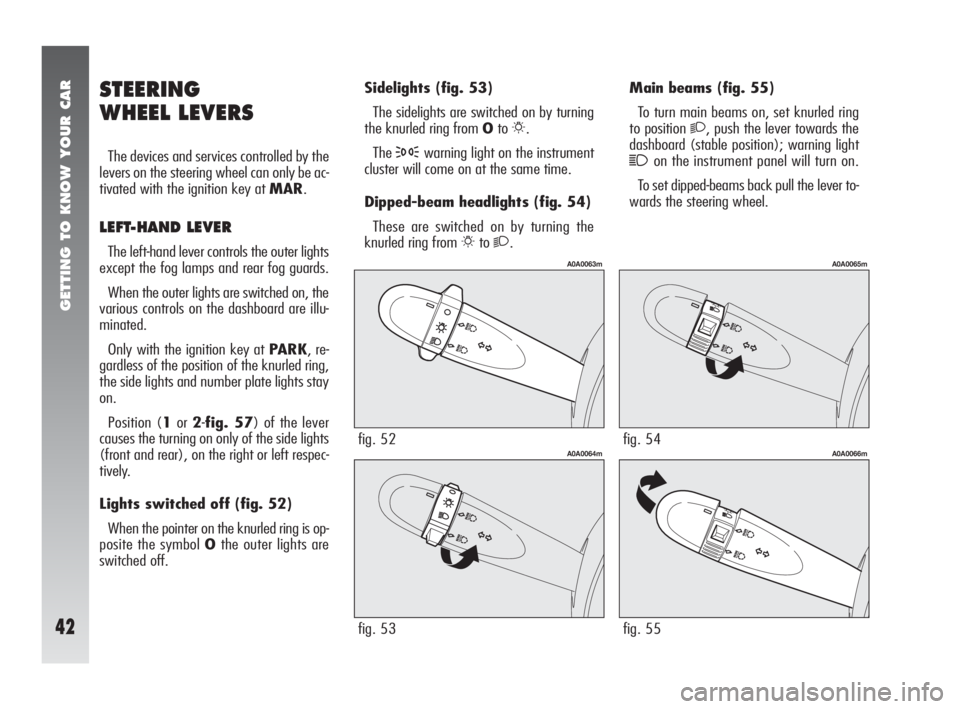
LEFT-HAND LEVER
The left-hand lever controls the outer lights
except the fog lamps and rear fog guards.
When the outer lights are switched on, the
various controls on the dashboard are illu-
minated.
Only with the ignition key at PARK, re-
gardless of the position of the knurled ring,
the side lights and number plate lights stay
on.
Position (1or2-fig. 57) of the lever
causes the turning on only of the side lights
(front and rear), on the right or left respec-
tively.
Lights switched off (fig. 52)
When the pointer on the knurled ring is op-
posite the symbol Othe outer lights are
switched off.Sidelights(fig. 53)
The sidelights are switched on by turning
the knurled ring from Oto
6.
The
3warning light on the instrument
cluster will come on at the same time.
Dipped-beam headlights (fig. 54)
These are switched on by turning the
knurled ring from
6to2.
fig. 52
A0A0063m
fig. 53
A0A0064m
Main beams (fig. 55)
To turn main beams on, set knurled ring
to position
2, push the lever towards the
dashboard (stable position); warning light
1on the instrument panel will turn on.
To set dipped-beams back pull the lever to-
wards the steering wheel.
fig. 54
A0A0065m
fig. 55
A0A0066m
Page 45 of 291
GETTING TO KNOW YOUR CAR
43
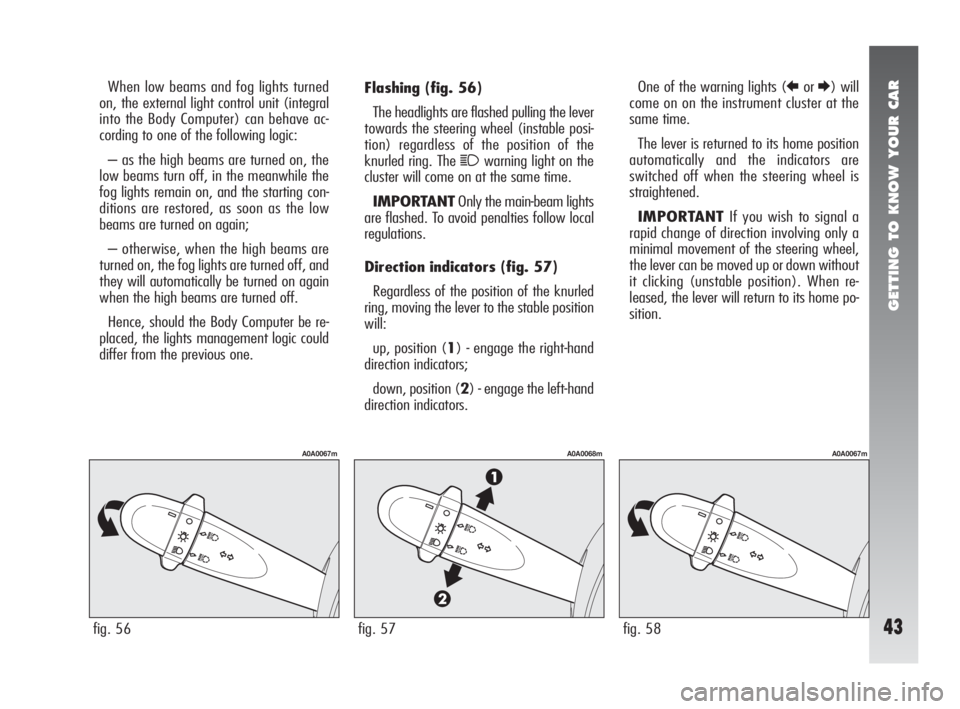
Flashing(fig. 56)
The headlights are flashed pulling the lever
towards the steering wheel (instable posi-
tion) regardless of the position of the
knurled ring. The
1warning light on the
cluster will come on at the same time.
IMPORTANTOnly the main-beam lights
are flashed. To avoid penalties follow local
regulations.
Direction indicators (fig. 57)
Regardless of the position of the knurled
ring, moving the lever to the stable position
will:
up, position (1) - engage the right-hand
direction indicators;
down, position (2) - engage the left-hand
direction indicators.One of the warning lights (
RorE) will
come on on the instrument cluster at the
same time.
The lever is returned to its home position
automatically and the indicators are
switched off when the steering wheel is
straightened.
IMPORTANTIf you wish to signal a
rapid change of direction involving only a
minimal movement of the steering wheel,
the lever can be moved up or down without
it clicking (unstable position). When re-
leased, the lever will return to its home po-
sition. When low beams and fog lights turned
on, the external light control unit (integral
into the Body Computer) can behave ac-
cording to one of the following logic:
– as the high beams are turned on, the
low beams turn off, in the meanwhile the
fog lights remain on, and the starting con-
ditions are restored, as soon as the low
beams are turned on again;
– otherwise, when the high beams are
turned on, the fog lights are turned off, and
they will automatically be turned on again
when the high beams are turned off.
Hence, should the Body Computer be re-
placed, the lights management logic could
differ from the previous one.
fig. 56
A0A0067m
fig. 58
A0A0067m
fig. 57
A0A0068m
Page 46 of 291
GETTING TO KNOW YOUR CAR
44
“Follow me home” device
(fig. 58)
This function allows the illumination of the
space in front of the car for the length of
time set, and is activated with the ignition
key at STOPor removed, pulling the left-
hand stalk towards the steering wheel.
This function is activated pulling the lever
within 2 minutes from when the engine is
turned off. At each single movement of the
lever, the staying on of the dipped beams
and sidelights is extended by 30 seconds up
to a maximum of 3.5 minutes; the lights
switch off automatically after the time set.
Each time the lever is operated, the
1
warning light on the cluster turns on.
This function can be interrupted by keep-
ing the lever pulled towards the steering
wheel for more than 2 seconds.
RIGHT-HAND LEVER
The right-hand lever is used to operate the
windscreen wiper-washer and rearscreen
wiper-washer. The windscreen washer con-
trol also activates the headlamp washers,
if fitted.
fig. 59
A0A0070m
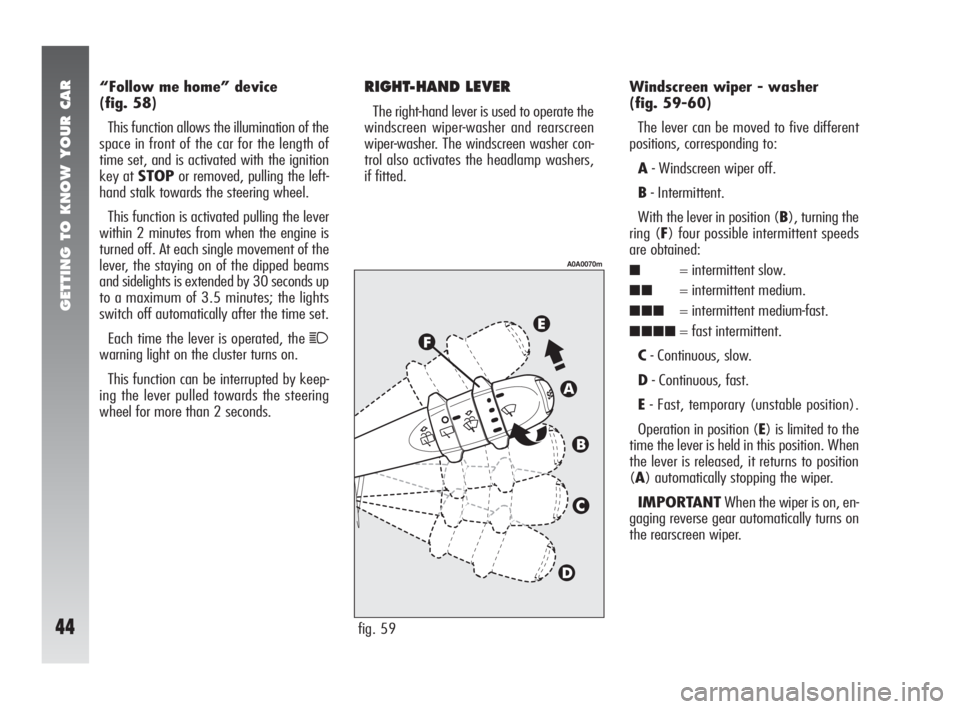
Windscreen wiper - washer
(fig. 59-60)
The lever can be moved to five different
positions, corresponding to:
A- Windscreen wiper off.
B- Intermittent.
With the lever in position (B), turning the
ring (F) four possible intermittent speeds
are obtained:
■= intermittent slow.
■■= intermittent medium.
■■■= intermittent medium-fast.
■■■■= fast intermittent.
C- Continuous, slow.
D- Continuous, fast.
E- Fast, temporary (unstable position).
Operation in position (E) is limited to the
time the lever is held in this position. When
the lever is released, it returns to position
(A) automatically stopping the wiper.
IMPORTANTWhen the wiper is on, en-
gaging reverse gear automatically turns on
the rearscreen wiper.
Page 47 of 291
GETTING TO KNOW YOUR CAR
45
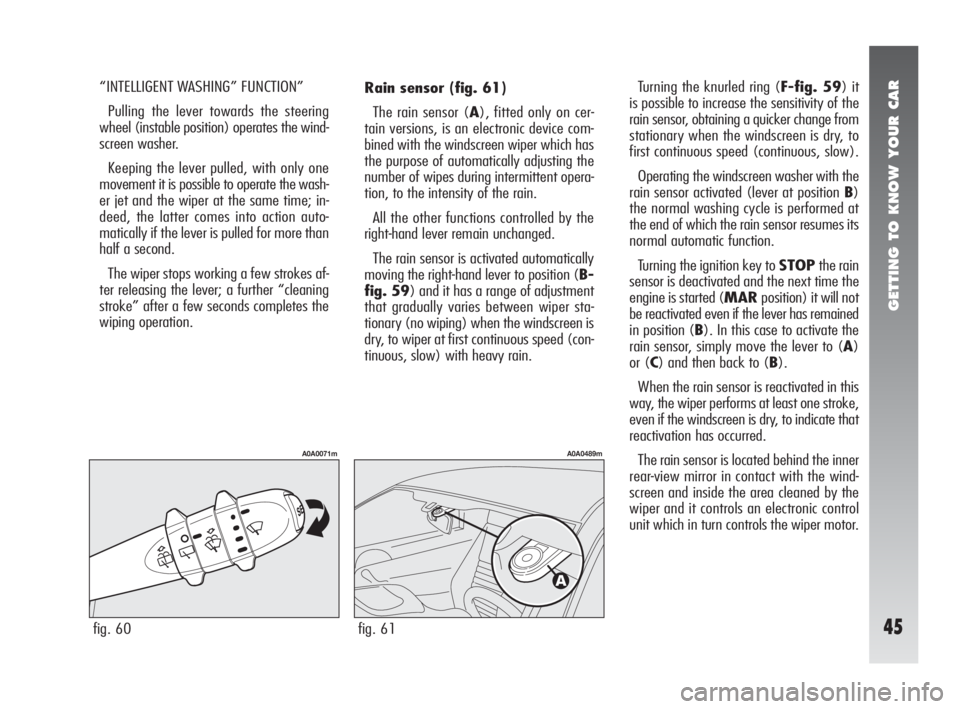
Rain sensor (fig. 61)
The rain sensor (A), fitted only on cer-
tain versions, is an electronic device com-
bined with the windscreen wiper which has
the purpose of automatically adjusting the
number of wipes during intermittent opera-
tion, to the intensity of the rain.
All the other functions controlled by the
right-hand lever remain unchanged.
The rain sensor is activated automatically
moving the right-hand lever to position (B-
fig. 59) and it has a range of adjustment
that gradually varies between wiper sta-
tionary (no wiping) when the windscreen is
dry, to wiper at first continuous speed (con-
tinuous, slow) with heavy rain.Turning the knurled ring (F-fig. 59) it
is possible to increase the sensitivity of the
rain sensor, obtaining a quicker change from
stationary when the windscreen is dry, to
first continuous speed (continuous, slow).
Operating the windscreen washer with the
rain sensor activated (lever at position B)
the normal washing cycle is performed at
the end of which the rain sensor resumes its
normal automatic function.
Turning the ignition key to STOPthe rain
sensor is deactivated and the next time the
engine is started (MARposition) it will not
be reactivated even if the lever has remained
in position (B). In this case to activate the
rain sensor, simply move the lever to (A)
or (C) and then back to (B).
When the rain sensor is reactivated in this
way, the wiper performs at least one stroke,
even if the windscreen is dry, to indicate that
reactivation has occurred.
The rain sensor is located behind the inner
rear-view mirror in contact with the wind-
screen and inside the area cleaned by the
wiper and it controls an electronic control
unit which in turn controls the wiper motor. “INTELLIGENT WASHING” FUNCTION”
Pulling the lever towards the steering
wheel (instable position) operates the wind-
screen washer.
Keeping the lever pulled, with only one
movement it is possible to operate the wash-
er jet and the wiper at the same time; in-
deed, the latter comes into action auto-
matically if the lever is pulled for more than
half a second.
The wiper stops working a few strokes af-
ter releasing the lever; a further “cleaning
stroke” after a few seconds completes the
wiping operation.
fig. 60
A0A0071m
fig. 61
A0A0489m
Page 52 of 291
GETTING TO KNOW YOUR CAR
50
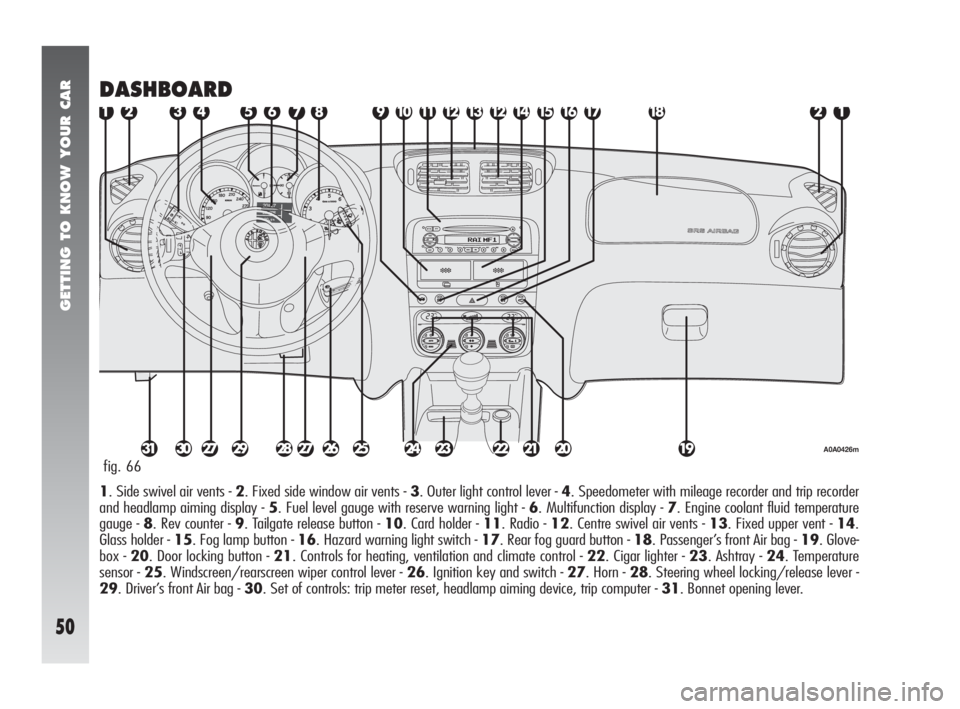
DASHBOARD
1. Side swivel air vents - 2. Fixed side window air vents - 3. Outer light control lever - 4. Speedometer with mileage recorder and trip recorder
and headlamp aiming display - 5. Fuel level gauge with reserve warning light - 6. Multifunction display - 7. Engine coolant fluid temperature
gauge - 8. Rev counter - 9. Tailgate release button - 10. Card holder - 11. Radio - 12. Centre swivel air vents - 13. Fixed upper vent - 14.
Glass holder - 15. Fog lamp button - 16. Hazard warning light switch - 17. Rear fog guard button - 18. Passenger’s front Air bag - 19. Glove-
box - 20. Door locking button - 21. Controls for heating, ventilation and climate control - 22. Cigar lighter - 23. Ashtray - 24. Temperature
sensor - 25. Windscreen/rearscreen wiper control lever - 26. Ignition key and switch - 27. Horn - 28. Steering wheel locking/release lever -
29. Driver’s front Air bag - 30. Set of controls: trip meter reset, headlamp aiming device, trip computer - 31. Bonnet opening lever. fig. 66
A0A0426m