horn Alfa Romeo 147 2011 Owner handbook (in English)
[x] Cancel search | Manufacturer: ALFA ROMEO, Model Year: 2011, Model line: 147, Model: Alfa Romeo 147 2011Pages: 291, PDF Size: 5.52 MB
Page 52 of 291
GETTING TO KNOW YOUR CAR
50
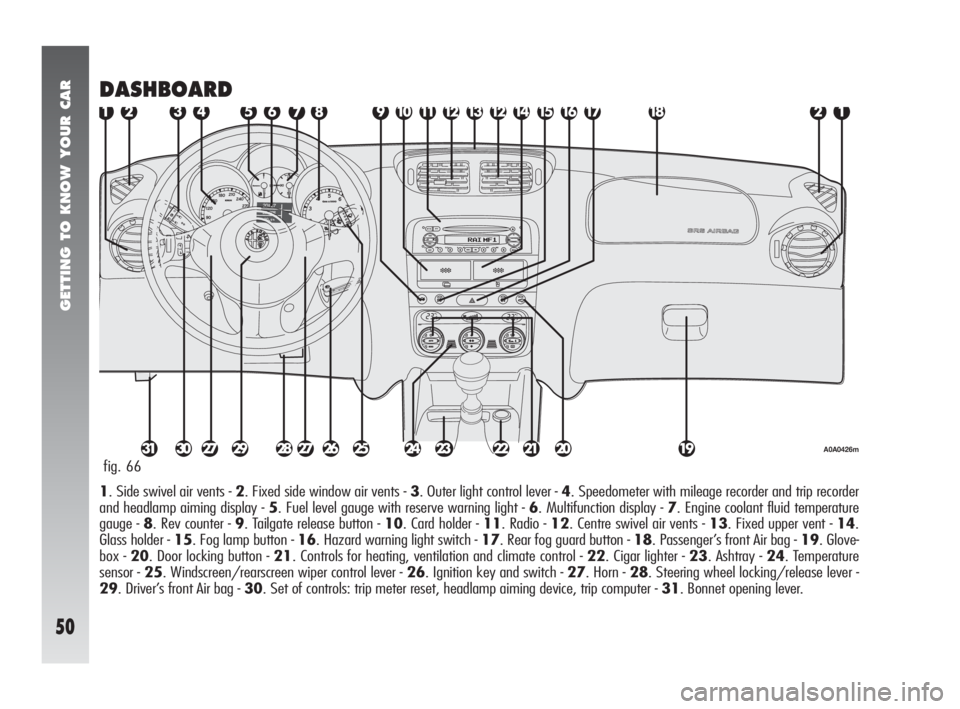
DASHBOARD
1. Side swivel air vents - 2. Fixed side window air vents - 3. Outer light control lever - 4. Speedometer with mileage recorder and trip recorder
and headlamp aiming display - 5. Fuel level gauge with reserve warning light - 6. Multifunction display - 7. Engine coolant fluid temperature
gauge - 8. Rev counter - 9. Tailgate release button - 10. Card holder - 11. Radio - 12. Centre swivel air vents - 13. Fixed upper vent - 14.
Glass holder - 15. Fog lamp button - 16. Hazard warning light switch - 17. Rear fog guard button - 18. Passenger’s front Air bag - 19. Glove-
box - 20. Door locking button - 21. Controls for heating, ventilation and climate control - 22. Cigar lighter - 23. Ashtray - 24. Temperature
sensor - 25. Windscreen/rearscreen wiper control lever - 26. Ignition key and switch - 27. Horn - 28. Steering wheel locking/release lever -
29. Driver’s front Air bag - 30. Set of controls: trip meter reset, headlamp aiming device, trip computer - 31. Bonnet opening lever. fig. 66
A0A0426m
Page 143 of 291
GETTING TO KNOW YOUR CAR
141
ADVICE
Road safety
You are advised to learn how to use the
various radio functions (e.g. storing stations)
before starting to drive.
Reception conditions
Reception conditions change constantly
when driving. Reception may be disturbed
by the presence of mountains, buildings or
bridges particularly when far away from the
station being listened to.
IMPORTANTWhen receiving traffic in-
formation, the volume may be higher than
normal.Care and maintenance
The radio structure ensures long operation
with no need for particular maintenance.
In the event of a fault, contact Authorised
Alfa Romeo Services.
To clean the front panel only use a soft,
antistatic cloth. Cleaning and polishing prod-
ucts might spoil the surface.
Compact Disc
Remember that dirt, marks or distortion on
Compact Discs can cause skipping and poor
sound quality. For top performance condi-
tions, we give the following advice:
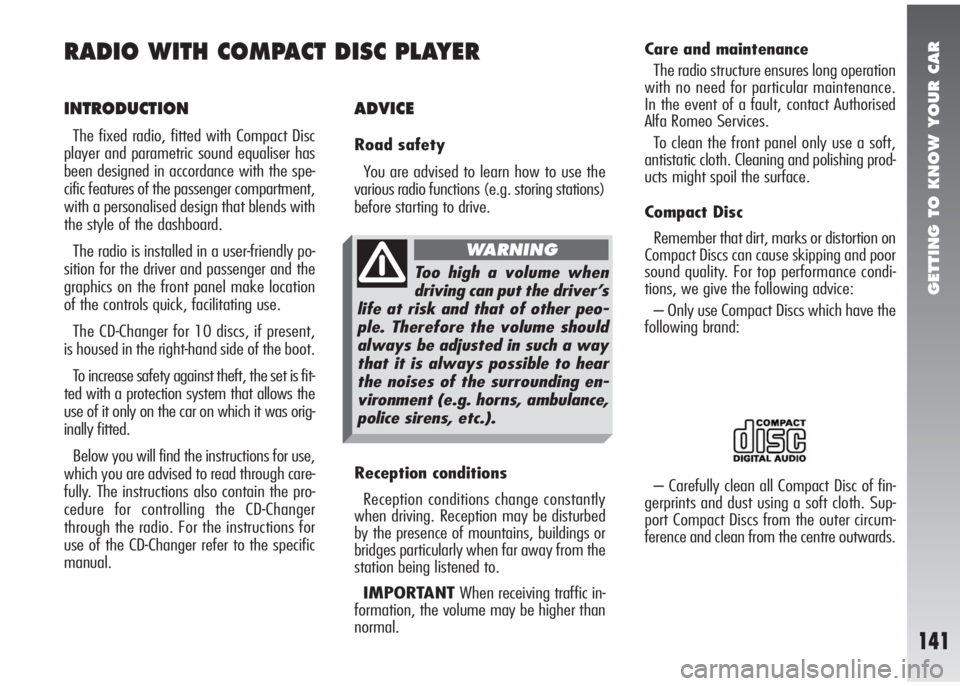
– Only use Compact Discs which have the
following brand:
– Carefully clean all Compact Disc of fin-
gerprints and dust using a soft cloth. Sup-
port Compact Discs from the outer circum-
ference and clean from the centre outwards.
INTRODUCTION
The fixed radio, fitted with Compact Disc
player and parametric sound equaliser has
been designed in accordance with the spe-
cific features of the passenger compartment,
with a personalised design that blends with
the style of the dashboard.
The radio is installed in a user-friendly po-
sition for the driver and passenger and the
graphics on the front panel make location
of the controls quick, facilitating use.
The CD-Changer for 10 discs, if present,
is housed in the right-hand side of the boot.
To increase safety against theft, the set is fit-
ted with a protection system that allows the
use of it only on the car on which it was orig-
inally fitted.
Below you will find the instructions for use,
which you are advised to read through care-
fully. The instructions also contain the pro-
cedure for controlling the CD-Changer
through the radio. For the instructions for
use of the CD-Changer refer to the specific
manual.
RADIO WITH COMPACT DISC PLAYER
Too high a volume when
driving can put the driver’s
life at risk and that of other peo-
ple. Therefore the volume should
always be adjusted in such a way
that it is always possible to hear
the noises of the surrounding en-
vironment (e.g. horns, ambulance,
police sirens, etc.).
WARNING
Page 182 of 291
CORRECT USE OF THE CAR
180
DRIVING WITH RAIN
Rain and wet roads can be dangerous.
If the road is wet, the traction between
wheel and asphalt is greatly reduced, thus
increasing the stopping distance and de-
creasing road holding.
Here are a few suggestions in the case of
rain:
– Reduce speed and keep further back
from the vehicle in front.
– Heavy rain also reduces visibility. In
these cases, turn on the headlights even dur-
ing the day to make yourself more visible
to others.
– Do not drive over puddles at high speed
and hold the steering wheel firmly: you may
lose control of the car (aquaplaning).
– Position the ventilation controls for
demisting (as described in the chapter (“Get-
ting to know your car”), to prevent visibili-
ty from worsening.
– Routinely check the conditions of the
windscreen wiper blades.
DRIVING IN FOG
– If fog is very thick, avoid travelling
where possible. If travelling with mist,
ground fog or the possibility of fog banks:
– Drive at moderate speed.
– Also in the day turn on the dipped-beam
headlights, rear fog guards and front fog
lights. Do not use the main-beam headlights.
IMPORTANTIf visibility in some parts
improves, switch off the rear fog guards; the
intense light disturbs the occupants of ve-
hicles behind.
– Remember that fog also involves wet
asphalt, thus greater difficulty in all types of
manoeuvres and longer stopping distances.
– Keep well away from the vehicle in
front.
– Where possible avoid sudden changes
in speed.
– Possibly avoid overtaking other vehicles.
– If the vehicle is forced to stop (faults,
impossibility to continue due to poor visi-
bility, etc.), firstly try to pull off the road.
Then turn on the hazard warning lights and,
if possible the dipped-beam headlights.
Rhythmically sound the horn if you note an-
other car coming.
MOUNTAIN DRIVING
– When travelling down hill use the en-
gine braking by engaging lower gears to pre-
vent the brakes from overheating.
– Never coast down hill with the engine
off or in neutral and especially not with the
ignition key removed.
– Drive at a moderate speed and avoid
cutting corners.
– Remember that overtaking up hill is
slower and therefore requires a greater
length of clear road. If you are being over-
taken on a hill, move over to enable the oth-
er vehicle to pass in safety.
Page 217 of 291
IN AN EMERGENCY
215
40
40
40
15
15
25
7.5
15
15
20
15
15
7.5
30
50 A/C (MAXI-FUSE)
FAN1 (MAXI-FUSE)
FAN2 (MAXI-FUSE)
F3
F4
F60 (*)
F11
F61 (*)
F62 (*)
F63 (*)
F46
F10
F12
EFI (MAXI-FUSE)
JB3 (MAXI-FUSE) 54
54
54
53
53
52
53
52
52
52
52
53
53
54
54
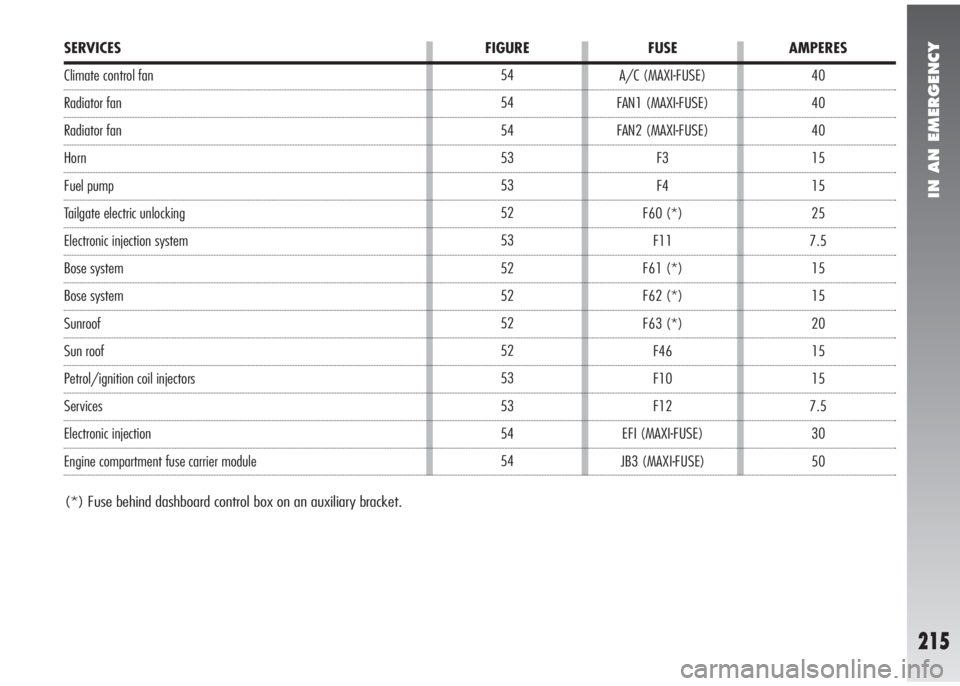
SERVICES FIGURE FUSE AMPERES
(*) Fuse behind dashboard control box on an auxiliary bracket.
Climate control fan
Radiator fan
Radiator fan
Horn
Fuel pump
Tailgate electric unlocking
Electronic injection system
Bose system
Bose system
Sunroof
Sun roof
Petrol/ignition coil injectors
Services
Electronic injection
Engine compartment fuse carrier module
Page 262 of 291
RIGHT HAND DRIVE VERSION
260
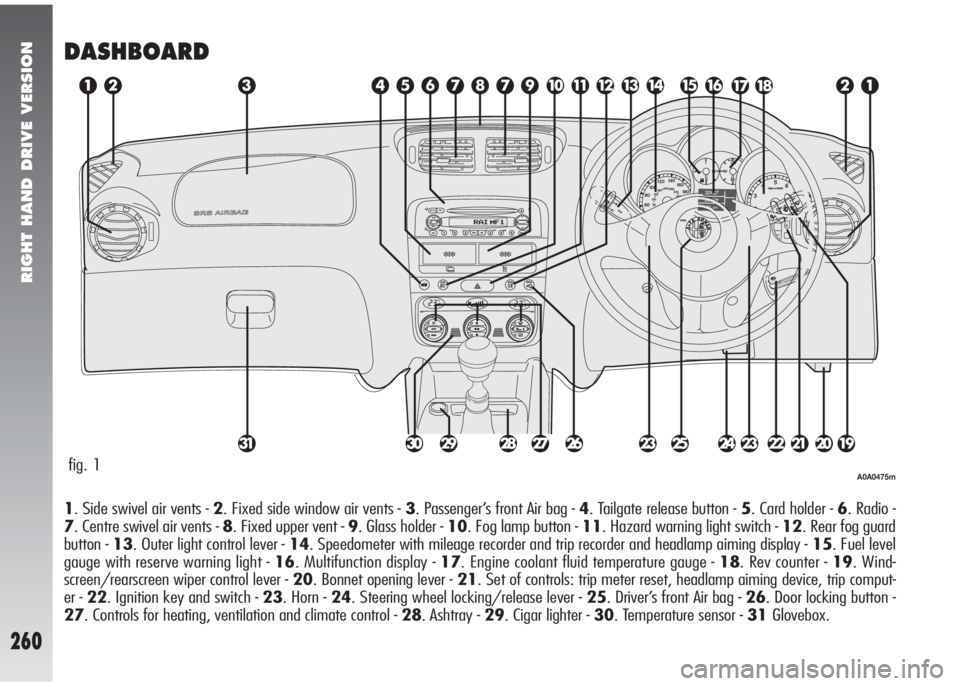
DASHBOARD
1. Side swivel air vents - 2. Fixed side window air vents - 3. Passenger’s front Air bag - 4. Tailgate release button - 5. Card holder - 6. Radio -
7. Centre swivel air vents - 8. Fixed upper vent - 9. Glass holder - 10. Fog lamp button - 11. Hazard warning light switch - 12. Rear fog guard
button - 13. Outer light control lever - 14. Speedometer with mileage recorder and trip recorder and headlamp aiming display - 15. Fuel level
gauge with reserve warning light - 16. Multifunction display - 17. Engine coolant fluid temperature gauge - 18. Rev counter - 19. Wind-
screen/rearscreen wiper control lever - 20. Bonnet opening lever - 21. Set of controls: trip meter reset, headlamp aiming device, trip comput-
er - 22. Ignition key and switch - 23. Horn - 24. Steering wheel locking/release lever - 25. Driver’s front Air bag - 26. Door locking button -
27. Controls for heating, ventilation and climate control - 28. Ashtray - 29. Cigar lighter - 30. Temperature sensor - 31Glovebox.
fig. 1A0A0475m