engine overheat Alfa Romeo 156 2006 Owner handbook (in English)
[x] Cancel search | Manufacturer: ALFA ROMEO, Model Year: 2006, Model line: 156, Model: Alfa Romeo 156 2006Pages: 357, PDF Size: 5.04 MB
Page 96 of 357

GETTING TO KNOW YOUR CAR94
Warning light Message
on display
ç
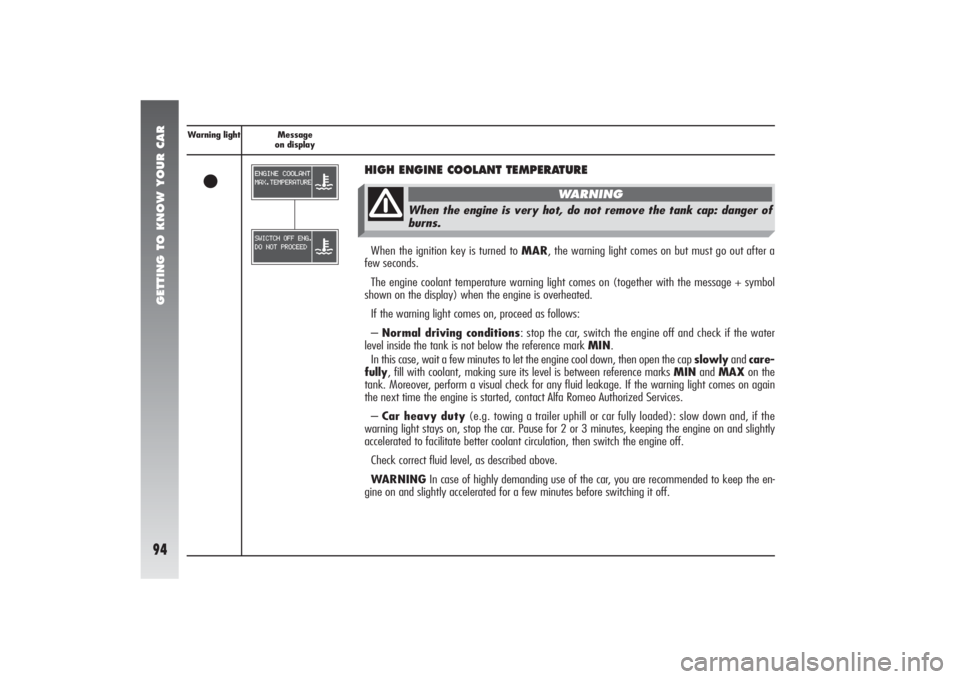
HIGH ENGINE COOLANT TEMPERATUREWhen the ignition key is turned to MAR, the warning light comes on but must go out after a
few seconds.
The engine coolant temperature warning light comes on (together with the message + symbol
shown on the display) when the engine is overheated.
If the warning light comes on, proceed as follows:
– Normal driving conditions: stop the car, switch the engine off and check if the water
level inside the tank is not below the reference mark MIN.
In this case, wait a few minutes to let the engine cool down, then open the cap slowlyand care-
fully, fill with coolant, making sure its level is between reference marks MINand MAXon the
tank. Moreover, perform a visual check for any fluid leakage. If the warning light comes on again
the next time the engine is started, contact Alfa Romeo Authorized Services.
– Car heavy duty(e.g. towing a trailer uphill or car fully loaded): slow down and, if the
warning light stays on, stop the car. Pause for 2 or 3 minutes, keeping the engine on and slightly
accelerated to facilitate better coolant circulation, then switch the engine off.
Check correct fluid level, as described above.
WARNINGIn case of highly demanding use of the car, you are recommended to keep the en-
gine on and slightly accelerated for a few minutes before switching it off.
When the engine is very hot, do not remove the tank cap: danger of
burns.
WARNING
Page 149 of 357

GETTING TO KNOW YOUR CAR
147
STOPPING THE CARTo stop the vehicle, simply release the ac-
celerator pedal and, if necessary, operate
the brake pedal.
Regardless of the gear engaged and of the
operating mode activated (MANUALor
CITY), the system automatically disen-
gages the clutch and downshifts gear.
If you intend to move off again without
having completely stopped the car, this way
the most suitable gear ratio for re-acceler-
ating will be available.
Stopping the vehicle, the system auto-
matically engages first gear (1). Though strongly inadvisable, if due to un-
foreseen circumstances when driving down-
hill the car is allowed to travel with the gear-
box in neutral (N), when the engagement
of a gear is requested, the system auto-
matically engages the best gear to allow
transmission of the torque to the wheels in
relation to the speed of the car.
Downhill with the gear engaged and the
accelerator released (if the vehicle is trav-
elling), if a certain pre-established speed is
exceeded, the system automatically en-
gages the clutch to provide adequate engine
braking.
Due to safety reasons, the Selespeed sys-
tem activates the buzzer when:
– clutch overheating occurs during vehicle
starting; in this case, it is necessary to
“force” moving off avoiding hesitations or
to release the accelerator and use the brake
pedal to park the vehicle if the car is on a
slope;
– the car moves in the opposite direction
to the gear engaged, (e.g.: vehicle moving
forward with reverse engaged); in this sit-
uation it is necessary to stop the vehicle and
keeping the brake pedal pressed, engage
the gear correctly.Still for safety reasons, when the vehicle
is stationary, with the engine started and
gear (1), (2) or (R) engaged, the system
activates the buzzer and shifts to neutral
(N) automatically when:
– there is no action on the accelerator
and/or brake pedal for at least 3 minutes;
– the brake pedal is pressed for over 10
minutes;
– the driver’s door is opened and the ac-
celerator and brake pedal are not pressed
for at least 1 second.
Page 153 of 357

GETTING TO KNOW YOUR CAR
151
SIGNALLING WITH THE BUZZERThe buzzer is activated when:
– reverse gear (R) is engaged;
– the vehicle is parked with the gearbox
at neutral (N); this can be seen turning the
ignition key to STOP;
– clutch overheating takes place during
pick-up;
– the car moves in the opposite direction
to the gear engaged (e.g.: the car tends to
do downhill with reverse gear engaged);
– in the event of gearbox failure;
– the system has automatically engaged
neutral (N) after:•
there is no action on the accelerator
and/or brake pedal for at least 3 min-
utes;
•
the brake pedal is pressed for over 10
minutes;
•
the driver’s door is opened and the ac-
celerator and brake pedal are not
pressed for at least 1 second;
•
detection of a gearbox fault.
PARKING THE VEHICLETo park the car safely it is absolutely
necessaryto engage first gear (1) or re-
verse (R) and, when on a sloping road, also
engage the hand-brake.
Turning the engine off with the car facing
uphill and a gear engaged, it is absolutely
necessaryto wait for the display on the
rev counter to go off before releasing the
brake pedal, so that the clutch has innested
completely.
If the gearbox is in neutral (N) and you
want to engage a parking gear, it is neces-
sary to activate the system and engage the
gear (1) or reverse (R) with your foot on
the brake pedal.
TOWING THE VEHICLEWARNINGFor towing the vehicle, ad-
here to local regulations. Make sure that the
gearbox is in neutral (N) (checking that the
car moves when pushed) and proceed as for
towing a normal car with mechanical gear-
box following the instructions given in the
chapter “In an emergency”.
Should it be impossible to set to neutral,
do not tow the vehicle; contact Alfa Romeo
Authorised Services.
Do not start the engine
when towing the vehicle.
WARNING
Page 160 of 357

GETTING TO KNOW YOUR CAR
158
1st2nd3rd4th
2nd2nd4th4th
Gear engaged Gear ratiomanually available
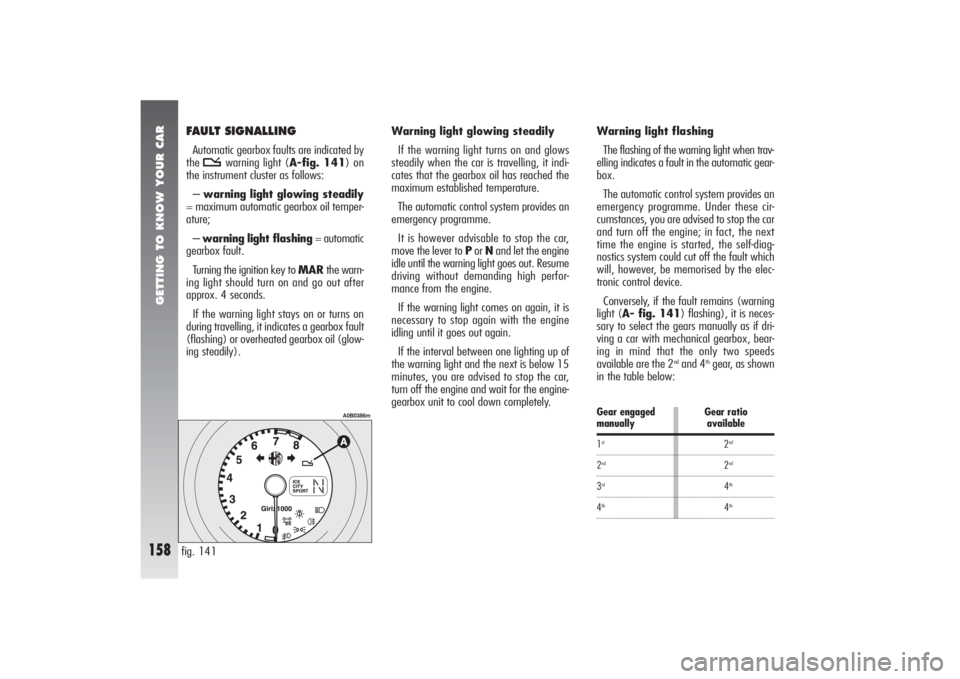
FAULT SIGNALLINGAutomatic gearbox faults are indicated by
the t
warning light (A-fig. 141) on
the instrument cluster as follows:
–warning light glowing steadily
= maximum automatic gearbox oil temper-
ature;
–warning light flashing= automatic
gearbox fault.
Turning the ignition key to MARthe warn-
ing light should turn on and go out after
approx. 4 seconds.
If the warning light stays on or turns on
during travelling, it indicates a gearbox fault
(flashing) or overheated gearbox oil (glow-
ing steadily).Warning light glowing steadily
If the warning light turns on and glows
steadily when the car is travelling, it indi-
cates that the gearbox oil has reached the
maximum established temperature.
The automatic control system provides an
emergency programme.
It is however advisable to stop the car,
move the lever to Por Nand let the engine
idle until the warning light goes out. Resume
driving without demanding high perfor-
mance from the engine.
If the warning light comes on again, it is
necessary to stop again with the engine
idling until it goes out again.
If the interval between one lighting up of
the warning light and the next is below 15
minutes, you are advised to stop the car,
turn off the engine and wait for the engine-
gearbox unit to cool down completely.
fig. 141
A0B0386m
Warning light flashing
The flashing of the warning light when trav-
elling indicates a fault in the automatic gear-
box.
The automatic control system provides an
emergency programme. Under these cir-
cumstances, you are advised to stop the car
and turn off the engine; in fact, the next
time the engine is started, the self-diag-
nostics system could cut off the fault which
will, however, be memorised by the elec-
tronic control device.
Conversely, if the fault remains (warning
light (A- fig. 141) flashing), it is neces-
sary to select the gears manually as if dri-
ving a car with mechanical gearbox, bear-
ing in mind that the only two speeds
available are the 2
ndand 4
thgear, as shown
in the table below:
Page 196 of 357

CORRECT USE OF THE CAR
194
DRIVING IN THE RAINRain and wet roads can be dangerous.
If the road is wet, the traction between
wheel and asphalt is greatly reduced, thus
increasing the stopping distance and de-
creasing road holding.
Here are few suggestions in the case of
rain:
– Reduce speed and keep further back
from the vehicle in front.
– If it is raining particularly heavily, visi-
bility is also reduced. In these cases, switch
on the dipped headlights even if it is still day-
light so you can be seen more easily.
– Do not drive through puddles at speed
and hold on tightly to the wheel if you do: a
puddle taken at high speed might cause you
to lose control of the car (“aquaplaning”).
– Position the ventilation controls for
demisting (see chapter “Getting to know
your car”), to prevent visibility from wors-
ening.
– Routinely check the conditions of the
windscreen wiper blades.
DRIVING IN THE FOG– If fog is very thick, avoid travelling
where possible. If travelling with mist,
ground fog or the possibility of fog banks:
– Drive at moderate speed.
– Also in the day turn on the dipped-beam
headlights, rear fog guards and front fog
lights. Do not use the main beam headlights.
WARNINGOn stretches of road with
good visibility, switch off your rear foglights;
the brightness of these lights could annoy
the people travelling in the cars behind.
– Remember that fog also involves wet
asphalt, thus greater difficulty in all types of
manoeuvres and longer stopping distances.
– Keep well away from the vehicle in
front.
– Where possible avoid sudden changes
in speed.
– Possibly avoid overtaking other vehicles.
– If the vehicle is forced to stop (faults,
impossibility to continue due to poor visi-
bility, etc.), firstly try to pull off the road.
Then turn on the hazard warning lights and,
if possible the dipped beam headlights. Ry-
thmically sound the horn if you note another
car coming.
MOUNTAIN DRIVING– When driving downhill, use the engine
braking by engaging a low gear, to prevent
the brakes from overheating.
– Never coast downhill with the engine off
or in neutral and especially not with the ig-
nition key removed.
– Drive at moderate speed and avoid “cut-
ting” corners.
– Remember that overtaking up hill is
slower and therefore requires a greater
length of clear road. If you are being over-
taken on a hill, move over to enable the
other vehicle to pass in safety.
Page 216 of 357

IN AN EMERGENCY
214
INFLATING PROCEDURE 1)Place the wheel in the position illus-
trated in the figure (A-fig. 13) for the op-
eration with the valve, then engage the
handbrake.
2)Screw the filling pipe (B-fig. 14) to
the bottle (C).
3)Unscrew the tyre valve plug, remove
the element inside the valve by using the
appropriate tool (D-fig. 15); be careful
not to place it on the sand or on a dirty sur-
face .
4)Introduce the filling pipe (B-fig. 16)
in the tyre valve, keep the bottle (C-fig.
16) with the pipe directed downwards, then
press it so that the whole sealer can get in-
to the tyre.5)Screw again the element inside the
valve with the tool (D-fig. 17).
6)Use the appropriate lever (E-fig. 18)
to insert and clamp the air compressor pipe
(F) to the tyre valve.
7)Start the engine, insert the plug (G-
fig. 19) in the lighter (or socket 12V) and
inflate the tyre according to the right pres-
sure value (see “Cold inflation pressures” in
the “Technical specification” chapter). You
are advised to check the tyre pressure val-
ue on the pressure gauge (H-fig. 18) with
the compressor off, in order to have a more
accurate reading.fig. 13
A0B0334m
fig. 14
A0B335m
IT IS NECESSARY TO KNOW
THAT:The sealer included in the quick repairing
kit, good for temperatures between –30°C
e +80°C, is not adequate for permanent
fixing.
The liquid inside the tyre can be easily re-
moved with water.
The sealer has no expire date.
Do not operate the com-
pressor for more than 20
minutes. Risk of overheating.
WARNING