clock Alfa Romeo 156 2007 Owner handbook (in English)
[x] Cancel search | Manufacturer: ALFA ROMEO, Model Year: 2007, Model line: 156, Model: Alfa Romeo 156 2007Pages: 357, PDF Size: 5.04 MB
Page 20 of 357
GETTING TO KNOW YOUR CAR18
STEERING LOCKEngaging lock:
– move the ignition key to the STOPor
PARKposition and remove the key lightly
turning the steering wheel to facilitate the
locking action.
Releasing the lock:
– turn the key to the MARposition and
gently rock the steering wheel.
DOORS
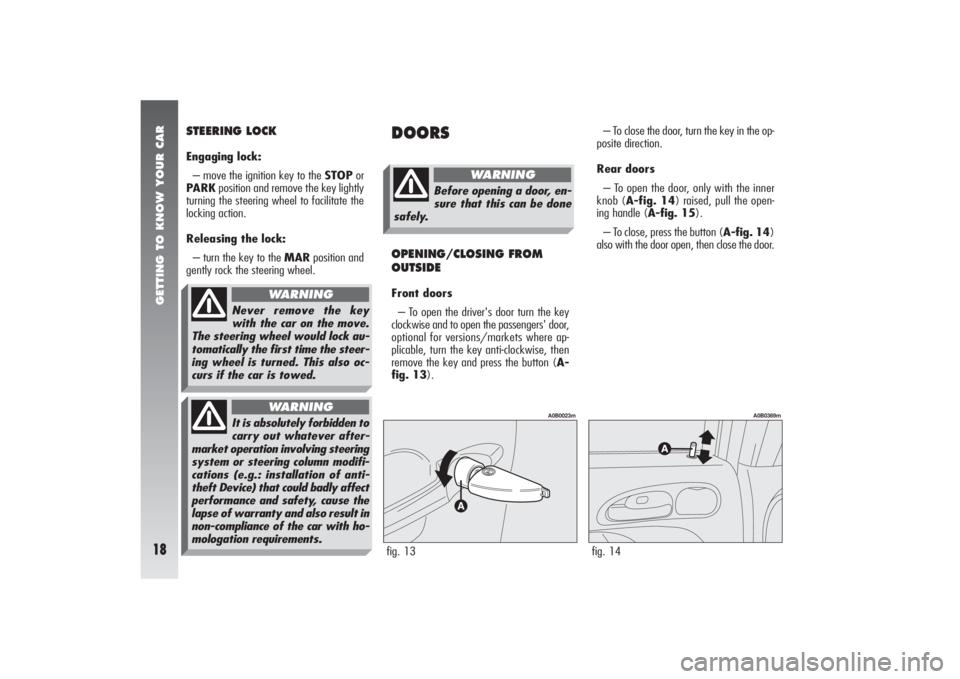
– To close the door, turn the key in the op-
posite direction.
Rear doors
– To open the door, only with the inner
knob (A-fig. 14) raised, pull the open-
ing handle (A-fig. 15).
– To close, press the button (A-fig. 14)
also with the door open, then close the door.
OPENING/CLOSING FROM
OUTSIDEFront doors
– To open the driver's door turn the key
clockwise and to open the passengers' door,
optional for versions/markets where ap-
plicable, turn the key anti-clockwise, then
remove the key and press the button (A-
fig. 13).fig. 13
A0B0023m
fig. 14
A0B0369m
Never remove the key
with the car on the move.
The steering wheel would lock au-
tomatically the first time the steer-
ing wheel is turned. This also oc-
curs if the car is towed.
WARNING
It is absolutely forbidden to
carry out whatever after-
market operation involving steering
system or steering column modifi-
cations (e.g.: installation of anti-
theft Device) that could badly affect
performance and safety, cause the
lapse of warranty and also result in
non-compliance of the car with ho-
mologation requirements.
WARNING
Before opening a door, en-
sure that this can be done
safely.
WARNING
Page 58 of 357
GETTING TO KNOW YOUR CAR56
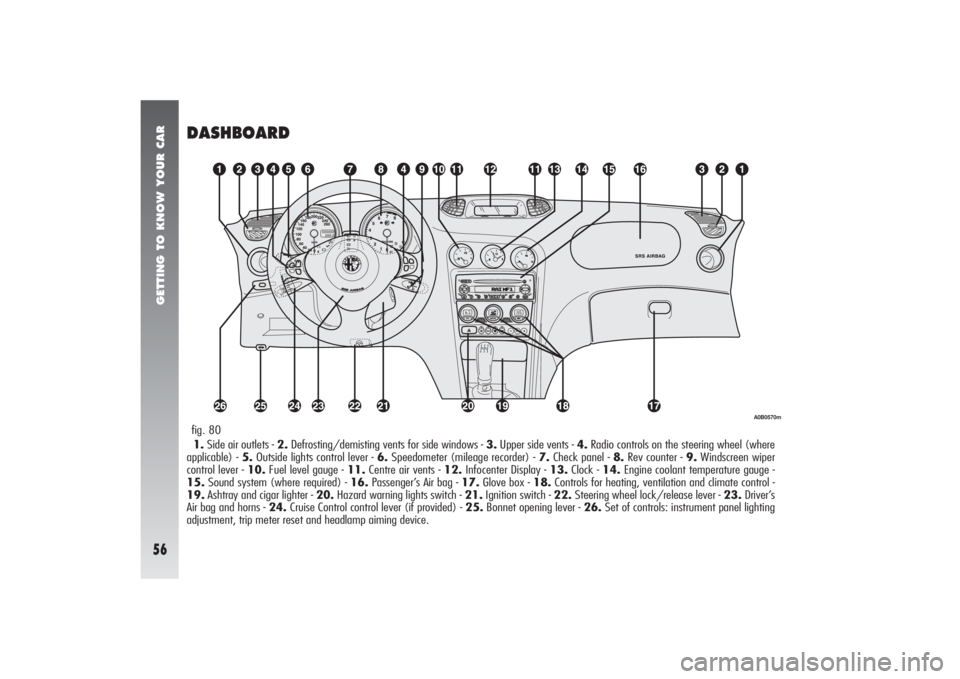
DASHBOARD1.Side air outlets - 2.Defrosting/demisting vents for side windows - 3.Upper side vents - 4.Radio controls on the steering wheel (where
applicable) - 5.Outside lights control lever - 6.Speedometer (mileage recorder) - 7.Check panel - 8.Rev counter - 9.Windscreen wiper
control lever - 10.Fuel level gauge - 11.Centre air vents - 12.Infocenter Display - 13.Clock - 14.Engine coolant temperature gauge -
15.Sound system (where required) - 16.Passenger’s Air bag - 17.Glove box - 18.Controls for heating, ventilation and climate control -
19.Ashtray and cigar lighter - 20.Hazard warning lights switch - 21.Ignition switch - 22.Steering wheel lock/release lever - 23.Driver’s
Air bag and horns - 24.Cruise Control control lever (if provided) - 25.Bonnet opening lever - 26.Set of controls: instrument panel lighting
adjustment, trip meter reset and headlamp aiming device.fig. 80
A0B0570m
Page 59 of 357
GETTING TO KNOW YOUR CAR57
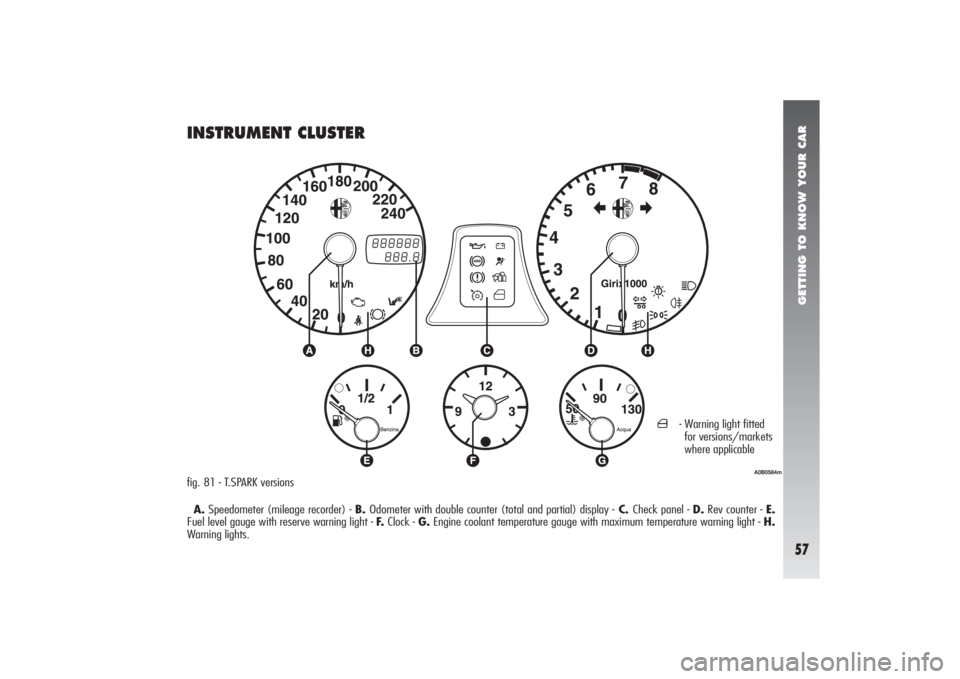
INSTRUMENT CLUSTERfig. 81 - T.SPARK versions
A.Speedometer (mileage recorder) - B. Odometer with double counter (total and partial) display -C. Check panel - D.Rev counter - E.
Fuel level gauge with reserve warning light - F.Clock - G.Engine coolant temperature gauge with maximum temperature warning light - H.
Warning lights.
A0B0584m
´
- Warning light fitted
for versions/markets
where applicable
Page 60 of 357
GETTING TO KNOW YOUR CAR58
A0B0695m
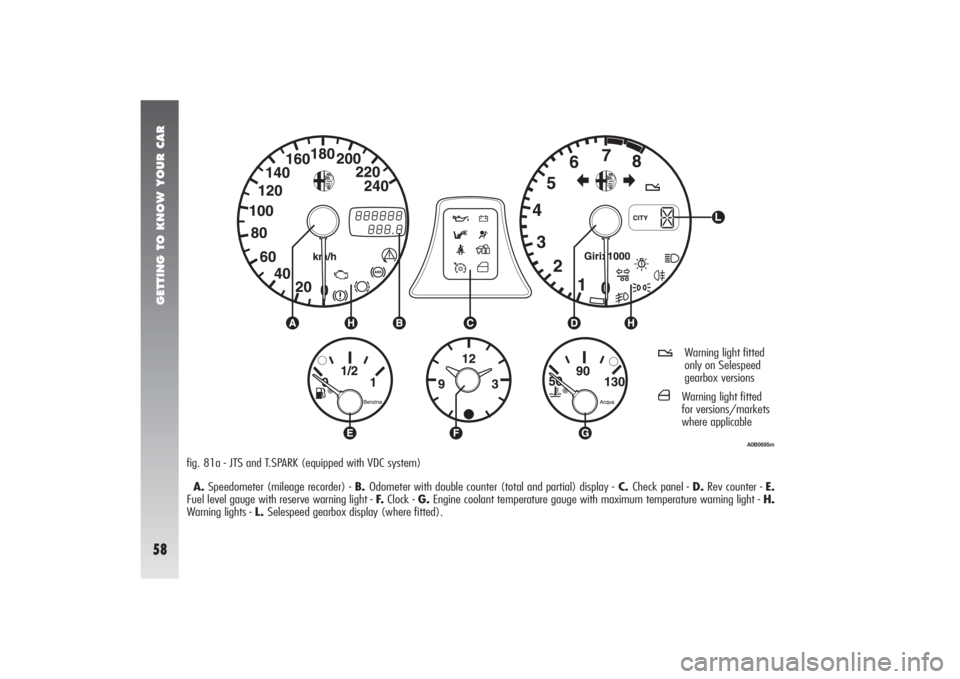
fig. 81a - JTS and T.SPARK (equipped with VDC system)
A.Speedometer (mileage recorder) - B. Odometer with double counter (total and partial) display -C. Check panel - D.Rev counter - E.
Fuel level gauge with reserve warning light - F.Clock - G.Engine coolant temperature gauge with maximum temperature warning light - H.
Warning lights - L. Selespeed gearbox display (where fitted).
t
Warning light fitted
only on Selespeed
gearbox versions
´
Warning light fitted
for versions/markets
where applicable
Page 61 of 357
GETTING TO KNOW YOUR CAR59
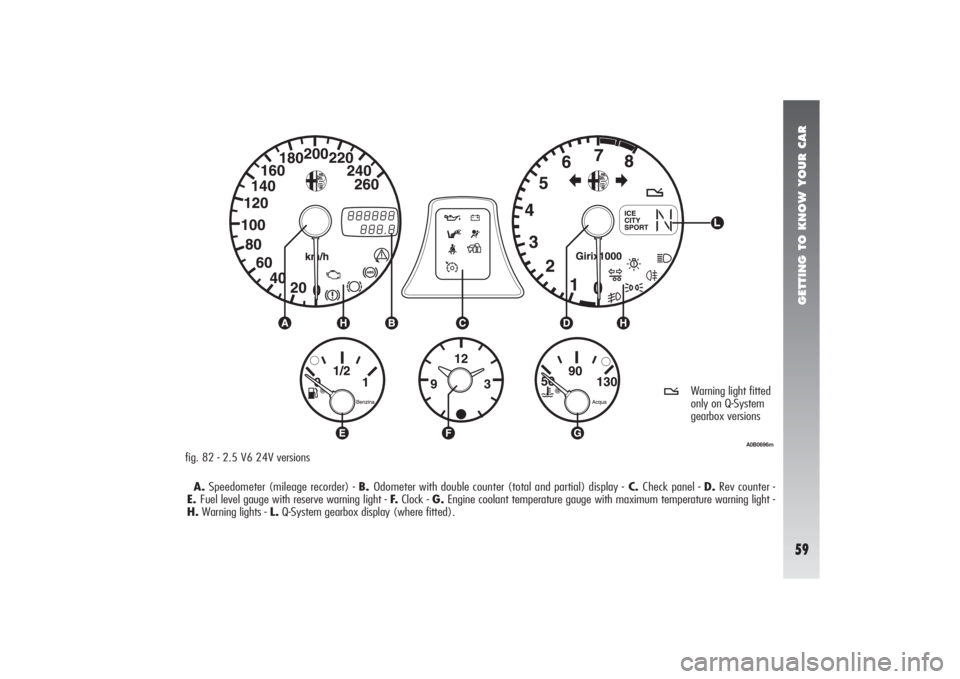
A.Speedometer (mileage recorder) - B. Odometer with double counter (total and partial) display -C. Check panel - D.Rev counter -
E.Fuel level gauge with reserve warning light - F.Clock - G.Engine coolant temperature gauge with maximum temperature warning light -
H.Warning lights - L.Q-System gearbox display (where fitted).fig. 82 - 2.5 V6 24V versions
A0B0696m
t
Warning light fitted
only on Q-System
gearbox versions
Page 62 of 357
GETTING TO KNOW YOUR CAR60
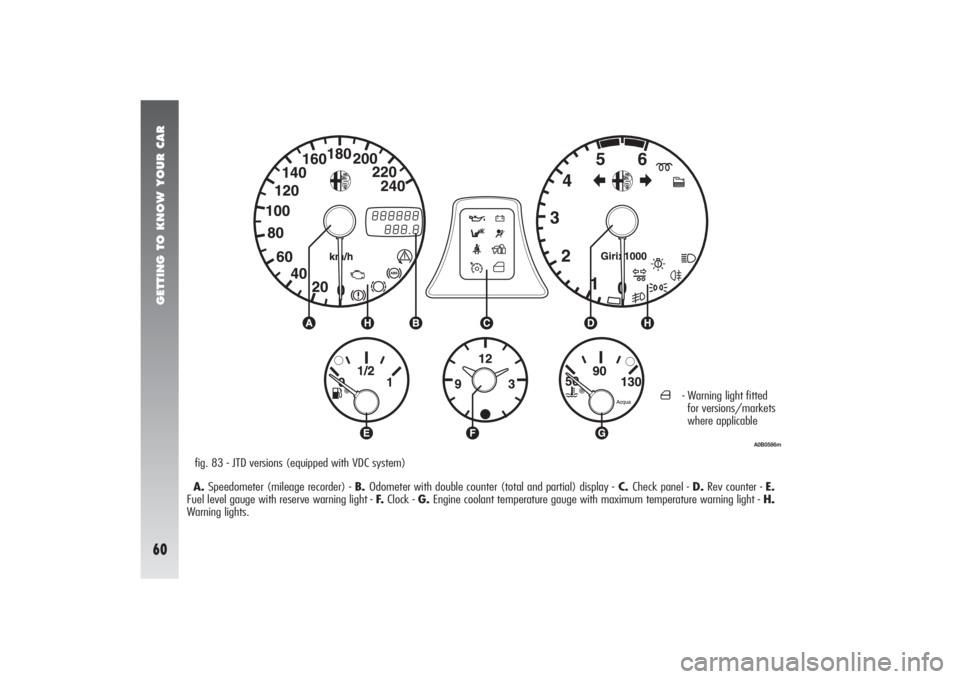
A.Speedometer (mileage recorder) - B. Odometer with double counter (total and partial) display -C. Check panel - D.Rev counter - E.
Fuel level gauge with reserve warning light - F.Clock - G.Engine coolant temperature gauge with maximum temperature warning light - H.
Warning lights.fig. 83 - JTD versions (equipped with VDC system)
A0B0586m
´
- Warning light fitted
for versions/markets
where applicable
Page 63 of 357
GETTING TO KNOW YOUR CAR61
A0B0597m
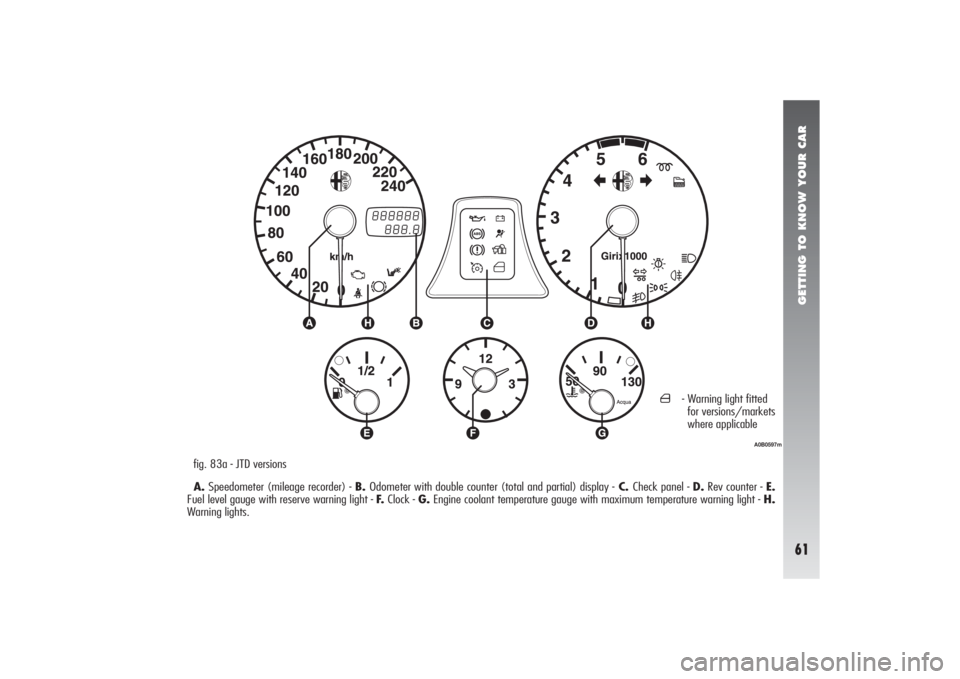
fig. 83a - JTD versions
A.Speedometer (mileage recorder) - B. Odometer with double counter (total and partial) display -C. Check panel - D.Rev counter - E.
Fuel level gauge with reserve warning light - F.Clock - G.Engine coolant temperature gauge with maximum temperature warning light - H.
Warning lights.
´
- Warning light fitted
for versions/markets
where applicable
Page 113 of 357
GETTING TO KNOW YOUR CAR
111
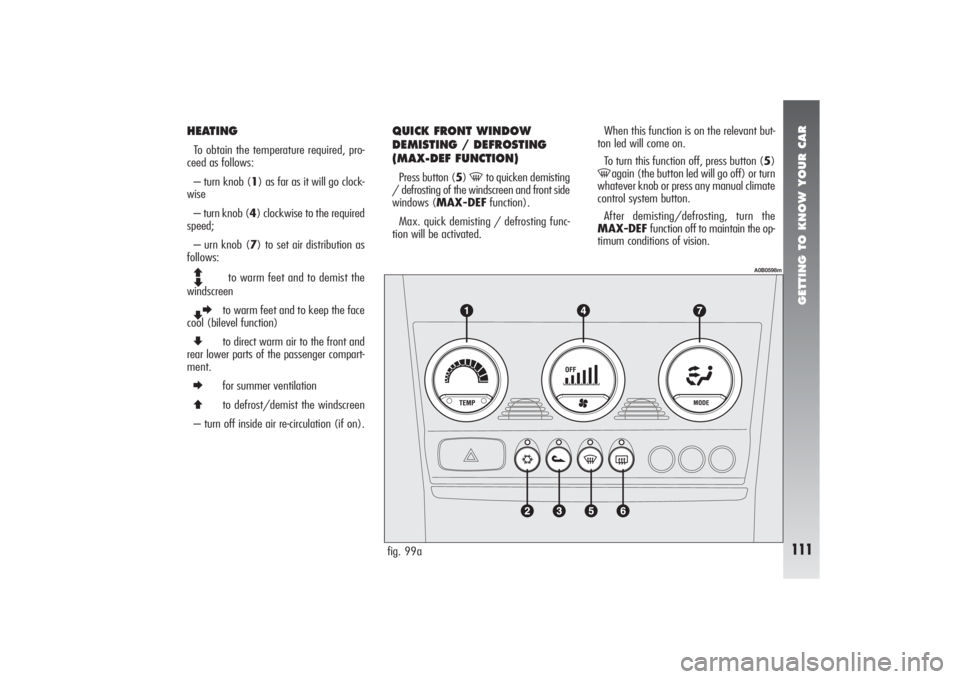
HEATINGTo obtain the temperature required, pro-
ceed as follows:
– turn knob (1) as far as it will go clock-
wise
– turn knob (4) clockwise to the required
speed;
– urn knob (7) to set air distribution as
follows:Q
Z
to warm feet and to demist the
windscreen
ZE
to warm feet and to keep the face
cool (bilevel function)
Z
to direct warm air to the front and
rear lower parts of the passenger compart-
ment.
E
for summer ventilation
Q
to defrost/demist the windscreen
– turn off inside air re-circulation (if on).
fig. 99a
A0B0598m
QUICK FRONT WINDOW
DEMISTING / DEFROSTING
(MAX-DEF FUNCTION)Press button (5)
-
to quicken demisting
/ defrosting of the windscreen and front side
windows (MAX-DEFfunction).
Max. quick demisting / defrosting func-
tion will be activated.When this function is on the relevant but-
ton led will come on.
To turn this function off, press button (5)
-
again (the button led will go off) or turn
whatever knob or press any manual climate
control system button.
After demisting/defrosting, turn the
MAX-DEF function off to maintain the op-
timum conditions of vision.
Page 114 of 357
GETTING TO KNOW YOUR CAR
112
Preventive demisting procedure
In cases of heavy damp and/or rain
and/or big differences in temperature be-
tween inside the car and outside, it is ad-
visable to proceed as follows to demist the
windows:
– turn off inside air re-circulation (if on)
– turn knob (1) as far as it will go clock-
wise
– turn knob (4) clockwise to an inter-
mediate speed
– turn knob (7) to
Q
or
ZQ
if the win-
dows do not mist up.
Climate control system is very useful to
speed up demisting. Set controls to demist-
ing function as described previously and
switch the climate control system on by
pressing button (2)
√
REARSCREEN AND WING
MIRROR (where applicable)
DEMISTING / DEFROSTINGPress button (6)
(
) to demist /defrost
the rearscreen and wing mirrors (where ap-
plicable).
When this function is on the relevant but-
ton led will come on.
To turn this function off, press the button
again, the button led will go off.
WARNINGDo not apply stickers on the
inside of the rearscreen over the heating fil-
aments to avoid damaging it.
FAN SPEED ADJUSTMENTTo ventilate the passenger's compartment
properly, proceed as follows:
– open completely the central and side
vents;
– turn knob (4) to the required speed;
– turn knob (7) to
E;
– - turn off inside air re-circulation (if on).
Page 115 of 357
GETTING TO KNOW YOUR CAR
113
SWITCHING THE INSIDE AIR
RE-CIRCULATION FUNCTION
ONPress button (3)
v
to turn the inside air
re-circulation function on.
When this function is on the relevant but-
ton led will come on.
It is advisable to turn on the inside air re-
circulation function in queues or tunnels to
avoid admitting polluted air from outside.
The prolonged use of this function should
however be avoided, especially with several
persons on board, to avoid the possibility of
the windows misting inside.WARNINGThe inside air re-circulation
function makes it possible to reach the re-
quired "heating" or "cooling" conditions
faster.
It is however inadvisable to use it on
rainy/cold days as it would considerably in-
crease the possibility of the windows mist-
ing inside, especially if the climate control
system is off.
CLIMATE CONTROL (COOLING) Proceed as follows:
– turn knob (1) as far as it will go coun-
terclockwise (blue led next to TEMPlit);
– turn knob (4) to the required speed;
– turn knob (7) to
E;
-– press buttons (2) √
and (3)
v
the
relevant leds will go on.