check engine light Alfa Romeo 159 2006 Owner handbook (in English)
[x] Cancel search | Manufacturer: ALFA ROMEO, Model Year: 2006, Model line: 159, Model: Alfa Romeo 159 2006Pages: 299, PDF Size: 4.64 MB
Page 21 of 299
19
SAFETY
DEVICES
WARNING LIGHTS
AND MESSAGES
IN AN
EMERGENCY
CAR
MAINTENANCE
TECHNICAL
SPECIFICATIONS
INDEX
DASHBOARD
AND
CONTROLS
CORRECT USE
OF THE CAR
IGNITION DEVICE
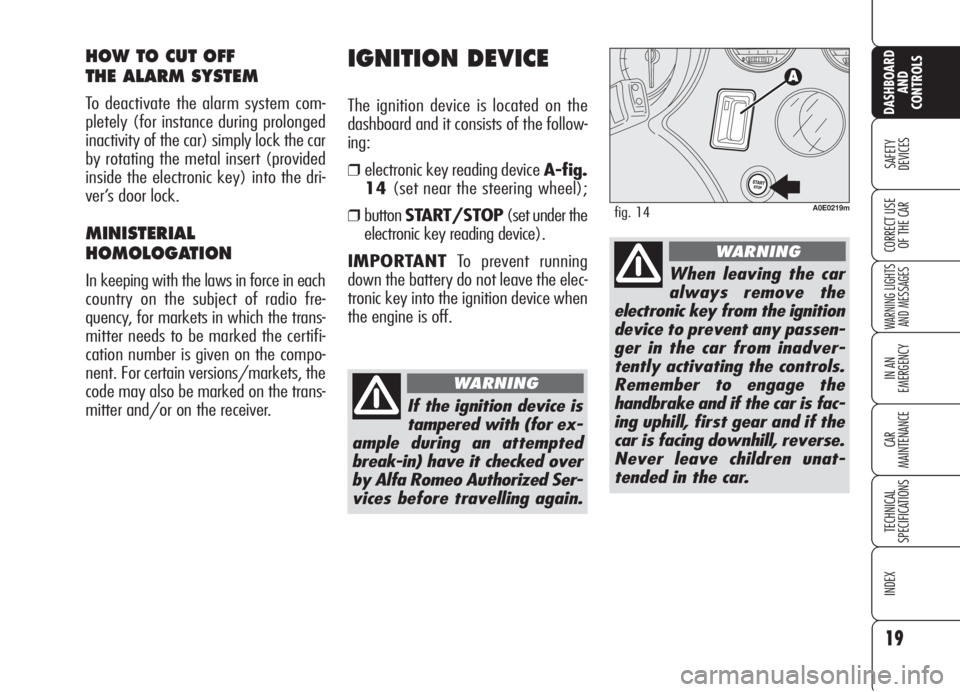
The ignition device is located on the
dashboard and it consists of the follow-
ing:
❒electronic key reading device A-fig.
14(set near the steering wheel);
❒buttonSTART/STOP(set under the
electronic key reading device).
IMPORTANTTo prevent running
down the battery do not leave the elec-
tronic key into the ignition device when
the engine is off.
HOW TO CUT OFF
THE ALARM SYSTEM
To deactivate the alarm system com-
pletely (for instance during prolonged
inactivity of the car) simply lock the car
by rotating the metal insert (provided
inside the electronic key) into the dri-
ver’s door lock.
MINISTERIAL
HOMOLOGATION
In keeping with the laws in force in each
country on the subject of radio fre-
quency, for markets in which the trans-
mitter needs to be marked the certifi-
cation number is given on the compo-
nent. For certain versions/markets, the
code may also be marked on the trans-
mitter and/or on the receiver.
A0E0219mfig. 14
If the ignition device is
tampered with (for ex-
ample during an attempted
break-in) have it checked over
by Alfa Romeo Authorized Ser-
vices before travelling again.
WARNING
When leaving the car
always remove the
electronic key from the ignition
device to prevent any passen-
ger in the car from inadver-
tently activating the controls.
Remember to engage the
handbrake and if the car is fac-
ing uphill, first gear and if the
car is facing downhill, reverse.
Never leave children unat-
tended in the car.
WARNING
Page 22 of 299
IMPORTANTIf when fitting the elec-
tronic key into the ignition device, the
warning light
Yon the instrument pan-
el comes on (on certain versions to-
gether with a message on the display),
check whether the electronic key is the
proper one and then try to refit it into
the ignition device. If the problem per-
sists contact Alfa Romeo Authorized Ser-
vices.
TURNING THE INSTRUMENT
PANEL OFF
With engine off and clutch and brake
pedals released, press button START/
STOPor remove the electronic key
from the ignition device.
A few seconds after the instrument pan-
el display will turn off gradually.
IMPORTANTContact Alfa Romeo Au-
thorized Services if the instrument pan-
el fails to turn off.
TURNING THE INSTRUMENT
PANEL ON
Proceed as follows:
❒fit the electronic key into the ignition
device;
❒if the electronic key is fitted yet, press
buttonSTART/STOPwithout
pressing the clutch or brake pedal.
To safeguard the battery, when leaving
the car with the instrument panel on,
electric and electronic devices will be de-
activated after approx. 1 hour.
IMPORTANTFit completely the elec-
tronic key into the ignition device until
it locks into place.
IMPORTANTContact Alfa Romeo Au-
thorized Services if the instrument pan-
el fails to turn on.
20
SAFETY
DEVICES
WARNING LIGHTS
AND MESSAGES
IN AN
EMERGENCY
CAR
MAINTENANCE
TECHNICAL
SPECIFICATIONS
INDEX
DASHBOARD
AND
CONTROLS
CORRECT USE
OF THE CAR
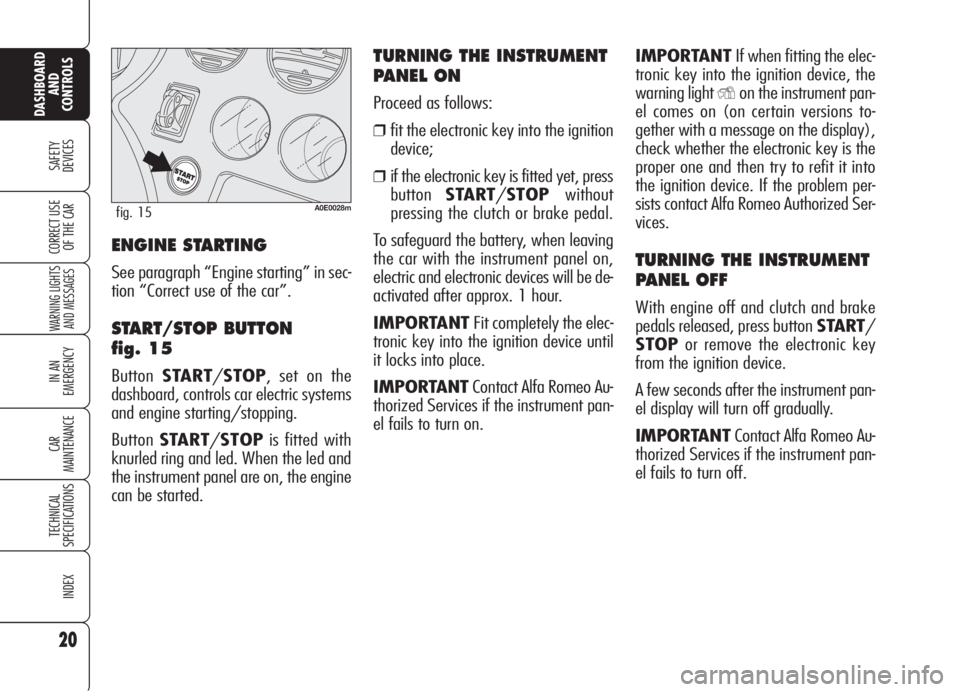
A0E0028mfig. 15
ENGINE STARTING
See paragraph “Engine starting” in sec-
tion “Correct use of the car”.
START/STOP BUTTON
fig. 15
ButtonSTART/STOP, set on the
dashboard, controls car electric systems
and engine starting/stopping.
ButtonSTART/STOPis fitted with
knurled ring and led. When the led and
the instrument panel are on, the engine
can be started.
Page 30 of 299
ENGINE OIL LEVEL
INDICATION
Fitting the electronic key into the igni-
tion device, the display will show for a
few seconds the engine oil level. At this
stage, to clear this indication and to go
to next screen, press button MENU.
Low oil level will be indicated by a ded-
icated warning message on the display.
IMPORTANT Check the proper en-
gine oil level on the dipstick (see para-
graph “Checking levels” in section “Car
maintenance”).
IMPORTANTProper engine oil level
shall be checked with the car on level
ground.
IMPORTANT To read the correct oil
level after fitting the electronic key, wait
for about 2 seconds before starting the
engine.
IMPORTANT Engine oil level could in-
crease after a long stop.
MESSAGES DISPLAYED
AT STARTING
After the engine oil level, the display will
show for a few seconds a message in-
dicating the procedure to follow to start
the engine (PRESS PEDAL AND
START: press brake or clutch pedal and
then press button START/STOPto
start the engine). Scheduled servicing
IMPORTANTThe Service schedule in-
cludes car maintenance every 30,000
km (or 18,000 mi); this is shown au-
tomatically, with the electronic key in-
to the ignition device starting from
2,000 km (or 1,240 mi) from this
deadline and it will be displayed in km
or miles according to the unit set. When
a scheduled service interval (“coupon”)
is near to come, fitting the electronic key
into the ignition device will display a
message followed by the number of
km/mi to go before car servicing. Con-
tact Alfa Romeo Authorized Services to
carry out any service operation provid-
ed by the Service schedule or by the An-
nual inspection plan, and to reset the
display.
28
SAFETY
DEVICES
WARNING LIGHTS
AND MESSAGES
IN AN
EMERGENCY
CAR
MAINTENANCE
TECHNICAL
SPECIFICATIONS
INDEX
CORRECT USE
OF THE CAR
DASHBOARD
AND
CONTROLS
Page 34 of 299
32
SAFETY
DEVICES
WARNING LIGHTS
AND MESSAGES
IN AN
EMERGENCY
CAR
MAINTENANCE
TECHNICAL
SPECIFICATIONS
INDEX
DASHBOARD
AND
CONTROLS
CORRECT USE
OF THE CAR
Selecting “Date” and “Clock”:
❒briefly press button MENUto select
the first value to change (e.g. hours/
minutes or year/month/day);
❒operate buttons +or–(by single
press) to select the new setting;
❒briefly press button MENUto store
the new setting and to go to the next
setup menu option, if this is the last
one you will go back to the previously
selected option of the main menu.
ENGINE OIL LEVEL
INDICATION
Fitting the electronic key into the igni-
tion device, the display will show for a
few seconds the engine oil level. At this
stage, to clear this indication and to go
to next screen, press button MENU.
Low oil level will be indicated by a ded-
icated warning message on the display.
IMPORTANT Check the proper en-
gine oil level on the dipstick (see para-
graph “Checking levels” in section “Car
maintenance”).
IMPORTANTProper engine oil level
shall be checked with the car on level
ground.
IMPORTANT To read the correct oil
level after fitting the electronic key, wait
for about 2 seconds before starting the
engine.
IMPORTANT Engine oil level could in-
crease after a long stop. Selecting an option of the main
menu with submenu:❒briefly press button MENUto display
the first submenu option;
❒operate buttons +or–(by single
press) to scroll all submenu options;
❒briefly press button MENUto select
the displayed submenu option and to
enter the corresponding setup menu;
❒operate buttons +or–(by single
press) to select the new setting of this
submenu option;
❒briefly press button MENUto store
the new setting and go back to the
previously selected submenu option.
Page 47 of 299
Reset Trip B
As concerns the Trip B values, it is pos-
sible to select through the “Setup
Menu” the reset mode (Manual or Au-
tomatic) (see paragraph “Setup Menu”
on previous pages):
❒manual reset: press and keep pressed
buttonTRIPfor over 2 seconds.
❒automatic reset: it takes place each
time the electronic key is fitted into
the ignition device.
At Trip B reset a warning message will
be displayed.
IMPORTANTTrip B reset will not re-
set “Range” and “Current Consump-
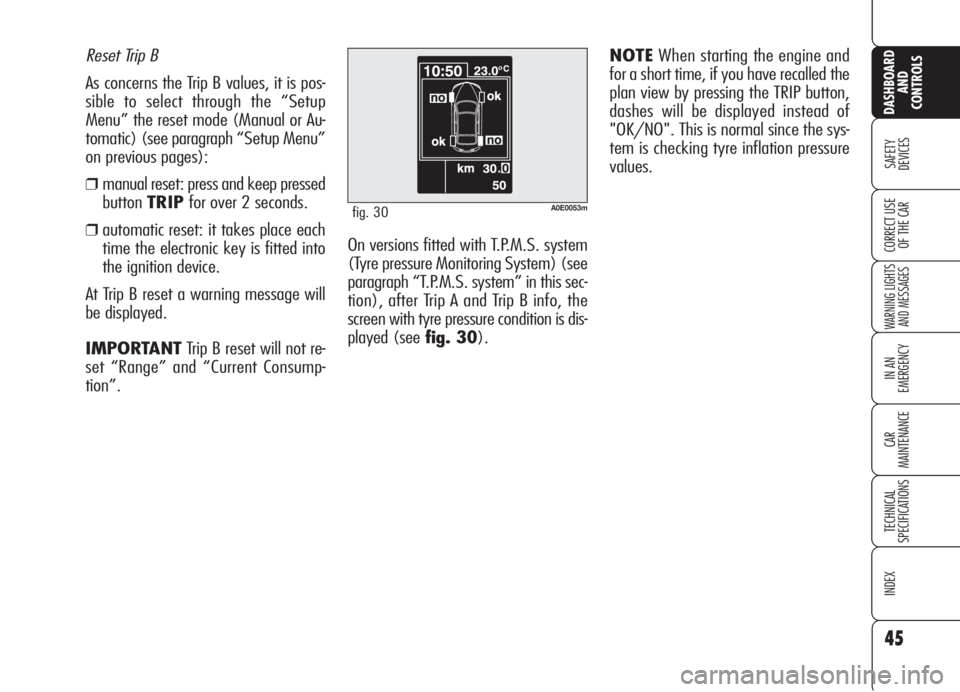
tion”.On versions fitted with T.P.M.S. system
(Tyre pressure Monitoring System) (see
paragraph “T.P.M.S. system” in this sec-
tion), after Trip A and Trip B info, the
screen with tyre pressure condition is dis-
played (see fig. 30).
45
SAFETY
DEVICES
WARNING LIGHTS
AND MESSAGES
IN AN
EMERGENCY
CAR
MAINTENANCE
TECHNICAL
SPECIFICATIONS
INDEX
CORRECT USE
OF THE CAR
DASHBOARD
AND
CONTROLS
A0E0053mfig. 30
NOTEWhen starting the engine and
for a short time, if you have recalled the
plan view by pressing the TRIP button,
dashes will be displayed instead of
"OK/NO". This is normal since the sys-
tem is checking tyre inflation pressure
values.
Page 88 of 299
86
SAFETY
DEVICES
WARNING
LIGHTS AND
MESSAGES
IN AN
EMERGENCY
CAR
MAINTENANCE
TECHNICAL
SPECIFICATIONS
INDEX
CORRECT USE
OF THE CAR
DASHBOARD
AND
CONTROLS
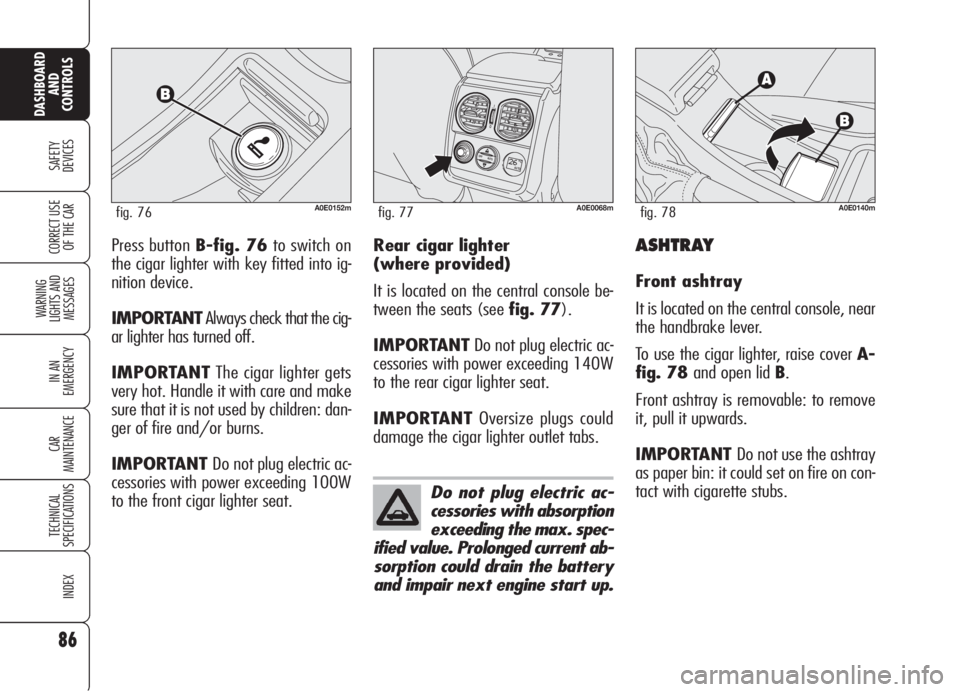
Press button B-fig. 76to switch on
the cigar lighter with key fitted into ig-
nition device.
IMPORTANTAlways check that the cig-
ar lighter has turned off.
IMPORTANTThe cigar lighter gets
very hot. Handle it with care and make
sure that it is not used by children: dan-
ger of fire and/or burns.
IMPORTANT Do not plug electric ac-
cessories with power exceeding 100W
to the front cigar lighter seat.
A0E0152mfig. 76
ASHTRAY
Front ashtray
It is located on the central console, near
the handbrake lever.
To use the cigar lighter, raise cover A-
fig. 78 and open lid B.
Front ashtray is removable: to remove
it, pull it upwards.
IMPORTANT Do not use the ashtray
as paper bin: it could set on fire on con-
tact with cigarette stubs. Rear cigar lighter
(where provided)
It is located on the central console be-
tween the seats (see fig. 77).
IMPORTANTDo not plug electric ac-
cessories with power exceeding 140W
to the rear cigar lighter seat.
IMPORTANTOversize plugs could
damage the cigar lighter outlet tabs.
Do not plug electric ac-
cessories with absorption
exceeding the max. spec-
ified value. Prolonged current ab-
sorption could drain the battery
and impair next engine start up.
OFF
O
I
AUTOAUTO
A0E0068mfig. 77A0E0140mfig. 78
Page 91 of 299
PROGRAMMING
IMPORTANTWhile programming the
system, check for the absence of peo-
ple, animals or objects within the ma-
noeuvre space of main doors or gates to
prevent the risk of injuries or damages.
IMPORTANTPull up the handbrake
and fit the key into the ignition device.
Do not start the engine.Proceed as follows:
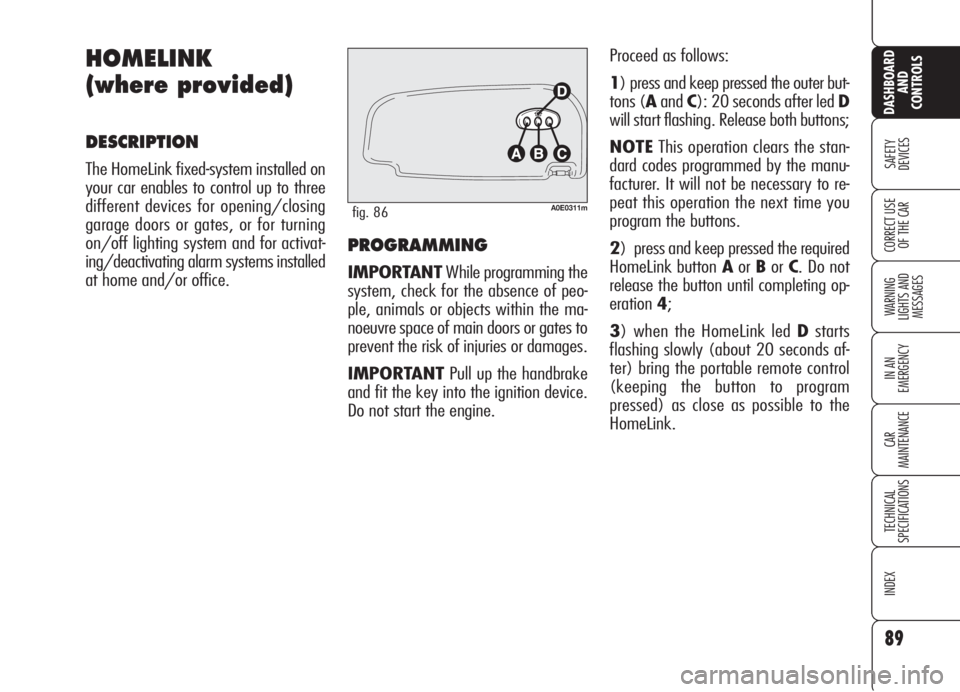
1) press and keep pressed the outer but-
tons (AandC): 20 seconds after led D
will start flashing. Release both buttons;
NOTEThis operation clears the stan-
dard codes programmed by the manu-
facturer. It will not be necessary to re-
peat this operation the next time you
program the buttons.
2) press and keep pressed the required
HomeLink button AorBorC. Do not
release the button until completing op-
eration4;
3) when the HomeLink led Dstarts
flashing slowly (about 20 seconds af-
ter) bring the portable remote control
(keeping the button to program
pressed) as close as possible to the
HomeLink.
89
SAFETY
DEVICES
WARNING
LIGHTS AND
MESSAGES
IN AN
EMERGENCY
CAR
MAINTENANCE
TECHNICAL
SPECIFICATIONS
INDEX
CORRECT USE
OF THE CAR
DASHBOARD
AND
CONTROLS
HOMELINK
(where provided)
DESCRIPTION
The HomeLink fixed-system installed on
your car enables to control up to three
different devices for opening/closing
garage doors or gates, or for turning
on/off lighting system and for activat-
ing/deactivating alarm systems installed
at home and/or office.
A0E0311mfig. 86
Page 93 of 299
Proceed as follows:
❒find the set-up button on the upper
side of the garage door/gate motor.
Colour and position may vary ac-
cording to the manufacturer (consult
the motor handbook);
❒press the motor set-up button (this
action will usually turn up the "set-
up" pilot light). After operation 2,
start to perform operation 3 within
30 seconds;
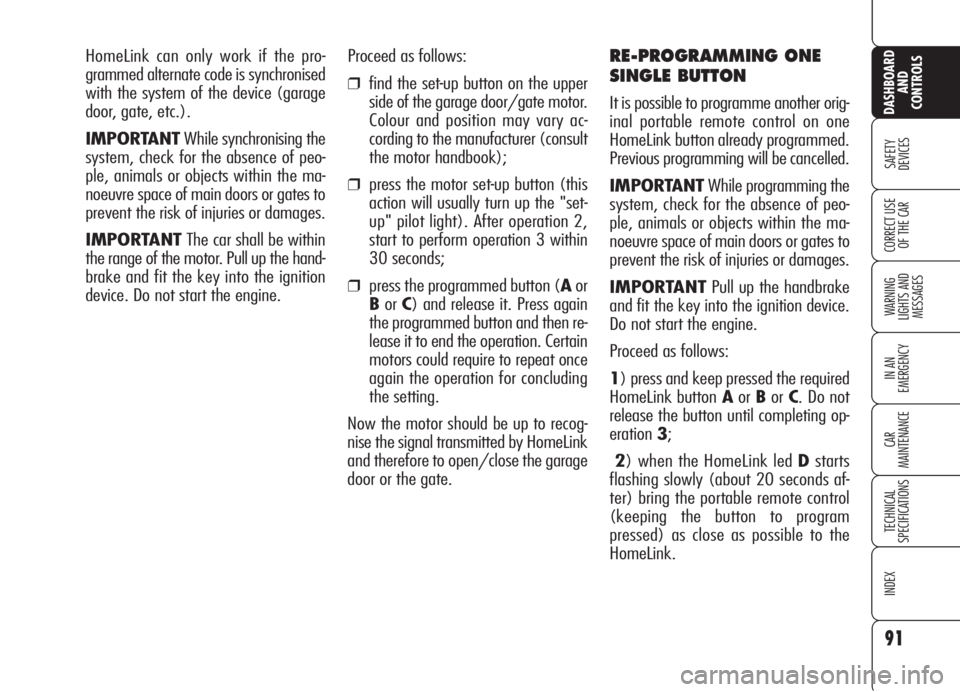
❒press the programmed button (Aor
BorC) and release it. Press again
the programmed button and then re-
lease it to end the operation. Certain
motors could require to repeat once
again the operation for concluding
the setting.
Now the motor should be up to recog-
nise the signal transmitted by HomeLink
and therefore to open/close the garage
door or the gate.
RE-PROGRAMMING ONE
SINGLE BUTTON
It is possible to programme another orig-
inal portable remote control on one
HomeLink button already programmed.
Previous programming will be cancelled.
IMPORTANTWhile programming the
system, check for the absence of peo-
ple, animals or objects within the ma-
noeuvre space of main doors or gates to
prevent the risk of injuries or damages.
IMPORTANTPull up the handbrake
and fit the key into the ignition device.
Do not start the engine.
Proceed as follows:
1) press and keep pressed the required
HomeLink button AorBorC. Do not
release the button until completing op-
eration3;
2) when the HomeLink led Dstarts
flashing slowly (about 20 seconds af-
ter) bring the portable remote control
(keeping the button to program
pressed) as close as possible to the
HomeLink. HomeLink can only work if the pro-
grammed alternate code is synchronised
with the system of the device (garage
door, gate, etc.).
IMPORTANTWhile synchronising the
system, check for the absence of peo-
ple, animals or objects within the ma-
noeuvre space of main doors or gates to
prevent the risk of injuries or damages.
IMPORTANTThe car shall be within
the range of the motor. Pull up the hand-
brake and fit the key into the ignition
device. Do not start the engine.
91
SAFETY
DEVICES
WARNING
LIGHTS AND
MESSAGES
IN AN
EMERGENCY
CAR
MAINTENANCE
TECHNICAL
SPECIFICATIONS
INDEX
CORRECT USE
OF THE CAR
DASHBOARD
AND
CONTROLS
Page 107 of 299

105
SAFETY
DEVICES
WARNING
LIGHTS AND
MESSAGES
IN AN
EMERGENCY
CAR
MAINTENANCE
TECHNICAL
SPECIFICATIONS
INDEX
CORRECT USE
OF THE CAR
DASHBOARD
AND
CONTROLS
Improper bonnet closing is indicated (on
certain versions) by the instrument pan-
el warning light
´(where provided), or
by symbol
Sand a message on the
display (see section “Warning lights and
messages”).
IMPORTANTAlways check that the
bonnet is closed properly to avoid its
opening while the car is travelling.
BONNET
TO OPEN THE BONNET
Proceed as follows:
❒pull lever A-fig. 98until hearing
the releasing click;
❒pull leverB-fig. 99and raise the
bonnet keeping the lever pulled
IMPORTANTBonnet raising is aided
by two gas springs. Do not tamper with
these springs and guide the bonnet
while raising it.
IMPORTANT Before opening the bon-
net, check that windscreen wiper arms
are not lifted from the windscreen.A0E0122mfig. 98
A0E0158mfig. 99
TO CLOSE THE BONNET
Lower the bonnet at approx. 20 cen-
timetres from the engine compartment
and then let it drop, ensuring that it is
fully closed and not just held in position
by the safety catch. If the bonnet does
not close properly, do not push it down
but open it again and repeat the above
procedure.
Carry out operations
only when the car is
stationary.
WARNING
For safety reasons the
bonnet must be closed
properly to avoid its opening
while the car is travelling.
Therefore, always check it is
properly closed and the catch
engaged. Should you notice
that the catch is not perfectly
engaged when travelling, stop
the car immediately and close
the bonnet.
WARNING
Page 117 of 299

115
SAFETY
DEVICES
WARNING
LIGHTS AND
MESSAGES
IN AN
EMERGENCY
CAR
MAINTENANCE
TECHNICAL
SPECIFICATIONS
INDEX
CORRECT USE
OF THE CAR
DASHBOARD
AND
CONTROLS
115
EOBD SYSTEM
The EOBD system (European On Board
Diagnosis) allows continuous diagnosis
of the components of the car correlat-
ed with emissions.
It also alerts the driver, by turning on the
warning light
Uon the instrument pan-
el (on certain versions together with the
message on the display) (see section
“Warning lights and messages”), when
these conditions are no longer in peak
conditions.
The objective is:
❒ to keep system efficiency under con-
trol;
❒ to warn when a fault causes emission
levels to increase;
❒to warn of the need to replace dete-
riorated components.
If when fitting the key
into the ignition device,
the warning light
U
does not turn on or if, while
travelling it turns on glowing
steadily or flashing, contact Al-
fa Romeo Authorized Services
as soon as possible. Warning
light
Uoperation can be
checked by means of special
equipment by traffic agents. Al-
ways comply with the traffic
regulations in force in the coun-
try where you are travelling.
The system also has a diagnostic con-
nector that can be interfaced with ap-
propriate tools, which makes it possible
to read the error codes stored in the con-
trol unit, together with a series of spe-
cific parameters for engine operation
and diagnosis. This check can also be
carried out by the traffic police.
IMPORTANTAfter eliminating the in-
convenience, to check the system com-
pletely, Alfa Romeo Authorized Services
are obliged to run a bench test and, if
necessary, road tests which may also
call for a long journey.