check engine Alfa Romeo 4C 2014 Owner handbook (in English)
[x] Cancel search | Manufacturer: ALFA ROMEO, Model Year: 2014, Model line: 4C, Model: Alfa Romeo 4C 2014Pages: 190, PDF Size: 7.87 MB
Page 115 of 190

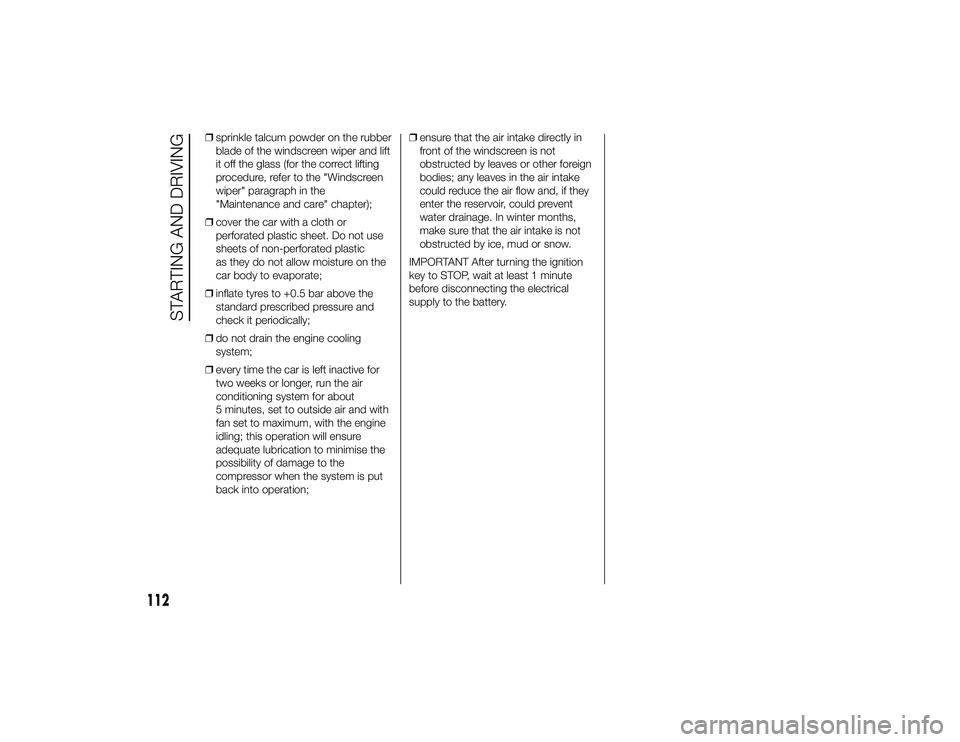
❒sprinkle talcum powder on the rubber
blade of the windscreen wiper and lift
it off the glass (for the correct lifting
procedure, refer to the "Windscreen
wiper" paragraph in the
"Maintenance and care" chapter);
❒ cover the car with a cloth or
perforated plastic sheet. Do not use
sheets of non-perforated plastic
as they do not allow moisture on the
car body to evaporate;
❒ inflate tyres to +0.5 bar above the
standard prescribed pressure and
check it periodically;
❒ do not drain the engine cooling
system;
❒ every time the car is left inactive for
two weeks or longer, run the air
conditioning system for about
5 minutes, set to outside air and with
fan set to maximum, with the engine
idling; this operation will ensure
adequate lubrication to minimise the
possibility of damage to the
compressor when the system is put
back into operation; ❒
ensure that the air intake directly in
front of the windscreen is not
obstructed by leaves or other foreign
bodies; any leaves in the air intake
could reduce the air flow and, if they
enter the reservoir, could prevent
water drainage. In winter months,
make sure that the air intake is not
obstructed by ice, mud or snow.
IMPORTANT After turning the ignition
key to STOP, wait at least 1 minute
before disconnecting the electrical
supply to the battery.
112
STARTING AND DRIVING
24-9-2013 11:50 Pagina 112
Page 117 of 190

STARTING THE
ENGINEContact the dedicated Alfa Romeo
Dealership immediately if
warning
light stays on constantly on the
instrument panel.
JUMP STARTING
If the battery is flat, start the engine
using an auxiliary battery with the same
capacity or a little higher than the flat
one.
11)
91)
Proceed as follows to start the car:
❒ connect the positive terminals (+ sign
near the terminal) of the two batteries
with a jump lead fig. 79; ❒
with a second lead, connect the
negative terminal(−)oftheauxiliary
battery to an earthing point
on
the engine or the gearbox/
transmission of the car to be started;
❒ start the engine; when the engine has
started, remove the leads, reversing
the order above.
If after a few attempts the engine does
not start, do not persist but contact
the dedicated Alfa Romeo Dealership.
IMPORTANT Do not connect the
negative terminals of the two batteries
directly! If the auxiliary battery is
installed on another car, check that
there is no accidental contact between
metallic parts of the two cars.
BUMP STARTING
Never, under any circumstances, jump
start the engine by pushing, towing
or coasting downhill.
IMPORTANT
11) Never use a fast battery charger to start the engine as this could
damage the electronic systems
and the ignition and engine supply
control units.
WARNING
91) This procedure must beperformed by qualified personnel
as incorrect actions may cause
high-intensity electrical discharge.
Furthermore, battery fluid is
poisonous and corrosive: avoid
contact with skin and eyes. Keep
naked flames and lit cigarettes
away from the battery and do not
cause sparks.
79
A0L0116
114
IN AN EMERGENCY
24-9-2013 11:50 Pagina 114
Page 118 of 190

REPAIRING A WHEELGENERAL
INSTRUCTIONS
The car is equipped with a quick tyre
repair device called the "Fix&Go
automatic" kit.
92) 94)
To use it, follow the instructions below.
93) 95) 96)
12)
2)
"Fix&Go automatic" KIT
It is located in the luggage
compartment.
The kit includes:
❒bottle A fig. 80 containing sealant
and fitted with: filling tube B and
adhesive label C with the wording
“max. 80 km/h” to be placed in
a clearly visible position (e.g. on the
dashboard) after repairing the tyre;
❒ compressor D complete with
pressure gauge and connectors;
❒ an information leaflet fig. 81,
providing instructions for using the kit
correctly. This booklet should be
given to the persons charged with
handling the tyre treated with this kit;
❒ a pair of gloves located in the side
compartment of the compressor;
❒ adaptors for inflating different
elements. IMPORTANT The sealant is suitable for
use at temperatures in the range from
−20°C to +50°C. The sealant has an
expiry date. INFLATION PROCEDURE
Proceed as follows:
97)
❒
engage the handbrake, unscrew the
tyre valve cap, take out filler hose A
fig. 82 and tighten ring nut B on
the tyre valve;
❒ make sure that switch A fig. 83 for
the compressor is in position 0 (off),
start the engine, insert the plug
into the cigar lighter socket on the
central tunnel (see fig. 84) and switch
on the compressor by bringing
switch A fig. 83 to I (on);
❒ inflate the tyre to the pressure
indicated in the “Wheels” paragraph
in the “Technical data” chapter. In
order to obtain a more precise
reading, check the pressure value on
pressure gauge B fig. 83 with the
compressor off;
80
A0L0076
81
A0L0077
82
A0L0078
115
24-9-2013 11:50 Pagina 115
Page 119 of 190

❒if after 5 minutes it is impossible to
reach at least 1.8 bar, disconnect
the compressor from the valve and
power socket, then move the car
forwards approximately 10 metres in
order to distribute the sealant inside
the tyre evenly, then repeat the
inflation operation; ❒
if you still cannot obtain a pressure of
at least 1.8 bar within 5 minutes from
the compressor switching on, do
not drive off and contact a dedicated
Alfa Romeo Dealership;
❒ after driving for about 10 minutes
stop and check the tyre pressure
again; remember to engage the
handbrake;
❒ if a pressure value of at least 1.8 bar
is detected, restore the correct
pressure (with the engine running and
the handbrake engaged), resume
driving and drive with great care to a
dedicated Alfa Romeo Dealership.
98) 99) 100)
CHECKING AND
RESTORING TYRE
PRESSURE
The compressor can also be used to
check and, if necessary, restore the tyre
pressure.
Release quick connector A fig. 85 and
connect it directly to the valve of the
tyre to be inflated. REPLACING THE BOTTLE
Proceed as follows:
❒
release connector A fig. 86 and
disconnect tube B;
❒ turn the bottle to be replaced
anticlockwise and raise it;
❒ insert the new bottle and turn it
clockwise;
❒ insert connector A and tube B in their
housings.
83
A0L0079
84
A0L0080
85
A0L0081
86
A0L0082
116
IN AN EMERGENCY
24-9-2013 11:50 Pagina 116
Page 129 of 190

REPLACING FUSESGENERAL INFORMATION
Fuses protect the electrical system:
they intervene (blow) in the event of a
fault or improper action on the system.
When a device does not work, check
the condition of its fuse: the filament
A fig. 101 must be intact.
If it is not, replace the blown fuse with
another with the same amperage (same
colour).
105) 106) 107) 108) 109)
14)
B = intact fuse;
C = fuse with damaged filament.FUSE LOCATION
The fuses are grouped in two fuse
boxes located in the engine and
passenger compartments.
Engine compartment fuse box
This is located next to the battery fig.
102: to access the fuses, undo screws
A and remove cover B.
The number identifying the electrical
component corresponding to each fuse
is shown on the back of the cover.
After replacing the fuse, make sure you
close cover B on the fuse box.
15)
Dashboard fuse box
This is located under the dashboard in
the area in front of the passenger seat.
To access the fuse box fig. 105 remove
the protective panel, following the
procedure described below:
❒
undo the four screws A fig. 104;
❒ to locate the fifth locking screw,
remove block B and remove plastic
cover C;
101
A0L0102
102
A0L0137
103
A0L0104
126
IN AN EMERGENCY
24-9-2013 11:50 Pagina 126
Page 133 of 190

IMPORTANT
16) Be careful to position the liftarms correctly at the points
illustrated, in order to prevent
damage to the carbon fibre
chassis and the bodywork
components.
17) To avoid damage to the carbon fibre chassis, the car cannot be
raised with standard hydraulic
jacks, only with suitable lowered
hydraulic jacks. Contact a
dedicated Alfa Romeo Dealership.
TOWING THE CAR
18)
The tow hook provided with the car is
located in the tool box in the luggage
compartment.
ATTACHING THE TOW
HOOK
Take tow hook A and tighten it fully
onto the threaded pin fig. 109.
110) 111) 112)
IMPORTANT
18) The tow hook attachment is onlyavailable at the front end of the
car.
WARNING
110) Before towing, turn the ignitionkey to MAR-ON and then to STOP
without removing it. The steering
column will automatically lock
when the key is removed and the
wheels cannot be steered. Also
check that the gearbox/
transmission is in neutral (N).
111) When towing, remember that the assistance of the brake servo
is absent. Consequently, more
force is required at the pedal
in order to brake. Do not
use flexible cables when towing
and avoid jerky movements. Make
sure not to damage parts in
contact with the car while towing.
When towing the car, you must
comply with all specific traffic
regulations, both in terms of the
towing device and behaviour
on the road. Do not start the
engine while towing the car.
Before tightening the ring, clean
the threaded housing thoroughly.
Make sure that the ring is fully
screwed into the housing before
towing the car.
109
A0L0107
130
IN AN EMERGENCY
24-9-2013 11:50 Pagina 130
Page 139 of 190

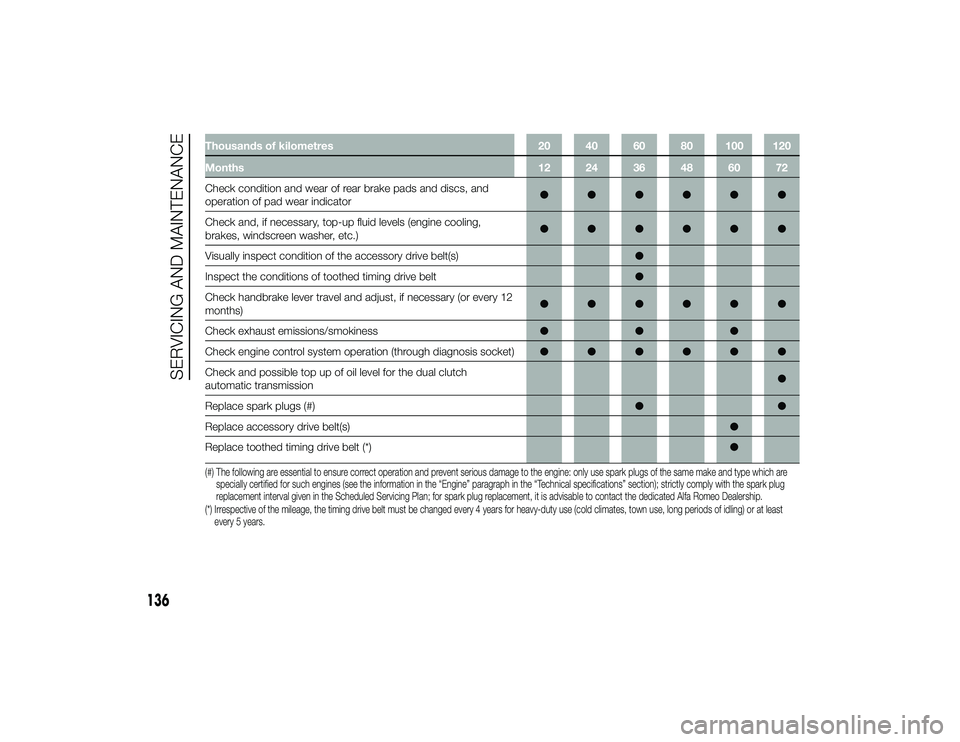
Thousands of kilometres20 40 60 80 100 120
Months 12 24 36 48 60 72
Check condition and wear of rear brake pads and discs, and
operation of pad wear indicator ●●●●●●
Check and, if necessary, top-up fluid levels (engine cooling,
brakes, windscreen washer, etc.) ●●●●●●
Visually inspect condition of the accessory drive belt(s) ●
Inspect the conditions of toothed timing drive belt ●
Check handbrake lever travel and adjust, if necessary (or every 12
months) ●●●●●●
Check exhaust emissions/smokiness ●●●
Check engine control system operation (through diagnosis socket) ●●●●●●
Check and possible top up of oil level for the dual clutch
automatic transmission ●
Replace spark plugs (#) ●●
Replace accessory drive belt(s) ●
Replace toothed timing drive belt (*) ●(#) The following are essential to ensure correct operation and prevent serious damage to the engine: only use spark plugs of the same make and type which are
specially certified for such engines (see the information in the “Engine” paragraph in the “Technical specifications” section); strictly comply with the spark plug
replacement interval given in the Scheduled Servicing Plan; for spark plug replacement, it is advisable to contact the dedicated Alfa Romeo Dealership.
(*) Irrespective of the mileage, the timing drive belt must be changed every 4 years for heavy-duty use (cold climates, town use, long periods of idling) or at least every 5 years.
136
SERVICING AND MAINTENANCE
24-9-2013 11:50 Pagina 136
Page 141 of 190

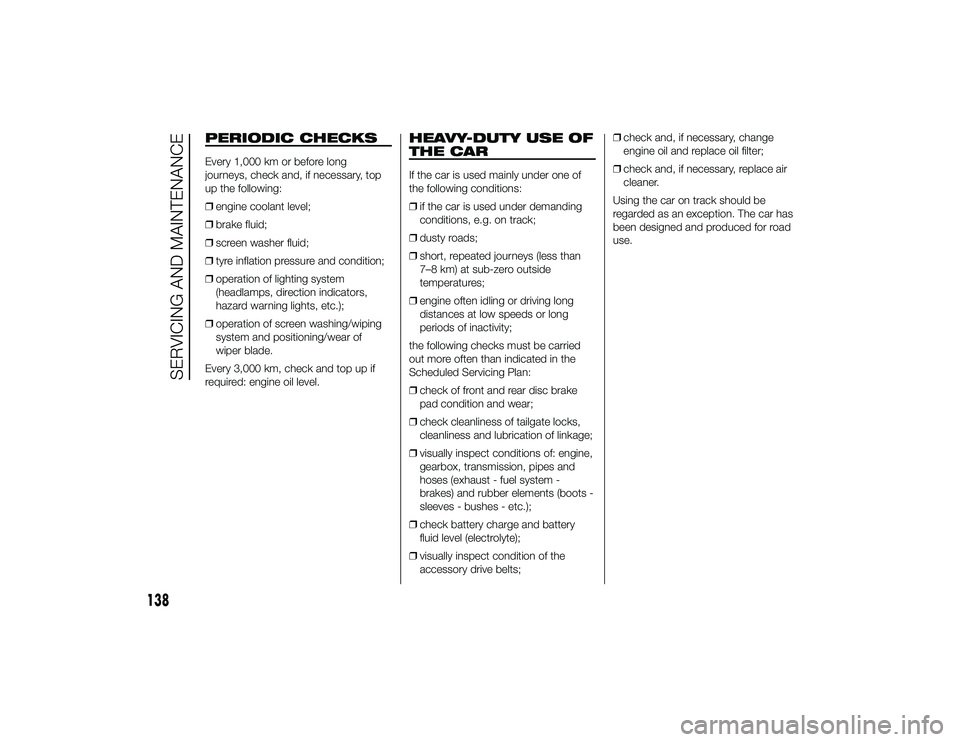
PERIODIC CHECKSEvery 1,000 km or before long
journeys, check and, if necessary, top
up the following:
❒engine coolant level;
❒ brake fluid;
❒ screen washer fluid;
❒ tyre inflation pressure and condition;
❒ operation of lighting system
(headlamps, direction indicators,
hazard warning lights, etc.);
❒ operation of screen washing/wiping
system and positioning/wear of
wiper blade.
Every 3,000 km, check and top up if
required: engine oil level.
HEAVY-DUTY USE OF
THE CARIf the car is used mainly under one of
the following conditions:
❒ if the car is used under demanding
conditions, e.g. on track;
❒ dusty roads;
❒ short, repeated journeys (less than
7–8 km) at sub-zero outside
temperatures;
❒ engine often idling or driving long
distances at low speeds or long
periods of inactivity;
the following checks must be carried
out more often than indicated in the
Scheduled Servicing Plan:
❒ check of front and rear disc brake
pad condition and wear;
❒ check cleanliness of tailgate locks,
cleanliness and lubrication of linkage;
❒ visually inspect conditions of: engine,
gearbox, transmission, pipes and
hoses (exhaust - fuel system -
brakes) and rubber elements (boots -
sleeves - bushes - etc.);
❒ check battery charge and battery
fluid level (electrolyte);
❒ visually inspect condition of the
accessory drive belts; ❒
check and, if necessary, change
engine oil and replace oil filter;
❒ check and, if necessary, replace air
cleaner.
Using the car on track should be
regarded as an exception. The car has
been designed and produced for road
use.
138
SERVICING AND MAINTENANCE
24-9-2013 11:50 Pagina 138
Page 142 of 190

CHECKING LEVELS.The topping-up plug B and the dipstick A for checking the engine oil level and the reservoir C for the engine coolant can be
accessed by lifting the tailgate (see the procedure in the "Bonnet/Luggage Compartment" paragraph in the "Knowing your car"
chapter).
19)113) 114) 115)110
A0L0152
139
24-9-2013 11:50 Pagina 139
Page 144 of 190

ENGINE OIL
Check that the oil level is between the
MIN and MAX marks on the dipstick
A fig. 110.
For this check, take out the dipstick
from its seat, clean it with a lint-free
cloth, reinsert the dipstick; take it out
again and check the oil level.
116)
If the oil level is near or under the MIN
mark, add oil through the filler B fig.
110 until it reaches the MAX mark.
20)
Take out the engine oil dipstick A, clean
it with a lint-free cloth and reinsert it.
Extract the engine oil dipstick again and
check that the level is between the
MIN and MAX marks on the dipstick.
116)
The range between the MIN and MAX
levels corresponds to approximately
1 litre of oil.
Engine oil consumption
21)
3)
The maximum engine oil consumption
is usually 400 grams every 1,000 km.
When the car is new, the engine needs
to run in, therefore the engine oil
consumption can only be considered
stabilised after the first 5,000 - 6,000
km.IMPORTANT After adding or changing
the oil, let the engine run for a few
seconds and wait a few minutes after
stopping it before you check the level.
ENGINE COOLANT
22)
117)
The coolant level must be checked
when the engine is cold and must
range between the MIN and MAX
marks on the reservoir.
If the level is too low, unscrew reservoir
plug C fig. 110 and add the fluid
described in the "Fluids and lubricants"
paragraph of the "Technical
Specifications" chapter.
WINDSCREEN WASHER
FLUID
118) 119)
To check the windscreen washer fluid
level, proceed as follows:
❒
to avoid any interference during the
procedure, lift the windscreen wiper
blade according to the "Windscreen
wiper" paragraph in the
"Maintenance and care" chapter;
❒ loosen the 4 self-tapping screws A
fig. 112 using the supplied
screwdriver. Remove the bonnet
grille;
❒ release the plug from the opening; ❒
leaving the plug close to the opening,
put a finger on the central hole B fig.
113 in the plug and remove it: the
level can be seen on the control pipe
C fig. 114 due to capillarity;
❒ after the check, reinsert the plug B
with the control pipe C in the initial
position;
❒ reposition the bonnet grille and
tighten the 4 self-tapping screws A.
WARNING Re-close the plug holding it
horizontally (not directed towards the
bonnet) to prevent the opening tang
from remaining locked in a position
difficult to reach.
It is recommended to check the
windscreen washer fluid regularly, in
particular in driving conditions needing
a heavier use of the windscreen washer.
112
A0L0130
141
24-9-2013 11:50 Pagina 141