warning light Alfa Romeo 4C 2015 Owner handbook (in English)
[x] Cancel search | Manufacturer: ALFA ROMEO, Model Year: 2015, Model line: 4C, Model: Alfa Romeo 4C 2015Pages: 199, PDF Size: 7.67 MB
Page 6 of 199
ESSENTIAL INFORMATION!
REFUELLING
Only refuel with unleaded petrol with octane rating (RON) not less than 95, in compliance with the European specification EN228. In
particular, the 4C’s engine has been designed to comply with all emission limits while simultaneously guaranteeing minimal consumption and
maximum performance, using premium-quality unleaded petrol with octane rating (RON) of 98 or higher. The use of petrol that does not
conform to the specification indicated may cause the
warning light to switch on and the irregular operation of the engine.
STARTING THE ENGINE
Make sure that the handbrake is engaged. Press the brake pedal and, without pressing the accelerator, turn the ignition key to AVV; release it
as soon as the engine has started.
PARKING ON FLAMMABLE MATERIAL
The catalytic converter develops high temperatures during operation. Do not park the car on grass, dry leaves, pine needles or other
flammable material: fire hazard.
RESPECTING THE ENVIRONMENT
The car is fitted with a system that carries out a continuous diagnosis of the emission-related components in order to help protect the
environment.
ELECTRICAL ACCESSORIES
If, after purchasing the car, you want to install accessories that require an electrical supply (with the risk of gradually draining the battery),
contact the dedicated Alfa Romeo Dealership which will calculate the overall electrical consumption and check that the car’s electrical system
can support the required load.
SCHEDULED SERVICING
Correct maintenance of the car is essential for ensuring that it maintains its performance and its safety features, its environmental friendliness
and low running costs for a long time to come.
THE OWNER HANDBOOK CONTAINS…
... important information, advice and warnings for correct use, driving safety and maintenance of your car over time. Special attention must
be paid to the symbols provided(personal safety)(environmental protection)(car integrity).
Page 11 of 199
.
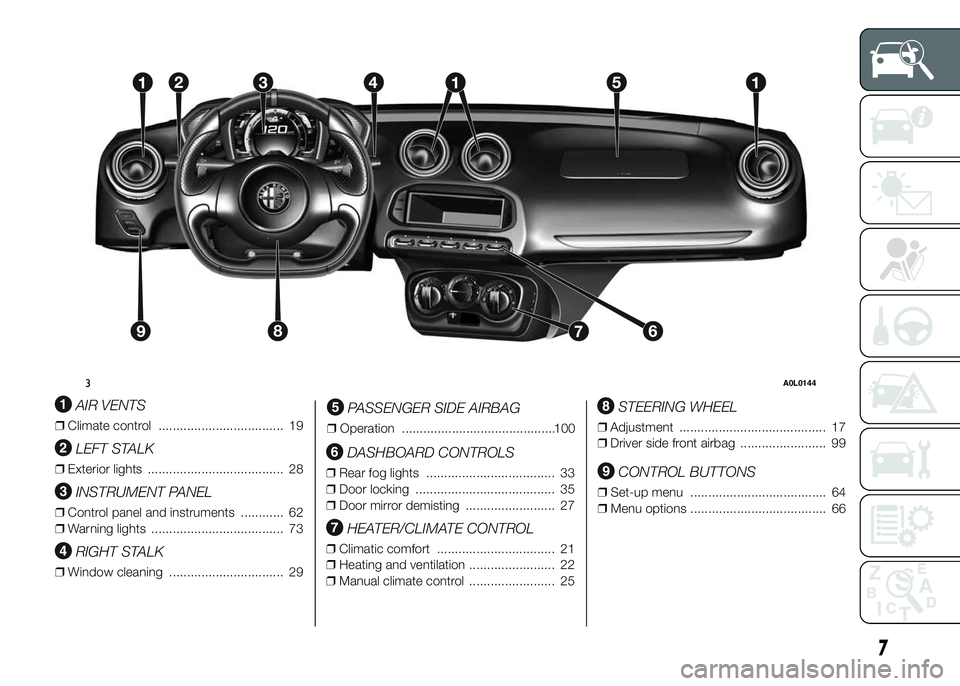
AIR VENTS
❒Climate control ................................... 19
LEFT STALK
❒Exterior lights ...................................... 28
INSTRUMENT PANEL
❒Control panel and instruments ............ 62
❒Warning lights ..................................... 73
RIGHT STALK
❒Window cleaning ................................ 29
PASSENGER SIDE AIRBAG
❒Operation ...........................................100
DASHBOARD CONTROLS
❒Rear fog lights .................................... 33
❒Door locking ....................................... 35
❒Door mirror demisting ......................... 27
HEATER/CLIMATE CONTROL
❒Climatic comfort ................................. 21
❒Heating and ventilation ........................ 22
❒Manual climate control ........................ 25
STEERING WHEEL
❒Adjustment ......................................... 17
❒Driver side front airbag ........................ 99
CONTROL BUTTONS
❒Set-up menu ...................................... 64
❒Menu options ...................................... 66
3A0L0144
7
Page 12 of 199
.
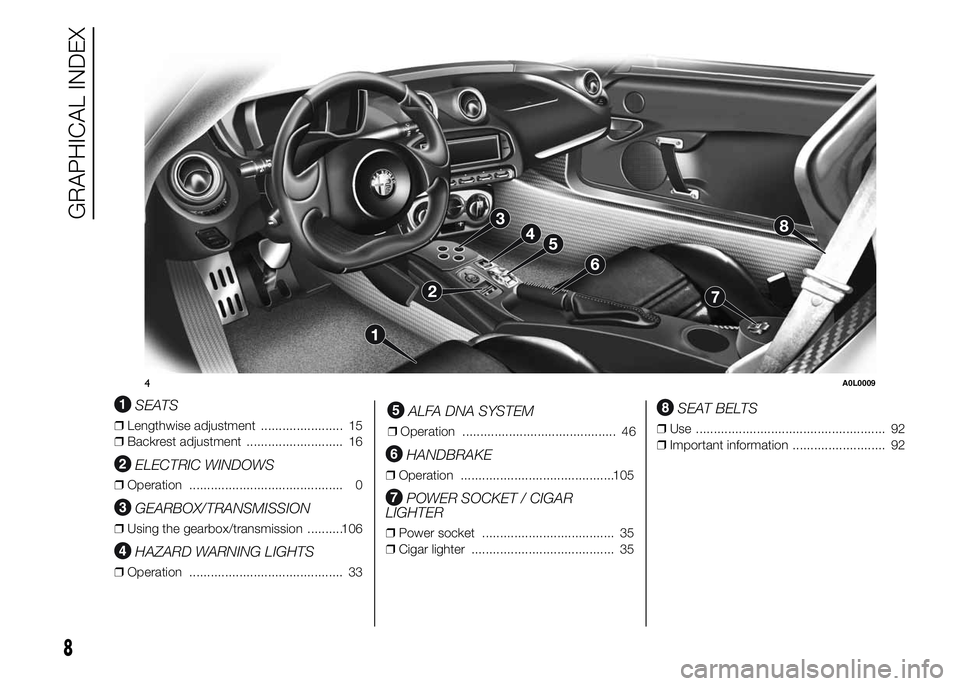
SEATS
❒Lengthwise adjustment ....................... 15
❒Backrest adjustment ........................... 16
ELECTRIC WINDOWS
❒Operation ........................................... 0
GEARBOX/TRANSMISSION
❒Using the gearbox/transmission ..........106
HAZARD WARNING LIGHTS
❒Operation ........................................... 33
ALFA DNA SYSTEM
❒Operation ........................................... 46
HANDBRAKE
❒Operation ...........................................105
POWER SOCKET / CIGAR
LIGHTER
❒Power socket ..................................... 35
❒Cigar lighter ........................................ 35
SEAT BELTS
❒Use ..................................................... 92
❒Important information .......................... 92
4A0L0009
8
GRAPHICAL INDEX
Page 14 of 199
SYMBOLS
Some car components have coloured
labels whose symbols indicate
precautions to be observed when using
this component. Under the engine
cover there is also a label that
summarises all the symbols.
ALFA ROMEO CODE
SYSTEM
IN BRIEF
This is an electronic engine locking
system which increases protection
against attempted thefts of the car. It
is automatically activated when the
ignition key is removed.
There is an electronic device in each
key which can identify the signal
emitted, when the engine is started,
from an aerial built into the ignition
switch. The signal, which changes
each time the engine is started, is the
“password” by means of which the
control unit recognises the key and
enables starting.
1)
Operation
Each time the car is started by turning
the ignition key to MAR-ON, the Alfa
Romeo CODE system control unit
sends an acknowledgement code to
the engine management control unit to
deactivate the inhibitor.
The code is sent only if the Alfa Romeo
CODE system control unit has
recognised the code transmitted by the
key.Each time the ignition key is turned to
STOP, the Alfa Romeo CODE system
deactivates the functions of the engine
management control unit.
Irregular operation
If, during starting, the code is not
correctly recognised, the
digital
warning light switches on in the display.
In this case, turn the key to STOP and
then to MAR-ON; if it is still locked,
try again with the other keys that come
with the vehicle. If it is still not possible
to start the engine, contact the
dedicated Alfa Romeo Dealership.
Activation of warning
light while driving
❒If the
digital warning light on the
display switches on, this means that
the system is running a self-diagnosis
(for example due to a voltage drop).
❒If the
digital warning light remains
on, contact the dedicated Alfa
Romeo Dealership.
10
GETTING TO KNOW YOUR CAR
Page 19 of 199
STEERING LOCK
Activation
When the key is at STOP, remove the
key and turn the steering wheel until
it locks.
Deactivation
Move the steering wheel slightly and
turn the ignition key to MAR-ON.
4) 5)
WARNING
2) If the ignition device has been
tampered with (e.g. an attempted
theft), have it checked over by
the dedicated Alfa Romeo
Dealership before driving again.
3) Always remove the key when you
leave your car to prevent someone
from accidentally operating the
controls. Remember to engage
the handbrake. Never leave
children unattended in the car.4) It is absolutely forbidden to carry
out any after-market operation
involving steering system or
steering column modifications
(e.g. installation of anti-theft
device) that could adversely affect
performance and safety,
invalidate the warranty and also
result in non-compliance of the
car with type-approval
requirements.
5) Never extract the key while the
car is moving. The steering wheel
would automatically lock as soon
as it is turned. This also applies
to cases in which the car is towed.
SEATS
ADJUSTMENTS
Lengthwise adjustment
(for versions/markets, where provided)
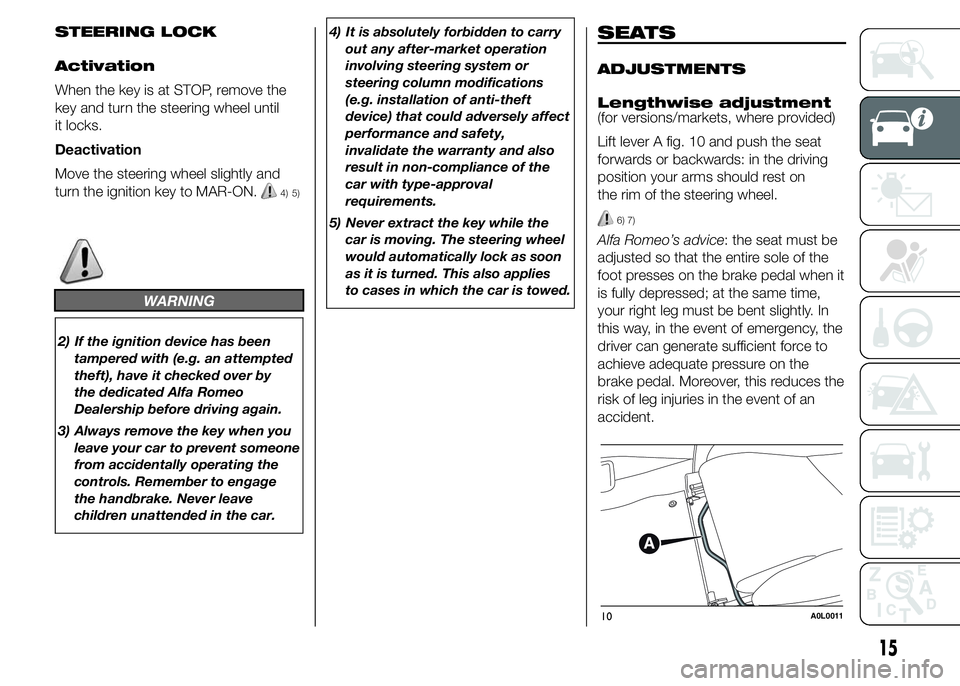
Lift lever A fig. 10 and push the seat
forwards or backwards: in the driving
position your arms should rest on
the rim of the steering wheel.
6) 7)
Alfa Romeo’s advice: the seat must be
adjusted so that the entire sole of the
foot presses on the brake pedal when it
is fully depressed; at the same time,
your right leg must be bent slightly. In
this way, in the event of emergency, the
driver can generate sufficient force to
achieve adequate pressure on the
brake pedal. Moreover, this reduces the
risk of leg injuries in the event of an
accident.
10A0L0011
15
Page 23 of 199
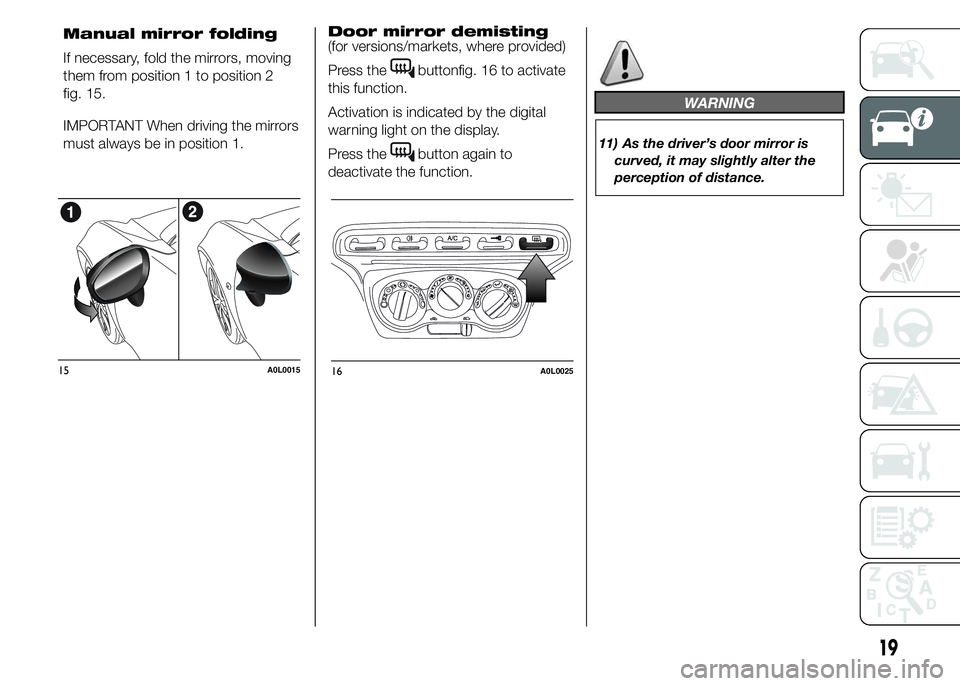
Door mirror demisting
(for versions/markets, where provided)
Press the
buttonfig. 16 to activate
this function.
Activation is indicated by the digital
warning light on the display.
Press the
button again to
deactivate the function.
WARNING
11) As the driver’s door mirror is
curved, it may slightly alter the
perception of distance.
15A0L001516A0L0025
19
Manual mirror folding
If necessary, fold the mirrors, moving
them from position 1 to position 2
fig. 15.
IMPORTANT When driving the mirrors
must always be in position 1.
Page 31 of 199
INTERNAL AIR
RECIRCULATION
ACTIVATION
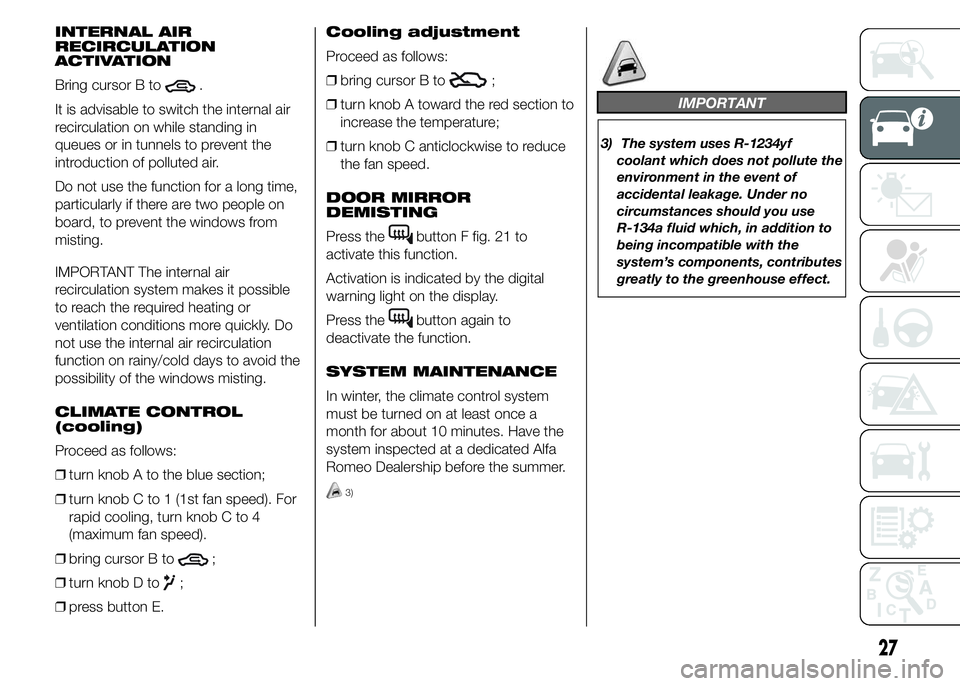
Bring cursor B to
.
It is advisable to switch the internal air
recirculation on while standing in
queues or in tunnels to prevent the
introduction of polluted air.
Do not use the function for a long time,
particularly if there are two people on
board, to prevent the windows from
misting.
IMPORTANT The internal air
recirculation system makes it possible
to reach the required heating or
ventilation conditions more quickly. Do
not use the internal air recirculation
function on rainy/cold days to avoid the
possibility of the windows misting.
CLIMATE CONTROL
(cooling)
Proceed as follows:
❒turn knob A to the blue section;
❒turn knob C to 1 (1st fan speed). For
rapid cooling, turn knob C to 4
(maximum fan speed).
❒bring cursor B to
;
❒turn knob D to
;
❒press button E.Cooling adjustment
Proceed as follows:
❒bring cursor B to
;
❒turn knob A toward the red section to
increase the temperature;
❒turn knob C anticlockwise to reduce
the fan speed.
DOOR MIRROR
DEMISTING
Press the
button F fig. 21 to
activate this function.
Activation is indicated by the digital
warning light on the display.
Press the
button again to
deactivate the function.
SYSTEM MAINTENANCE
In winter, the climate control system
must be turned on at least once a
month for about 10 minutes. Have the
system inspected at a dedicated Alfa
Romeo Dealership before the summer.
3)
IMPORTANT
3) The system uses R-1234yf
coolant which does not pollute the
environment in the event of
accidental leakage. Under no
circumstances should you use
R-134a fluid which, in addition to
being incompatible with the
system’s components, contributes
greatly to the greenhouse effect.
.
27
Page 32 of 199
EXTERIOR LIGHTS
IN BRIEF
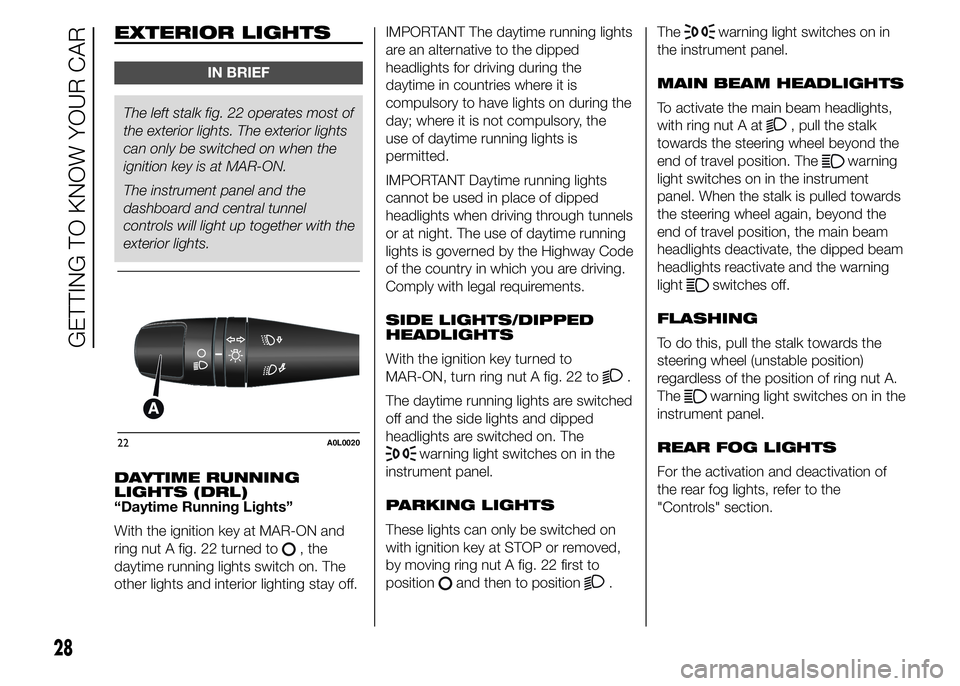
The left stalk fig. 22 operates most of
the exterior lights. The exterior lights
can only be switched on when the
ignition key is at MAR-ON.
The instrument panel and the
dashboard and central tunnel
controls will light up together with the
exterior lights.
DAYTIME RUNNING
LIGHTS (DRL)
“Daytime Running Lights”
With the ignition key at MAR-ON and
ring nut A fig. 22 turned to
, the
daytime running lights switch on. The
other lights and interior lighting stay off.IMPORTANT The daytime running lights
are an alternative to the dipped
headlights for driving during the
daytime in countries where it is
compulsory to have lights on during the
day; where it is not compulsory, the
use of daytime running lights is
permitted.
IMPORTANT Daytime running lights
cannot be used in place of dipped
headlights when driving through tunnels
or at night. The use of daytime running
lights is governed by the Highway Code
of the country in which you are driving.
Comply with legal requirements.
SIDE LIGHTS/DIPPED
HEADLIGHTS
With the ignition key turned to
MAR-ON, turn ring nut A fig. 22 to
.
The daytime running lights are switched
off and the side lights and dipped
headlights are switched on. The
warning light switches on in the
instrument panel.
PARKING LIGHTS
These lights can only be switched on
with ignition key at STOP or removed,
by moving ring nut A fig. 22 first to
position
and then to position.The
warning light switches on in
the instrument panel.
MAIN BEAM HEADLIGHTS
To activate the main beam headlights,
with ring nut A at
, pull the stalk
towards the steering wheel beyond the
end of travel position. The
warning
light switches on in the instrument
panel. When the stalk is pulled towards
the steering wheel again, beyond the
end of travel position, the main beam
headlights deactivate, the dipped beam
headlights reactivate and the warning
light
switches off.
FLASHING
To do this, pull the stalk towards the
steering wheel (unstable position)
regardless of the position of ring nut A.
The
warning light switches on in the
instrument panel.
REAR FOG LIGHTS
For the activation and deactivation of
the rear fog lights, refer to the
"Controls" section.
22A0L0020
28
GETTING TO KNOW YOUR CAR
Page 33 of 199
DIRECTION INDICATORS
Bring the stalk to the (stable) position:
❒upwards: activates right direction
indicator;
❒downwards: activates left direction
indicator.
Warning light
orwill blink on the
instrument panel.
The direction indicators are switched off
automatically when the steering wheel
is straightened.
"Lane change" function
If you wish to signal a lane change,
place the left stalk in the unstable
position for less than half a second. The
direction indicator on the side selected
will flash five times and then switch
off automatically.
"FOLLOW ME HOME"
DEVICE
This device allows you to illuminate the
area in front of the car for a certain
amount of time.Activation
With the key turned to STOP or
removed, pull stalk A towards the
steering wheel within 2 minutes from
when the engine is turned off.
Each time the stalk is moved, the lights
stay on for an extra 30 seconds up to
a maximum of 210 seconds; then
the lights are switched off automatically.
Also, each time the stalk is operated,
the
warning light on the
instrument panel switches on. The
display shows the time set for the
function and the corresponding
graphics.
The warning light comes on when the
lever is operated and stays on until
the function is automatically
deactivated. Each movement of the
stalk only increases the amount of time
the lights stay on.
Deactivation
Keep the stalk pulled towards the
steering wheel for more than 2
seconds.
WINDOW CLEANING
IN BRIEF
The right stalk controls screen
wiper/washer operation.
This operates only with the ignition
key at MAR-ON.
SCREEN WIPER/WASHER
Operation
12) 13)
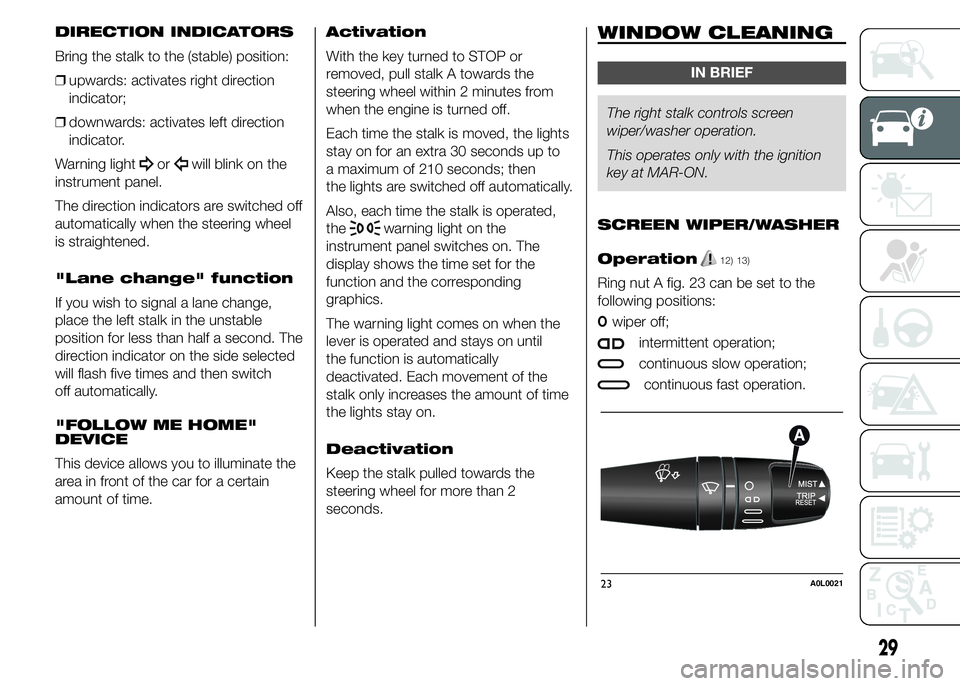
Ring nut A fig. 23 can be set to the
following positions:
Owiper off;
intermittent operation;
continuous slow operation;
continuous fast operation.
23A0L0021
29
Page 35 of 199
The device cannot be engaged in 1st or
reverse gear: it is advisable to engage
it in 5th gear or higher.
When travelling downhill with the device
engaged, the car may slightly exceed
the stored speed.
When the device is activated, the
digital warning light switches on
together with the relevant message on
the display.
Storing speed
Proceed as follows:
❒turn ring nut A fig. 24 to
and
press the accelerator to reach the
desired speed;
❒move the stalk upwards (+) for at
least 1 second, then release it: the
car speed is now stored and you can
therefore release the accelerator.
If needed (when overtaking for
instance), you can accelerate simply by
pressing the accelerator; when you
release the pedal, the car goes back to
the speed stored previously.Restoring speed
If the device has been deactivated, for
example by pressing the brake pedal,
the stored speed can be restored as
follows:
❒accelerate gradually until a speed
approaching the one stored is
reached;
❒engage the gear selected at the time
that the speed was stored;
❒press the CANCEL/RESUME button
(B fig. 24).
Increasing speed
This can be done in two ways:
❒by pressing the accelerator and
storing the new speed reached
or
❒by moving the stalk upwards (+) until
the new speed, which will be stored
automatically, is reached.
Each movement of the stalk
corresponds to an increase in speed of
about 1 km/h, while keeping the stalk
held upwards will continuously increase
the speed.Decreasing speed
This can be done in two ways:
❒by deactivating the device and then
storing the new speed
or
❒by moving the stalk downwards (–)
until the new speed, which will be
stored automatically, is reached.
Each movement of the stalk will
correspond to a slight reduction in
speed of about 1 km/h, while keeping
the stalk held downwards will decrease
the speed continuously.
Deactivation
The device can be switched off by the
driver in the following ways:
❒by turning ring nut A fig. 24 toO;
❒by switching off the engine;
❒by pressing the CANCEL/RESUME
button;
❒by pressing the brake pedal or the
accelerator; in this last case the
system is not completely deactivated
but gives priority to the acceleration
request. The device still remains
active, without the need to press the
CANCEL/RESUME button to return
to the previous condition once
acceleration is concluded.
31