light Alfa Romeo 8C 2007 Owner handbook (in English)
[x] Cancel search | Manufacturer: ALFA ROMEO, Model Year: 2007, Model line: 8C, Model: Alfa Romeo 8C 2007Pages: 223, PDF Size: 14.35 MB
Page 39 of 223
37
2
ACTIVE AND PASSIVE SAFETY
CAUTION
The warning light
usually
comes on with running engine to
indicate a fault in the ABS system only.
In this case, the standard braking
system is still efficient, but cannot use
the ABS system. In these conditions,
also the EBD system efficiency may be
reduced. Drive with the greatest care
to avoid abrupt braking and go the
nearest Service Centre of the
Manufacturer’s Network to have the
system checked-
CAUTION
If the low brake fluid warning
light
illuminates while driving,
stop the vehicle and check the brake
fluid level immediately. If the level is
below the minimum notch, top up with
the recommended oil and immediately
contact an Authorised Service Centre
of the Manufacturer’s Network to
have the system checked.
Brake fluid leaks impair the operation
of the braking systems, both of the
traditional type and of those equipped
with ABS.
CAUTION
System performance in terms
of active safety is not a reason for the
driver to run unnecessary risks. The
driving style shall always be suited to
weather conditions, range of visibility
and traffic.CAUTION
The maximum obtainable
deceleration always depends on the
tyre grip on the road surface. With
snow or ice the grip is obviously
reduced and the braking distance is
very high, even with the ABS system.
Page 40 of 223
38
2
A
FUEL CUT-OUT
INERTIA SWITCHThe vehicle is equipped with a safety switch
which activates in the event of a collision, cutting
off the fuel supply and consequently causing the
engine to stop. It also prevents fuel leaks if the
fuel lines are damaged during the accident.
Activation of the safety switch is signalled by
the illumination of the warning light
on the
display.
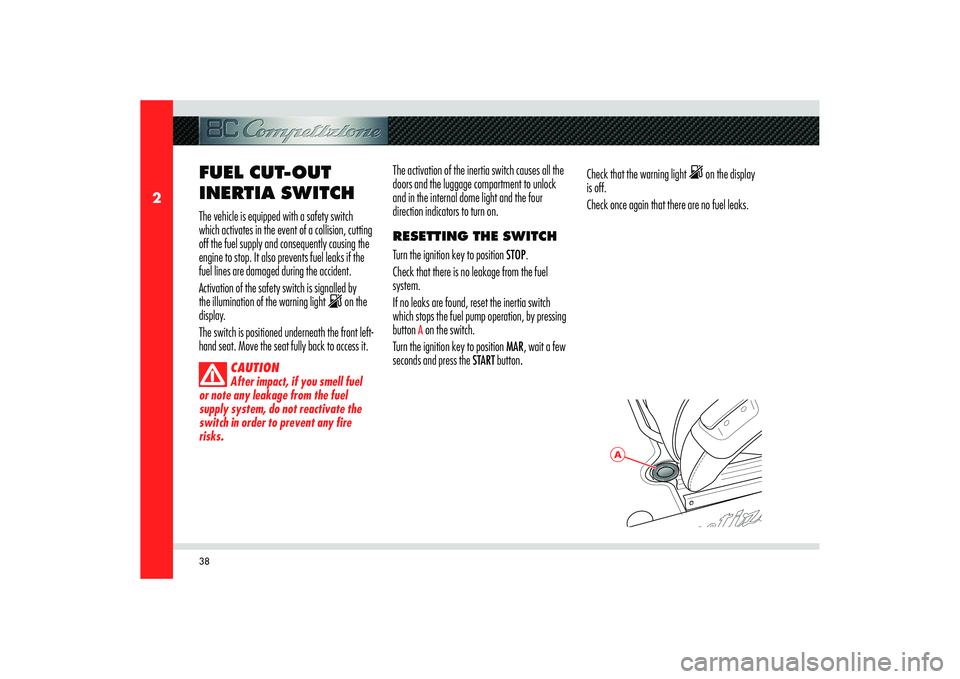
The switch is positioned underneath the front left-
hand seat. Move the seat fully back to access it.
CAUTION
After impact, if you smell fuel
or note any leakage from the fuel
supply system, do not reactivate the
switch in order to prevent any fire
risks.
The activation of the inertia switch causes all the
doors and the luggage compartment to unlock
and in the internal dome light and the four
direction indicators to turn on.
RESETTING THE SWITCH
Turn the ignition key to position STOP.
Check that there is no leakage from the fuel
system.
If no leaks are found, reset the inertia switch
which stops the fuel pump operation, by pressing
button
A on the switch.
Turn the ignition key to position MAR, wait a few
seconds and press the START button.Check that the warning light
on the display
is off.
Check once again that there are no fuel leaks.
Page 43 of 223
3
INSTRUMENTS AND CONTROLS
Dashboard .......................................................................................................................... 42
Instrument panel ................................................................................................................. 45
Reconfi gurable multifunction display ...................................................................................... 46
Warning lights and messages ................................................................................................ 60
Instruments and gauges ........................................................................................................66
Controls ............................................................................................................................. 68
Internal equipment .............................................................................................................. 72
Page 45 of 223
43
3
A
B
C
D
E
INSTRUMENTS AND CONTROLS
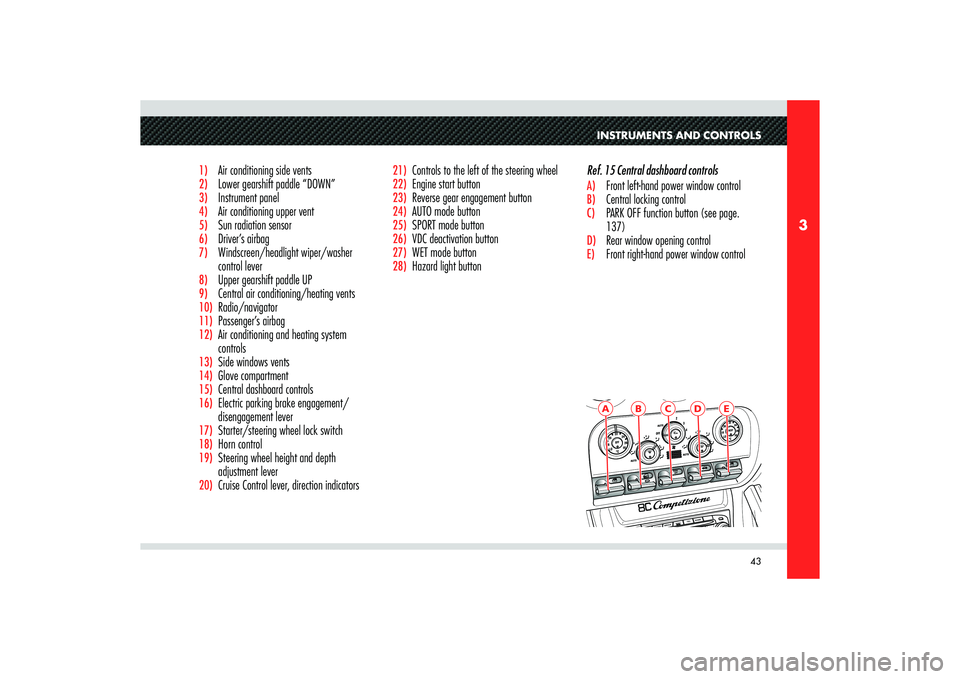
1) Air conditioning side vents2) Lower gearshift paddle “DOWN”3) Instrument panel4) Air conditioning upper vent5)
Sun radiation sensor
6)
Driver’s airbag
7)
Windscreen/headlight wiper/washer
control lever
8)
Upper gearshift paddle UP
9)
Central air conditioning/heating vents
10)
Radio/navigator
11)
Passenger’s airbag
12)
Air conditioning and heating system
controls
13)
Side windows vents
14)
Glove compartment
15)
Central dashboard controls
16)
Electric parking brake engagement/
disengagement lever
17)
Starter/steering wheel lock switch
18)
Horn control
19)
Steering wheel height and depth
adjustment lever
20)
Cruise Control lever, direction indicators
21)
Controls to the left of the steering wheel
22)
Engine start button
23)
Reverse gear engagement button
24)
AUTO mode button
25)
SPORT mode button
26)
VDC deactivation button
27)
WET mode button
28)
Hazard light buttonRef. 15 Central dashboard controls
A) Front left-hand power window controlB) Central locking control C) PARK OFF function button (see page.
137)D) Rear window opening control E) Front right-hand power window control
Page 46 of 223
44
3
A
B
C
D
F
C
D
E
B
A
AB
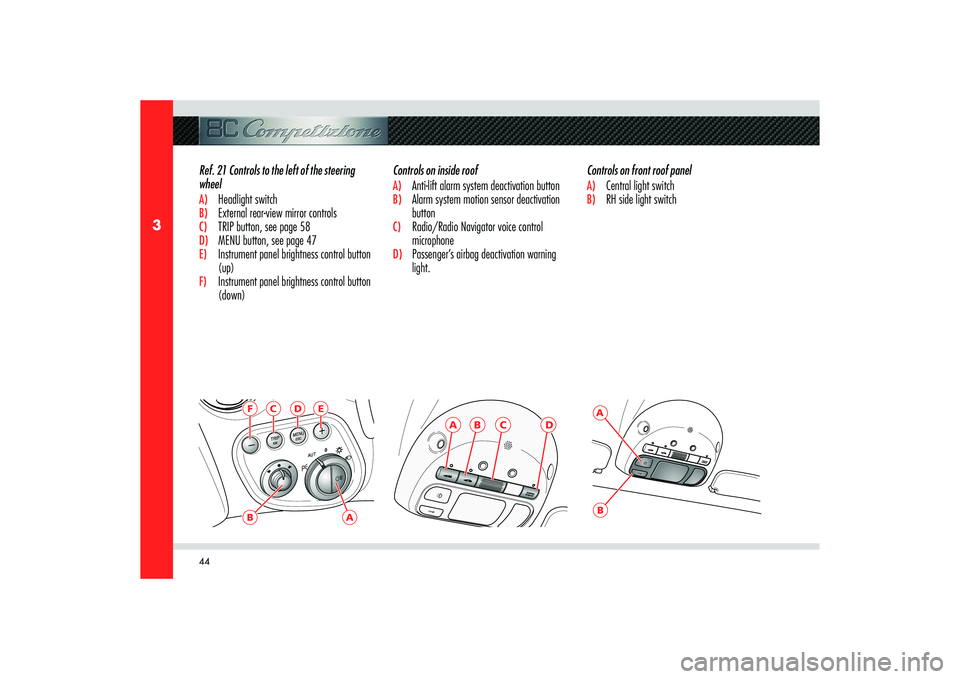
Controls on inside roofA) Anti-lift alarm system deactivation buttonB) Alarm system motion sensor deactivation
buttonC) Radio/Radio Navigator voice control
microphoneD) Passenger’s airbag deactivation warning
light. Ref. 21 Controls to the left of the steering
wheel
A) Headlight switchB) External rear-view mirror controlsC) TRIP button, see page 58D) MENU button, see page 47E) Instrument panel brightness control button
(up)F) Instrument panel brightness control button
(down)Controls on front roof panel
A) Central light switchB) RH side light switch
Page 47 of 223
45
3
1
24
3
INSTRUMENTS AND CONTROLS
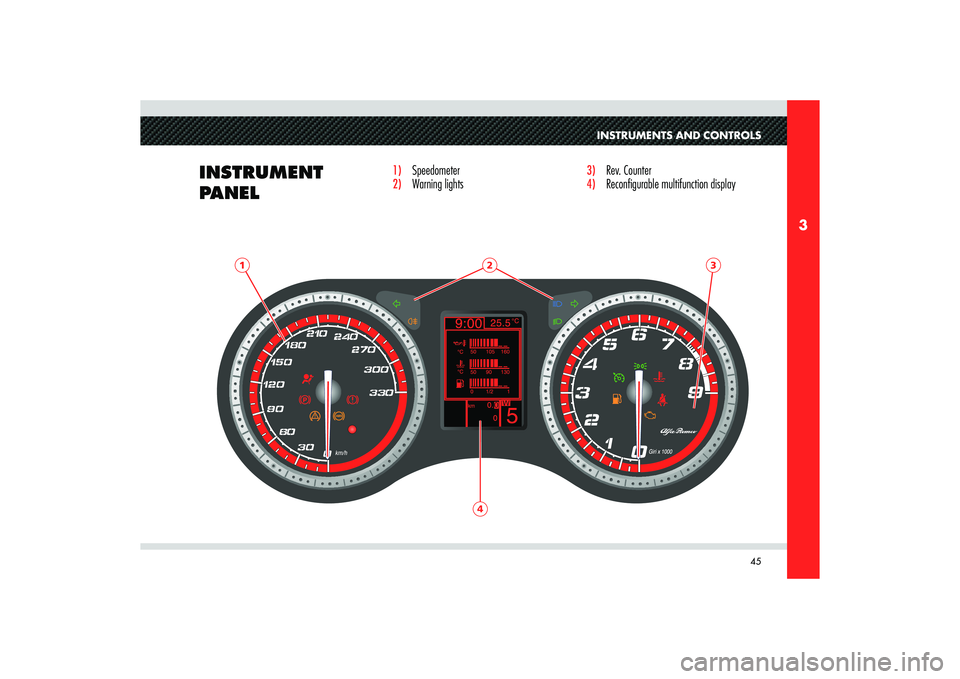
INSTRUMENT
PANEL
1) Speedometer 2) Warning lights
3)
Rev. Counter
4)
Reconfi gurable multifunction display
Page 49 of 223
47
3
INSTRUMENTS AND CONTROLS
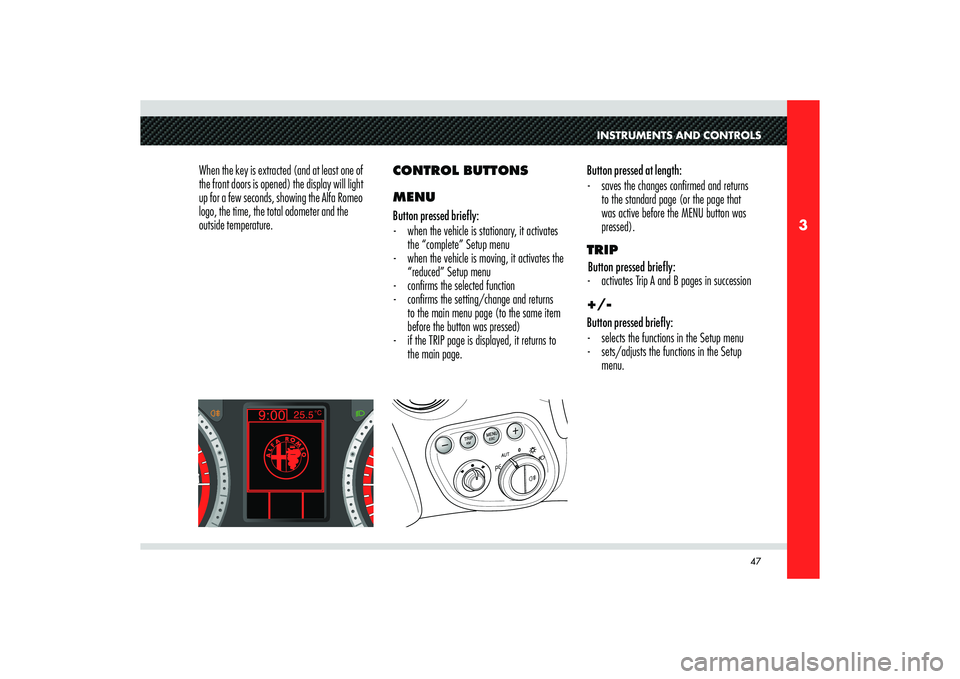
When the key is extracted (and at least one of
the front doors is opened) the display will light
up for a few seconds, showing the Alfa Romeo
logo, the time, the total odometer and the
outside temperature. Button pressed at length:
- saves the changes confi rmed and returns
to the standard page (or the page that
was active before the MENU button was
pressed).
TRIP
Button pressed brie� y:
- activates Trip A and B pages in succession
+/-
Button pressed briefly:
- selects the functions in the Setup menu
- sets/adjusts the functions in the Setup
menu. CONTROL BUTTONS
MENU
Button pressed briefly:
- when the vehicle is stationary, it activates
the “complete” Setup menu
- when the vehicle is moving, it activates the
“reduced” Setup menu
- confi rms the selected function
- confi rms the setting/change and returns
to the main menu page (to the same item
before the button was pressed)
- if the TRIP page is displayed, it returns to
the main page.
Page 51 of 223
49
3
INSTRUMENTS AND CONTROLS
+
+–
–
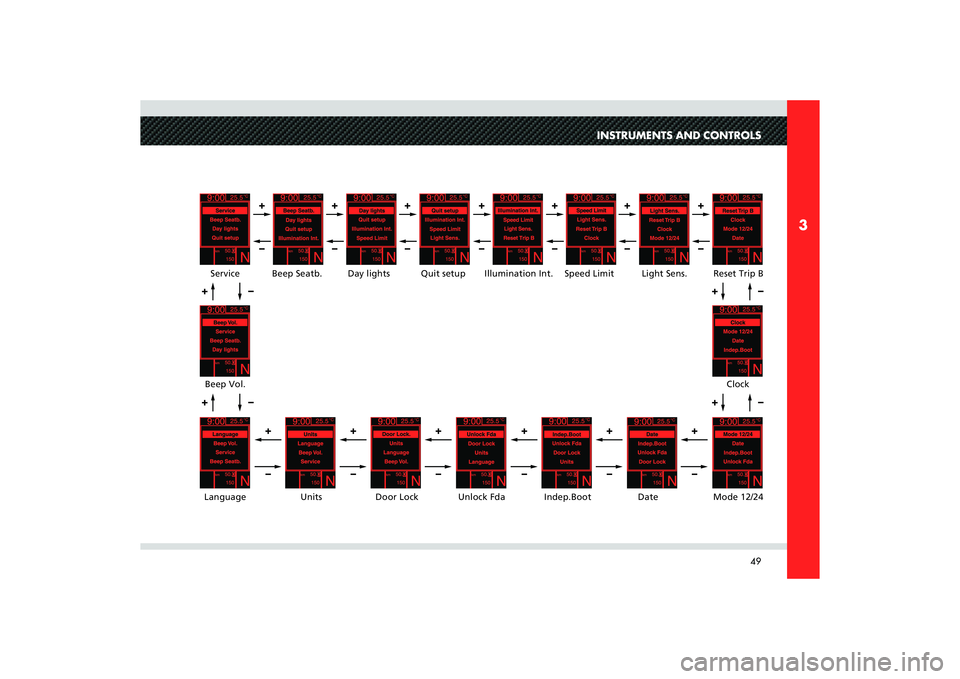
Illumination Int.Speed Limit Light Sens. Reset Trip B
Clock
Mode 12/24 Date Indep.Boot Unlock Fda Door Lock Units LanguageBeep Vol.Service Beep Seatb.Quit setup
Day lights
+–
+–+–
+
–
+
–
+
–
+
–
+
–
+
–
+
–
+
–
+
–
+
–
+
–
+
–
Page 52 of 223
50
3
Brightness adjustment
This function allows you to adjust the brightness
of the instrument panel to 8 levels.
To adjust, proceed as follows:
- briefl y press the MENU button: the display
highlights the level previously set.
- press button + o – to adjust;
- press the MENU button briefl y to return to
the menu page or hold it down to return to
the standard page.Speed limit
This function allows you to set the vehicle
speed limit (km/h or mph). When this limit is
exceeded, you are warned with an acoustic and
visual warning and a message appears on the
display (see the section “Warning lights and
messages”).
To set the speed limit proceed as follows:
- briefl y press the MENU button: the message
OFF is displayed ;
- Press the + button: the message ON; is
displayed briefl y press the MENU button
then press the buttons +/– to set the
desired speed (the value fl ashes during
setting).
- press the MENU button briefl y to return to
the main page or hold it down to return to
the standard page.
WARNING: The value can be set between
30 and 250 km/h (or 20 and 150 mph)
depending on the unit of measure previously
set (see the chapter “Unit of measure” below).
When the +/– button is pressed once, the speed
is increased/decreased by 5 units. Holding the
+/– button down, the value automatically
increases/decreases continuously until you
release the button. When you are close to the
desired value, release the button and then press
it briefly a few times until you reach the desired
value.To cancel the setting:
- briefl y press the MENU button: the message
ON is displayed;
- press button –: the message OFF is
displayed;
- press the MENU button briefl y to return to
the menu page or hold it down to return to
the standard screen page.
Page 53 of 223
51
3
INSTRUMENTS AND CONTROLS
Adjusting the sensing range of the twilight
sensor (Automatic low-beam)
This function allows you to adjust the sensing
range of the twilight sensor to 3 levels.
To adjust, proceed as follows:
- briefl y press the MENU button: the display
highlights the sensing range level previously
set
- press button + o – to adjust;
- press the MENU button briefl y to return to
the menu page or hold it down to return to
the standard screen page.Trip B reset mode (Reset TRIP B)
This function allows you to select Trip B reset
mode (automatic or manual).
For further information see the chapter “TRIP
button”.Clock adjustment (Clock)
This function allows you to adjust the clock.
To adjust the time proceed as follows:
- briefl y press the MENU button: the display
highlights the “hours”
- press button + o – to adjust;
- briefl y press the MENU button: the display
highlights the “minutes”
- press button + o – to adjust;
WARNING: When the button is pressed once
+/– the value increases/decreases by 1
unit. Holding the +/– button down, the value
automatically increases/decreases continuously
until you release the button. When you are close
to the desired value, release the button and then
press it briefly a few times until you reach the
desired value.- press the MENU button briefl y to return to
the main page or hold it down to return to
the standard page.