key battery Alfa Romeo 8C 2007 Owner handbook (in English)
[x] Cancel search | Manufacturer: ALFA ROMEO, Model Year: 2007, Model line: 8C, Model: Alfa Romeo 8C 2007Pages: 223, PDF Size: 14.35 MB
Page 5 of 223
INTRODUCTION
3
IT IS ESSENTIAL THAT
YOU READ THIS MANUAL!
Refuelling
Fuel-powered engines: use only
unleaded fuel with an octane rating
(RON) of not less than 95.
Starting the Engine
Make sure that the electronic parking
brake (EPB) is engaged. Shift the
gearshift lever to neutral (N). Insert
the electronic key in the ignition block
and turn it to MAR. Fully depress the
brake pedal without pressing the
accelerator. Press the START button and
release it as soon as the engine starts.Parking on fl ammable material
During operation, the catalytic muffl er
develops high temperatures. For this
reason, do not park the vehicle on
grass, dry leaves, pine needles or other
fl ammable materials: risk of fi re!
Respecting the environment
The vehicle is equipped with a system
that continuosly monitors the emission-
related components to help ensure
enhanced respect for the environment.
Accessory electrical devices
If you wish to install accessories that
require electric power (which may
gradually discharge the battery),
please contact an Authorised Service
Centre of the Manufacturer’s
Network, where the overall electrical
absorption of the accessories will be
estimated and the vehicle system
checked to verify whether it is capable
of supporting the required load. Code Card
Keep it in a safe place, not in the
vehicle.
Scheduled Maintenance
Proper maintenance will allow you
to preserve the vehicle performance
and safety features over time, ensure
respect for the environment and low
operating costs.
The owner’s manual …
… contains important information,
advice and warnings on proper use and
safe driving, as well as tips to keep
your vehicle in good condition over
time. Pay particular attention to the
following symbols:
- personal safety
- protection of the environment
- proper vehicle condition.
Page 59 of 223
57
3
INSTRUMENTS AND CONTROLS
TRIP COMPUTER
General
When the electronic key is inserted in the ignition
block, the “Trip computer” allows you to view
the vehicle mileage features. This function
comprises the “Trip A” function which monitors
total mileage, and the “Trip B” function which
monitors trip mileage; the latter function is
“contained” in the total mileage function.
Both functions can be reset (reset when setting
off on a new trip).
Trip A and B allow you to view the following
values:
- Fuel range
- Distance travelled
- Average fuel consumption
- Instantaneous fuel consumption
- Average speed
- Travel timeValues displayed
Fuel rangeIt indicates the distance you can still travel with
the fuel left in the tank, assuming you continue
travelling at the same speed.
A specific message will be shown on the display
“----“ when the following events occur:
- when the fuel range is less than 50 km (or
30 mi)
- if the vehicle is stopped with the engine
running for more than 3 minutes.
Distance travelledIt indicates the distance travelled from the
beginning of a new trip.
Every time the battery is connected and at the
beginning of each new trip (reset) the display
indicates the value “0.0”.WARNING: If there is no information, all the
Trip Computer indicators will show “-” instead of
the value. When correct operation is resumed,
the counter resumes regular operation as well,
without resetting the values displayed prior to
the malfunction nor restarting the count from
zero as for a new trip.Average fuel consumptionThis is the average fuel consumption from the
beginning of a new trip.
Page 60 of 223
58
3
Instantaneous fuel consumptionThis is the actual fuel consumption which is
constantly updated. If the vehicle is stopped with
the engine running, the display will show the
information “----“.Average speedThis is the average vehicle speed in relation
to the total time that has elapsed from the
beginning of a new trip.Travel timeThis is the time that has elapsed from the
beginning of a new trip (trip time) New tripA new trip begins after:
- the user has manually reset the indicator by
holding down the button TRIP;
- an “automatic” reset when the “distance
travelled” reaches 9999.9 km (or mi),
when the “travelling time” reaches 99.59
(99 hours and 59 minutes) or after
disconnection and reconnection of the
battery.
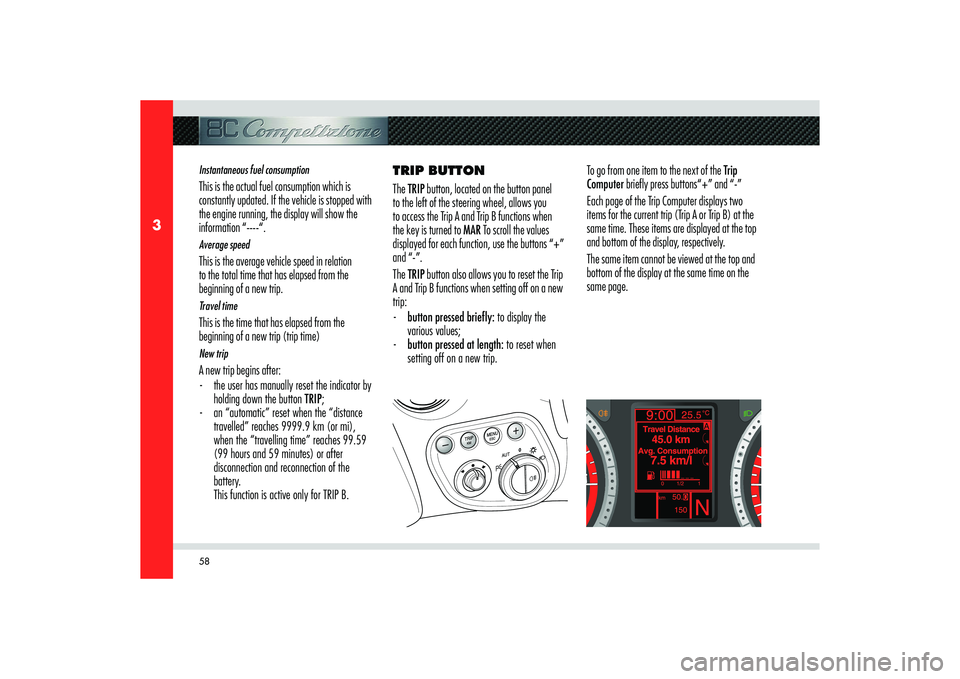
This function is active only for TRIP B.TRIP BUTTON
The TRIP button, located on the button panel
to the left of the steering wheel, allows you
to access the Trip A and Trip B functions when
the key is turned to MAR To scroll the values
displayed for each function, use the buttons “+”
and “-”.
The TRIP button also allows you to reset the Trip
A and Trip B functions when setting off on a new
trip:
- button pressed brie� y: to display the
various values;
- button pressed at length: to reset when
setting off on a new trip.To go from one item to the next of the Trip
Computer briefly press buttons“+” and “-”
Each page of the Trip Computer displays two
items for the current trip (Trip A or Trip B) at the
same time. These items are displayed at the top
and bottom of the display, respectively.
The same item cannot be viewed at the top and
bottom of the display at the same time on the
same page.
Page 61 of 223
59
3
INSTRUMENTS AND CONTROLS
The two modes of the Trip Computer can be
selected by briefly pressing the TRIP button;
Using the button “+” you can scroll the item
shown at the top of the display, while the button
“-” allows you to scroll the items displayed at
the bottom.
To go from the Trip A to the Trip B information,
briefly press the TRIP button.Procedure when setting off on a trip (reset)
Trip A and Trip B must be reset separately.
Reset Trip ATo reset Trip A, turn the key to MAR and press
and hold down the TRIP button for more than 2
seconds. WARNING: The counter will automatically be
reset only in the following cases:- when the “distance travelled” reaches
9999.9 km or when the “travelling time”
reaches 99.59 (99 hours and 59 minutes)
- Every time the battery is disconnected
and reconnected. When the trip is reset, a
warning message appears on the display.WARNING: When Trip A is reset, the “fuel
range” and “instantaneous consumption” values
are not reset.
Reset Trip BFor the Trip B values, through the Setup menu
you can select whether you wish to perform a
manual or an automatic reset procedure (see the
chapter “Setup menu” above):
- Manual reset: to manually reset Trip B,
press and hold down the TRIP button for
more than 2 seconds.
- Automatic reset: this occurs each time the
electronic key is inserted in the ignition
block.
When Trip B is reset, a warning message appears
on the display.WARNING: When Trip B is reset, the “fuel
range” and “instantaneous fuel consumption”
values are not reset.
Page 91 of 223
89
4
B
BEFORE YOU DRIVE
WARNING: If the direction indicators flash 9
times when the alarm system is activated with
doors, front and rear lids properly closed, this
means that the self-diagnostic function has
detected a malfunction in the system and that
you should contact an Authorised Service
Centre of the Manufacturer’s Network to have
the system checked.
DEACTIVATION
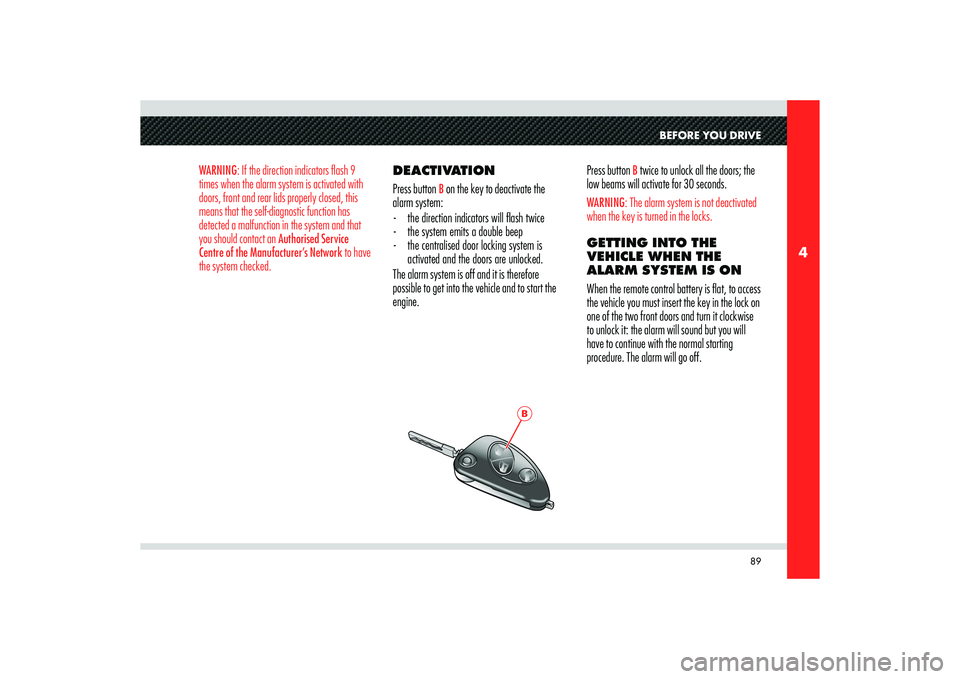
Press button
B on the key to deactivate the
alarm system:
- the direction indicators will fl ash twice
- the system emits a double beep
- the centralised door locking system is
activated and the doors are unlocked.
The alarm system is off and it is therefore
possible to get into the vehicle and to start the
engine.Press button
B twice to unlock all the doors; the
low beams will activate for 30 seconds.
WARNING: The alarm system is not deactivated
when the key is turned in the locks.GETTING INTO THE
VEHICLE WHEN THE
ALARM SYSTEM IS ON
When the remote control battery is flat, to access
the vehicle you must insert the key in the lock on
one of the two front doors and turn it clockwise
to unlock it: the alarm will sound but you will
have to continue with the normal starting
procedure. The alarm will go off.
Page 93 of 223
91
4
E
GF
H
BEFORE YOU DRIVE
ORDERING EXTRA
RADIO OPERATED
CONTROLS
To purchase new keys with radio control,
exclusively contact an Authorised Service
Centre of the Manufacturer’s Network,
bringing with you:
- all the keys with radio control in your
possession
- the CODE CARD of the Alfa Romeo CODE
system
- the electronic alarm system CODE CARD
- your identity card
- the identifi cation and registration documents
proving ownership of the vehicle. WARNING: The radio controls not handed over
for the new code storage procedure will be
automatically deactivated in order to prevent any
lost or stolen radio controls from being used to
deactivate the electronic alarm system.
REPLACING RADIO
OPERATED CONTROL
BATTERIES
If you press one of the three buttons and this
does not activate the corresponding feature,
before replacing the batteries, check the alarm
system features using the other remote control.
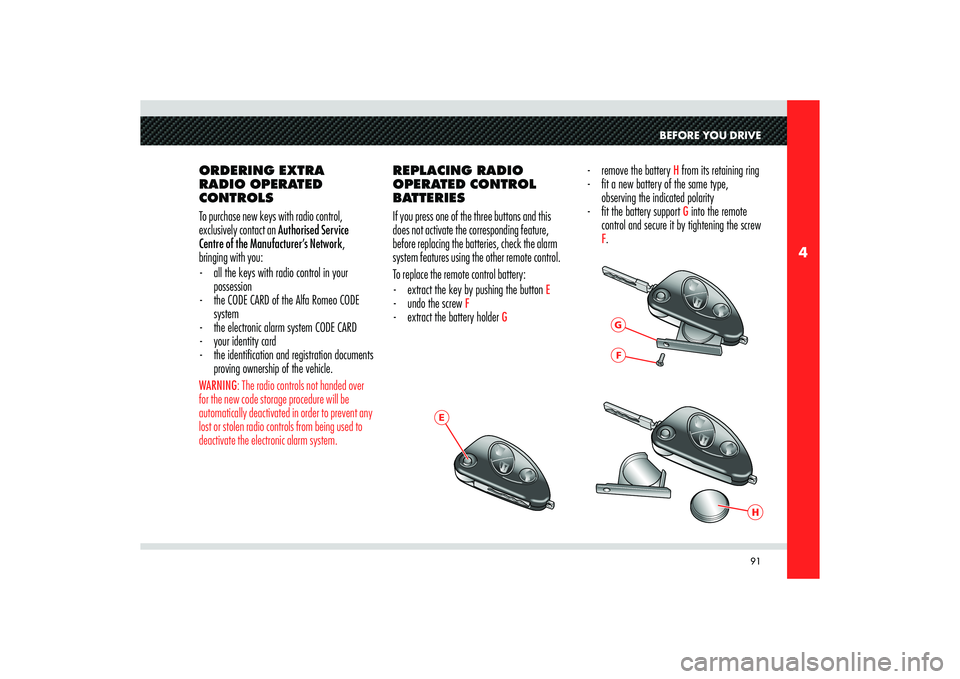
To replace the remote control battery:
- extract the key by pushing the button
E
- undo the screw
F
- extract the battery holder
G
- remove the battery
H from its retaining ring
- fi t a new battery of the same type,
observing the indicated polarity
- fi t the battery support G into the remote
control and secure it by tightening the screw
F.
Page 108 of 223
106
4
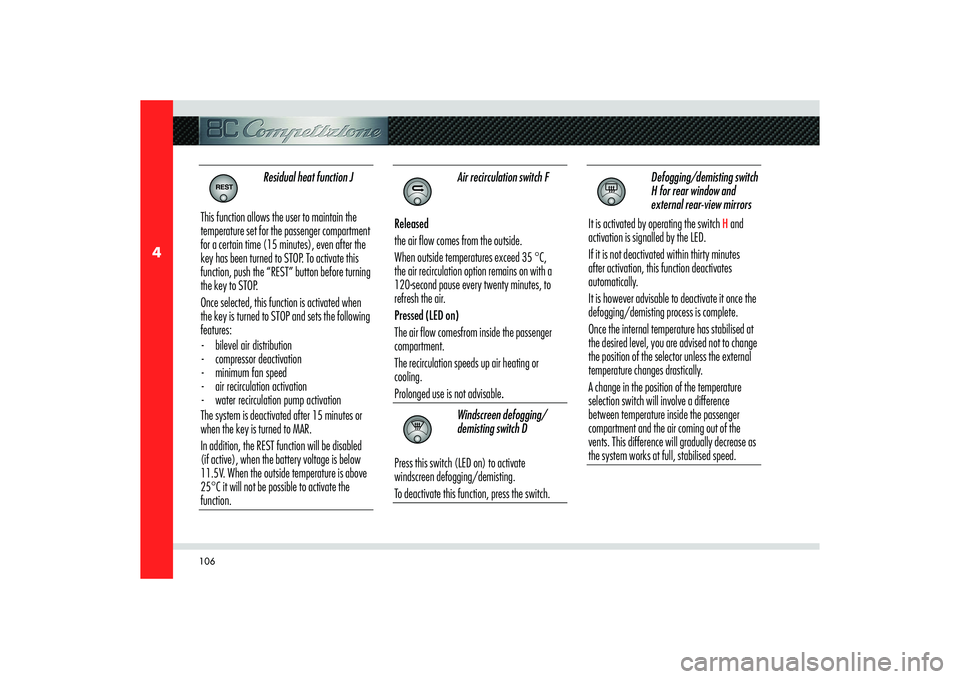
Residual heat function J
This function allows the user to maintain the
temperature set for the passenger compartment
for a certain time (15 minutes), even after the
key has been turned to STOP. To activate this
function, push the “REST” button before turning
the key to STOP.
Once selected, this function is activated when
the key is turned to STOP and sets the following
features:
- bilevel air distribution
- compressor deactivation
- minimum fan speed
- air recirculation activation
- water recirculation pump activation
The system is deactivated after 15 minutes or
when the key is turned to MAR.
In addition, the REST function will be disabled
(if active), when the battery voltage is below
11.5V. When the outside temperature is above
25°C it will not be possible to activate the
function.
Air recirculation switch F
Released
the air flow comes from the outside.
When outside temperatures exceed 35 °C,
the air recirculation option remains on with a
120-second pause every twenty minutes, to
refresh the air.
Pressed (LED on)
The air flow comesfrom inside the passenger
compartment.
The recirculation speeds up air heating or
cooling.
Prolonged use is not advisable.
Windscreen defogging/
demisting switch D
Press this switch (LED on) to activate
windscreen defogging/demisting.
To deactivate this function, press the switch.
Defogging/demisting switch
H for rear window and
external rear-view mirrors
It is activated by operating the switch
H and
activation is signalled by the LED.
If it is not deactivated within thirty minutes
after activation, this function deactivates
automatically.
It is however advisable to deactivate it once the
defogging/demisting process is complete.
Once the internal temperature has stabilised at
the desired level, you are advised not to change
the position of the selector unless the external
temperature changes drastically.
A change in the position of the temperature
selection switch will involve a difference
between temperature inside the passenger
compartment and the air coming out of the
vents. This difference will gradually decrease as
the system works at full, stabilised speed.
Page 118 of 223
116
5
A
B
WARNING: Do not use a battery-charger for
emergency starting under any circumstances:
you could damage the electronic systems,
particularly the control units that manage the
ignition and fuel supply functions.
CAUTION
Remember that when the
engine is not started, the power
braking and power steering systems
are not activated and so the effort
required on the brake pedal and
steering wheel is much greater.
TURNING OFF THE
ENGINE
With the engine idling, rotate the ignition key to
the STOP position.
A burst on the accelerator pedal before turning
off the engine has no purpose and increases fuel
consumption.
Q-SELECT
GEARBOXThe “Q-Select gearbox” is controlled with
the paddles on the steering wheel for gear
engagement and with the buttons on the centre
console for reverse gear engagement and
activation of the “automatic gearshift” and “low
grip” functions.
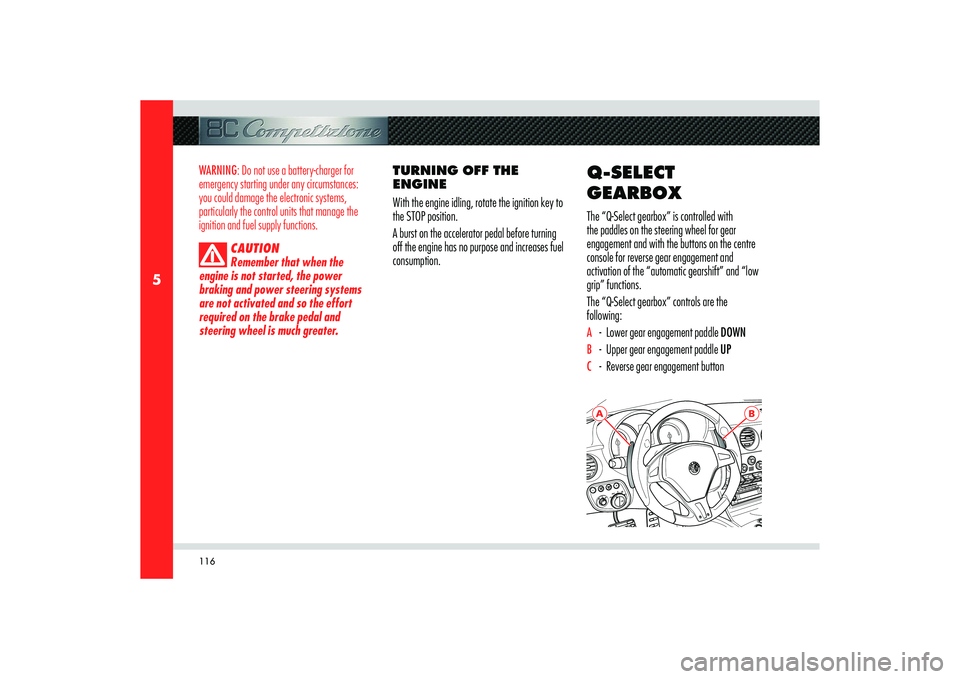
The “Q-Select gearbox” controls are the
following:A - Lower gear engagement paddle DOWNB - Upper gear engagement paddle UPC - Reverse gear engagement button
Page 120 of 223
118
5
If the symbol
remains on, there is a system
failure. This condition is also indicated by a beep
when the key is turned to position MAR.
WARNING: Contact an Authorised Service
Centre of the Manufacturer’s Network to have
the malfunction corrected.
OPERATION WITH THE
ENGINE OFF
After completing the “system start-up” stage,
the gear currently engaged will appear on the
display:
- N (Neutral)
- R (Reverse)
- D(1
st).
If the indication flashes (may also occur with N)
it means that the gear is not properly engaged or
is disengaged; therefore, request neutral (N) and
then the desired gear.CAUTION
If a horizontal dash appears on
the display, there is a system failure.
When the engine is off, 1st gear, reverse (R) and
neutral (N) can be engaged. Keeping the brake
pedal pressed during the request, you must
proceed as follows:
- N (Neutral): pull both paddles found behind
the steering wheel.
- R (Reverse): press button
C.
- Engaging 1
st gear: pull the UP paddle
towards the steering wheel.
CAUTION
To engage reverse gear, hold
the button C down until the letter R is
displayed.
WARNING: Immediately release the paddles
UP, DOWN and the button R after the gearshift
request. A prolonged manoeuvre may cause
the failure warning light
and the buzzer
to activate. Do not operate the system with the
engine off, to prevent discharging the battery.
Avoid useless gearshifting with the engine off, to
prevent overheating of the pump.
Page 141 of 223

139
5
A
USING THE VEHICLE
Malfunction indication
In the event of electric parking brake system
failures, the warning light
! on the display
will come on.
Depending on the message displayed, it signals
the following failures of the EPB system:
- Parking brake failure
If the message warning you to go to the
nearest Authorised Service Centre of the
Manufacturer’s Network is displayed,
drive slowly and remember that the electric
parking brake device is not functioning.
- Excessive temperature. If after leaving the engine off (key turned
to STOP) for about 15 minutes without
using the parking brake, the warning
light illuminates again when the engine
is started, slowly drive to an Authorised
Service Centre of the Manufacturer’s
Network. If the brake failure is accompanied by the
message “Mechanical release only”, the
manual emergency deactivation procedure
must be performed to release the parking
brake.
Deactivating the PARK OFF automatic
operation
To deactivate manual operation of the electric
parking brake, with the engine on, press the
button
A on the dashboard. The words PARK OFF
will appear on the display for 5 seconds and then
the page that was active previously will reappear.
To reactivate automatic operation, press the
button A again, the words PARK ON appear on
the display for 5 seconds.
WARNING: In certain conditions, when the
battery voltage is low, the electric parking brake
activation/deactivation system may temporarily
be deactivated for safety reasons. Therefore,
typically during engine starting when the battery
voltage drops, the message PARK OFF may
temporarily appear on the display indicating that
automatic operation is temporarily disabled.
WARNING: In the case of performance
starting, check that the electric parking brake is
disengaged.