sensor Alfa Romeo 8C 2007 Owner handbook (in English)
[x] Cancel search | Manufacturer: ALFA ROMEO, Model Year: 2007, Model line: 8C, Model: Alfa Romeo 8C 2007Pages: 223, PDF Size: 14.35 MB
Page 21 of 223
19
2
ACTIVE AND PASSIVE SAFETY
PRETENSIONERS
To further enhance the seat belt efficiency,
the vehicle seat belts are equipped with ETD
(Emergency Tensioning Device) pretensioners.
These devices “detect”, by means of a sensor,
that a severe collision is occurring and retract the
seat belts by a few centimetres. This way, they
help ensure that the seat belt properly adheres to
the occupant’s body before its restraining action
starts.
The seat belt locking indicates that the device
has activated; a small amount of smoke may be
visible.
This smoke is not toxic and is not indicative of
fire.
The pretensioners activate in the following cases:
- Head-on and rear collisions of a suffi cient
severity
- In certain roll-overs
The pretensioner only activates when the seat
belt is fastened.
After a pretensioner activation, the seat belt can
be unfastened as usual, by pressing the button
on the buckle.The pretensioner does not require any
maintenance or lubrication. Do not tamper with
or modify the pretensioner, as this will affect its
efficiency. If exceptional natural events (floods,
heavy storms, etc.) have caused the device to be
wet in water and mud, you must replace it.
To help ensure optimal protection from the
pretensioners, wear the seat belt in such a way
that it fits snugly against your chest and pelvis.
CAUTION
The pretensioners can be used
only once and activate only when
the seat belts are fastened. If the
pretensioners have been activated,
go to an Authorised Service Centre of
the Manufacturer’s Network to have
them replaced and disposed of. The
units have a 14 year service life from
the date of manufacture; they must be
replaced when their service life is near
to expiry. WARNING: Operations on the vehicle which
involve blows, vibrations or localised heating
(over 100°C for 6 hours max.) in the area of
the pretensioners may damage or activate them:
vibrations due to uneven road surfaces or small
obstacles, such as impacts with kerbs, do not
affect the units. Contact an Authorised Service
Centre of the Manufacturer’s Network if
service operations must be carried out.
CAUTION
Do not tamper with the
pretensioner components. Any
intervention must be carried out only
by qualified and authorised personnel.
Always contact an Authorised Service
Centre of the Manufacturer’s Network.
Page 28 of 223
26
2
CAUTION
If the passenger airbag
system is active, do not sit a child in a
rearward-facing child seat on the front
vehicle seat. The airbag activation in
the event of a collision may cause fatal
injury to the child, regardless of the
collision severity.
FRONT AIRBAGSThe vehicle is equipped with 2 airbags (2 front
ones) and electronically controlled pretensioners
for all of the seat belts.
The system components are the following:1) Electronic control unit2) Dual-stage front passenger’s airbag 3) Passenger’s airbag deactivation switch4) Passenger’s front seat belt pretensioner5) Driver’s front seat belt pretensioner
6) Airbag system failure warning light7) Dual-stage front driver’s airbag8) Clock Spring9) Diagnostic socket10)
Left-hand front Crash Zone Sensor
11)
Right-hand front Crash Zone Sensor.
12)
Passenger’s airbag deactivation warning
light
The vehicle is equipped with multistage front
airbags for the driver and the passenger.
Page 37 of 223
35
2
A
ACTIVE AND PASSIVE SAFETY
ACTIVATION
The VDC and ASR systems are integrated in one
single function and are automatically activated
every time the engine is started; they can be
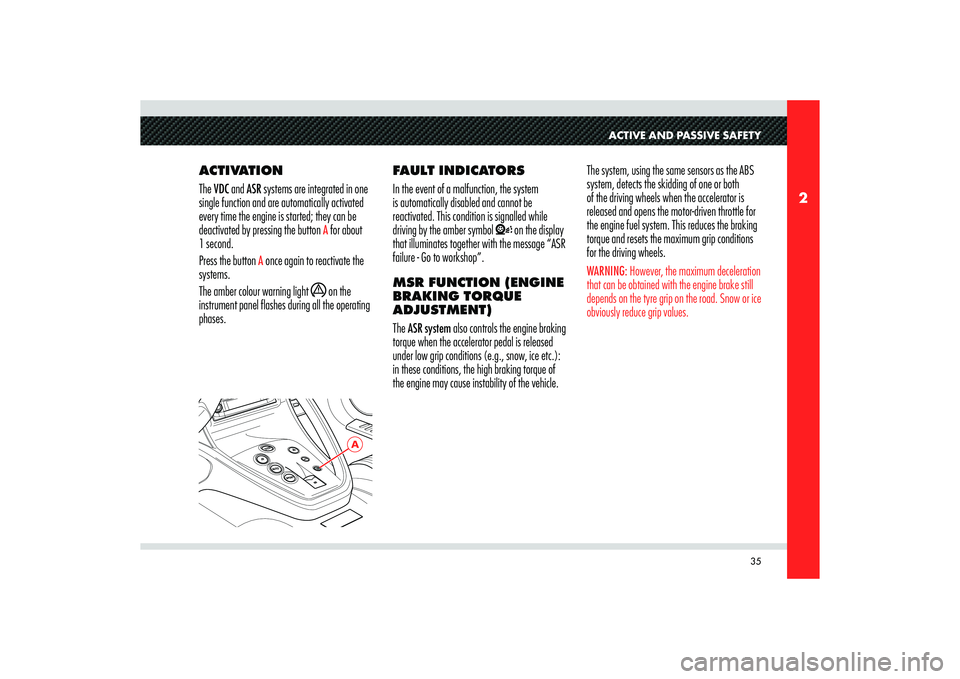
deactivated by pressing the button
A for about
1 second.
Press the button
A once again to reactivate the
systems.
The amber colour warning light
on the
instrument panel flashes during all the operating
phases.FAULT INDICATORS
In the event of a malfunction, the system
is automatically disabled and cannot be
reactivated. This condition is signalled while
driving by the amber symbol
on the display
that illuminates together with the message “ASR
failure - Go to workshop”.
MSR FUNCTION (ENGINE
BRAKING TORQUE
ADJUSTMENT)
The ASR system also controls the engine braking
torque when the accelerator pedal is released
under low grip conditions (e.g., snow, ice etc.):
in these conditions, the high braking torque of
the engine may cause instability of the vehicle.The system, using the same sensors as the ABS
system, detects the skidding of one or both
of the driving wheels when the accelerator is
released and opens the motor-driven throttle for
the engine fuel system. This reduces the braking
torque and resets the maximum grip conditions
for the driving wheels.
WARNING: However, the maximum deceleration
that can be obtained with the engine brake still
depends on the tyre grip on the road. Snow or ice
obviously reduce grip values.
Page 38 of 223
36
2
ABS AND EBD
SYSTEMSThe vehicle is equipped with ABS (Anti-lock
Brake System) and EBD (Electronic Brake force
Distribution) system which enhances braking
power through the ABS system sensors and
control unit.
In the event of an emergency stop or braking on
slippery surfaces (e.g., snow, ice etc.) the ABS,
together with the standard braking system, is
designed to allow the driver to apply maximum
braking force without causing the wheels to lock
and consequently losing control of the vehicle.
The system is based on an electronic control unit
that processes the signals coming from 4 sensors
fitted on the 4 wheels.
When a wheel tends to lock, the sensor warns
the control unit, which informs the electro-
hydraulic unit so that it controls the pressure
exerted on the brake calipers; the driver feels a
“pulsating” sensation on the brake pedal which
is completely normal.
In the event of a failure, the system will be
deactivated, but this will not affect the efficiency of the standard braking system.
The failure is signalled by the amber warning
light
on the instrument panel and the
display which illuminates together with the
message “ABS failure - Go to workshop”.
In this case, we recommend that you contact the
nearest Service Centre of the Manufacturer’s
Network in order to identify the fault as soon as
possible, by means of the system self-diagnostic
function.CAUTION
The vehicles must be equipped
only with wheels, tyres and brake
pads of the type and make approved
by the Manufacturer for this model.CAUTION
Regardless of the fact that
this device makes a considerable
contribution to safety it is still
essential to drive with the greatest
care when the road surface is wet,
covered with snow or ice.
CAUTION
The vehicle is equipped with
Electronic Brake force Distribution
(EBD). The warning light
illuminates when the engine is running
to indicate an EBD system malfunction.
In this case, sharp braking can cause
early locking of the rear wheels
and possible side skidding. Driving
extremely carefully, immediately go
to the nearest Service Centre of the
Manufacturer’s Network to have the
system checked.
Page 45 of 223
43
3
A
B
C
D
E
INSTRUMENTS AND CONTROLS
1) Air conditioning side vents2) Lower gearshift paddle “DOWN”3) Instrument panel4) Air conditioning upper vent5)
Sun radiation sensor
6)
Driver’s airbag
7)
Windscreen/headlight wiper/washer
control lever
8)
Upper gearshift paddle UP
9)
Central air conditioning/heating vents
10)
Radio/navigator
11)
Passenger’s airbag
12)
Air conditioning and heating system
controls
13)
Side windows vents
14)
Glove compartment
15)
Central dashboard controls
16)
Electric parking brake engagement/
disengagement lever
17)
Starter/steering wheel lock switch
18)
Horn control
19)
Steering wheel height and depth
adjustment lever
20)
Cruise Control lever, direction indicators
21)
Controls to the left of the steering wheel
22)
Engine start button
23)
Reverse gear engagement button
24)
AUTO mode button
25)
SPORT mode button
26)
VDC deactivation button
27)
WET mode button
28)
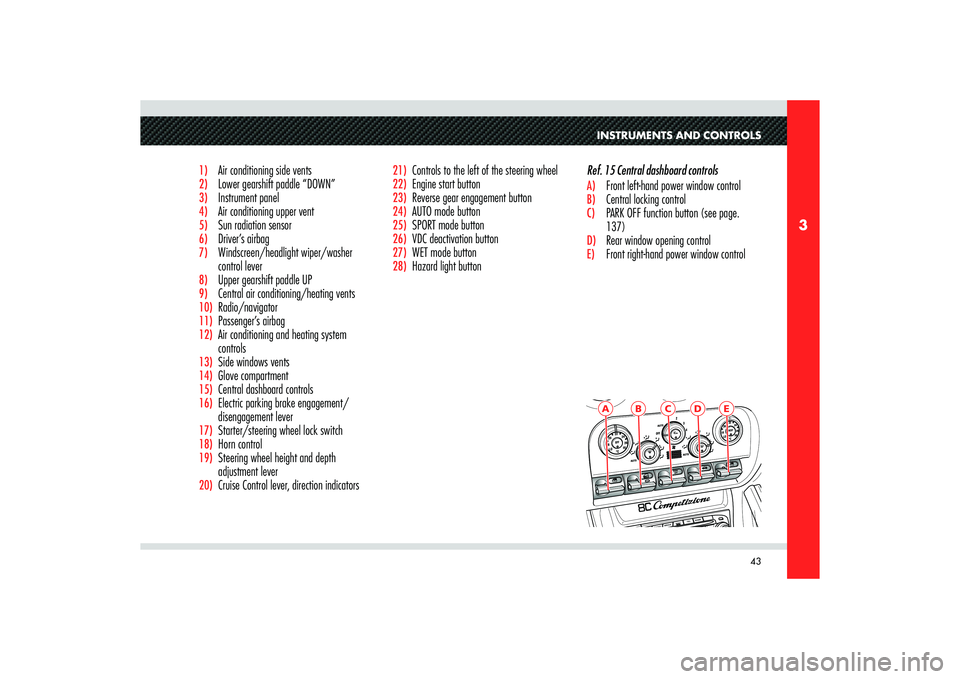
Hazard light buttonRef. 15 Central dashboard controls
A) Front left-hand power window controlB) Central locking control C) PARK OFF function button (see page.
137)D) Rear window opening control E) Front right-hand power window control
Page 46 of 223
44
3
A
B
C
D
F
C
D
E
B
A
AB
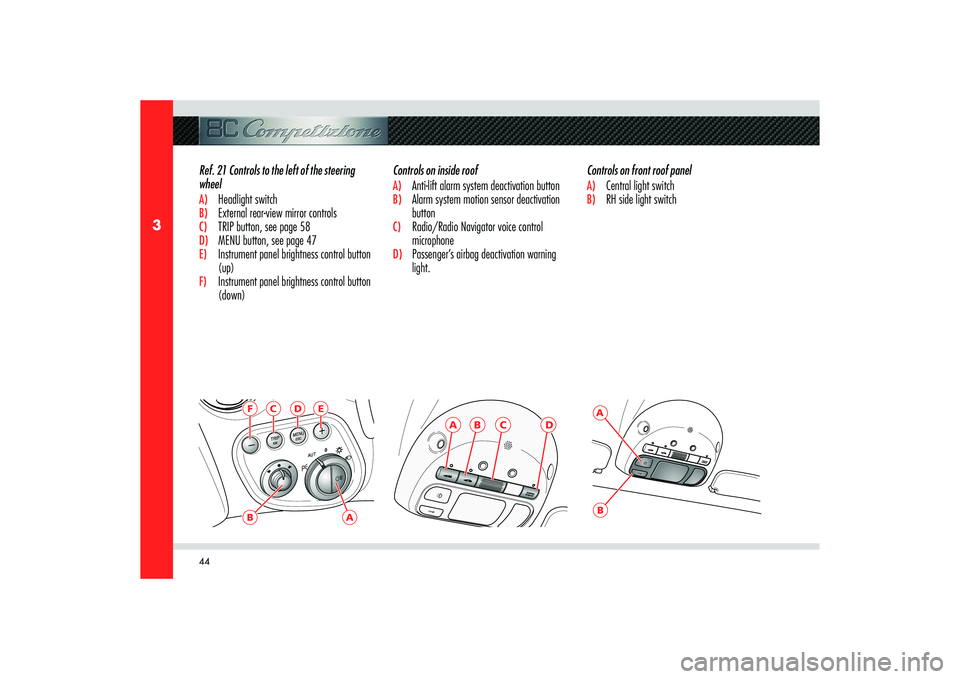
Controls on inside roofA) Anti-lift alarm system deactivation buttonB) Alarm system motion sensor deactivation
buttonC) Radio/Radio Navigator voice control
microphoneD) Passenger’s airbag deactivation warning
light. Ref. 21 Controls to the left of the steering
wheel
A) Headlight switchB) External rear-view mirror controlsC) TRIP button, see page 58D) MENU button, see page 47E) Instrument panel brightness control button
(up)F) Instrument panel brightness control button
(down)Controls on front roof panel
A) Central light switchB) RH side light switch
Page 53 of 223
51
3
INSTRUMENTS AND CONTROLS
Adjusting the sensing range of the twilight
sensor (Automatic low-beam)
This function allows you to adjust the sensing
range of the twilight sensor to 3 levels.
To adjust, proceed as follows:
- briefl y press the MENU button: the display
highlights the sensing range level previously
set
- press button + o – to adjust;
- press the MENU button briefl y to return to
the menu page or hold it down to return to
the standard screen page.Trip B reset mode (Reset TRIP B)
This function allows you to select Trip B reset
mode (automatic or manual).
For further information see the chapter “TRIP
button”.Clock adjustment (Clock)
This function allows you to adjust the clock.
To adjust the time proceed as follows:
- briefl y press the MENU button: the display
highlights the “hours”
- press button + o – to adjust;
- briefl y press the MENU button: the display
highlights the “minutes”
- press button + o – to adjust;
WARNING: When the button is pressed once
+/– the value increases/decreases by 1
unit. Holding the +/– button down, the value
automatically increases/decreases continuously
until you release the button. When you are close
to the desired value, release the button and then
press it briefly a few times until you reach the
desired value.- press the MENU button briefl y to return to
the main page or hold it down to return to
the standard page.
Page 65 of 223
63
3
INSTRUMENTS AND CONTROLS
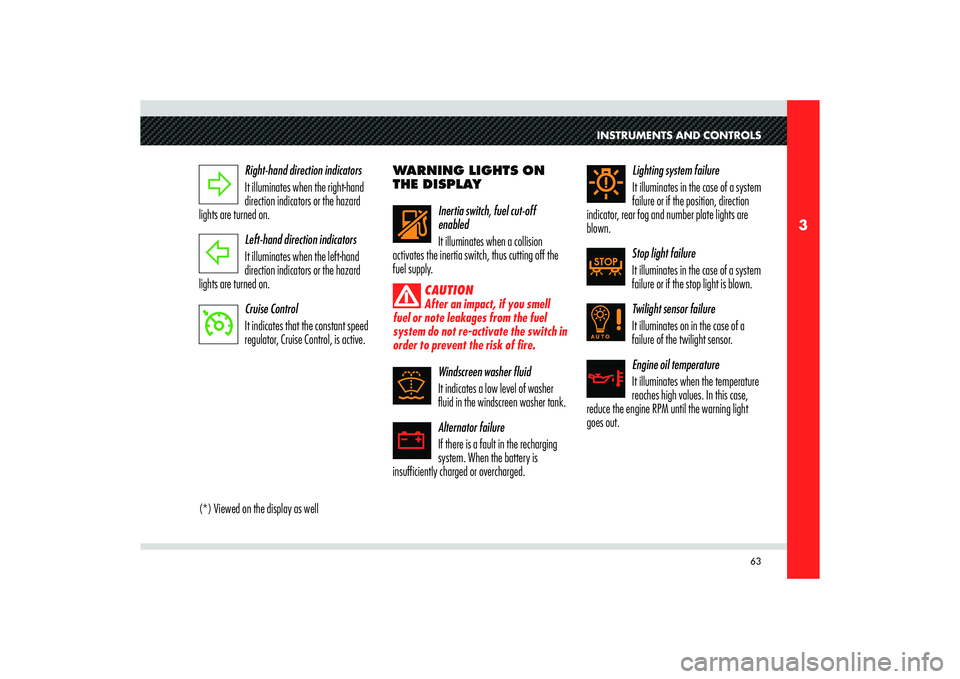
Right-hand direction indicators
It illuminates when the right-hand
direction indicators or the hazard
lights are turned on.
Left-hand direction indicators
It illuminates when the left-hand
direction indicators or the hazard
lights are turned on.
Cruise Control
It indicates that the constant speed
regulator, Cruise Control, is active.
(*) Viewed on the display as wellWARNING LIGHTS ON
THE DISPLAY
Inertia switch, fuel cut-off
enabled
It illuminates when a collision
activates the inertia switch, thus cutting off the
fuel supply.
CAUTION
After an impact, if you smell
fuel or note leakages from the fuel
system do not re-activate the switch in
order to prevent the risk of fire.
Windscreen washer fluid
It indicates a low level of washer
fluid in the windscreen washer tank.
Alternator failure
If there is a fault in the recharging
system. When the battery is
insufficiently charged or overcharged. Lighting system failure
It illuminates in the case of a system
failure or if the position, direction
indicator, rear fog and number plate lights are
blown.
Stop light failure
It illuminates in the case of a system
failure or if the stop light is blown.
Twilight sensor failure
It illuminates on in the case of a
failure of the twilight sensor.
Engine oil temperature
It illuminates when the temperature
reaches high values. In this case,
reduce the engine RPM until the warning light
goes out.
Page 67 of 223
65
3
INSTRUMENTS AND CONTROLS
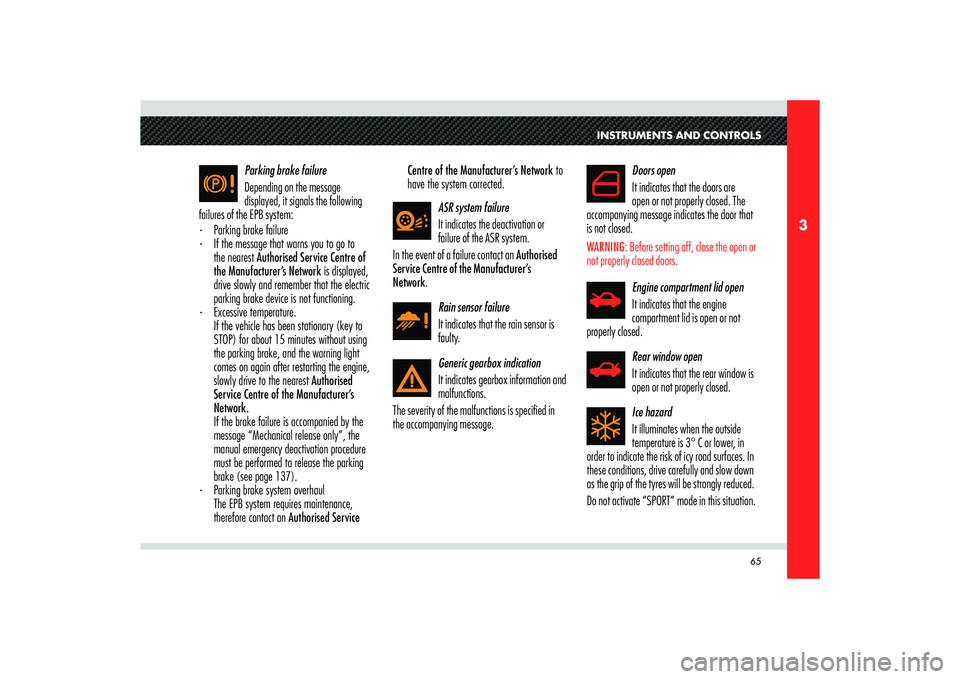
Parking brake failure
Depending on the message
displayed, it signals the following
failures of the EPB system:
- Parking brake failure
- If the message that warns you to go to
the nearest Authorised Service Centre of
the Manufacturer’s Network is displayed,
drive slowly and remember that the electric
parking brake device is not functioning.
- Excessive temperature.
If the vehicle has been stationary (key to
STOP) for about 15 minutes without using
the parking brake, and the warning light
comes on again after restarting the engine,
slowly drive to the nearest Authorised
Service Centre of the Manufacturer’s
Network.
If the brake failure is accompanied by the
message “Mechanical release only”, the
manual emergency deactivation procedure
must be performed to release the parking
brake (see page 137).
- Parking brake system overhaul
The EPB system requires maintenance,
therefore contact an Authorised Service Centre of the Manufacturer’s Network to
have the system corrected.
ASR system failure
It indicates the deactivation or
failure of the ASR system.
In the event of a failure contact an Authorised
Service Centre of the Manufacturer’s
Network.
Rain sensor failure
It indicates that the rain sensor is
faulty.
Generic gearbox indication
It indicates gearbox information and
malfunctions.
The severity of the malfunctions is specified in
the accompanying message.Doors open
It indicates that the doors are
open or not properly closed. The
accompanying message indicates the door that
is not closed.
WARNING: Before setting off, close the open or
not properly closed doors.
Engine compartment lid open
It indicates that the engine
compartment lid is open or not
properly closed.
Rear window open
It indicates that the rear window is
open or not properly closed.
Ice hazard
It illuminates when the outside
temperature is 3° C or lower, in
order to indicate the risk of icy road surfaces. In
these conditions, drive carefully and slow down
as the grip of the tyres will be strongly reduced.
Do not activate “SPORT” mode in this situation.
Page 73 of 223
71
3
A
B
INSTRUMENTS AND CONTROLS
SPORT mode
Use button
D to select SPORT mode, which is
a sport setting for the Q-Select gearbox and
traction control.
Please note that selecting SPORT mode will
reduce driving comfort during gearshifting.
When this function is active, the letter “S
illuminates on the display”.
“Automatic gearshift” mode (AUTO)
Button
E activates/deactivates automatic
operation of the Q-Select gearbox.
When this mode is activated, the gear displayed
is replaced with the letter “D” and gearshifting
will be automatic.Reverse
Button
F engages reverse gear.
START button
Press button
G, with the key turned to MAR and
the brake pedal depressed, to start the engine.
Electric parking brake (EPB)
Pull up the lever EPB
H to engage/disengage
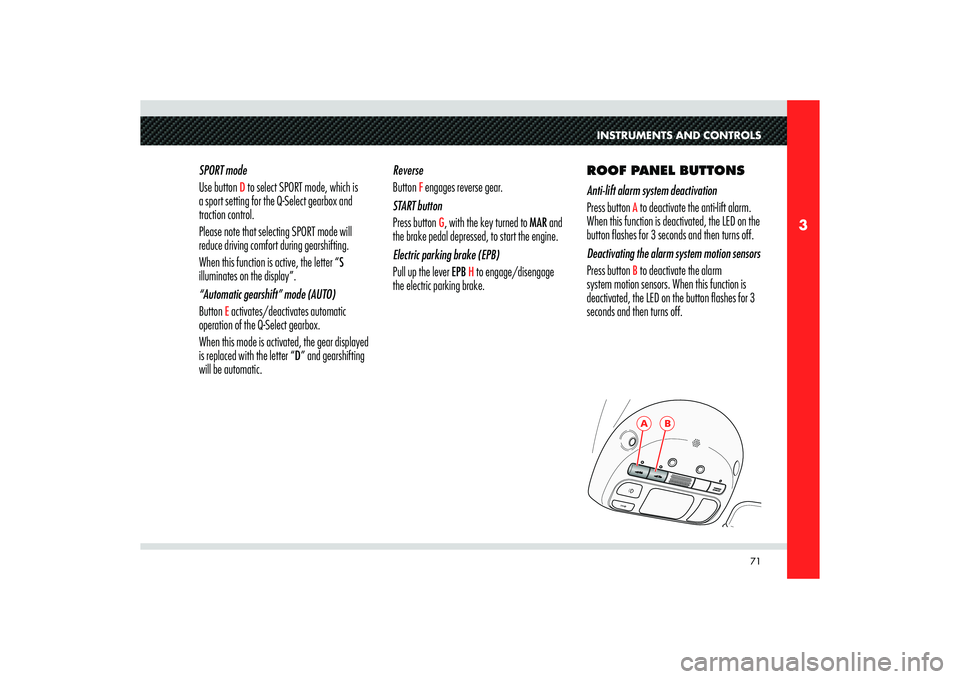
the electric parking brake.ROOF PANEL BUTTONS
Anti-lift alarm system deactivation
Press button
A to deactivate the anti-lift alarm.
When this function is deactivated, the LED on the
button flashes for 3 seconds and then turns off.
Deactivating the alarm system motion sensors
Press button B to deactivate the alarm
system motion sensors. When this function is
deactivated, the LED on the button flashes for 3
seconds and then turns off.