ad blue Alfa Romeo Giulia 2016 Owner's Manual
[x] Cancel search | Manufacturer: ALFA ROMEO, Model Year: 2016, Model line: Giulia, Model: Alfa Romeo Giulia 2016Pages: 204, PDF Size: 4.95 MB
Page 29 of 204
The first time the main beam headlights
are activated (pushing the left lever), the
function is activated (the warning light
or thesymbol comes on in the
instrument panel).
If the main beam headlights are actually
on, the blue icon/warning light
will
also come on in the instrument panel.
DIRECTION INDICATORS
Move the left lever fig. 30 as far as
possible (unstable position):
up: right direction signal activated, the
warning light
flashes on the
instrument panel;
down: left direction signal activated,
the warning light
flashes on the
instrument panel;
The direction indicators are switched off
automatically when the steering wheel is
straightened.
"Lane Change" function
When you want to signal the change of
the driving lane, move the lever until the
first impulse (about half stroke).
The direction indicator on the side
selected will flash five times and then
switch off automatically.
SBL FUNCTION (Static Bending Light)(where provided)
The SBL LEDs activate in order to better
illuminate the street and increase the
light angle while turning. This function isenabled by rotating the light switch to
position
orAUTO. The SBL LEDs
activate if the speed exceeds 12 mph
(20 km/h) and the steering radius is
below 1640 ft (500 m).
HEADLIGHT ALIGNMENT ADJUSTMENT
Headlight alignment corrector
(where provided)
This device is not available on vehicles
equipped with Xenon headlights
(Bi-Xenon 35 W headlamp version), as
they require an automatic alignment
correction system.
It only operates with the ignition device
at ON.
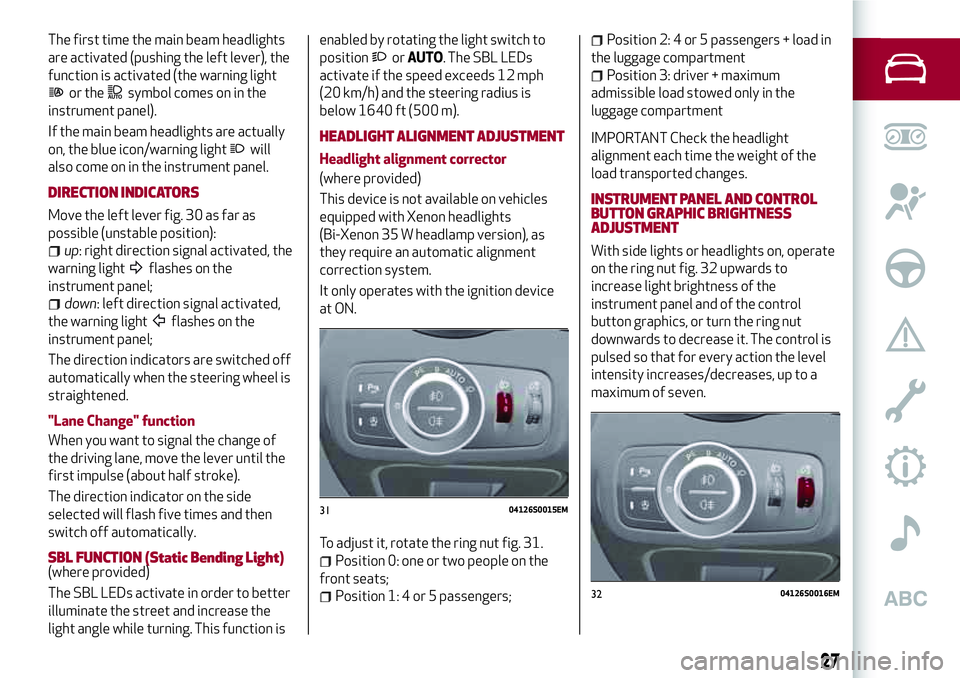
To adjust it, rotate the ring nut fig. 31.
Position 0: one or two people on the
front seats;
Position 1: 4 or 5 passengers;
Position 2: 4 or 5 passengers + load in
the luggage compartment
Position 3: driver + maximum
admissible load stowed only in the
luggage compartment
IMPORTANT Check the headlight
alignment each time the weight of the
load transported changes.
INSTRUMENT PANEL AND CONTROL
BUTTON GRAPHIC BRIGHTNESS
ADJUSTMENT
With side lights or headlights on, operate
on the ring nut fig. 32 upwards to
increase light brightness of the
instrument panel and of the control
button graphics, or turn the ring nut
downwards to decrease it. The control is
pulsed so that for every action the level
intensity increases/decreases, up to a
maximum of seven.
3104126S0015EM
3204126S0016EM
27
Page 55 of 204
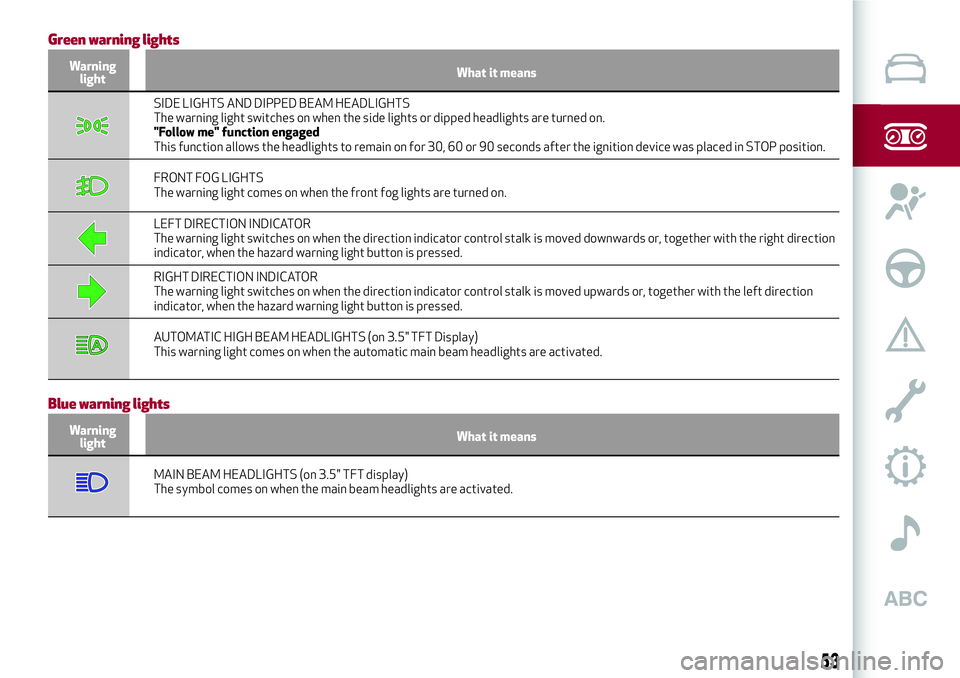
Green warning lights
Warning
lightWhat it means
SIDE LIGHTS AND DIPPED BEAM HEADLIGHTS
The warning light switches on when the side lights or dipped headlights are turned on.
"Follow me" function engaged
This function allows the headlights to remain on for 30, 60 or 90 seconds after the ignition device was placed in STOP position.
FRONT FOG LIGHTS
The warning light comes on when the front fog lights are turned on.
LEFT DIRECTION INDICATOR
The warning light switches on when the direction indicator control stalk is moved downwards or, together with the right direction
indicator, when the hazard warning light button is pressed.
RIGHT DIRECTION INDICATOR
The warning light switches on when the direction indicator control stalk is moved upwards or, together with the left direction
indicator, when the hazard warning light button is pressed.
AUTOMATIC HIGH BEAM HEADLIGHTS (on 3.5" TFT Display)
This warning light comes on when the automatic main beam headlights are activated.
Blue warning lights
Warning
lightWhat it means
MAIN BEAM HEADLIGHTS (on 3.5" TFT display)
The symbol comes on when the main beam headlights are activated.
53
Page 66 of 204
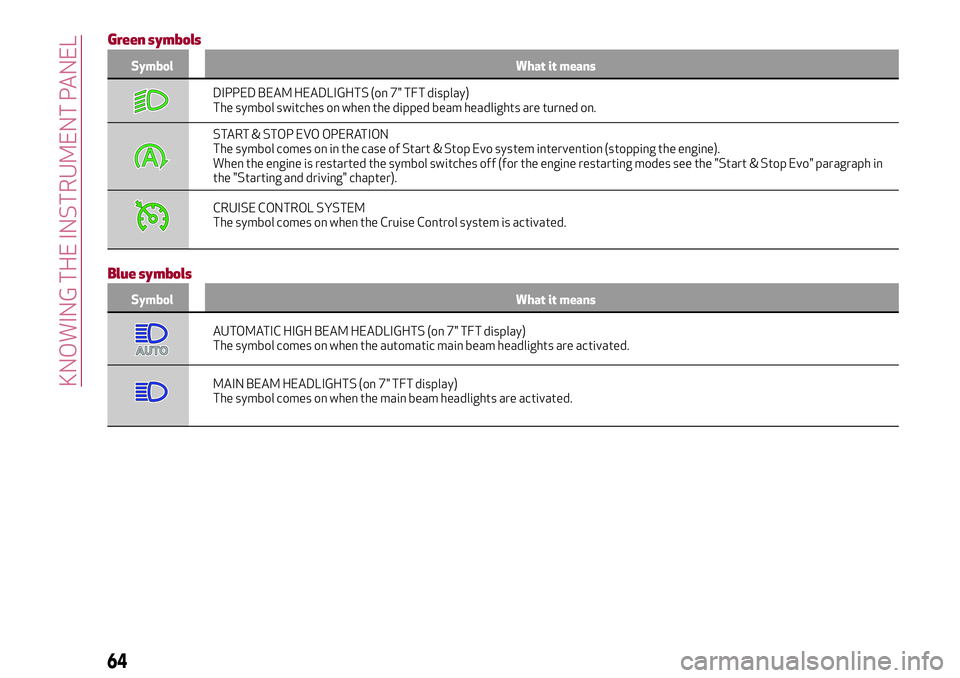
Green symbols
Symbol What it means
DIPPED BEAM HEADLIGHTS (on 7" TFT display)
The symbol switches on when the dipped beam headlights are turned on.
START & STOP EVO OPERATION
The symbol comes on in the case of Start & Stop Evo system intervention (stopping the engine).
When the engine is restarted the symbol switches off (for the engine restarting modes see the "Start & Stop Evo" paragraph in
the "Starting and driving" chapter).
CRUISE CONTROL SYSTEM
The symbol comes on when the Cruise Control system is activated.
Blue symbols
Symbol What it means
AUTOMATIC HIGH BEAM HEADLIGHTS (on 7" TFT display)
The symbol comes on when the automatic main beam headlights are activated.
MAIN BEAM HEADLIGHTS (on 7" TFT display)
The symbol comes on when the main beam headlights are activated.
64
KNOWING THE INSTRUMENT PANEL
Page 111 of 204
"ALFA DNA™"SYSTEM
"ALFA DNA™"SYSTEM
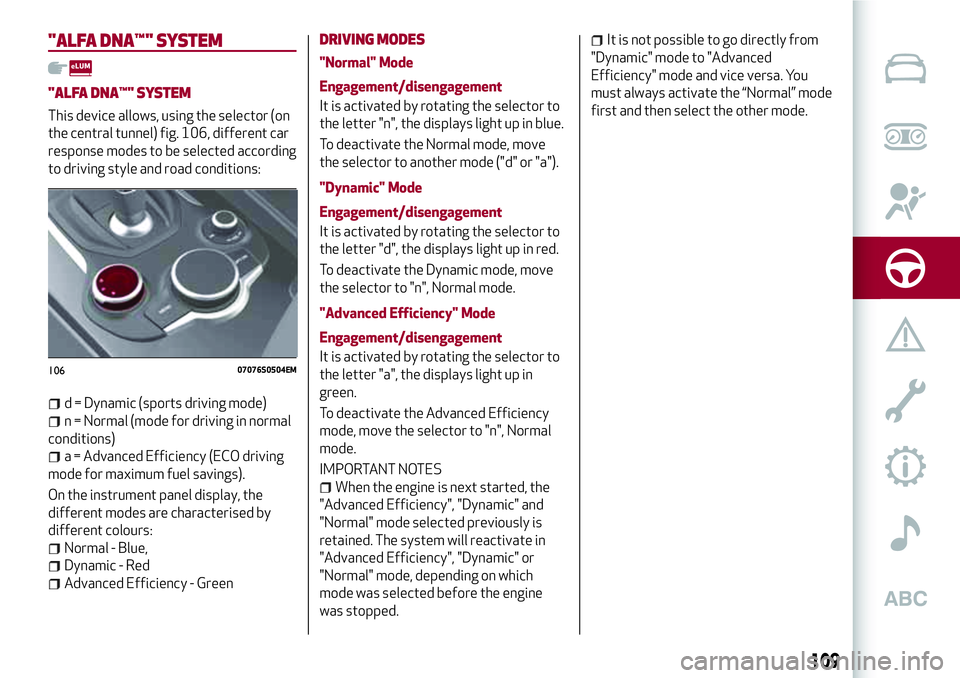
This device allows, using the selector (on
the central tunnel) fig. 106, different car
response modes to be selected according
to driving style and road conditions:
d = Dynamic (sports driving mode)
n = Normal (mode for driving in normal
conditions)
a = Advanced Efficiency (ECO driving
mode for maximum fuel savings).
On the instrument panel display, the
different modes are characterised by
different colours:
Normal - Blue,
Dynamic - Red
Advanced Efficiency - Green
DRIVING MODES
"Normal" Mode
Engagement/disengagement
It is activated by rotating the selector to
the letter "n", the displays light up in blue.
To deactivate the Normal mode, move
the selector to another mode ("d" or "a").
"Dynamic" Mode
Engagement/disengagement
It is activated by rotating the selector to
the letter "d", the displays light up in red.
To deactivate the Dynamic mode, move
the selector to "n", Normal mode.
"Advanced Efficiency" Mode
Engagement/disengagement
It is activated by rotating the selector to
the letter "a", the displays light up in
green.
To deactivate the Advanced Efficiency
mode, move the selector to "n", Normal
mode.
IMPORTANT NOTES
When the engine is next started, the
"Advanced Efficiency", "Dynamic" and
"Normal" mode selected previously is
retained. The system will reactivate in
"Advanced Efficiency", "Dynamic" or
"Normal" mode, depending on which
mode was selected before the engine
was stopped.
It is not possible to go directly from
"Dynamic" mode to "Advanced
Efficiency" mode and vice versa. You
must always activate the “Normal” mode
first and then select the other mode.
10607076S0504EM
109
Page 175 of 204
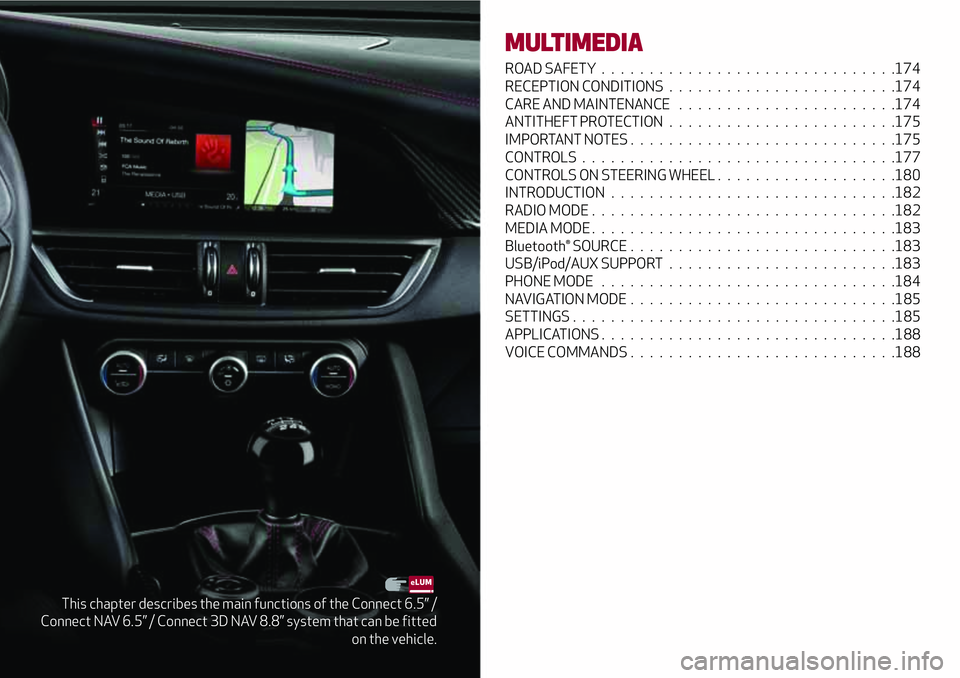
This chapter describes the main functions of the Connect 6.5” /
Connect NAV 6.5” / Connect 3D NAV 8.8” system that can be fitted
on the vehicle.
MULTIMEDIA
ROAD SAFETY...............................174
RECEPTION CONDITIONS........................174
CARE AND MAINTENANCE.......................174
ANTITHEFT PROTECTION........................175
IMPORTANT NOTES............................175
CONTROLS.................................177
CONTROLS ON STEERING WHEEL...................180
INTRODUCTION..............................182
RADIO MODE................................182
MEDIA MODE................................183
Bluetooth® SOURCE ............................183
USB/iPod/AUX SUPPORT........................183
PHONE MODE...............................184
NAVIGATION MODE ............................185
SETTINGS..................................185
APPLICATIONS...............................188
VOICE COMMANDS . . ..........................188
Page 185 of 204
MEDIA MODE
IMPORTANT Applications used on
portable devices may be not compatible
with the Connect system.
Track selection (Browse)
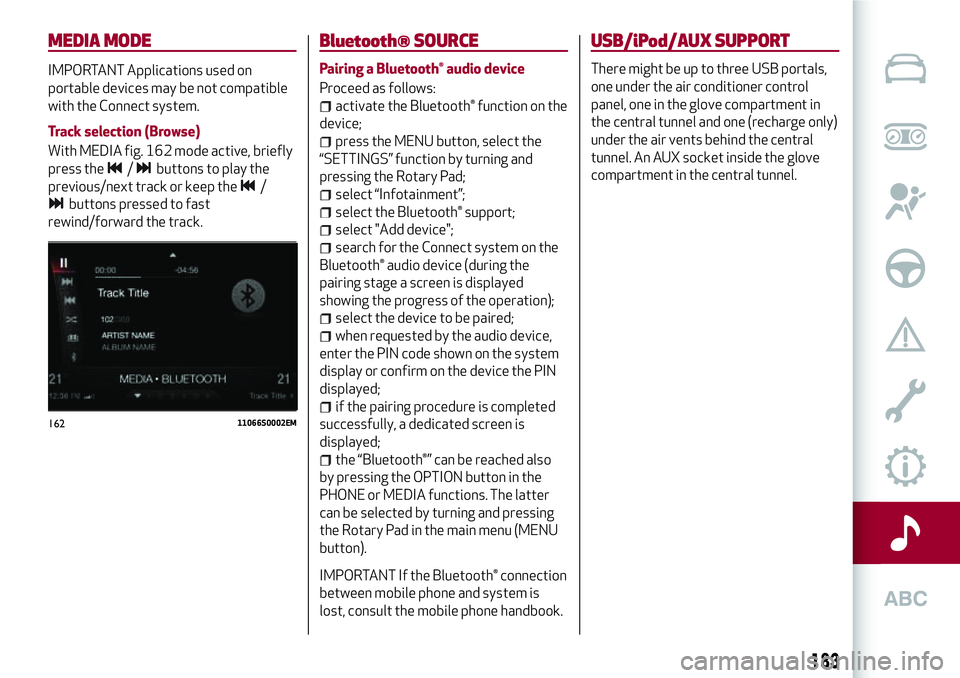
With MEDIA fig. 162 mode active, briefly
press the
/buttons to play the
previous/next track or keep the
/
buttons pressed to fast
rewind/forward the track.
Bluetooth® SOURCE
Pairing a Bluetooth® audio device
Proceed as follows:
activate the Bluetooth® function on the
device;
press the MENU button, select the
“SETTINGS” function by turning and
pressing the Rotary Pad;
select “Infotainment”;
select the Bluetooth® support;
select "Add device";
search for the Connect system on the
Bluetooth® audio device (during the
pairing stage a screen is displayed
showing the progress of the operation);
select the device to be paired;
when requested by the audio device,
enter the PIN code shown on the system
display or confirm on the device the PIN
displayed;
if the pairing procedure is completed
successfully, a dedicated screen is
displayed;
the “Bluetooth®” can be reached also
by pressing the OPTION button in the
PHONE or MEDIA functions. The latter
can be selected by turning and pressing
the Rotary Pad in the main menu (MENU
button).
IMPORTANT If the Bluetooth® connection
between mobile phone and system is
lost, consult the mobile phone handbook.
USB/iPod/AUX SUPPORT
There might be up to three USB portals,
one under the air conditioner control
panel, one in the glove compartment in
the central tunnel and one (recharge only)
under the air vents behind the central
tunnel. An AUX socket inside the glove
compartment in the central tunnel.
16211066S0002EM
183
Page 186 of 204
PHONE MODE
PHONE mode can be activated from the
main menu (MENU button) by turning and
pressing the Rotary Pad.
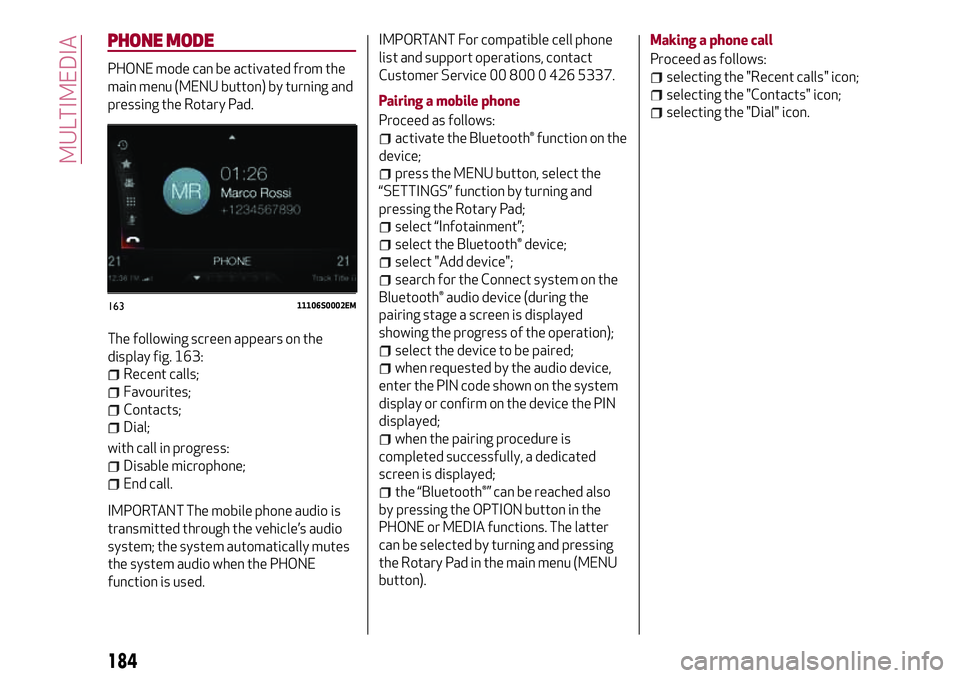
The following screen appears on the
display fig. 163:
Recent calls;
Favourites;
Contacts;
Dial;
with call in progress:
Disable microphone;
End call.
IMPORTANT The mobile phone audio is
transmitted through the vehicle’s audio
system; the system automatically mutes
the system audio when the PHONE
function is used.IMPORTANT For compatible cell phone
list and support operations, contact
Customer Service 00 800 0 426 5337.
Pairing a mobile phone
Proceed as follows:
activate the Bluetooth® function on the
device;
press the MENU button, select the
“SETTINGS” function by turning and
pressing the Rotary Pad;
select “Infotainment”;
select the Bluetooth® device;
select "Add device";
search for the Connect system on the
Bluetooth® audio device (during the
pairing stage a screen is displayed
showing the progress of the operation);
select the device to be paired;
when requested by the audio device,
enter the PIN code shown on the system
display or confirm on the device the PIN
displayed;
when the pairing procedure is
completed successfully, a dedicated
screen is displayed;
the “Bluetooth®” can be reached also
by pressing the OPTION button in the
PHONE or MEDIA functions. The latter
can be selected by turning and pressing
the Rotary Pad in the main menu (MENU
button).Making a phone call
Proceed as follows:
selecting the "Recent calls" icon;
selecting the "Contacts" icon;
selecting the "Dial" icon.
16311106S0002EM
184
MULTIMEDIA
Page 189 of 204
This function can be used to carry out the
following adjustments:
ParkSense
This function can be used to select the
type of warning provided by the
ParkSense system.
The options available are:
“Mode”: the following options are
available in this function: “Sound”, the
system notifies the driver of the
presence of an obstacle by means of
auditory signals only, by means of the
speakers in the car or “Sound and
Display”, the system notifies the driver of
the presence of an obstacle by means of
auditory signals (by means of the
speakers in the vehicle) and visual
signals, on the instrument panel display.
"Audio": allows to select the volume of
the acoustic warnings provided by the
ParkSense system, the available options
are: "High", "Medium" or "Low".
Rear view camera
(where provided)
This function can be used to carry out the
following adjustments:
"Active": lets you activate viewing the
video camera on the display;
"Switching off delay": allows you to
delay the switching off of the camera by a
few seconds when reverse gear is
disengaged.
"Grid": Allows you to activate the
display of the dynamic guidelines that
indicate the route of the vehicle.
Automatic parking brake
This function allows you to
activate/deactivate the automatic
parking brake engagement upon
switching off the engine.
Brake service
(where provided)
This function permits the activation of
the procedure to carry out braking
system servicing.
Access the functions and select the
setting by turning and pressing the
Rotary Pad.
Doors & Locks
To access the “Doors & Locks” function,
select it by turning the Rotary Pad and
press the Rotary Pad to activate. The
following settings can be modified when
this mode is selected:
Door lock in motion;
Unlock all doors on exit;
Passive entry;
Door unlock on entry;
Horn w/Remote Start (for
versions/markets where provided)
Horn on closing;
Auto relock;
Restore settings.Cluster
To access the “Cluster” function, select it
by turning the Rotary Pad and press the
Rotary Pad to activate. The following
settings can be modified when this mode
is selected:
Warning buzzer volume;
Trip B;
Phone repeat;
Audio repeat;
Nav repeat;
Restore settings.
Infotainment
To access the “Infotainment” function,
select it by turning the Rotary Pad and
press the Rotary Pad to activate. The
following settings can be modified when
this mode is selected:
Screen Off;
Splitscreen (where provided);
Audio;
Bluetooth®;
Radio;
Media;
Phone;
Navigation (where provided);
Apps.
187
Page 191 of 204
Display Genre
Play Genre
Display Playlist
Play Playlist
Play song
Play All
Display all the albums
Display all the artists
Display all the composers
Display all the genres
Display all the playlists
View all songs
Activate shuffle
Deactivate shuffle
Pass to Aux
Pass to USB 1
Pass to USB 2
Pass tp Bluetooth
Phone functions
The
button activates the following
functions:
Dial
Call
Redial
Show contacts
Show all the calls
Show the missed calls
Search
Navigation functions
(where provided)
The
button activates the following
functions:
Navigate to
Favourite
Set 2D map
Set detailed 3D map
Set overhead view
Route preview
Start navigation
Interrupt navigation
Repeat instructions
Show map
Find the nearest
189