fuel pressure Alfa Romeo Giulia 2017 Owner's Manual
[x] Cancel search | Manufacturer: ALFA ROMEO, Model Year: 2017, Model line: Giulia, Model: Alfa Romeo Giulia 2017Pages: 268, PDF Size: 18.64 MB
Page 77 of 268
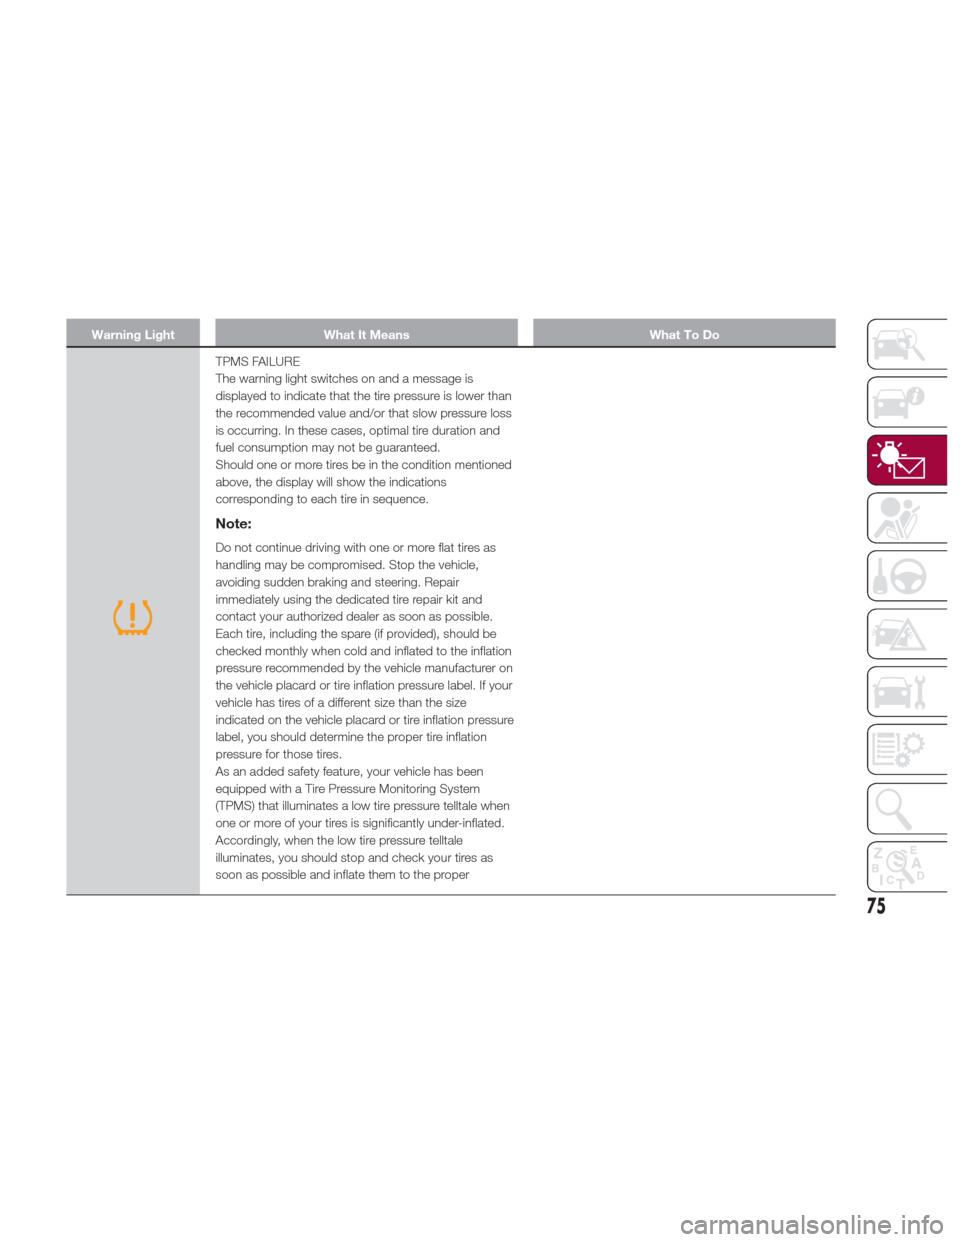
Warning LightWhat It Means What To Do
TPMS FAILURE
The warning light switches on and a message is
displayed to indicate that the tire pressure is lower than
the recommended value and/or that slow pressure loss
is occurring. In these cases, optimal tire duration and
fuel consumption may not be guaranteed.
Should one or more tires be in the condition mentioned
above, the display will show the indications
corresponding to each tire in sequence.
Note:
Do not continue driving with one or more flat tires as
handling may be compromised. Stop the vehicle,
avoiding sudden braking and steering. Repair
immediately using the dedicated tire repair kit and
contact your authorized dealer as soon as possible.
Each tire, including the spare (if provided), should be
checked monthly when cold and inflated to the inflation
pressure recommended by the vehicle manufacturer on
the vehicle placard or tire inflation pressure label. If your
vehicle has tires of a different size than the size
indicated on the vehicle placard or tire inflation pressure
label, you should determine the proper tire inflation
pressure for those tires.
As an added safety feature, your vehicle has been
equipped with a Tire Pressure Monitoring System
(TPMS) that illuminates a low tire pressure telltale when
one or more of your tires is significantly under-inflated.
Accordingly, when the low tire pressure telltale
illuminates, you should stop and check your tires as
soon as possible and inflate them to the proper
75
Page 78 of 268
Warning LightWhat It Means What To Do
pressure. Driving on a significantly under-inflated tire
causes
the tire to overheat and can lead to tire failure.
Under-inflation also reduces fuel efficiency and tire tread
life, and may affect the vehicle’s handling and stopping
ability.
Please note that the TPMS is not a substitute for proper
tire maintenance, and it is the driver’s responsibility to
maintain correct tire pressure, even if under-inflation has
not reached the level to trigger illumination of the TPMS
low tire pressure telltale.
Your vehicle has also been equipped with a TPMS
malfunction indicator to indicate when the system is not
operating properly. The TPMS malfunction indicator is
combined with the low tire pressure telltale. When the
system detects a malfunction, the telltale will flash for
approximately one minute and then remain continuously
illuminated. This sequence will continue upon
subsequent vehicle start-ups as long as the malfunction
exists. When the malfunction indicator is illuminated, the
system may not be able to detect or signal low tire
pressure as intended. TPMS malfunctions may occur
for a variety of reasons, including the installation of
replacement or alternate tires or wheels on the vehicle
that prevent the TPMS from functioning properly. Always
check the TPMS malfunction telltale after replacing one
or more tires or wheels on your vehicle, to ensure that
the replacement or alternate tires and wheels allow the
TPMS to continue to function properly.
76
GETTING TO KNOW YOUR INSTRUMENT PANEL
Page 79 of 268
Warning LightWhat It Means What To Do
Caution!The TPMS has been optimized for the original
equipment tires and wheels. TPMS pressures and
warning have been established for the tire size
equipped on your vehicle. Undesirable system
operation or sensor damage may result when using
replacement equipment that is not of the same size,
type, and/or style. Aftermarket wheels can cause
sensor damage. Using aftermarket tire sealants may
cause the Tire Pressure Monitoring System (TPMS)
sensor to become inoperable. After using an
aftermarket tire sealant it is recommended that you
take your vehicle to an authorized dealership to have
your sensor function checked.
Do not continue driving with one or more flat tires as
handling may be compromised. Stop the vehicle,
avoiding sharp braking and steering. Immediately
restore the correct inflation pressure using the Tire
Repair Kit (refer to “Tire Repair Kit” in “In Case Of
Emergency”) and contact an authorized dealer as soon
as possible.
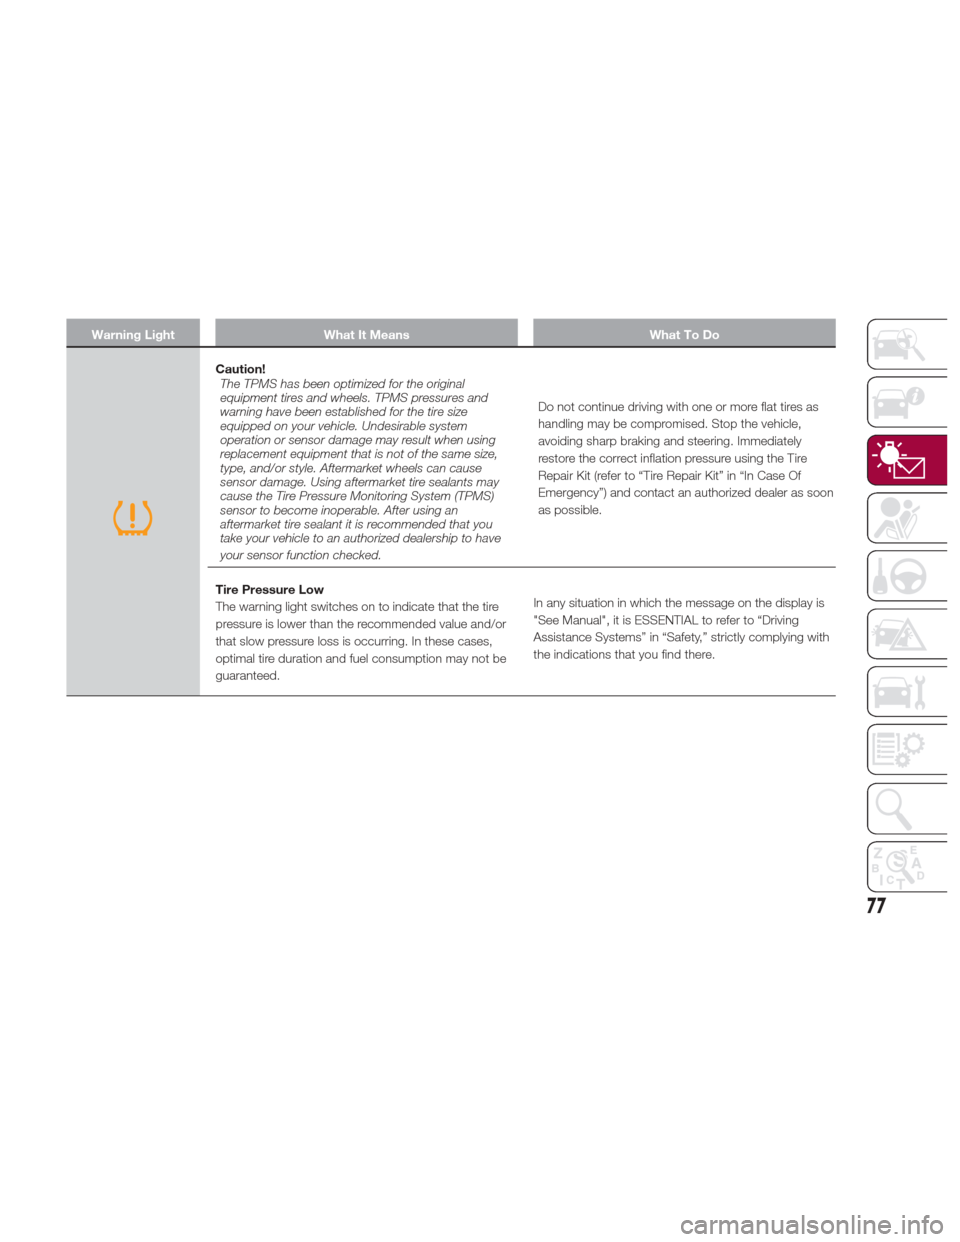
Tire Pressure Low
The warning light switches on to indicate that the tire
pressure is lower than the recommended value and/or
that slow pressure loss is occurring. In these cases,
optimal tire duration and fuel consumption may not be
guaranteed. In any situation in which the message on the display is
"See Manual", it is ESSENTIAL to refer to “Driving
Assistance Systems” in “Safety,” strictly complying with
the indications that you find there.
77
Page 90 of 268

SymbolWhat It Means What To Do
ENGINE OIL PRESSURE SENSOR FAILURE
The symbol switches on in the event of engine oil
pressure sensor failure.Contact an authorized dealer as soon as possible.
ENGINE OIL LEVEL SENSOR FAILURE
The symbol switches on in the event of engine oil level
sensor failure.Contact an authorized dealer as soon as possible.
FORWARD COLLISION WARNING (FCW) SYSTEM
FAILURE
The symbol switches on in the case of failure of the
Forward Collision Warning system.Contact an authorized dealer as soon as possible.
START & STOP EVO SYSTEM FAILURE
This symbol switches on to report a Stop & Start Evo
system failure.Contact an authorized dealer as soon as possible to
have the failure eliminated.
RAIN SENSOR FAILURE
The symbol switches on in the case of failure of the
automatic windshield wiper.
Contact an authorized dealer as soon as possible.
DUSK SENSOR FAILURE
The symbol switches on in the case of failure of the
automatic low beam alignment.Contact an authorized dealer as soon as possible.
BLIND SPOT MONITORING SYSTEM FAILURE
The symbol comes on in the event of a Blind Spot
Monitoring system failure.Contact an authorized dealer as soon as possible.
FUEL LEVEL SENSOR FAILURE
The symbol switches on in the event of fuel level sensor
failure.Contact an authorized dealer as soon as possible.
88
GETTING TO KNOW YOUR INSTRUMENT PANEL
Page 110 of 268
Then, drive the vehicle for up to
10 minutes above 15 mph (24 km/h).
The TPMS will chime, the "TPM Telltale
Light" will flash on and off for
75 seconds and then turn off. The
instrument cluster will display the
“SERVICE TPM SYSTEM” message
and then display pressure values in
place of the dashes. On the next
ignition switch cycle the "SERVICE TPM
SYSTEM" message will no longer be
displayed, as long as no system fault
exists.
Note:
The TPMS is not intended to
replace normal tire care and
maintenance, or to provide warning of
a tire failure or condition.
The TPMS should not be used as a
tire pressure gauge while adjusting
your tire pressure.
Driving on a significantly
underinflated tire will cause the tire to
overheat, and can lead to tire failure.
Underinflation also reduces fuel
efficiency and tire tread life, and may
affect the vehicle’s handling and
stopping ability.
The TPMS is not a substitute for
proper tire maintenance, and it is the
driver’s responsibility to maintain
correct tire pressure using an accurate
tire pressure gauge, even if
underinflation has not reached the level to trigger illumination of the “Tire
Pressure Monitoring Telltale Light”.
Seasonal temperature changes will
affect tire pressure, and the TPMS will
monitor the actual tire pressure in the
tire.
General Information
The following regulatory statement
applies to all radio frequency (RF)
devices equipped in this vehicle:
This device complies with Part 15 of the
FCC rules and RSS-210 of Industry
Canada. Operation is subject to the
following two conditions:
(1) This device may not cause harmful
interference.
(2) This device must accept any
interference received, including
interference that may cause undesired
operation.
Note:
Changes or modifications not expressly
approved by the party responsible for
compliance could void the user’s
authority to operate the equipment.
OCCUPANT
RESTRAINT
SYSTEMS
Some of the most important safety
features in your vehicle are the restraint
systems:
Occupant Restraint
Systems Features
Seat Belt Systems
Supplemental Restraint Systems
(SRS) Air Bags
Child Restraints
Some of the safety features described
in this section may be standard
equipment on some models, or may be
optional equipment on others. If you are
not sure, ask your authorized dealer.
Important Safety
Precautions
Please pay close attention to the
information in this section. It tells you
how to use your restraint system
properly, to keep you and your
passengers as safe as possible.
Here are some simple steps you can
take to minimize the risk of harm from a
deploying air bag:
1. Children 12 years old and under
should always ride buckled up in a
vehicle with a rear seat.
108
SAFETY
Page 175 of 268
The label indicates the fuel type
(UNLEADED FUEL = gasoline).
Emergency Fuel Door Opening
In the event of an emergency the fuel
filler door can be opened by operating
from inside the trunk.
Proceed as follows:
1. Open the deck lid and reach the
emergency opening cable placed on
the side of the fuel filler
2. Pull the cord to unlock the fuel filler
door3. Open the fuel filler door by pressing
on it (see the previous instructions)
Warning!
Never have any smoking materials lit in
or near the vehicle when the fuel door is
open or the tank is being filled.
Never add fuel when the engine is
running. This is in violation of most state
and federal fire regulations and may cause
the MIL to turn on.
A fire may result if gasoline is pumped
into a portable container that is inside of a
vehicle. You could be burned. Always place
gas containers on the ground while filling.
Note: If the filler compartment is
washed with a pressure washer, keep it
at a distance of at least 8 inches
(20 cm).
VEHICLE LOADING
Certification Label
As required by National Highway Traffic
Safety Administration regulations, your
vehicle has a certification label affixed to
the driver's side door or pillar.
This label contains the month and year
of manufacture, Gross Vehicle Weight
Rating (GVWR), Gross Axle Weight
Rating (GAWR) front and rear, and
Vehicle Identification Number (VIN). A
Month-Day-Hour (MDH) number is
included on this label and indicates the
Month, Day and Hour of manufacture.
The bar code that appears on the
bottom of the label is your VIN.
Gross Vehicle Weight Rating
(GVWR)
The GVWR is the total permissible
weight of your vehicle including driver,
passengers, vehicle, options and cargo.
The label also specifies maximum
capacities of front and rear axle
systems (GAWR). Total load must be
limited so GVWR and front and rear
GAWR are not exceeded.
07206S0002EMFuel Door Label
173
Page 176 of 268
Payload
The payload of a vehicle is defined as
the allowable load weight a truck can
carry, including the weight of the driver,
all passengers, options and cargo.
Gross Axle Weight Rating
(GAWR)
The GAWR is the maximum permissible
load on the front and rear axles. The
load must be distributed in the cargo
area so that the GAWR of each axle is
not exceeded.
Each axle GAWR is determined by the
components in the system with the
lowest load carrying capacity (axle,
springs, tires or wheels). Heavier axles
or suspension components sometimes
specified by purchasers for increased
durability does not necessarily increase
the vehicle's GVWR.
Tire Size
The tire size on the Vehicle Certification
Label represents the actual tire size on
your vehicle. Replacement tires must be
equal to the load capacity of this tire
size.
Rim Size
This is the rim size that is appropriate
for the tire size listed.
Inflation Pressure
This is the cold tire inflation pressure for
your vehicle for all loading conditions up
to full GAWR.
Curb Weight
The curb weight of a vehicle is defined
as the total weight of the vehicle with all
fluids, including vehicle fuel, at full
capacity conditions, and with no
occupants or cargo loaded into the
vehicle. The front and rear curb weight
values are determined by weighing your
vehicle on a commercial scale before
any occupants or cargo are added.
Loading
The actual total weight and the weight
of the front and rear of your vehicle at
the ground can best be determined by
weighing it when it is loaded and ready
for operation.The entire vehicle should first be
weighed on a commercial scale to
insure that the GVWR has not been
exceeded. The weight on the front and
rear of the vehicle should then be
determined separately to be sure that
the load is properly distributed over the
front and rear axle. Weighing the vehicle
may show that the GAWR of either the
front or rear axles has been exceeded
but the total load is within the specified
GVWR. If so, weight must be shifted
from front to rear or rear to front as
appropriate until the specified weight
limitations are met. Store the heavier
items down low and be sure that the
weight is distributed equally. Stow all
loose items securely before driving.
Improper weight distributions can have
an adverse effect on the way your
vehicle steers and handles and the way
the brakes operate.
Caution!
Do not load your vehicle any heavier than
the GVWR or the maximum front and rear
GAWR. If you do, parts on your vehicle can
break, or it can change the way your
vehicle handles. This could cause you to
lose control. Also overloading can shorten
the life of your vehicle.
174
STARTING AND OPERATING
Page 177 of 268
TRAILER TOWING
Trailer Towing — If
Equipped
Trailer towing is not recommended for
this vehicle.
SUGGESTIONS FOR
DRIVING
Saving Fuel
Below are some suggestions which
may help you save fuel and lower the
amount of harmful emissions released
into the atmosphere.
Vehicle maintenance
Checks and operations should be
carried out in accordance with the
"Scheduled Servicing" (see chapter
"Servicing And Maintenance").
Tires
Check the tire pressures at least once
every four weeks: if the pressure is too
low, consumption levels increase as
resistance to rolling is higher.
Unnecessary loads
Do not travel with an overloaded trunk.
The weight of the vehicle and its
arrangement greatly affect fuel
consumption and stability.
Electric devices
Use electrical systems only for the
amount of time needed. The rear
window defroster, additional headlights,
windshield wipers and heater blower
fan require a considerable amount of
energy; increasing the current uptake
increases fuel consumption (by up to
+25% when city driving).Climate control system
Using the climate control system will
increase consumption: use standard
ventilation when the temperature
outside permits.
Devices for aerodynamic control
The use of non-certified devices for
aerodynamic control may adversely
affect air drag and consumption levels.
Driving Style
Starting
Do not warm up the engine at low or
high revs when the vehicle is stationary;
this causes the engine to warm up
more slowly, thereby increasing fuel
consumption and emissions. It is
therefore advisable to drive off
immediately, slowly, avoiding high
speeds: by doing this the engine will
warm up more quickly.
Unnecessary Actions
Avoid revving up when starting at traffic
lights or before stopping the engine.
This action is unnecessary and causes
increased fuel consumption and
pollution.
Gear Selection
Use a high gear when traffic and road
conditions allow it. Using a low gear for
faster acceleration will increase fuel
consumption. Improper use of a high
gear increases consumption, emissions
and engine wear.
175
Page 207 of 268
SCHEDULED
SERVICING
Correct servicing is crucial for
guaranteeing a long life for the vehicle
under the best conditions.
For this reason, Alfa Romeo has
planned a series of checks and services
for your vehicle at fixed intervals based
on distance and time, as described in
the Scheduled Servicing Plan.
Before each service, it is always
necessary to carefully follow the
instructions in the Scheduled Servicing
Plan (e.g. periodically check level of
fluids, tire pressure, etc.).
Scheduled Servicing is offered by an
authorized dealer according to a set
time schedule. If, during each
operation, in addition to the ones
scheduled, the need arises for further
replacements or repairs, these may be
carried out with owners explicit consent
only.
Note:
Scheduled Servicing intervals are
required by the Manufacturer. Failure to
have them carried out may invalidate
the New Vehicle Limited Warranty.
You are advised to inform your
authorized dealer of any small operating
irregularities without waiting for the next
service.
Periodic Checks
Every month or every600miles
( 1,000 km) or before long trips check
and, if necessary, top off:
Engine coolant level.
Brake fluid level (if insufficient, see
your authorized dealer as soon as
possible).
Windshield washer fluid level.
Tire inflation pressure and condition.
Operation of lighting system
(headlights, direction indicators, hazard
warning lights, etc.).
Operation of windshield
washing/wiping system and
positioning/wear of wiper blades.
Every 2,000 miles ( 3,000km), check
and top off if required:
Engine oil level.
Heavy Usage Of The Car
If the vehicle is used under one of the
following conditions:
Dusty roads.
Short, repeated journeys less than
4 miles (7-8 km) at sub-zero outside
temperatures.
Engine often idling or driving long
distances at low speeds or long periods
of inactivity.
In the event of a long period of
inactivity. The following checks must be carried
out more often than indicated in the
Scheduled Servicing Plan:
Check cleanliness of hood and trunk
locks, cleanliness and lubrication of
linkage.
Visually inspect conditions of: engine,
transmission, pipes and hoses
(exhaust/fuel system/brakes) and
rubber elements (sleeves/bushes, etc.).
Check battery charge and battery
fluid level (electrolyte).
Visually inspect conditions of the
accessory drive belts.
Check and, if necessary, change
engine oil and replace oil filter.
Check and, if necessary, replace
cabin air filter.
Check and, if necessary, replace air
cleaner.
Severe Duty All Models
Change Engine Oil at 4,000 miles
(6,500 km) if the vehicle is operated in a
dusty and off-road environment or is
operated predominately at idle or only
very low engine RPM’s. This type of
vehicle use is considered Severe Duty.
205
Page 208 of 268
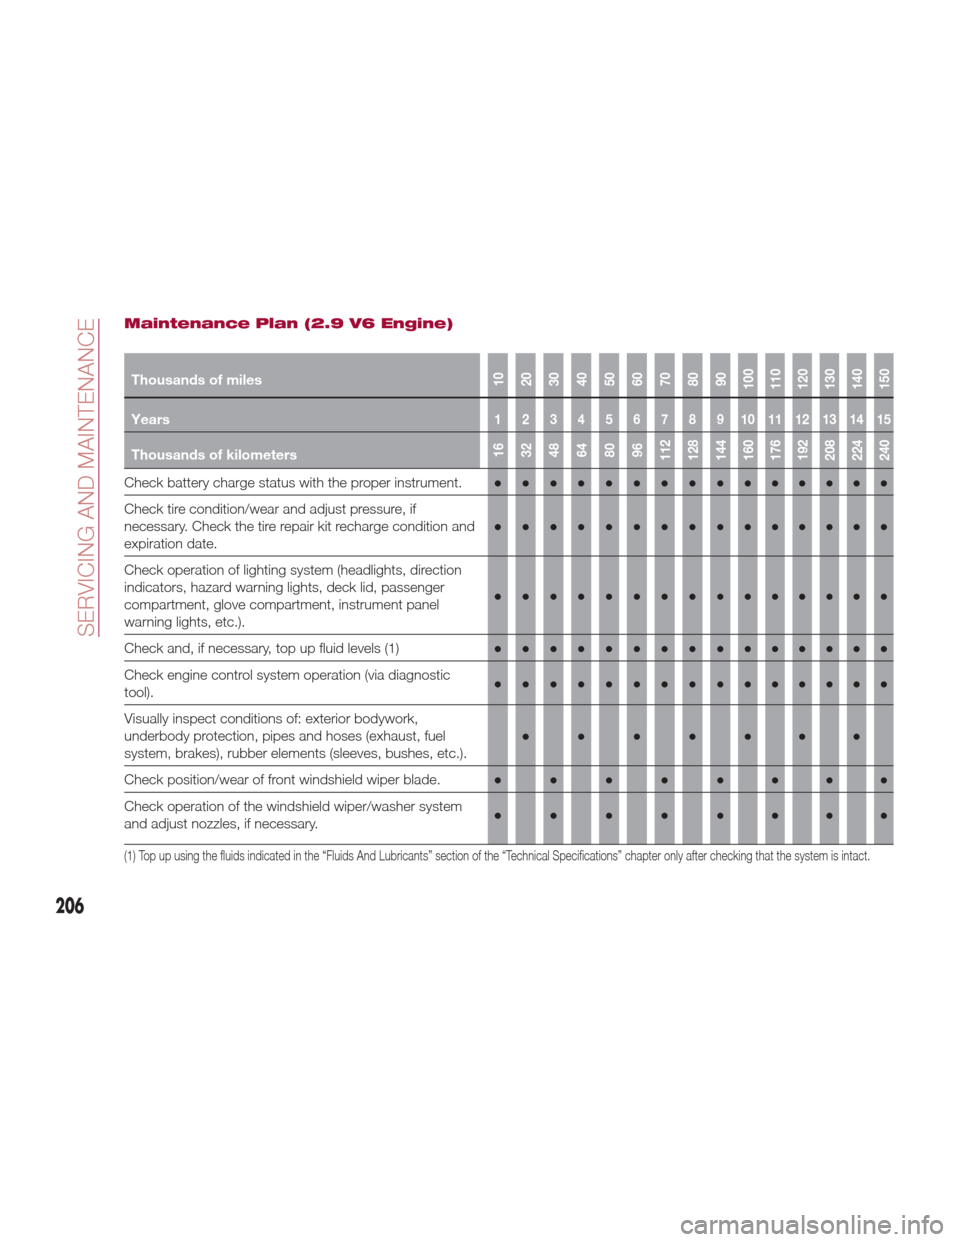
Maintenance Plan (2.9 V6 Engine)
Thousands of miles10
20
30
40
50
60
70
80
90
100
110
120
130
140
150
Years123456789101112131415
Thousands of kilometers16
32
48
64
80
96
112
128
144
160
176
192
208
224
240
Check battery charge status with the proper instrument. ●●●●●●●●●●●●●●●
Check tire condition/wear and adjust pressure, if
necessary. Check the tire repair kit recharge condition and
expiration date. ●●●●●●●●●
●●●●●●
Check operation of lighting system (headlights, direction
indicators, hazard warning lights, deck lid, passenger
compartment, glove compartment, instrument panel
warning lights, etc.). ●●●●●●●●●
●●●●●●
Check and, if necessary, top up fluid levels
(1)●●●●●●●●● ●●●●●●
Check engine control system operation (via diagnostic
tool). ●●●●●●●●●
●●●●●●
Visually inspect conditions of: exterior bodywork,
underbody protection, pipes and hoses (exhaust, fuel
system, brakes), rubber elements (sleeves, bushes, etc.). ●●●●●●●
Check position/wear of front windshield wiper blade. ●●●●●●●●
Check operation of the windshield wiper/washer system
and adjust nozzles, if necessary. ●●●●●●●●
(1) Top up using the fluids indicated in the “Fluids And Lubricants” section of the “Technical Specifications” chapter only after checking that the system is intact.
206
SERVICING AND MAINTENANCE