remove seats Alfa Romeo Giulia 2018 Owner's Manual
[x] Cancel search | Manufacturer: ALFA ROMEO, Model Year: 2018, Model line: Giulia, Model: Alfa Romeo Giulia 2018Pages: 260, PDF Size: 6 MB
Page 27 of 260
2. Turn the manual release lock cylinder
clockwise for the right door locks or
counterclockwise for the left door locks.
3. Remove the key/screwdriver from the
manual release lock.
Proceed in one of the following ways to
realign the door lock device (only when
the battery charge has been restored):
Push the lock button on the electronic
key
Push the unlock button on the door
panel
Unlock driver’s door lock with the
emergency key
Operate the internal door handle
Note: For the rear doors, if the Child
Safety Locks are engaged, and the
previously described locking procedure is
carried out, operating the internal handle
will not open the door. Instead, it will only
realign the lock release device. To open
the door, the outside handle must be
used. The door central locking/unlocking
buttons are not deactivated when the
emergency lock is engaged.
SEATS
The front seats can be adjusted to ensure
maximum comfort for the occupants.
When adjusting the driver’s seat, keep
the shoulders resting firmly against the
backrest, and the wrists within reach of
the top of the steering wheel. The driver
must also be able to fully press the brake
pedal.
Warning!
It is dangerous to ride in a cargo area,
inside or outside of a vehicle. In a collision,
people riding in these areas are more likely
to be seriously injured or killed.
Do not allow people to ride in any area of
your vehicle that is not equipped with seats
and seat belts. In a collision, people riding in
these areas are more likely to be seriously
injured or killed.
Be sure everyone in your vehicle is in a
seat and using a seat belt properly.
Sparco Racing Seats — If Equipped
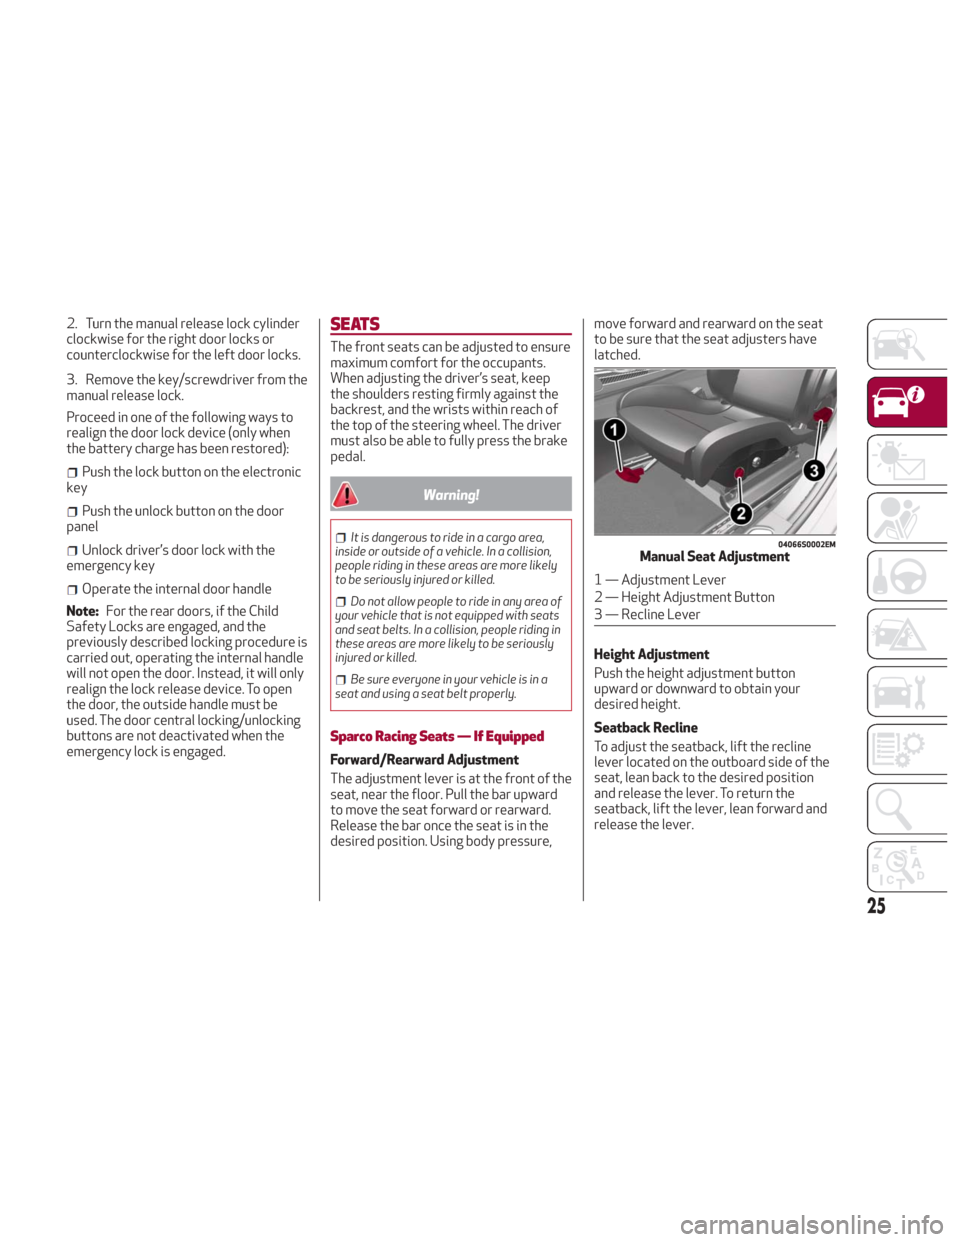
Forward/Rearward Adjustment
The adjustment lever is at the front of the
seat, near the floor. Pull the bar upward
to move the seat forward or rearward.
Release the bar once the seat is in the
desired position. Using body pressure, move forward and rearward on the seat
to be sure that the seat adjusters have
latched.
Height Adjustment
Push the height adjustment button
upward or downward to obtain your
desired height.
Seatback Recline
To adjust the seatback, lift the recline
lever located on the outboard side of the
seat, lean back to the desired position
and release the lever. To return the
seatback, lift the lever, lean forward and
release the lever.
04066S0002EMManual Seat Adjustment
1 — Adjustment Lever
2 — Height Adjustment Button
3 — Recline Lever
25
Page 30 of 260
that has been overheated could cause
serious burns due to the increased surface
temperature of the seat.
Rear Seats
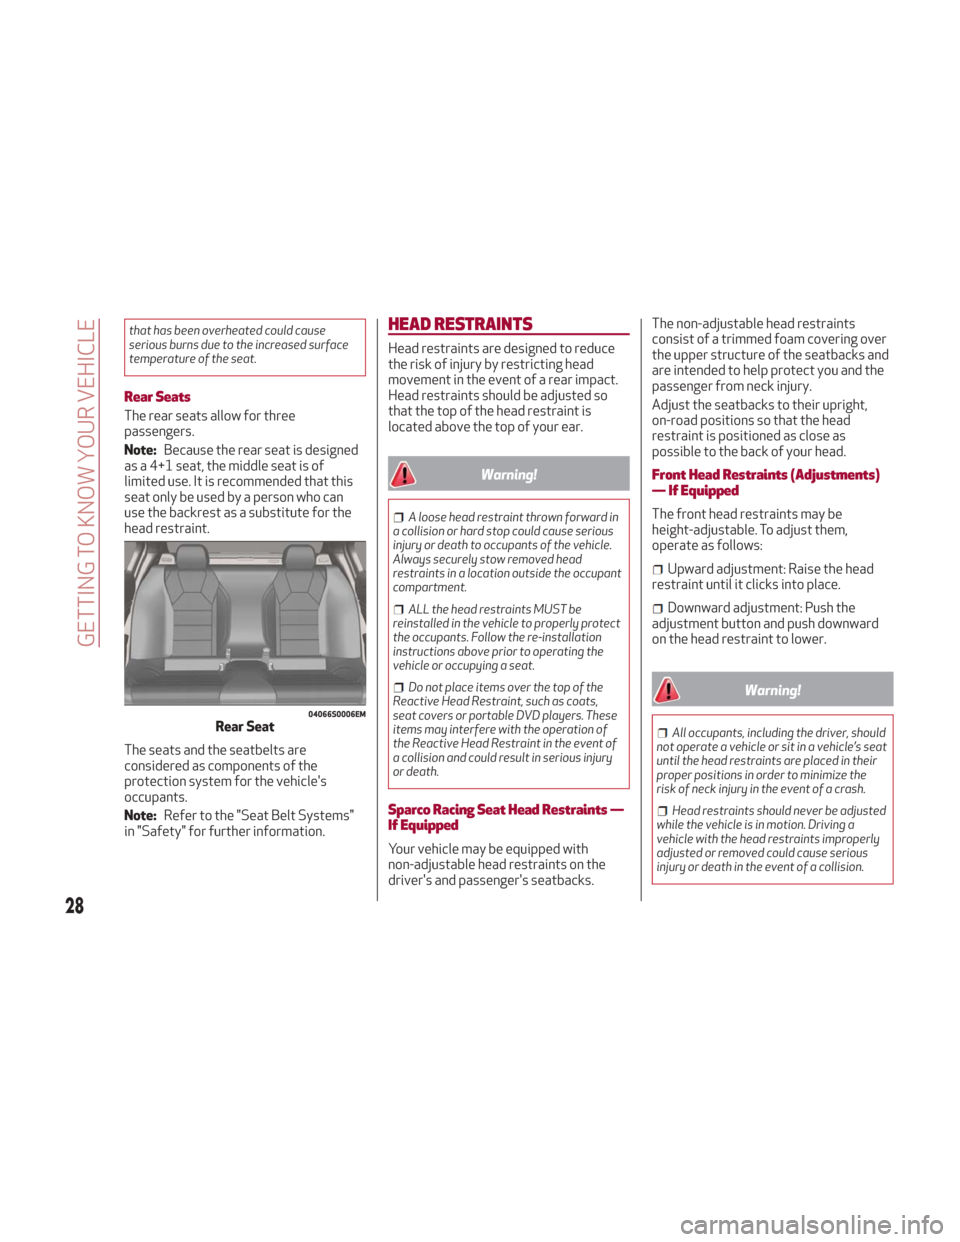
The rear seats allow for three
passengers.
Note:Because the rear seat is designed
as a 4+1 seat, the middle seat is of
limited use. It is recommended that this
seat only be used by a person who can
use the backrest as a substitute for the
head restraint.
The seats and the seatbelts are
considered as components of the
protection system for the vehicle's
occupants.
Note: Refer to the "Seat Belt Systems"
in "Safety" for further information.
HEAD RESTRAINTS
Head restraints are designed to reduce
the risk of injury by restricting head
movement in the event of a rear impact.
Head restraints should be adjusted so
that the top of the head restraint is
located above the top of your ear.
Warning!
A loose head restraint thrown forward in
a collision or hard stop could cause serious
injury or death to occupants of the vehicle.
Always securely stow removed head
restraints in a location outside the occupant
compartment.
ALL the head restraints MUST be
reinstalled in the vehicle to properly protect
the occupants. Follow the re-installation
instructions above prior to operating the
vehicle or occupying a seat.
Do not place items over the top of the
Reactive Head Restraint, such as coats,
seat covers or portable DVD players. These
items may interfere with the operation of
the Reactive Head Restraint in the event of
a collision and could result in serious injury
or death.
Sparco Racing Seat Head Restraints —
If Equipped
Your vehicle may be equipped with
non-adjustable head restraints on the
driver's and passenger's seatbacks. The non-adjustable head restraints
consist of a trimmed foam covering over
the upper structure of the seatbacks and
are intended to help protect you and the
passenger from neck injury.
Adjust the seatbacks to their upright,
on-road positions so that the head
restraint is positioned as close as
possible to the back of your head.
Front Head Restraints (Adjustments)
— If Equipped
The front head restraints may be
height-adjustable. To adjust them,
operate as follows:
Upward adjustment: Raise the head
restraint until it clicks into place.
Downward adjustment: Push the
adjustment button and push downward
on the head restraint to lower.
Warning!
All occupants, including the driver, should
not operate a vehicle or sit in a vehicle’s seat
until the head restraints are placed in their
proper positions in order to minimize the
risk of neck injury in the event of a crash.
Head restraints should never be adjusted
while the vehicle is in motion. Driving a
vehicle with the head restraints improperly
adjusted or removed could cause serious
injury or death in the event of a collision.
04066S0006EMRear Seat
28
GETTING TO KNOW YOUR VEHICLE
Page 108 of 260
The second row center seat belt features
a seat belt with a mini-latch plate and
buckle, which allows the seat belt to
detach from the lower anchor when the
seat is folded. The mini-latch plate and
regular latch plate can then be stored out
of the way in the parcel tray for added
convenience to open up utilization of the
storage areas behind the front seats
when the seat is not occupied.
1. Remove the mini-latch plate and
regular latch plate from its stowed
position in the right rear side trim panel.
2. Grasp the mini-latch plate and pull the
seat belt over the seat.
3. Route the shoulder belt to the inside
of the right head restraint.
4. When the seat belt is long enough to
fit, insert the mini-latch plate into the
mini-buckle until you hear a “click.”
5.
Sit back in seat. Slide the regular latch
plate up the webbing as far as necessary to
allow the seat belt to go around your lap.
6. When the seat belt is long enough to
fit, insert the latch plate into the buckle
until you hear a “click.”
7. Position the lap belt so that it is snug
and lies low across your hips, below your
abdomen. To remove slack in the lap belt
portion, pull up on the shoulder belt. To loosen the lap belt if it is too tight, pull
on the lap belt. A snug seat belt reduces
the risk of sliding under the seat belt in a
collision.
8. Position the shoulder belt on your
chest so that it is comfortable and not
resting on your neck. The retractor will
withdraw any slack in the seat belt.
9. To release the seat belt, push the red
button on the buckle.
10. To disengage the mini-latch plate
from the mini-buckle for storage, insert
the regular latch plate into the black
button on the top of the mini-buckle. The
seat belt will automatically retract to its
stowed position. If necessary, slide the
latch plate down the webbing to allow the
seat belt to retract fully. Insert the
mini-latch plate and regular latch plate
into its stowed position.
Warning!
If the mini-latch plate and mini-buckle are
not properly connected when the seat belt is
used by an occupant, the seat belt will not
be able to provide proper restraint and will
increase the risk of injury in a collision.
When reattaching the mini-latch plate and
mini-buckle, ensure the seat belt webbing is
not twisted. If the webbing is twisted, follow
the preceding procedure to detach the
mini-latch plate and mini-buckle, untwist the
webbing, and reattach the mini-latch plate
and mini-buckle.
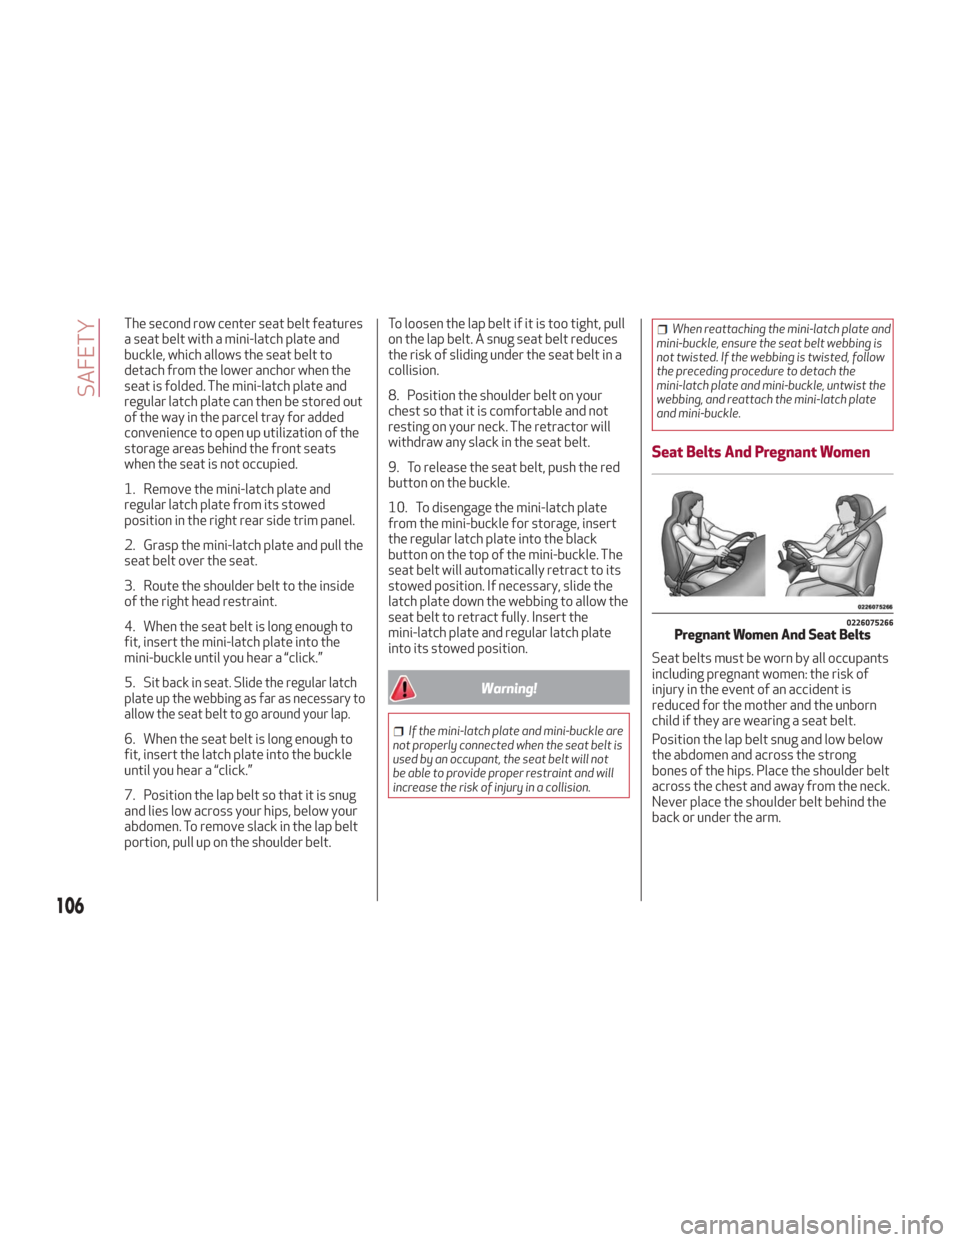
Seat Belts And Pregnant Women
Seat belts must be worn by all occupants
including pregnant women: the risk of
injury in the event of an accident is
reduced for the mother and the unborn
child if they are wearing a seat belt.
Position the lap belt snug and low below
the abdomen and across the strong
bones of the hips. Place the shoulder belt
across the chest and away from the neck.
Never place the shoulder belt behind the
back or under the arm.
0226075266Pregnant Women And Seat Belts
106
SAFETY
Page 121 of 260
Infant And Child Restraints
Safety experts recommend that children
ride rear-facing in the vehicle until they
are two years old or until they reach
either the height or weight limit of their
rear-facing child restraint. Two types of
child restraints can be used rear-facing:
infant carriers and convertible child
seats.
The infant carrier is only used rear-facing
in the vehicle. It is recommended for
children from birth until they reach the
weight or height limit of the infant carrier.
Convertible child seats can be used either
rear-facing or forward-facing in the
vehicle. Convertible child seats often
have a higher weight limit in the
rear-facing direction than infant carriers
do, so they can be used rear-facing by
children who have outgrown their infant
carrier but are still less than at least two
years old. Children should remain
rear-facing until they reach the highest
weight or height allowed by their
convertible child seat.Warning!
Never place a rear-facing child restraint in
front of an air bag. A deploying passenger
front air bag can cause death or serious injury
to a child 12 years or younger, including a
child in a rear-facing child restraint.
Only use a rear-facing child restraint in
the rear seat of a vehicle with a rear seat.
Older Children And Child Restraints
Children who are two years old or who have
outgrown their rear-facing convertible
child seat can ride forward-facing in the
vehicle. Forward-facing child seats and
convertible child seats used in the
forward-facing direction are for children
who are over two years old or who have
outgrown the rear-facing weight or height
limit of their rear-facing convertible child
seat. Children should remain in a
forward-facing child seat with a harness
for as long as possible, up to the highest
weight or height allowed by the child seat.
All children whose weight or height is
above the forward-facing limit for the
child seat should use a belt-positioning
booster seat until the vehicle’s seat belts
fit properly. If the child cannot sit with
knees bent over the vehicle’s seat
cushion while the child’s back is against the seatback, they should use a
belt-positioning booster seat. The child
and belt-positioning booster seat are
held in the vehicle by the seat belt.
Warning!
Improper installation can lead to failure
of an infant or child restraint. It could come
loose in a collision. The child could be badly
injured or killed. Follow the child restraint
manufacturer’s directions exactly when
installing an infant or child restraint.
After a child restraint is installed in the
vehicle, do not move the vehicle seat
forward or rearward because it can loosen
the child restraint attachments. Remove the
child restraint before adjusting the vehicle
seat position. When the vehicle seat has
been adjusted, reinstall the child restraint.
When your child restraint is not in use,
secure it in the vehicle with the seat belt or
LATCH anchorages, or remove it from the
vehicle. Do not leave it loose in the vehicle. In
a sudden stop or accident, it could strike the
occupants or seatbacks and cause serious
personal injury.
119
Page 125 of 260
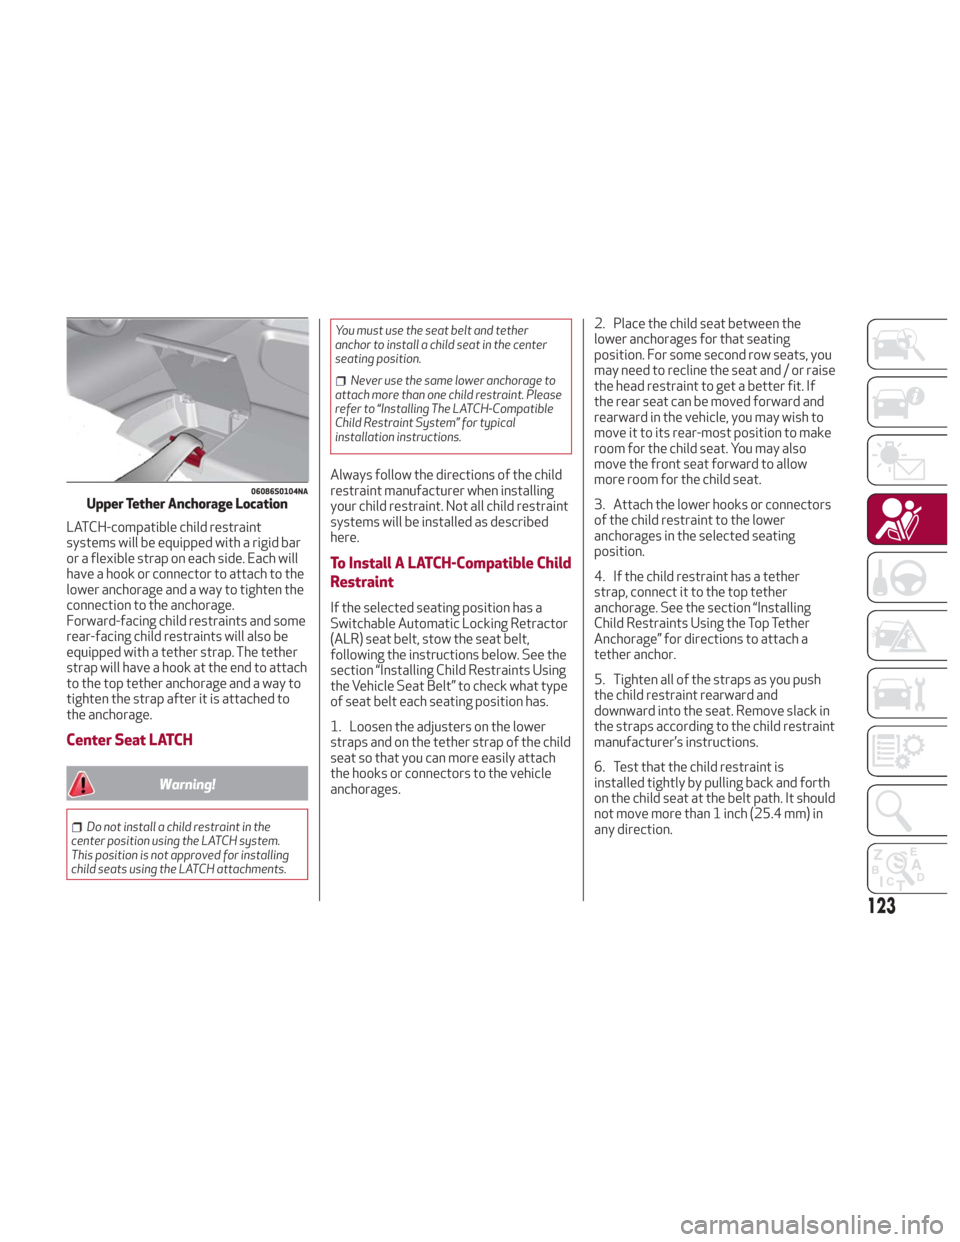
LATCH-compatible child restraint
systems will be equipped with a rigid bar
or a flexible strap on each side. Each will
have a hook or connector to attach to the
lower anchorage and a way to tighten the
connection to the anchorage.
Forward-facing child restraints and some
rear-facing child restraints will also be
equipped with a tether strap. The tether
strap will have a hook at the end to attach
to the top tether anchorage and a way to
tighten the strap after it is attached to
the anchorage.
Center Seat LATCH
Warning!
Do not install a child restraint in the
center position using the LATCH system.
This position is not approved for installing
child seats using the LATCH attachments. You must use the seat belt and tether
anchor to install a child seat in the center
seating position.
Never use the same lower anchorage to
attach more than one child restraint. Please
refer to “Installing The LATCH-Compatible
Child Restraint System” for typical
installation instructions.
Always follow the directions of the child
restraint manufacturer when installing
your child restraint. Not all child restraint
systems will be installed as described
here.
To Install A LATCH-Compatible Child
Restraint
If the selected seating position has a
Switchable Automatic Locking Retractor
(ALR) seat belt, stow the seat belt,
following the instructions below. See the
section “Installing Child Restraints Using
the Vehicle Seat Belt” to check what type
of seat belt each seating position has.
1. Loosen the adjusters on the lower
straps and on the tether strap of the child
seat so that you can more easily attach
the hooks or connectors to the vehicle
anchorages. 2. Place the child seat between the
lower anchorages for that seating
position. For some second row seats, you
may need to recline the seat and / or raise
the head restraint to get a better fit. If
the rear seat can be moved forward and
rearward in the vehicle, you may wish to
move it to its rear-most position to make
room for the child seat. You may also
move the front seat forward to allow
more room for the child seat.
3. Attach the lower hooks or connectors
of the child restraint to the lower
anchorages in the selected seating
position.
4. If the child restraint has a tether
strap, connect it to the top tether
anchorage. See the section “Installing
Child Restraints Using the Top Tether
Anchorage” for directions to attach a
tether anchor.
5. Tighten all of the straps as you push
the child restraint rearward and
downward into the seat. Remove slack in
the straps according to the child restraint
manufacturer’s instructions.
6. Test that the child restraint is
installed tightly by pulling back and forth
on the child seat at the belt path. It should
not move more than 1 inch (25.4 mm) in
any direction.
06086S0104NAUpper Tether Anchorage Location
123
Page 127 of 260
Frequently Asked Questions About Installing Child Restraints With Seat Belts
What is the weight limit (child’s weight +
weight
of the child restraint) for using the
Tether Anchor with the seat belt to attach a
forward facing child restraint? Weight limit of the Child RestraintAlways use the tether anchor when using the
seat belt to install a forward facing child
restraint, up to the recommended weight limit
of the child restraint.
Can the rear-facing child restraint touch the
back of the front passenger seat? Ye sContact between the front passenger seat and
the child restraint is allowed, if the child
restraint manufacturer also allows contact.
Can the head restraints be removed? YesThe head restraints can be removed in each
seating position.
Can the buckle stalk be twisted to tighten the
seat belt against the belt path of the child
restraint? No
Do not twist the buckle stalk in a seating
position with an ALR retractor.
Installing A Child Restraint With A
Switchable Automatic Locking
Retractor (ALR):
Child restraint systems are designed to
be secured in vehicle seats by lap belts or
the lap belt portion of a lap/shoulder belt.
Warning!
Improper installation or failure to
properly secure a child restraint can lead to
failure of the restraint. The child could be
badly injured or killed.
Follow the child restraint manufacturer’s
directions exactly when installing an infant
or child restraint.
1. Place the child seat in the center of
the seating position. For some second
row seats, you may need to recline the
seat and/or raise the head restraint to
get a better fit. If the rear seat can be
moved forward and rearward in the
vehicle, you may wish to move it to its
rear-most position to make room for the
child seat. You may also move the front
seat forward to allow more room for the
child seat.
2. Pull enough of the seat belt webbing
from the retractor to pass it through the
belt path of the child restraint. Do not
twist the belt webbing in the belt path.
3. Slide the latch plate into the buckle
until you hear a “click.” 4. Pull on the webbing to make the lap
portion tight against the child seat.
5. To lock the seat belt, pull down on the
shoulder part of the belt until you have
pulled all the seat belt webbing out of the
retractor. Then, allow the webbing to
retract back into the retractor. As the
webbing retracts, you will hear a clicking
sound. This means the seat belt is now in
the Automatic Locking mode.
6. Try to pull the webbing out of the
retractor. If it is locked, you should not be
able to pull out any webbing. If the
retractor is not locked, repeat step 5.
125
Page 129 of 260
Warning!
An incorrectly anchored tether strap
could lead to increased head motion and
possible injury to the child. Use only the
anchorage position directly behind the child
seat to secure a child restraint top tether
strap.
If your vehicle is equipped with a split rear
seat, make sure the tether strap does not
slip into the opening between the seatbacks
as you remove slack in the strap.
Transporting Pets
Air Bags deploying in the front seat could
harm your pet. An unrestrained pet will be
thrown about and possibly injured, or
injure a passenger during panic braking or
in a collision.
Pets should be restrained in the rear seat
in pet harnesses or pet carriers that are
secured by seat belts.
SAFETY TIPS
Transporting Passengers
NEVER TRANSPORT PASSENGERS IN
THE CARGO AREA.
Warning!
Do not leave children or animals inside
parked vehicles in hot weather. Interior heat
build-up may cause serious injury or death.
It is extremely dangerous to ride in a
cargo area, inside or outside of a vehicle. In
a collision, people riding in these areas are
more likely to be seriously injured or killed.
Do not allow people to ride in any area of
your vehicle that is not equipped with seats
and seat belts.
Be sure everyone in your vehicle is in a
seat and using a seat belt properly.
Exhaust Gas
Warning!
Exhaust gases can injure or kill. They contain
carbon monoxide (CO), which is colorless and
odorless. Breathing it can make you
unconscious and can eventually poison you.
To avoid breathing (CO), follow these safety
tips:
Do not run the engine in a closed garage
or in confined areas any longer than needed
to move your vehicle in or out of the area.
If you are required to drive with the
trunk/liftgate/rear doors open, make sure
that all windows are closed and the climate
control BLOWER switch is set at high speed.
DO NOT use the recirculation mode.
If it is necessary to sit in a parked vehicle
with the engine running, adjust your heating
or cooling controls to force outside air into
the vehicle. Set the blower at high speed.
The best protection against carbon
monoxide entry into the vehicle body is a
properly maintained engine exhaust
system.
Whenever a change is noticed in the
sound of the exhaust system, when
exhaust fumes can be detected inside the
vehicle, or when the underside or rear of
the vehicle is damaged, have a competent
mechanic inspect the complete exhaust
system and adjacent body areas for
broken, damaged, deteriorated, or
mispositioned parts. Open seams or
loose connections could permit exhaust
fumes to seep into the passenger
compartment. In addition, inspect the
exhaust system each time the vehicle is
raised for lubrication or oil change.
Replace as required.
127
Page 134 of 260
STARTING THE ENGINE
Before starting the engine, be sure to
adjust the seat, the interior rear view
mirrors, and the door mirrors, and fasten
the seat belt correctly.
Never press the accelerator pedal before
starting the engine.
If necessary, messages indicating the
starting procedure can be shown in the
display.
Warning!
When leaving the vehicle, always remove
the key fob from the vehicle and lock your
vehicle.
Never leave children alone in a vehicle, or
with access to an unlocked vehicle.
Allowing children to be in a vehicle
unattended is dangerous for a number of
reasons. A child or others could be seriously
or fatally injured. Children should be warned
not to touch the parking brake, brake pedal
or the transmission gear selector.
Do not leave the key fob in or near the
vehicle, or in a location accessible to
children. A child could operate power
windows, other controls, or move the
vehicle.
Do not leave children or animals inside
parked vehicles in hot weather. Interior heat
build-up may cause serious injury or death.
Starting Procedure
Proceed as follows:
1. Apply the electric park brake and set
the gear selector to PARK (P) or
NEUTRAL (N).
2. Fully depress the brake pedal without
touching the accelerator.
3. Briefly push the ignition button.
4. If the engine doesn't start within a
few seconds, you need to repeat the
procedure.
If the problem persists, contact an
authorized dealer.
Warning!
Never pour fuel or other flammable liquid
into the throttle body air inlet opening in an
attempt to start the vehicle. This could
result in flash fire causing serious personal
injury.
Do not attempt to push or tow your
vehicle to get it started. Vehicles equipped
with an automatic transmission cannot be
started this way. Unburned fuel could enter
the catalytic converter and once the engine
has started, ignite and damage the
converter and vehicle.
If the vehicle has a discharged battery,
booster cables may be used to obtain a
start from a booster battery or the battery
in another vehicle. This type of start can be
dangerous if done improperly. Refer to
“Jump Starting” in “In Case Of Emergency”
for further information.
Caution!
To prevent damage to the starter, do not
continuously crank the engine for more than
25 seconds at a time. Wait 60 seconds
before trying again.
Remote Starting System
This system uses the key fob to start the
engine conveniently from outside the
vehicle while still maintaining security.
The system has a range of at least
300 feet (91 meters).
The remote starting system also
activates the climate control
(if equipped), the heated seats
(if equipped), and the heated steering
wheel (if equipped), depending on
temperatures outside and inside of
the vehicle.
Note:
Obstructions between the vehicle
and key fob may reduce this range.
132
STARTING AND OPERATING
Page 230 of 260
INTERIORS
Periodically check the cleanliness of the
interior, beneath the mats, which could
cause oxidation of the sheet metal.
Seats And Fabric Parts
Remove dust with a soft brush or a
vacuum cleaner. It is advised to use a
moist brush on velvet upholstery. Rub the
seats with a sponge moistened with a
solution of water and neutral detergent.
Leather Seats
Remove the dry dirt with a chamois or
slightly damp cloth, without exerting too
much pressure.
Remove any liquid or grease stains using
an absorbent dry cloth, without rubbing.
Then clean with a soft cloth or buckskin
cloth dampened with water and mild
soap. If the stain persists, use specific
products and observe the instructions
carefully.
Note:Never use alcohol. Make sure that
the cleaning products used contain no
alcohol or alcohol derivatives, even in
small quantities.
Plastic And Coated Parts
Clean interior plastic parts with a damp
cloth (if possible made from microfiber),
and a solution of water and neutral,
non-abrasive detergent.
To clean oily or persistent stains, use
specific products free from solvents and
designed to maintain the original
appearance and color of the components.
Remove any dust using a microfiber cloth,
if necessary moistened with water. The use
of paper tissues is not recommended as
these may leave residues.
Genuine Leather Parts
Use only water and mild soap to clean
these parts. Never use alcohol or
alcohol-based products.
Before using a specific product for
cleaning interiors, make sure that it does
not contain alcohol and/or alcohol based
substances.
Carbon Fiber Parts
To eliminate small scratches and marks
on the carbon, contact your authorized
dealer. An improperly performed
operation may irreparably damage the
carbon.
228
SERVICING AND MAINTENANCE