sensor light ALFA ROMEO GIULIA 2021 Owners Manual
[x] Cancel search | Manufacturer: ALFA ROMEO, Model Year: 2021, Model line: GIULIA, Model: ALFA ROMEO GIULIA 2021Pages: 284, PDF Size: 8.87 MB
Page 16 of 284
SYMBOL GLOSSARY
14
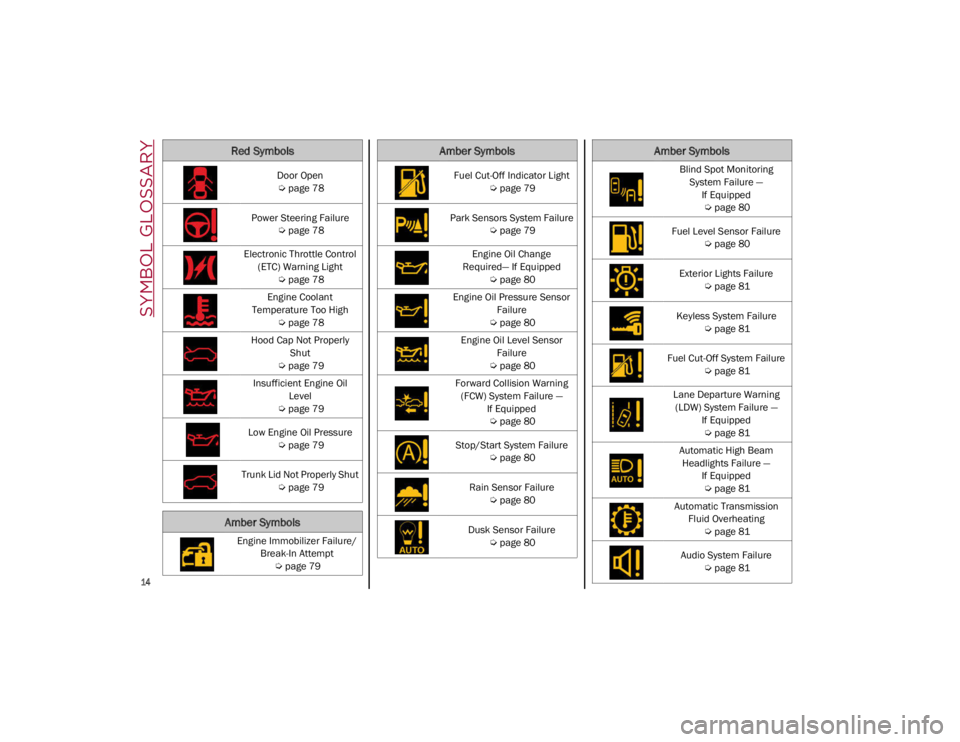
Door Open
Ú
page 78
Power Steering Failure
Ú
page 78
Electronic Throttle Control (ETC) Warning Light
Ú
page 78
Engine Coolant
Temperature Too High
Ú
page 78
Hood Cap Not Properly Shut
Ú
page 79
Insufficient Engine Oil Level
Ú
page 79
Low Engine Oil Pressure
Ú
page 79
Trunk Lid Not Properly Shut
Ú
page 79
Amber Symbols
Engine Immobilizer Failure/
Break-In Attempt
Ú
page 79
Red Symbols
Fuel Cut-Off Indicator Light
Ú
page 79
Park Sensors System Failure
Ú
page 79
Engine Oil Change
Required— If Equipped
Ú
page 80
Engine Oil Pressure Sensor Failure
Ú
page 80
Engine Oil Level Sensor Failure
Ú
page 80
Forward Collision Warning (FCW) System Failure — If Equipped
Ú
page 80
Stop/Start System Failure
Ú
page 80
Rain Sensor Failure
Ú
page 80
Dusk Sensor Failure
Ú
page 80
Amber Symbols
Blind Spot Monitoring
System Failure — If Equipped
Ú
page 80
Fuel Level Sensor Failure
Ú
page 80
Exterior Lights Failure
Ú
page 81
Keyless System Failure
Ú
page 81
Fuel Cut-Off System Failure
Ú
page 81
Lane Departure Warning (LDW) System Failure — If Equipped
Ú
page 81
Automatic High Beam Headlights Failure — If Equipped
Ú
page 81
Automatic Transmission Fluid Overheating
Ú
page 81
Audio System Failure
Ú
page 81
Amber Symbols
21_GA_OM_EN_USC_t.book Page 14
Page 44 of 284

GETTING TO KNOW YOUR VEHICLE
42
EXTERIOR LIGHTS
Headlight Switch
The headlight switch is located on the left side
of the instrument panel, next to the steering
wheel. The headlight switch controls the oper-
ation of the headlights, parking lights, instru -
ment panel lights, instrument panel light
dimming, interior lights and rear fog lights.
In addition, there are buttons for the Park -
Sense system and Engine Stop/Start
Ú
page 86.
Headlight Switch The instrument panel and the various controls
on the dashboard will be illuminated when the
exterior lights are turned on.
To turn on the headlights, rotate the headlight
switch clockwise. When the headlight switch is
on, the parking lights, taillights, license plate
light and instrument panel lights are also turned
on. To turn off the headlights, rotate the head
-
light switch back to the O (off) position.
Daytime Running Lights (DRLs)
The Daytime Running Lights (DRLs) (low inten -
sity) come on automatically whenever the igni -
tion is placed in the ON/RUN position, and the
headlight switch is turned to the position,
and the dusk sensor detects sufficient
external light.
If the turn signals are operated, the brightness
of the corresponding Daytime Running Lights
will be decreased as long as the turn signals
are on.
The DRL can be activated/deactivated from
the radio system, by selecting the following
functions in sequence on the main MENU:
1. “Settings.”
2. “Lights.”
3. “Daytime Running Lights.”
NOTE:
The Daytime Running Lights cannot be deacti -
vated in Canadian markets.
High Beam Headlights
Push the multifunction lever towards the
instrument panel to switch the headlights to
high beams. The headlight switch must be
turned to the (auto) or (on) position.
The High Beam Indicator on the instrument
panel will illuminate when the high beams are
on.
Multifunction Lever
Pulling the multifunction lever back will turn
the low beams on.
Automatic Headlights
This system automatically turns the headlights
on or off according to ambient light levels. To
turn the system on, rotate the headlight switch
to the (AUTO) position.
NOTE:
The function can only operate with the ignition
placed in the ON/RUN position.
1 — ParkSense Button
2 — Parking Light, Daylight Running Lights,
Headlight Switch
3 — Instrument Panel Dimmer
4 — Rear Fog Light Button
5 — Engine Stop/Start Button
21_GA_OM_EN_USC_t.book Page 42
Page 45 of 284

43
To turn the automatic headlights off, turn the
headlight switch out of the (AUTO) position.
Flash-To-Pass
You can signal another vehicle with your head-
lights by lightly pulling the multifunction lever
toward you. This will cause the high beam
headlights to turn on, and remain on, until the
lever is released.
Automatic High Beam Headlights — If
Equipped
The Automatic High Beam Headlights system
provides increased forward lighting at night by
automating high beam control through the use
of a camera mounted on the windshield. This
camera detects vehicle specific light and auto -
matically switches from high beams to low
beams until the approaching vehicle is out of
view.
This function is enabled with the radio system,
and can only be activated with the light switch
turned to (auto).
If the high beam headlights are on, the blue
icon/warning light will illuminate in the
instrument panel.
When the speed is higher than 25 mph
(40 km/h) and the function is active, the lights
will turn off if the multifunction lever is pushed
again. When the speed is lower than 15 mph
(25 km/h) and the function is active, the func
-
tion switches the high beam headlights off.
If the high beam headlights are operated
quickly again (pushing the multifunction lever
towards the instrument panel), the warning
light/icon will illuminate in the instrument
panel, and the high beam headlights will turn
on constantly until the speed exceeds 25 mph
(40 km/h).
When the speed of 25 mph (40 km/h) is
exceeded again, the automatic functioning is
reactivated.
If the multifunction lever is pushed again with
the Automatic High Beam Headlights acti -
vated, the Automatic High Beam Headlights
function deactivates.
To deactivate the automatic headlight function,
rotate the headlight switch to the position.
NOTE:
If the system recognizes heavy traffic areas,
the automatic functions remain disabled
independently of the vehicle’s speed.
The Automatic High Beam functionality may
also be influenced by:
• Reflections on road signs
• Dim headlights from oncoming traffic
• Poor weather conditions •
Presence of dirt or other obstructions on
the sensor
• Damage to the windshield
Parking Lights
To turn on the parking lights and instrument
panel lights, rotate the headlight switch clock -
wise to the position. All of the parking lights
will turn on for eight minutes, and opening the
door activates an audible warning.
To leave only the lights on one side (right/left)
illuminated, move the multifunction lever
(located on the left side of the steering wheel)
to the side that you want to remain on. With
the parking lights on, the warning light on
the instrument panel will illuminate.
To turn off the parking lights, rotate the head -
light switch back to the O (off) position.
Headlight Off Delay
To assist when exiting the vehicle, the “Head -
light Off Delay” feature will leave the head -
lights on for up to 90 seconds. This delay is
initiated when the ignition is placed in the OFF
position while the headlight switch is on, and
then the headlight switch is cycled off. Head -
light delay can be canceled by either turning
on the headlights or side lights, or by placing
the ignition in the ON position.
21_GA_OM_EN_USC_t.book Page 43
Page 57 of 284
55
the number of buttons and knobs indicate that
the selected feature is on/off. If no operation
is performed for a predetermined time, the
pop-up will close on the display.
Humidity Sensor
The Humidity Sensor helps prevent the
windows from fogging up. The AUTO function
(indicator illuminated) must be on for the
Humidity Sensor to function.
When outside temperature is low, the system
may turn the compressor on and turn air recir-
culation off for safer driving.
Stop/Start
The Stop/Start system shuts off the engine
when the vehicle speed is 0 mph (0 km/h), as
a fuel conservation measure.
In order to maintain comfort in the cabin, the
Stop/Start feature will not activate if any of the
following conditions exist:
The climate control system is in AUTO mode
(indicator illuminated), and the vehicle has
yet to reach the set temperature
The climate control system is in LO maximum
cooling
The climate control system is in HI maximum
heating
The climate control system is in the MAX-DEF
status
When the Stop/Start system is active, the
engine will restart if the inside temperature
changes significantly, or if the LO setting, or
MAX-DEF setting, is activated.
With Stop/Start system on (engine is off), air
flow is reduced to keep the compartment
comfort conditions for longer.
Until the temperature drastically changes within
the cabin, the climate control system will
continue to maintain the temperature while the
engine is off. By deactivating the Stop/Start
system with the button (located by the head
-
light switch), the climate control system operates
normally according to the settings.
NOTE:
In harsh climate conditions, limit the use of
the Stop/Start system to prevent the
compressor from continuously switching on
and off. This will prevent rapid misting of the
windows and the accumulation of humidity
in the passenger compartment.
When the Stop/Start system is on, the
climate control system will always take air in
from outside, reducing the probability of the
windows fogging up.
System Maintenance
In winter months, the Climate Control system
must be turned on at least once a month for
approximately ten minutes.
Have the system inspected at an authorized
dealer before the summer.
INTERIOR STORAGE AND
EQUIPMENT
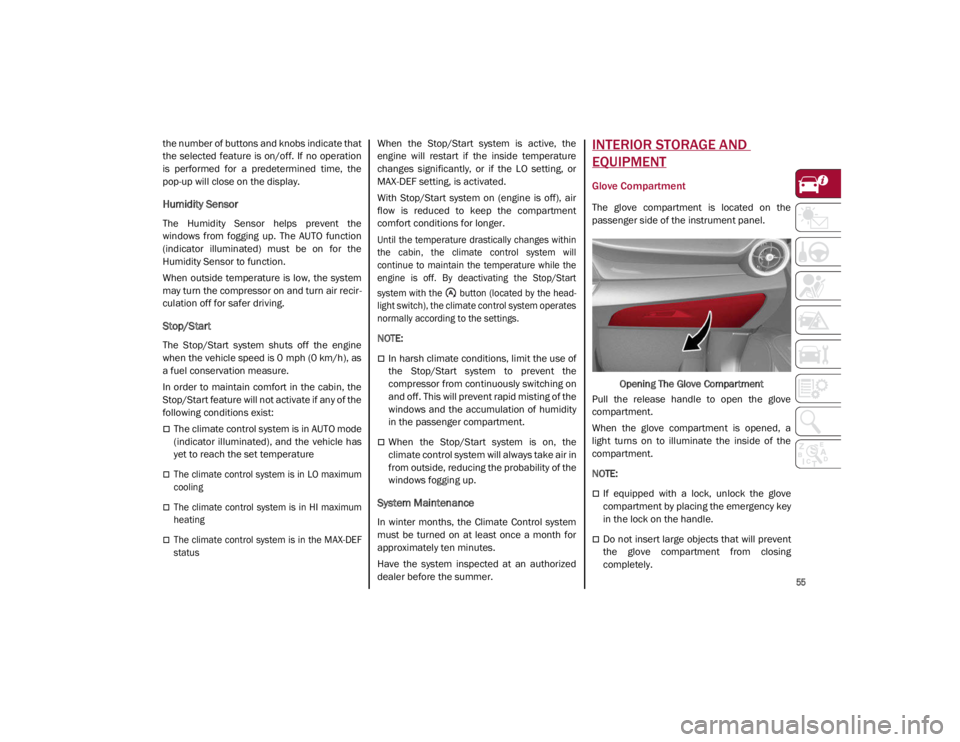
Glove Compartment
The glove compartment is located on the
passenger side of the instrument panel.
Opening The Glove Compartment
Pull the release handle to open the glove
compartment.
When the glove compartment is opened, a
light turns on to illuminate the inside of the
compartment.
NOTE:
If equipped with a lock, unlock the glove
compartment by placing the emergency key
in the lock on the handle.
Do not insert large objects that will prevent
the glove compartment from closing
completely.
21_GA_OM_EN_USC_t.book Page 55
Page 67 of 284

65
ENVIRONMENTAL PROTECTION
SYSTEMS
The following systems are used for reducing
engine emissions:
Catalytic Converter
Oxygen Sensors
Evaporation Control System
ACTIVE AERODYNAMIC SPOILER
(QUADRIFOGLIO VEHICLES)
Carbon Fiber Active Aero Front Spoiler
This is an automatic device working at the
vehicle speed to regulate air flow in the lower
part of the vehicle. It allows higher reactivity at
average speeds and higher vehicle stability at
high speeds.
NOTE:
The Active Aero Spoiler is active in the
Dynamic or RACE mode of the Alfa DNA Pro
Selector; it is not active in any mode when
external temperatures are near or below zero.Front Fascia
If there is a fault, a generic failure icon will light
up on the instrument panel display, along with
a message that will identify the type of
malfunction. See an authorized dealer if a
fault occurs.
21_GA_OM_EN_USC_t.book Page 65
Page 69 of 284

67
Quadrifoglio Instrument Cluster
1. Tachometer
2. Digital Engine Oil Temperature Gauge With Overheating Warning Light
3. Driver Interactive Display
4. Digital Fuel Level Gauge (The triangle on the left side of the symbol indicates that
the Fuel Door Location is on the left side of
the vehicle)
5. Speedometer (Speed Indicator)
Tachometer
The Tachometer indicates the engine Revolu -
tions Per Minute (Giri).
Adjusting Instrument Panel Lighting (Bright -
ness Sensor)
Inside the Tachometer there is a light sensor
capable of detecting light and adjusting the
brightness of the instrument panel and the
Information and Entertainment System display.
Engine Oil Temperature Gauge
The digital indicator monitors the temperature
of the engine oil and starts supplying indica -
tions when the oil temperature reaches
approximately 122°F (50°C).
Under normal usage, the temperature should
remain around the middle of the digital scale
according to the working conditions.
21_GA_OM_EN_USC_t.book Page 67
Page 78 of 284
GETTING TO KNOW YOUR INSTRUMENT PANEL
76
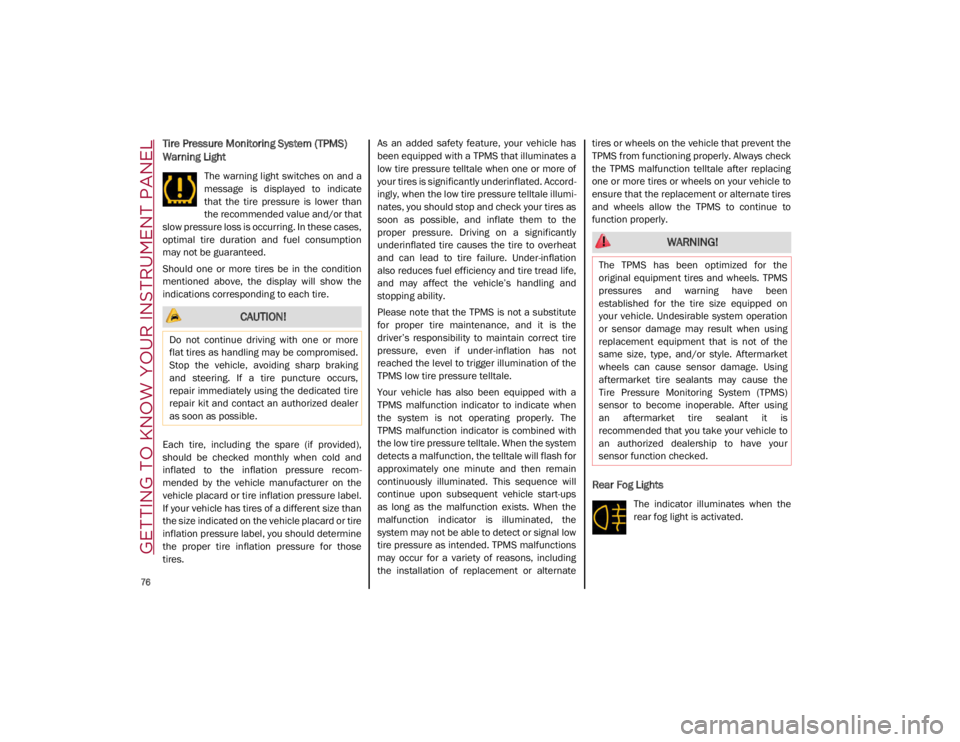
Tire Pressure Monitoring System (TPMS)
Warning Light
The warning light switches on and a
message is displayed to indicate
that the tire pressure is lower than
the recommended value and/or that
slow pressure loss is occurring. In these cases,
optimal tire duration and fuel consumption
may not be guaranteed.
Should one or more tires be in the condition
mentioned above, the display will show the
indications corresponding to each tire.
Each tire, including the spare (if provided),
should be checked monthly when cold and
inflated to the inflation pressure recom -
mended by the vehicle manufacturer on the
vehicle placard or tire inflation pressure label.
If your vehicle has tires of a different size than
the size indicated on the vehicle placard or tire
inflation pressure label, you should determine
the proper tire inflation pressure for those
tires. As an added safety feature, your vehicle has
been equipped with a TPMS that illuminates a
low tire pressure telltale when one or more of
your tires is significantly underinflated. Accord
-
ingly, when the low tire pressure telltale illumi -
nates, you should stop and check your tires as
soon as possible, and inflate them to the
proper pressure. Driving on a significantly
underinflated tire causes the tire to overheat
and can lead to tire failure. Under-inflation
also reduces fuel efficiency and tire tread life,
and may affect the vehicle’s handling and
stopping ability.
Please note that the TPMS is not a substitute
for proper tire maintenance, and it is the
driver’s responsibility to maintain correct tire
pressure, even if under-inflation has not
reached the level to trigger illumination of the
TPMS low tire pressure telltale.
Your vehicle has also been equipped with a
TPMS malfunction indicator to indicate when
the system is not operating properly. The
TPMS malfunction indicator is combined with
the low tire pressure telltale. When the system
detects a malfunction, the telltale will flash for
approximately one minute and then remain
continuously illuminated. This sequence will
continue upon subsequent vehicle start-ups
as long as the malfunction exists. When the
malfunction indicator is illuminated, the
system may not be able to detect or signal low
tire pressure as intended. TPMS malfunctions
may occur for a variety of reasons, including
the installation of replacement or alternate tires or wheels on the vehicle that prevent the
TPMS from functioning properly. Always check
the TPMS malfunction telltale after replacing
one or more tires or wheels on your vehicle to
ensure that the replacement or alternate tires
and wheels allow the TPMS to continue to
function properly.
Rear Fog Lights
The indicator illuminates when the
rear fog light is activated.
CAUTION!
Do not continue driving with one or more
flat tires as handling may be compromised.
Stop the vehicle, avoiding sharp braking
and steering. If a tire puncture occurs,
repair immediately using the dedicated tire
repair kit and contact an authorized dealer
as soon as possible.
WARNING!
The TPMS has been optimized for the
original equipment tires and wheels. TPMS
pressures and warning have been
established for the tire size equipped on
your vehicle. Undesirable system operation
or sensor damage may result when using
replacement equipment that is not of the
same size, type, and/or style. Aftermarket
wheels can cause sensor damage. Using
aftermarket tire sealants may cause the
Tire Pressure Monitoring System (TPMS)
sensor to become inoperable. After using
an aftermarket tire sealant it is
recommended that you take your vehicle to
an authorized dealership to have your
sensor function checked.
21_GA_OM_EN_USC_t.book Page 76
Page 81 of 284
79
Also check visually for any fluid leaks. Contact
an authorized dealer if the telltale comes on
when the engine is started again.
If the vehicle is used under demanding condi-
tions (e.g. in high-performance driving): slow
down and, if the warning light stays on, stop
the vehicle. Stop for two or three minutes with
the engine running and slightly accelerated to
facilitate better coolant circulation, then turn
the engine off. Check that the coolant level is
correct as described above.
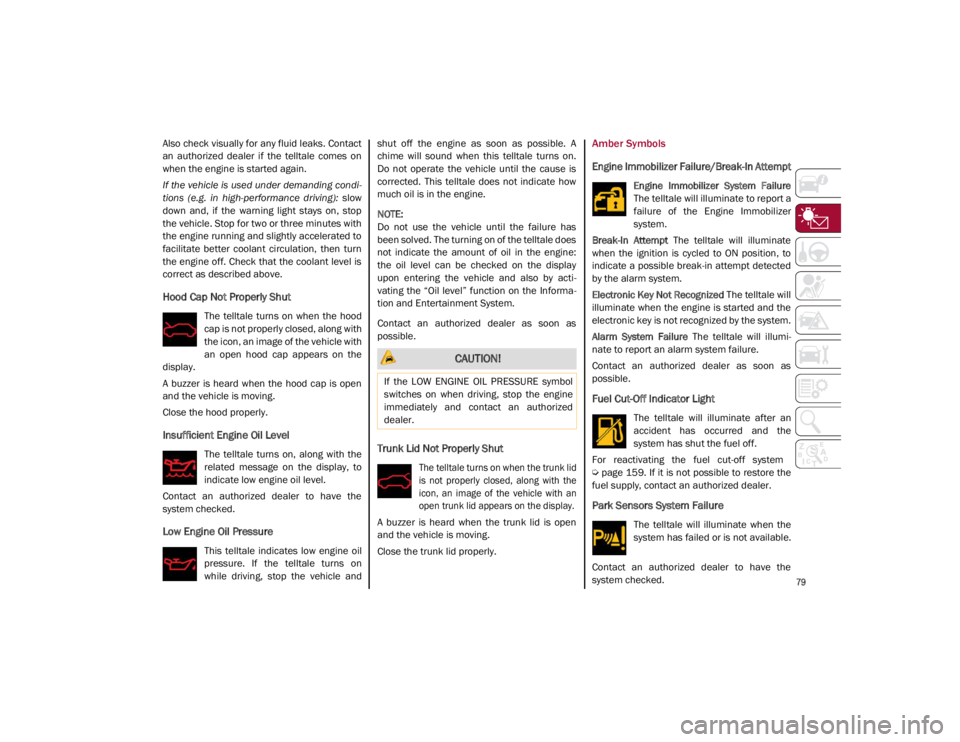
Hood Cap Not Properly Shut
The telltale turns on when the hood
cap is not properly closed, along with
the icon, an image of the vehicle with
an open hood cap appears on the
display.
A buzzer is heard when the hood cap is open
and the vehicle is moving.
Close the hood properly.
Insufficient Engine Oil Level
The telltale turns on, along with the
related message on the display, to
indicate low engine oil level.
Contact an authorized dealer to have the
system checked.
Low Engine Oil Pressure
This telltale indicates low engine oil
pressure. If the telltale turns on
while driving, stop the vehicle and shut off the engine as soon as possible. A
chime will sound when this telltale turns on.
Do not operate the vehicle until the cause is
corrected. This telltale does not indicate how
much oil is in the engine.
NOTE:
Do not use the vehicle until the failure has
been solved. The turning on of the telltale does
not indicate the amount of oil in the engine:
the oil level can be checked on the display
upon entering the vehicle and also by acti
-
vating the “Oil level” function on the Informa -
tion and Entertainment System.
Contact an authorized dealer as soon as
possible.
Trunk Lid Not Properly Shut
The telltale turns on when the trunk lid
is not properly closed, along with the
icon, an image of the vehicle with an
open trunk lid appears on the display.
A buzzer is heard when the trunk lid is open
and the vehicle is moving.
Close the trunk lid properly.
Amber Symbols
Engine Immobilizer Failure/Break-In Attempt
Engine Immobilizer System Failure
The telltale will illuminate to report a
failure of the Engine Immobilizer
system.
Break-In Attempt The telltale will illuminate
when the ignition is cycled to ON position, to
indicate a possible break-in attempt detected
by the alarm system.
Electronic Key Not Recognized The telltale will
illuminate when the engine is started and the
electronic key is not recognized by the system.
Alarm System Failure The telltale will illumi -
nate to report an alarm system failure.
Contact an authorized dealer as soon as
possible.
Fuel Cut-Off Indicator Light
The telltale will illuminate after an
accident has occurred and the
system has shut the fuel off.
For reactivating the fuel cut-off system
Ú
page 159. If it is not possible to restore the
fuel supply, contact an authorized dealer.
Park Sensors System Failure
The telltale will illuminate when the
system has failed or is not available.
Contact an authorized dealer to have the
system checked.
CAUTION!
If the LOW ENGINE OIL PRESSURE symbol
switches on when driving, stop the engine
immediately and contact an authorized
dealer.
21_GA_OM_EN_USC_t.book Page 79
Page 109 of 284
107
Metric Speed (km/h)
Pushing the SET switch once will result in a
1 km/h speed adjustment. Each subse -
quent movement of the switch results in an
adjustment of 1 km/h.
If the switch is continually pushed, the set
speed will continue to adjust until the switch
is released, then the new set speed will be
established.
NOTE:
Moving the SET switch allows for adjusting of
the speed according to the selected unit of
measurement set on the radio system. Refer
to the Information and Entertainment System
Owner’s Manual for more information.
To Accelerate For Passing
Press the accelerator as you would normally.
When the pedal is released, the vehicle will
return to the set speed.
Using Cruise Control On Hills
The transmission may downshift on hills to
maintain the vehicle set speed.
NOTE:
The Cruise Control system maintains speed up
and down hills. A slight speed change on
moderate hills is normal.
On steep hills, a greater speed loss or gain
may occur so it may be preferable to drive
without Cruise Control.
To Resume Speed
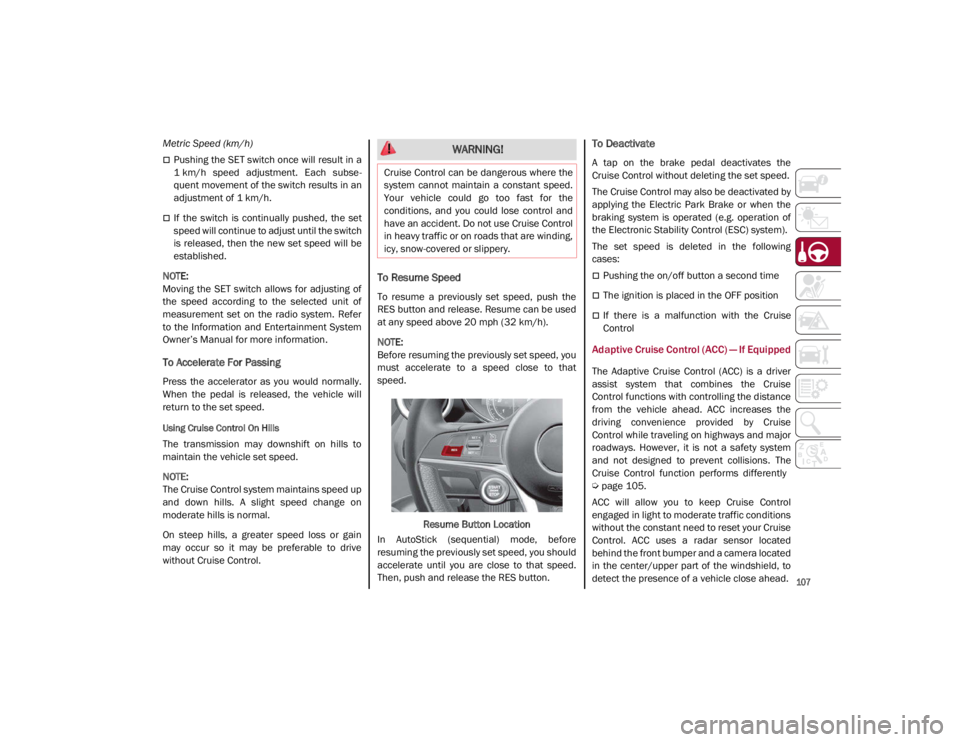
To resume a previously set speed, push the
RES button and release. Resume can be used
at any speed above 20 mph (32 km/h).
NOTE:
Before resuming the previously set speed, you
must accelerate to a speed close to that
speed.
Resume Button Location
In AutoStick (sequential) mode, before
resuming the previously set speed, you should
accelerate until you are close to that speed.
Then, push and release the RES button.
To Deactivate
A tap on the brake pedal deactivates the
Cruise Control without deleting the set speed.
The Cruise Control may also be deactivated by
applying the Electric Park Brake or when the
braking system is operated (e.g. operation of
the Electronic Stability Control (ESC) system).
The set speed is deleted in the following
cases:
Pushing the on/off button a second time
The ignition is placed in the OFF position
If there is a malfunction with the Cruise
Control
Adaptive Cruise Control (ACC) — If Equipped
The Adaptive Cruise Control (ACC) is a driver
assist system that combines the Cruise
Control functions with controlling the distance
from the vehicle ahead. ACC increases the
driving convenience provided by Cruise
Control while traveling on highways and major
roadways. However, it is not a safety system
and not designed to prevent collisions. The
Cruise Control function performs differently
Ú
page 105.
ACC will allow you to keep Cruise Control
engaged in light to moderate traffic conditions
without the constant need to reset your Cruise
Control. ACC uses a radar sensor located
behind the front bumper and a camera located
in the center/upper part of the windshield, to
detect the presence of a vehicle close ahead.
WARNING!
Cruise Control can be dangerous where the
system cannot maintain a constant speed.
Your vehicle could go too fast for the
conditions, and you could lose control and
have an accident. Do not use Cruise Control
in heavy traffic or on roads that are winding,
icy, snow-covered or slippery.
21_GA_OM_EN_USC_t.book Page 107
Page 118 of 284
STARTING AND OPERATING
116
To Activate/Deactivate
To Activate
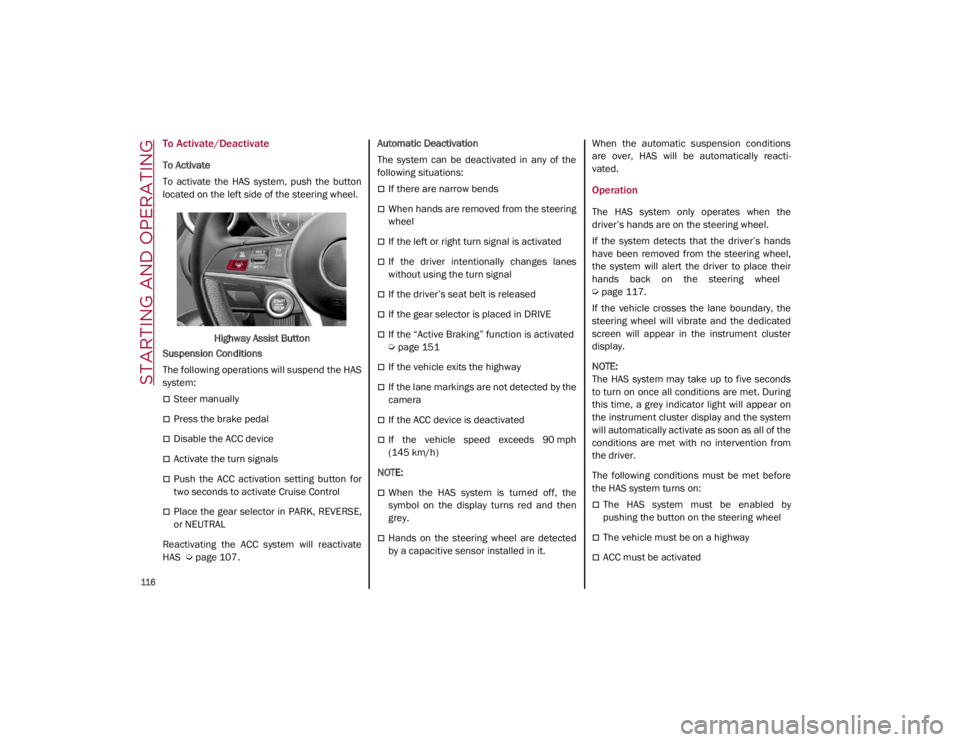
To activate the HAS system, push the button
located on the left side of the steering wheel.Highway Assist Button
Suspension Conditions
The following operations will suspend the HAS
system:
Steer manually
Press the brake pedal
Disable the ACC device
Activate the turn signals
Push the ACC activation setting button for
two seconds to activate Cruise Control
Place the gear selector in PARK, REVERSE,
or NEUTRAL
Reactivating the ACC system will reactivate
HAS
Ú
page 107. Automatic Deactivation
The system can be deactivated in any of the
following situations:
If there are narrow bends
When hands are removed from the steering
wheel
If the left or right turn signal is activated
If the driver intentionally changes lanes
without using the turn signal
If the driver’s seat belt is released
If the gear selector is placed in DRIVE
If the “Active Braking” function is activated
Ú
page 151
If the vehicle exits the highway
If the lane markings are not detected by the
camera
If the ACC device is deactivated
If the vehicle speed exceeds 90 mph
(145 km/h)
NOTE:
When the HAS system is turned off, the
symbol on the display turns red and then
grey.
Hands on the steering wheel are detected
by a capacitive sensor installed in it. When the automatic suspension conditions
are over, HAS will be automatically reacti
-
vated.
Operation
The HAS system only operates when the
driver’s hands are on the steering wheel.
If the system detects that the driver’s hands
have been removed from the steering wheel,
the system will alert the driver to place their
hands back on the steering wheel
Ú
page 117.
If the vehicle crosses the lane boundary, the
steering wheel will vibrate and the dedicated
screen will appear in the instrument cluster
display.
NOTE:
The HAS system may take up to five seconds
to turn on once all conditions are met. During
this time, a grey indicator light will appear on
the instrument cluster display and the system
will automatically activate as soon as all of the
conditions are met with no intervention from
the driver.
The following conditions must be met before
the HAS system turns on:
The HAS system must be enabled by
pushing the button on the steering wheel
The vehicle must be on a highway
ACC must be activated
21_GA_OM_EN_USC_t.book Page 116