sensor ALFA ROMEO GIULIA 2022 User Guide
[x] Cancel search | Manufacturer: ALFA ROMEO, Model Year: 2022, Model line: GIULIA, Model: ALFA ROMEO GIULIA 2022Pages: 248, PDF Size: 9.71 MB
Page 75 of 248
73
Each tire, including the spare (if provided), should
be checked monthly when cold and inflated to the
inflation pressure recommended by the vehicle
manufacturer on the vehicle placard or tire
inflation pressure label. If your vehicle has tires of
a different size than the size indicated on the
vehicle placard or tire inflation pressure label, you
should determine the proper tire inflation
pressure for those tires.
As an added safety feature, your vehicle has been
equipped with a TPMS that illuminates a low tire
pressure telltale when one or more of your tires is
significantly underinflated. Accordingly, when the
low tire pressure telltale illuminates, you should
stop and check your tires as soon as possible,
and inflate them to the proper pressure. Driving
on a significantly underinflated tire causes the
tire to overheat and can lead to tire failure.
Underinflation also reduces fuel efficiency and
tire tread life, and may affect the vehicle’s
handling and stopping ability.
Please note that the TPMS is not a substitute for
proper tire maintenance, and it is the driver’s
responsibility to maintain correct tire pressure,
even if underinflation has not reached the level to
trigger illumination of the TPMS low tire pressure
telltale.
Your vehicle has also been equipped with a TPMS
malfunction indicator to indicate when the
system is not operating properly. The TPMS
malfunction indicator is combined with the low
tire pressure telltale. When the system detects a
malfunction, the telltale will flash for approxi-
mately one minute and then remain continuously
illuminated. This sequence will continue upon
subsequent vehicle start-ups as long as the
malfunction exists. When the malfunction
indicator is illuminated, the system may not be able to detect or signal low tire pressure as
intended. TPMS malfunctions may occur for a
variety of reasons, including the installation of
replacement or alternate tires or wheels on the
vehicle that prevent the TPMS from functioning
properly. Always check the TPMS malfunction
telltale after replacing one or more tires or wheels
on your vehicle to ensure that the replacement or
alternate tires and wheels allow the TPMS to
continue to function properly.
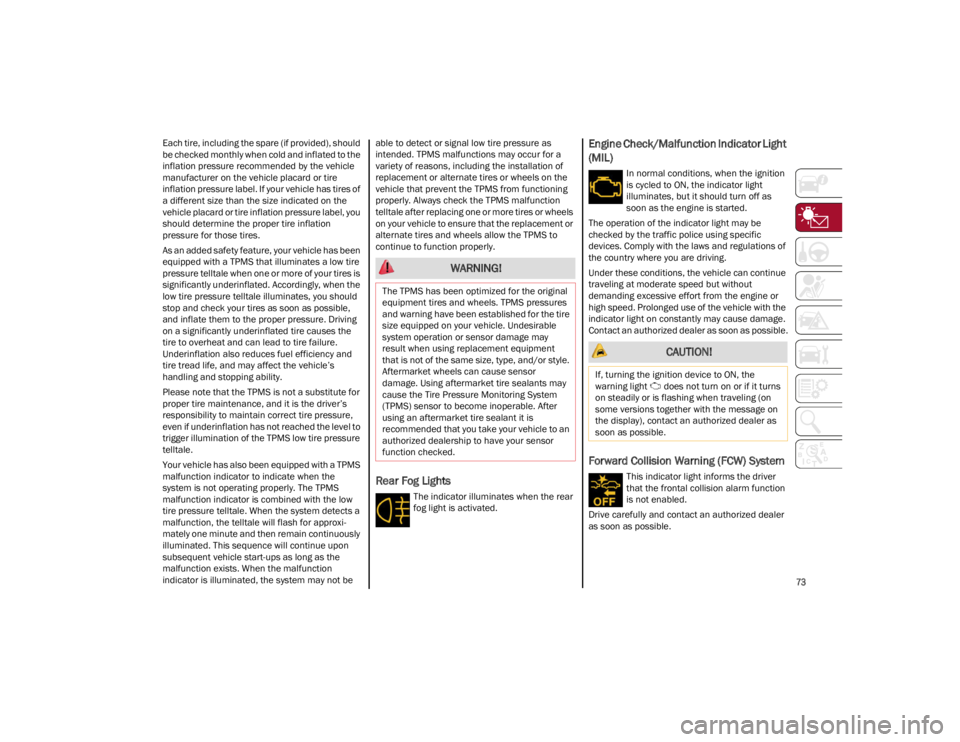
Rear Fog Lights
The indicator illuminates when the rear
fog light is activated.
Engine Check/Malfunction Indicator Light
(MIL)
In normal conditions, when the ignition
is cycled to ON, the indicator light
illuminates, but it should turn off as
soon as the engine is started.
The operation of the indicator light may be
checked by the traffic police using specific
devices. Comply with the laws and regulations of
the country where you are driving.
Under these conditions, the vehicle can continue
traveling at moderate speed but without
demanding excessive effort from the engine or
high speed. Prolonged use of the vehicle with the
indicator light on constantly may cause damage.
Contact an authorized dealer as soon as possible.
Forward Collision Warning (FCW) System
This indicator light informs the driver
that the frontal collision alarm function
is not enabled.
Drive carefully and contact an authorized dealer
as soon as possible.
WARNING!
The TPMS has been optimized for the original
equipment tires and wheels. TPMS pressures
and warning have been established for the tire
size equipped on your vehicle. Undesirable
system operation or sensor damage may
result when using replacement equipment
that is not of the same size, type, and/or style.
Aftermarket wheels can cause sensor
damage. Using aftermarket tire sealants may
cause the Tire Pressure Monitoring System
(TPMS) sensor to become inoperable. After
using an aftermarket tire sealant it is
recommended that you take your vehicle to an
authorized dealership to have your sensor
function checked.
CAUTION!
If, turning the ignition device to ON, the
warning light does not turn on or if it turns
on steadily or is flashing when traveling (on
some versions together with the message on
the display), contact an authorized dealer as
soon as possible.
22_GA_OM_EN_USC_t.book Page 73
Page 78 of 248
GETTING TO KNOW YOUR INSTRUMENT PANEL
76
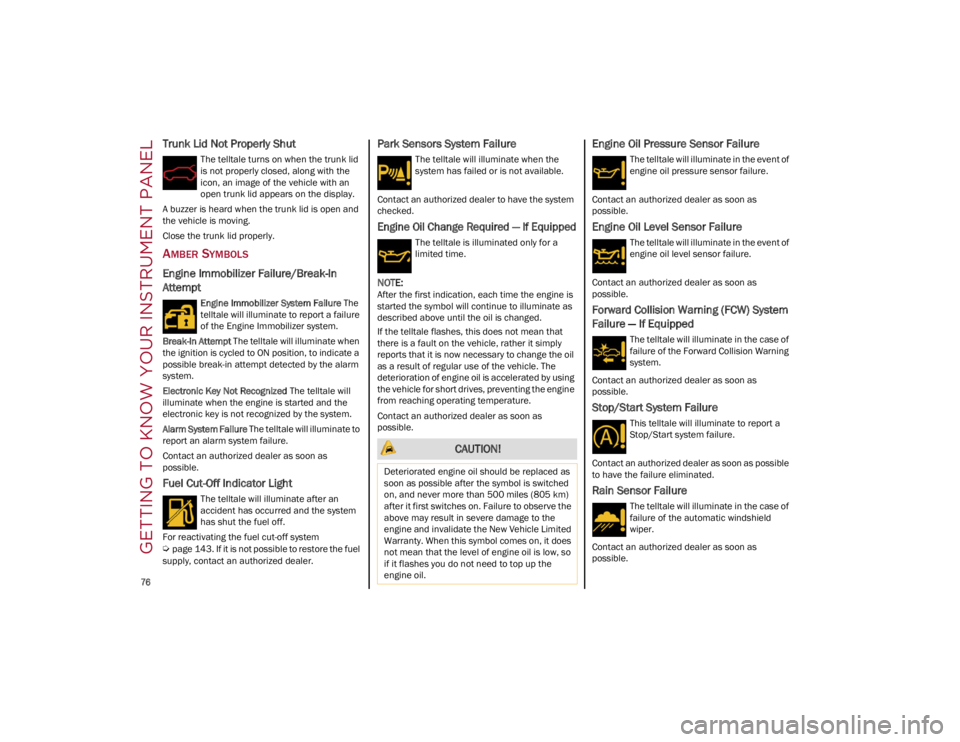
Trunk Lid Not Properly Shut
The telltale turns on when the trunk lid
is not properly closed, along with the
icon, an image of the vehicle with an
open trunk lid appears on the display.
A buzzer is heard when the trunk lid is open and
the vehicle is moving.
Close the trunk lid properly.
AMBER SYMBOLS
Engine Immobilizer Failure/Break-In
Attempt
Engine Immobilizer System Failure The
telltale will illuminate to report a failure
of the Engine Immobilizer system.
Break-In Attempt The telltale will illuminate when
the ignition is cycled to ON position, to indicate a
possible break-in attempt detected by the alarm
system.
Electronic Key Not Recognized The telltale will
illuminate when the engine is started and the
electronic key is not recognized by the system.
Alarm System Failure The telltale will illuminate to
report an alarm system failure.
Contact an authorized dealer as soon as
possible.
Fuel Cut-Off Indicator Light
The telltale will illuminate after an
accident has occurred and the system
has shut the fuel off.
For reactivating the fuel cut-off system
Ú
page 143. If it is not possible to restore the fuel
supply, contact an authorized dealer.
Park Sensors System Failure
The telltale will illuminate when the
system has failed or is not available.
Contact an authorized dealer to have the system
checked.
Engine Oil Change Required — If Equipped
The telltale is illuminated only for a
limited time.
NOTE:
After the first indication, each time the engine is
started the symbol will continue to illuminate as
described above until the oil is changed.
If the telltale flashes, this does not mean that
there is a fault on the vehicle, rather it simply
reports that it is now necessary to change the oil
as a result of regular use of the vehicle. The
deterioration of engine oil is accelerated by using
the vehicle for short drives, preventing the engine
from reaching operating temperature.
Contact an authorized dealer as soon as
possible.
Engine Oil Pressure Sensor Failure
The telltale will illuminate in the event of
engine oil pressure sensor failure.
Contact an authorized dealer as soon as
possible.
Engine Oil Level Sensor Failure
The telltale will illuminate in the event of
engine oil level sensor failure.
Contact an authorized dealer as soon as
possible.
Forward Collision Warning (FCW) System
Failure — If Equipped
The telltale will illuminate in the case of
failure of the Forward Collision Warning
system.
Contact an authorized dealer as soon as
possible.
Stop/Start System Failure
This telltale will illuminate to report a
Stop/Start system failure.
Contact an authorized dealer as soon as possible
to have the failure eliminated.
Rain Sensor Failure
The telltale will illuminate in the case of
failure of the automatic windshield
wiper.
Contact an authorized dealer as soon as
possible.
CAUTION!
Deteriorated engine oil should be replaced as
soon as possible after the symbol is switched
on, and never more than 500 miles (805 km)
after it first switches on. Failure to observe the
above may result in severe damage to the
engine and invalidate the New Vehicle Limited
Warranty. When this symbol comes on, it does
not mean that the level of engine oil is low, so
if it flashes you do not need to top up the
engine oil.
22_GA_OM_EN_USC_t.book Page 76
Page 79 of 248
77
Dusk Sensor Failure
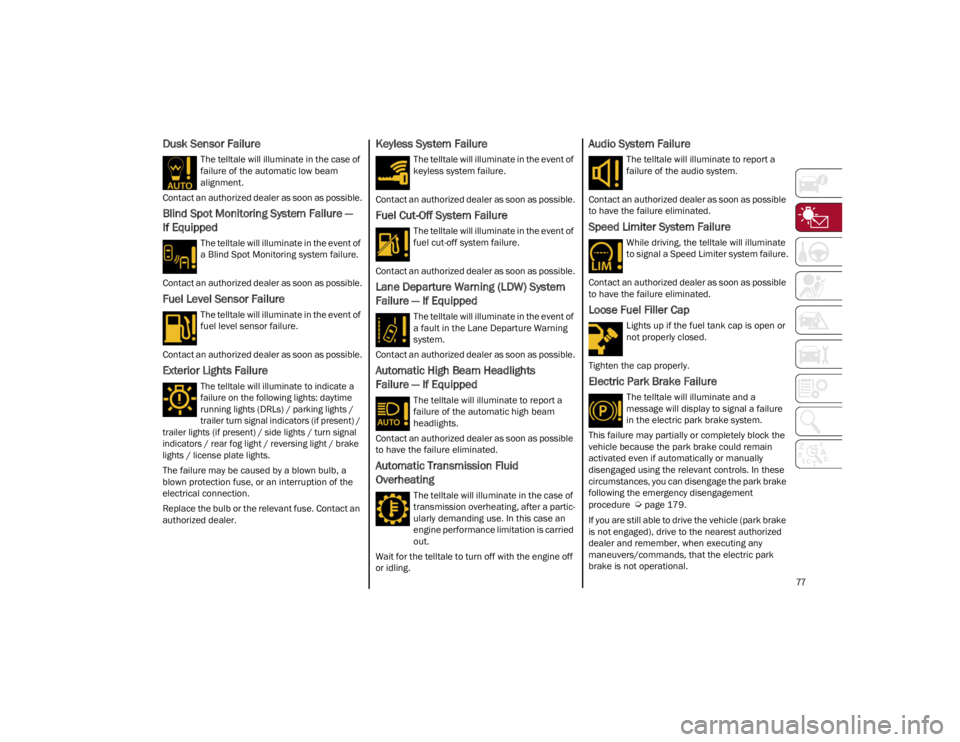
The telltale will illuminate in the case of
failure of the automatic low beam
alignment.
Contact an authorized dealer as soon as possible.
Blind Spot Monitoring System Failure —
If Equipped
The telltale will illuminate in the event of
a Blind Spot Monitoring system failure.
Contact an authorized dealer as soon as possible.
Fuel Level Sensor Failure
The telltale will illuminate in the event of
fuel level sensor failure.
Contact an authorized dealer as soon as possible.
Exterior Lights Failure
The telltale will illuminate to indicate a
failure on the following lights: daytime
running lights (DRLs) / parking lights /
trailer turn signal indicators (if present) /
trailer lights (if present) / side lights / turn signal
indicators / rear fog light / reversing light / brake
lights / license plate lights.
The failure may be caused by a blown bulb, a
blown protection fuse, or an interruption of the
electrical connection.
Replace the bulb or the relevant fuse. Contact an
authorized dealer.
Keyless System Failure
The telltale will illuminate in the event of
keyless system failure.
Contact an authorized dealer as soon as possible.
Fuel Cut-Off System Failure
The telltale will illuminate in the event of
fuel cut-off system failure.
Contact an authorized dealer as soon as possible.
Lane Departure Warning (LDW) System
Failure — If Equipped
The telltale will illuminate in the event of
a fault in the Lane Departure Warning
system.
Contact an authorized dealer as soon as possible.
Automatic High Beam Headlights
Failure — If Equipped
The telltale will illuminate to report a
failure of the automatic high beam
headlights.
Contact an authorized dealer as soon as possible
to have the failure eliminated.
Automatic Transmission Fluid
Overheating
The telltale will illuminate in the case of
transmission overheating, after a partic -
ularly demanding use. In this case an
engine performance limitation is carried
out.
Wait for the telltale to turn off with the engine off
or idling.
Audio System Failure
The telltale will illuminate to report a
failure of the audio system.
Contact an authorized dealer as soon as possible
to have the failure eliminated.
Speed Limiter System Failure
While driving, the telltale will illuminate
to signal a Speed Limiter system failure.
Contact an authorized dealer as soon as possible
to have the failure eliminated.
Loose Fuel Filler Cap
Lights up if the fuel tank cap is open or
not properly closed.
Tighten the cap properly.
Electric Park Brake Failure
The telltale will illuminate and a
message will display to signal a failure
in the electric park brake system.
This failure may partially or completely block the
vehicle because the park brake could remain
activated even if automatically or manually
disengaged using the relevant controls. In these
circumstances, you can disengage the park brake
following the emergency disengagement
procedure
Ú
page 179.
If you are still able to drive the vehicle (park brake
is not engaged), drive to the nearest authorized
dealer and remember, when executing any
maneuvers/commands, that the electric park
brake is not operational.
22_GA_OM_EN_USC_t.book Page 77
Page 84 of 248
STARTING AND OPERATING
82
Battery at an acceptable charge level.
PANIC button not pushed.
System not disabled from previous remote
start event.
Vehicle alarm system indicator flashing.
Ignition in the OFF position.
Fuel level meets minimum requirement.
Remote Start Comfort Systems — If Equipped
When Remote Start is activated, the heated
steering wheel and driver heated seat features
will automatically turn on in cold weather.
These features will stay on through the duration
of remote start until the ignition is placed in the
ON/RUN position.
Remote Start Windshield Wiper De-Icer
Activation — If Equipped
When remote start is active and the outside
ambient temperature is less than 39°F (4°C),
the Windshield Wiper De-Icer will be enabled.
Exiting remote start will resume previous
operation, except if the Windshield Wiper De-Icer
is active.
The Windshield Wiper De-Icer timer and
operation will continue.
COLD WEATHER OPERATION
To prevent possible engine damage while starting
at low temperatures, this vehicle will inhibit
engine cranking when the ambient temperature
is less than –22°F (–30°C) and the oil
temperature sensor reading indicates an engine
block heater has not been used. An
externally-powered electric engine block heater is
available as optional equipment or from an
authorized dealer. The message “Plug In Engine Heater” will be
displayed in the instrument cluster when the
ambient temperature is below 5°F (–15°C) at
the time the engine is shut off as a reminder to
avoid possible crank delays at the next cold start.
EXTENDED PARK STARTING
If the vehicle has not been started or driven for at
least 30 days, it is advisable to follow the
instructions below.
To start the engine, proceed as follows:
1. Briefly push the ignition button
2. If the engine does not start, wait five seconds
and let the starter cool down and then repeat
the starting procedure
3. If the engine does not start after eight attempts, let the starter cool down for at least
10 seconds, and then repeat the starting
procedure
If the problem persists, contact an authorized
dealer.
NOTE:
After prolonged vehicle inactivity, very difficult
starting, that can be noticed through rapid fatigue
of the starter, might also be due to a discharged
battery. In this case you may jump start the
vehicle
Ú
page 177.
IF ENGINE FAILS TO START
Starting the Engine with Key Fob Battery Run
Down or Drained
If the ignition does not respond when the button
is pushed, the key fob battery might be run down
or drained. Therefore, the system does not detect
the presence of the key fob in the vehicle, and will
display a dedicated message.
For more information on starting with a
discharged key fob battery
Ú
page 22.
CAUTION!
Use of the recommended oil and adhering to
the prescribed oil change intervals is
important to prevent engine damage and
ensure satisfactory starting in cold conditions.
WARNING!
Never pour fuel or other flammable liquid into
the throttle body air inlet opening in an attempt
to start the vehicle. This could result in flash fire
causing serious personal injury.
Do not attempt to push or tow your vehicle to
get it started. Vehicles equipped with an
automatic transmission cannot be started this
way. Unburned fuel could enter the catalytic
converter and once the engine has started,
ignite and damage the converter and vehicle.
If the vehicle has a discharged battery, booster
cables may be used to obtain a start from a
booster battery or the battery in another vehicle
Ú
page 177. This type of start can be
dangerous if done improperly.
CAUTION!
To prevent damage to the starter, do not
continuously crank the engine for more than
25 seconds at a time. Wait 60 seconds before
trying again.
22_GA_OM_EN_USC_t.book Page 82
Page 98 of 248
STARTING AND OPERATING
96
SAFETY FUNCTIONS
When the engine is stopped through the Stop/
Start system, if the driver releases their seat belt,
opens the driver's or passenger's door, or opens
the hood from inside the vehicle, the engine can
be restarted only by using the ignition.
This condition is indicated to the driver both
through a buzzer and a message on the
instrument cluster display.
IRREGULAR OPERATION
In the event of malfunction, the Stop/Start
system is deactivated.
For further information on failure indications
Ú
page 70.
VEHICLE INACTIVITY
In the event of vehicle inactivity (or if the battery
is replaced), special attention must be paid to the
disconnection of the battery power supply.
Proceed as follows:
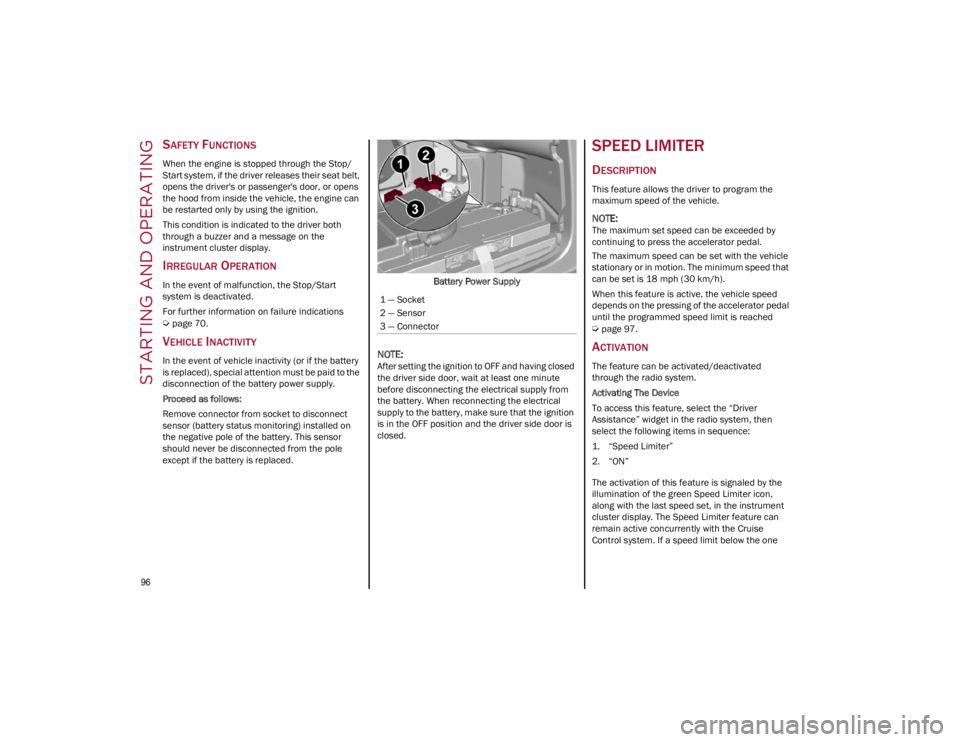
Remove connector from socket to disconnect
sensor (battery status monitoring) installed on
the negative pole of the battery. This sensor
should never be disconnected from the pole
except if the battery is replaced.Battery Power Supply
NOTE:
After setting the ignition to OFF and having closed
the driver side door, wait at least one minute
before disconnecting the electrical supply from
the battery. When reconnecting the electrical
supply to the battery, make sure that the ignition
is in the OFF position and the driver side door is
closed.
SPEED LIMITER
DESCRIPTION
This feature allows the driver to program the
maximum speed of the vehicle.
NOTE:
The maximum set speed can be exceeded by
continuing to press the accelerator pedal.
The maximum speed can be set with the vehicle
stationary or in motion. The minimum speed that
can be set is 18 mph (30 km/h).
When this feature is active, the vehicle speed
depends on the pressing of the accelerator pedal
until the programmed speed limit is reached
Ú
page 97.
ACTIVATION
The feature can be activated/deactivated
through the radio system.
Activating The Device
To access this feature, select the “Driver
Assistance” widget in the radio system, then
select the following items in sequence:
1. “Speed Limiter”
2. “ON”
The activation of this feature is signaled by the
illumination of the green Speed Limiter icon,
along with the last speed set, in the instrument
cluster display. The Speed Limiter feature can
remain active concurrently with the Cruise
Control system. If a speed limit below the one
1 — Socket
2 — Sensor
3 — Connector
22_GA_OM_EN_USC_t.book Page 96
Page 102 of 248
STARTING AND OPERATING
100
(Continued)
However, it is not a safety system and not
designed to prevent collisions. The Cruise Control
function performs differently
Ú
page 98.
ACC will allow you to keep Cruise Control engaged
in light to moderate traffic conditions without the
constant need to reset your Cruise Control. ACC
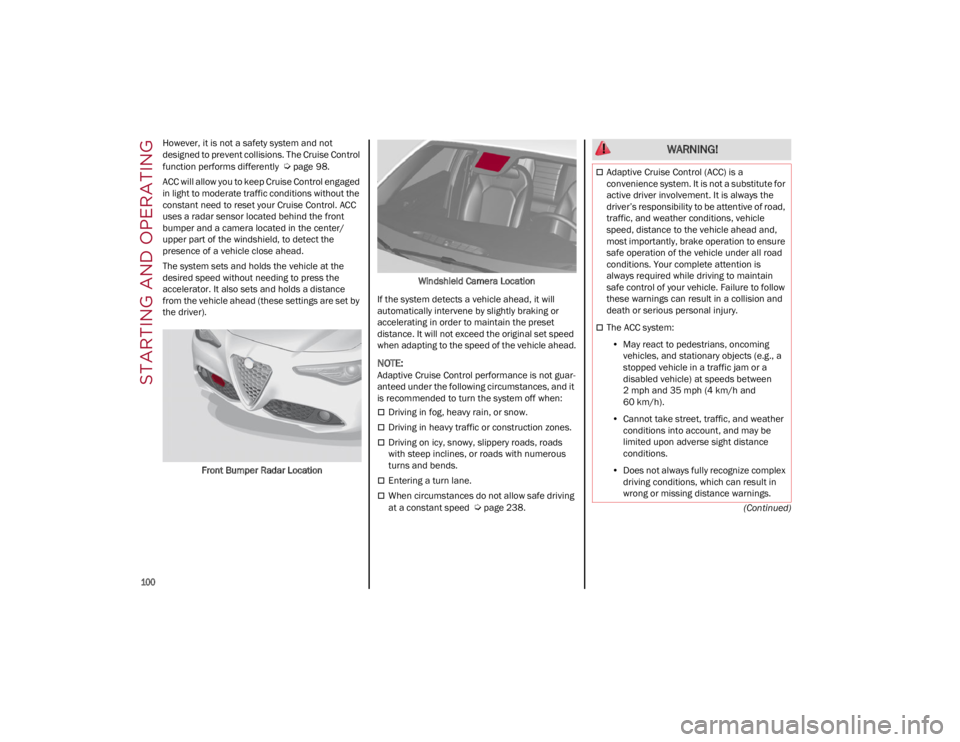
uses a radar sensor located behind the front
bumper and a camera located in the center/
upper part of the windshield, to detect the
presence of a vehicle close ahead.
The system sets and holds the vehicle at the
desired speed without needing to press the
accelerator. It also sets and holds a distance
from the vehicle ahead (these settings are set by
the driver).
Front Bumper Radar Location Windshield Camera Location
If the system detects a vehicle ahead, it will
automatically intervene by slightly braking or
accelerating in order to maintain the preset
distance. It will not exceed the original set speed
when adapting to the speed of the vehicle ahead.
NOTE:
Adaptive Cruise Control performance is not guar -
anteed under the following circumstances, and it
is recommended to turn the system off when:
Driving in fog, heavy rain, or snow.
Driving in heavy traffic or construction zones.
Driving on icy, snowy, slippery roads, roads
with steep inclines, or roads with numerous
turns and bends.
Entering a turn lane.
When circumstances do not allow safe driving
at a constant speed
Ú
page 238.
WARNING!
Adaptive Cruise Control (ACC) is a
convenience system. It is not a substitute for
active driver involvement. It is always the
driver’s responsibility to be attentive of road,
traffic, and weather conditions, vehicle
speed, distance to the vehicle ahead and,
most importantly, brake operation to ensure
safe operation of the vehicle under all road
conditions. Your complete attention is
always required while driving to maintain
safe control of your vehicle. Failure to follow
these warnings can result in a collision and
death or serious personal injury.
The ACC system:
• May react to pedestrians, oncoming
vehicles, and stationary objects (e.g., a stopped vehicle in a traffic jam or a disabled vehicle) at speeds between 2 mph and 35 mph (4 km/h and
60 km/h).
• Cannot take street, traffic, and weather
conditions into account, and may be limited upon adverse sight distanceconditions.
• Does not always fully recognize complex
driving conditions, which can re sult in
wro n
g or missing distance warnings.
22_GA_OM_EN_USC_t.book Page 100
Page 103 of 248
101
Activating Adaptive Cruise Control (ACC)
The minimum set speed for the ACC system is
19 mph (30 km/h) and the maximum is 110 mph
(180 km/h).
The system cannot be activated:
When pressing the brake pedal.
When the brakes are overheated.
When the Electric Park Brake has been
operated.
When either PARK, REVERSE or NEUTRAL is
engaged.
When the engine RPM is above a maximum
threshold.
When the vehicle speed is not within the
operational speed range.
When the Electronic Stability Control (ESC) (or
Anti-Lock Brake System (ABS) or other stability
control systems) are operating or have just
operated.
When the ESC system is off.
When the Forward Collision Warning system (if
equipped) is braking automatically.
In the event of a system failure.
When the engine is off.
In case of obstruction of the radar sensor (in
this case the bumper area where it is located
must be cleaned).
If the system is set, the conditions described
above also cause a cancellation or deactivation
of the system. These situations may vary
according to the conditions.
NOTE:
The system will not be deactivated when speeds
higher than those set are reached by pressing the
accelerator pedal above 110 mph (180 km/h). In
these situations, the system may not work
correctly and it is recommended to deactivate it.
To Activate/Deactivate
The system has four operating states:
Enabled (speed not set)
Activated (speed set)
Paused
Deactivated To Activate
To enable the system, push and release the on/
off button located on the left side on the steering
wheel.
On/Off Button
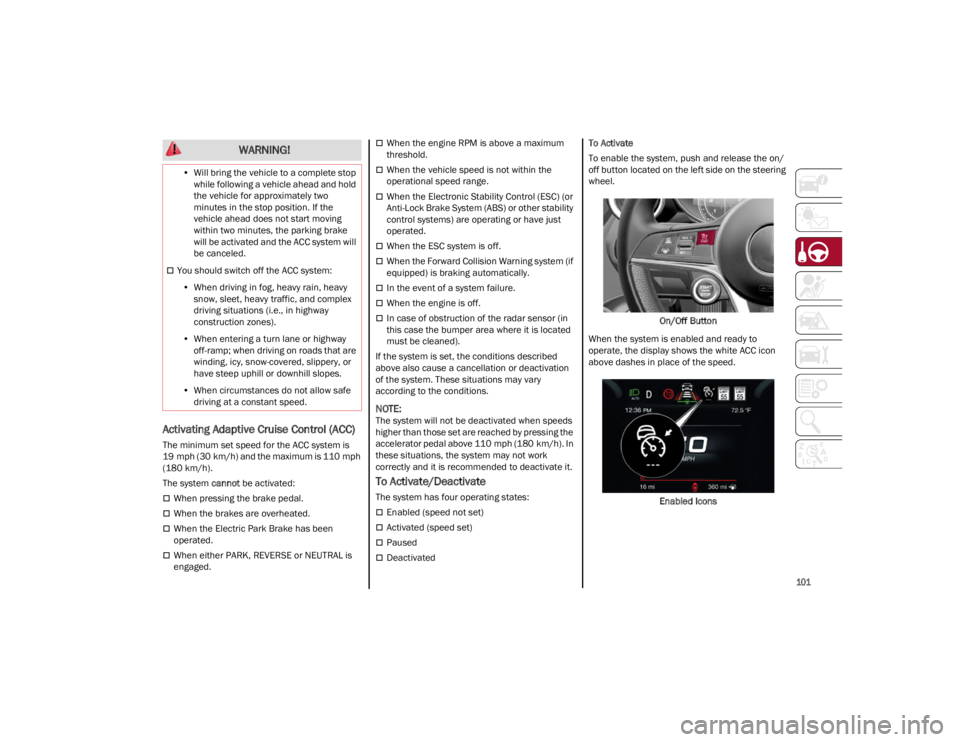
When the system is enabled and ready to
operate, the display shows the white ACC icon
above dashes in place of the speed.
Enabled Icons
•
Will bring the vehicle to a complete stop
while following a vehicle ahead and holdthe vehicle for approximately twominutes in the stop position. If thevehicle ahead does not start movingwithin two minutes, the parking brakewill be activated and the ACC system will be canceled.
You should switch off the ACC system:
• When driving in fog, heavy rain, heavy
sn
ow, sleet, heavy traffic, and complex
driving situations (i.e., in highway construction zones).
• When entering a turn lane or highway
off-ramp; when driving on roads that are winding, icy, snow-covered, slippery, or have steep uphill or downhill slopes.
• When circumstances do not allow safe
driving at a constant speed.
WARNING!
22_GA_OM_EN_USC_t.book Page 101
Page 105 of 248
103
(Continued)
To Resume
Once the system has been canceled but not
deactivated, to resume a previously set speed,
simply push the RES/SET switch upward and
remove your foot from the accelerator to recall it.
The system will be set to the last stored speed.
Setting The Distance Between Vehicles
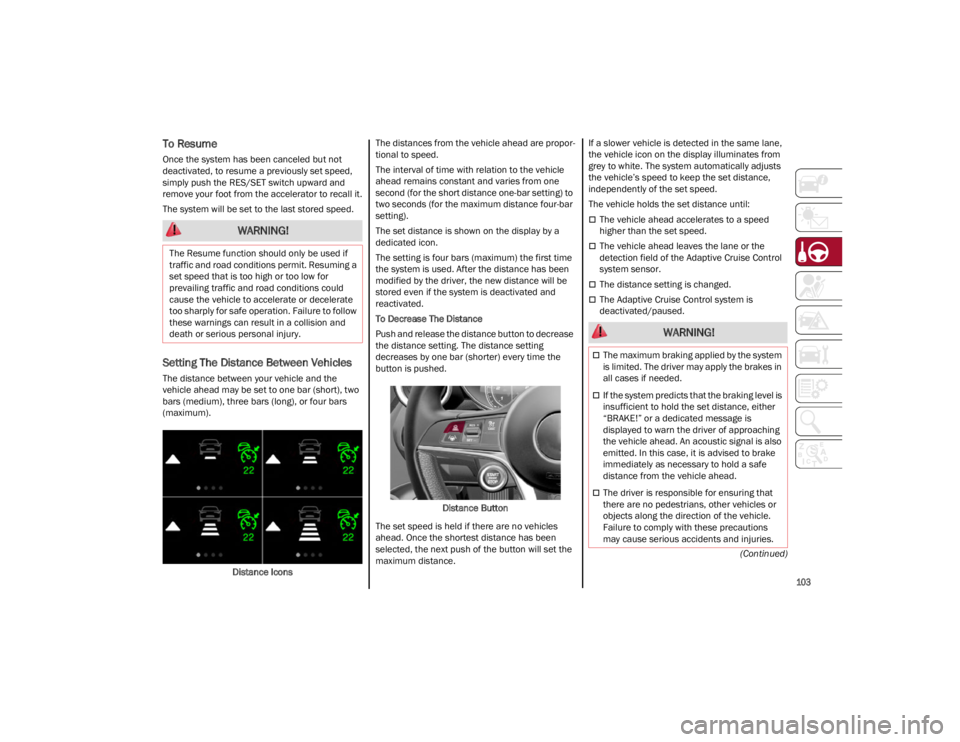
The distance between your vehicle and the
vehicle ahead may be set to one bar (short), two
bars (medium), three bars (long), or four bars
(maximum).Distance Icons The distances from the vehicle ahead are propor
-
tional to speed.
The interval of time with relation to the vehicle
ahead remains constant and varies from one
second (for the short distance one-bar setting) to
two seconds (for the maximum distance four-bar
setting).
The set distance is shown on the display by a
dedicated icon.
The setting is four bars (maximum) the first time
the system is used. After the distance has been
modified by the driver, the new distance will be
stored even if the system is deactivated and
reactivated.
To Decrease The Distance
Push and release the distance button to decrease
the distance setting. The distance setting
decreases by one bar (shorter) every time the
button is pushed.
Distance Button
The set speed is held if there are no vehicles
ahead. Once the shortest distance has been
selected, the next push of the button will set the
maximum distance. If a slower vehicle is detected in the same lane,
the vehicle icon on the display illuminates from
grey to white. The system automatically adjusts
the vehicle’s speed to keep the set distance,
independently of the set speed.
The vehicle holds the set distance until:
The vehicle ahead accelerates to a speed
higher than the set speed.
The vehicle ahead leaves the lane or the
detection field of the Adaptive Cruise Control
system sensor.
The distance setting is changed.
The Adaptive Cruise Control system is
deactivated/paused.
WARNING!
The Resume function should only be used if
traffic and road conditions permit. Resuming a
set speed that is too high or too low for
prevailing traffic and road conditions could
cause the vehicle to accelerate or decelerate
too sharply for safe operation. Failure to follow
these warnings can result in a collision and
death or serious personal injury.
WARNING!
The maximum braking applied by the system
is limited. The driver may apply the brakes in
all cases if needed.
If the system predicts that the braking level is
insufficient to hold the set distance, either
“BRAKE!” or a dedicated message is
displayed to warn the driver of approaching
the vehicle ahead. An acoustic signal is also
emitted. In this case, it is advised to brake
immediately as necessary to hold a safe
distance from the vehicle ahead.
The driver is responsible for ensuring that
there are no pedestrians, other vehicles or
objects along the direction of the vehicle.
Failure to comply with these precautions
may cause serious accidents and injuries.
22_GA_OM_EN_USC_t.book Page 103
Page 106 of 248
STARTING AND OPERATING
104
Overtake Aid
When driving with ACC engaged and following a
vehicle at a speed greater than 45 mph
(70 km/h), the system will provide an additional
acceleration up to the ACC set speed to assist in
passing the vehicle. This additional acceleration
is triggered when the driver utilizes the left turn
signal and will only be active when passing on the
left hand side.
The system detects the direction of traffic
automatically when the vehicle passes from left
hand traffic to right hand traffic. In this case, the
overtaking assist function is only active when the
reference vehicle is overtaken on the right. The
additional acceleration is deactivated when the
driver uses the right direction indicator and
returns to the original lane.
“Stop And Go” Function
The “Stop and Go” operating strategy allows you
to maintain a safe distance from the vehicle
ahead until the vehicle has completely stopped.
In the event that the ACC system brings your
vehicle to a standstill while following the vehicle
in front, if the vehicle in front starts moving within
two seconds of your vehicle coming to a
standstill, your vehicle will resume motion
without the need for any driver action.
If the vehicle in front does not start moving within
two seconds of your vehicle coming to a standstill, the driver will have to push the RES/
SET switch upward to restart.
Deactivation
The system is deactivated and the set speed is
canceled if:
The on/off button is pushed (when the system
is on or paused)
The ignition is placed in the OFF position
RACE mode is activated (Quadrifoglio models)
The system is canceled (the set speed and
distance are stored):
When the system is paused
Ú
page 101
When the conditions shown in the “Activating
Adaptive Cruise Control (ACC)” section occur
Ú
page 101
Limited Operation Warning
If the dedicated message is shown on the display,
a condition limiting the Adaptive Cruise Control
operation may have occurred.
This could be due to an obstruction of the
vehicle’s sensor or camera. It could also be due
to a fault in the system. If an obstruction is
detected, clean the area of the windshield
opposite the interior rearview mirror, where the
camera is located, as well as the area of the front bumper where the sensor is located. Then check
that the message has disappeared.
When the conditions limiting the system
functions end, normal operation will resume.
Should the fault persist, contact an authorized
dealer.
Precautions While Driving With ACC
In certain driving situations, ACC may have
detection issues. In these cases, ACC may brake
late or unexpectedly. The driver needs to stay
alert and may need to intervene. The following
are examples of these types of situations:
Offset Driving
ACC may not detect a vehicle in the same lane
that is offset from your direct line of travel, or a
vehicle merging in from a side lane. There may
not be sufficient distance to the vehicle ahead.
The offset vehicle may move in and out of the line
of travel, which can cause your vehicle to brake or
accelerate unexpectedly.
Turns And Bends
When driving on a curve with ACC engaged, the
system may increase or decrease the vehicle
speed for stability, with no vehicle ahead
detected. Once the vehicle is out of the curve the
system will resume your original set speed. This is
a part of normal ACC system functionality.
NOTE:
On tight turns ACC performance may be
limited. In this case, it is advisable to
deactivate the system.
The system only limits the speed DURING a
bend and not BEFORE it.
The driver is fully responsible for holding a
safe distance from the vehicle ahead
respecting the highway code in force in the
respective country.
WARNING!
WARNING!
When the ACC system is resumed, the driver
must ensure that there are no pedestrians,
vehicles or objects in the path of the vehicle.
Failure to follow these warnings can result in a
collision and death or serious personal injury.
22_GA_OM_EN_USC_t.book Page 104
Page 109 of 248

107
Suspension Conditions
The following operations will suspend the HAS
system:
Steer manually
Press the brake pedal
Disable the ACC device
Activate the turn signals
Push the ACC activation setting button for two
seconds to activate Cruise Control
Place the gear selector in PARK, REVERSE, or
NEUTRAL
Reactivating the ACC system will reactivate HAS
Ú
page 99.
Automatic Deactivation
The system can be deactivated in any of the
following situations:
If there are narrow bends
When hands are removed from the steering
wheel
If the left or right turn signal is activated
If the driver intentionally changes lanes
without using the turn signal
If the driver’s seat belt is released
If the gear selector is placed in DRIVE
If the “Active Braking” function is activated
Ú
page 138
If the vehicle exits the highway
If the lane markings are not detected by the
camera
If the ACC device is deactivated
If the vehicle speed exceeds 90 mph
(145 km/h)
NOTE:
When the HAS system is turned off, the symbol
on the display turns red and then grey.
Hands on the steering wheel are detected by a
capacitive sensor installed in it.
When the automatic suspension conditions are
over, HAS will be automatically reactivated.
OPERATION
The HAS system only operates when the driver’s
hands are on the steering wheel.
If the system detects that the driver’s hands have
been removed from the steering wheel, the
system will alert the driver to place their hands
back on the steering wheel
Ú
page 108.
If the vehicle crosses the lane boundary, the
steering wheel will vibrate and the dedicated
screen will appear in the instrument cluster
display.
NOTE:
The HAS system may take up to five seconds to
turn on once all conditions are met. During this
time, a grey indicator light will appear on the
instrument cluster display and the system will
automatically activate as soon as all of the condi -
tions are met with no intervention from the driver.
The following conditions must be met before the
HAS system turns on:
The HAS system must be enabled by pushing
the button on the steering wheel
The vehicle must be on a highway
ACC must be activated
The right and left lane boundaries must be
visible
The vehicle speed must be between 0 and
90 mph (0 and 145 km/h)
The camera, radar, and radio system must be
functioning properly
The road lane width must be between 8.5 ft
and 13.7 ft (2.6 m and 4.2 m)
The turn signals must not be activated
The HAS system must be functioning properly
Other operating limits:
If the speed of ACC can be set to a higher value
(top speed 110 mph (180 km/h), HAS is only
available as long as the vehicle speed is equal
to or less than 90 mph (145 km/h).
When the ACC speed is reduced and the
vehicle speed is less than 90 mph (145 km/h),
the system will automatically reactivate.
If the ACC speed is set to 90 mph (145 km/h),
traveling downhill may increase the vehicle
speed. The HAS system will deactivate until the
speed returns to 90 mph (145 km/h).
INDICATIONS ON THE DISPLAY
The HAS system status can always be viewed in
the instrument cluster display.
The system status is indicated by the color of the
symbol on the display.
The HAS system uses sensors in the steering
wheel to detect if the driver’s hands are on it.
If the driver’s hands are not on the steering
wheel, a series of warnings will appear in the
instrument cluster display to alert the driver to
reposition their hands on the steering wheel. An
acoustic signal will also sound. After a period of
22_GA_OM_EN_USC_t.book Page 107