rear entertainment ALFA ROMEO GIULIA 2022 Owners Manual
[x] Cancel search | Manufacturer: ALFA ROMEO, Model Year: 2022, Model line: GIULIA, Model: ALFA ROMEO GIULIA 2022Pages: 248, PDF Size: 9.71 MB
Page 28 of 248
GETTING TO KNOW YOUR VEHICLE
26
Proceed in one of the following ways to realign
the door lock device (only when the battery
charge has been restored):
Push the lock button on the key fob
Push the unlock button on the door panel
Unlock the driver’s door lock cylinder with the
emergency key
Operate the internal door handle
NOTE:
For the rear doors, if the Child Safety Locks are
engaged, and the previously described locking
procedure is carried out, operating the internal
handle will not open the door. Instead, it will only
realign the lock release device. To open the door,
the outside handle must be used. The door
central locking/unlocking buttons are not deacti-
vated when the emergency lock is engaged.
PASSIVE ENTRY SYSTEM
The Passive Entry system is an enhancement to
the vehicle’s key fob. This feature allows you to
lock and unlock the vehicle’s door(s) and trunk lid
without having to push the key fob lock or unlock
buttons.
NOTE:
Passive Entry may be programmed on/off
through the radio screen. Refer to the
Information and Entertainment System
Owner’s Manual Supplement for Passive Entry
settings.
The key fob may not be detected by the vehicle
Passive Entry system if it is located next to a
mobile phone, laptop, or other electronic
device; these devices may block the key fob’s wireless signal and prevent the Passive Entry
system from locking/unlocking the vehicle.
If wearing gloves, or if it has been raining/
snowing on the Passive Entry door handle, the
unlock sensitivity can be affected, resulting in
a slower response time.
If the vehicle is unlocked by Passive Entry and
no door is opened within 60 seconds, the
vehicle will relock and (if equipped) will arm
the Vehicle Security system.
To Unlock From The Driver Or Passenger Side
With a valid Passive Entry key fob close to the
door handle, grab the handle to unlock the
vehicle. Grabbing the driver’s door handle will
unlock the driver door automatically. Grabbing
the passenger door handle will unlock all doors
and the trunk lid automatically.
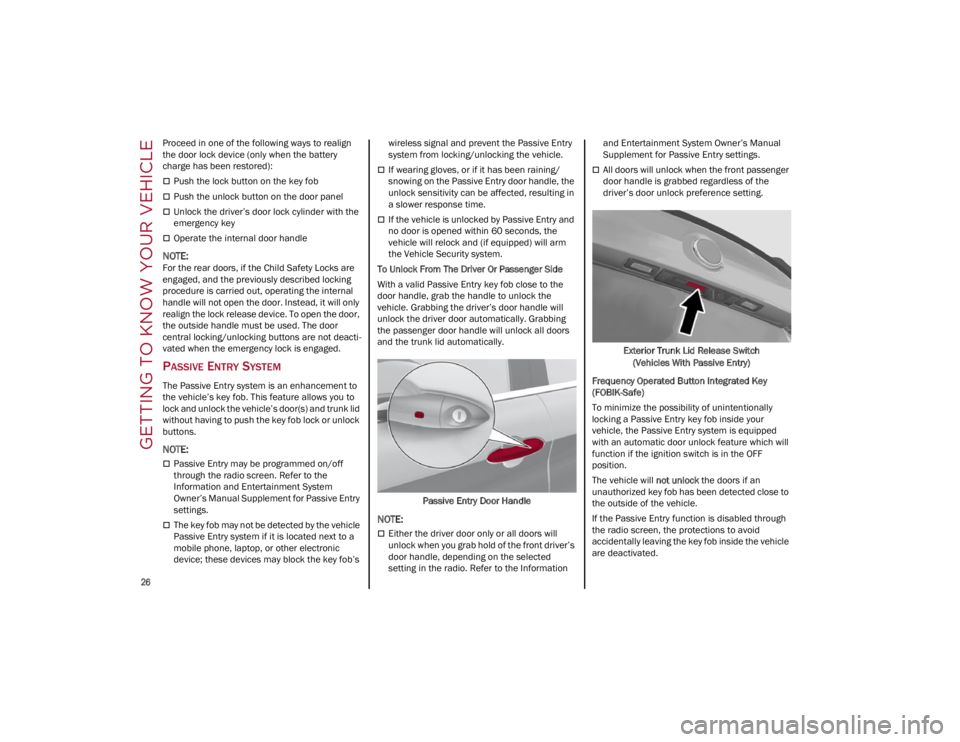
Passive Entry Door Handle
NOTE:
Either the driver door only or all doors will
unlock when you grab hold of the front driver’s
door handle, depending on the selected
setting in the radio. Refer to the Information and Entertainment System Owner’s Manual
Supplement for Passive Entry settings.
All doors will unlock when the front passenger
door handle is grabbed regardless of the
driver’s door unlock preference setting.
Exterior Trunk Lid Release Switch (Vehicles With Passive Entry)
Frequency Operated Button Integrated Key
(FOBIK-Safe)
To minimize the possibility of unintentionally
locking a Passive Entry key fob inside your
vehicle, the Passive Entry system is equipped
with an automatic door unlock feature which will
function if the ignition switch is in the OFF
position.
The vehicle will not unlock the doors if an
unauthorized key fob has been detected close to
the outside of the vehicle.
If the Passive Entry function is disabled through
the radio screen, the protections to avoid
accidentally leaving the key fob inside the vehicle
are deactivated.
22_GA_OM_EN_USC_t.book Page 26
Page 29 of 248
27
To Lock The Vehicle’s Doors And Trunk Lid
With one of the vehicle’s Passive Entry key fobs
close to either front door handle, pushing the
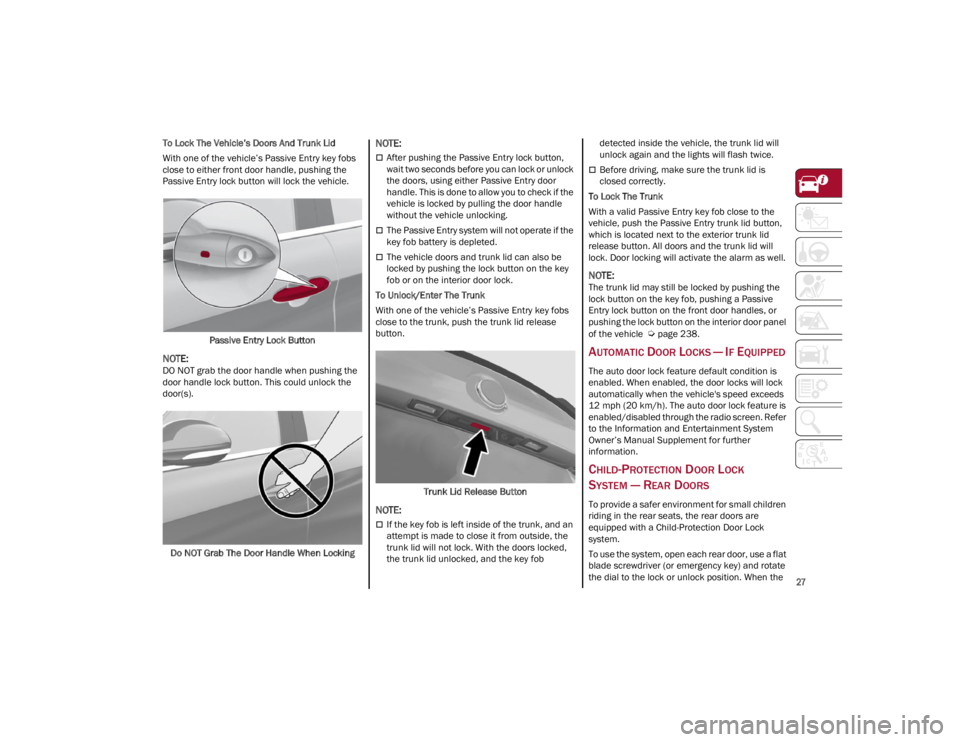
Passive Entry lock button will lock the vehicle.Passive Entry Lock Button
NOTE:
DO NOT grab the door handle when pushing the
door handle lock button. This could unlock the
door(s).
Do NOT Grab The Door Handle When Locking
NOTE:
After pushing the Passive Entry lock button,
wait two seconds before you can lock or unlock
the doors, using either Passive Entry door
handle. This is done to allow you to check if the
vehicle is locked by pulling the door handle
without the vehicle unlocking.
The Passive Entry system will not operate if the
key fob battery is depleted.
The vehicle doors and trunk lid can also be
locked by pushing the lock button on the key
fob or on the interior door lock.
To Unlock/Enter The Trunk
With one of the vehicle’s Passive Entry key fobs
close to the trunk, push the trunk lid release
button.
Trunk Lid Release Button
NOTE:
If the key fob is left inside of the trunk, and an
attempt is made to close it from outside, the
trunk lid will not lock. With the doors locked,
the trunk lid unlocked, and the key fob detected inside the vehicle, the trunk lid will
unlock again and the lights will flash twice.
Before driving, make sure the trunk lid is
closed correctly.
To Lock The Trunk
With a valid Passive Entry key fob close to the
vehicle, push the Passive Entry trunk lid button,
which is located next to the exterior trunk lid
release button. All doors and the trunk lid will
lock. Door locking will activate the alarm as well.
NOTE:
The trunk lid may still be locked by pushing the
lock button on the key fob, pushing a Passive
Entry lock button on the front door handles, or
pushing the lock button on the interior door panel
of the vehicle
Ú
page 238.
AUTOMATIC DOOR LOCKS — IF EQUIPPED
The auto door lock feature default condition is
enabled. When enabled, the door locks will lock
automatically when the vehicle's speed exceeds
12 mph (20 km/h). The auto door lock feature is
enabled/disabled through the radio screen. Refer
to the Information and Entertainment System
Owner’s Manual Supplement for further
information.
CHILD-PROTECTION DOOR LOCK
SYSTEM — REAR DOORS
To provide a safer environment for small children
riding in the rear seats, the rear doors are
equipped with a Child-Protection Door Lock
system.
To use the system, open each rear door, use a flat
blade screwdriver (or emergency key) and rotate
the dial to the lock or unlock position. When the
22_GA_OM_EN_USC_t.book Page 27
Page 36 of 248
GETTING TO KNOW YOUR VEHICLE
34
Tilting The Seat Up Or Down — If Equipped
The seat angle can be adjusted in four directions.
Lift or push the front part of seat switch to move
the front part of the seat in the corresponding
direction. Release the seat switch when the seat
has reached the desired position.
Reclining The Seatback
The angle of the seatback can be adjusted
forward or rearward by using the recline switch.
The seat will move in the direction of the switch.
Release the switch when the desired position is
reached.
Power Lumbar
The power lumbar switch is located on the
outboard side of the power seat. Push the switch
forward or rearward to increase or decrease the
lumbar support. Push the switch upward or
downward to raise or lower the lumbar support.
Seat Cushion Extension — If Equipped
Lift the adjustment lever and push the front of the
cushion forward or rearward to extend the
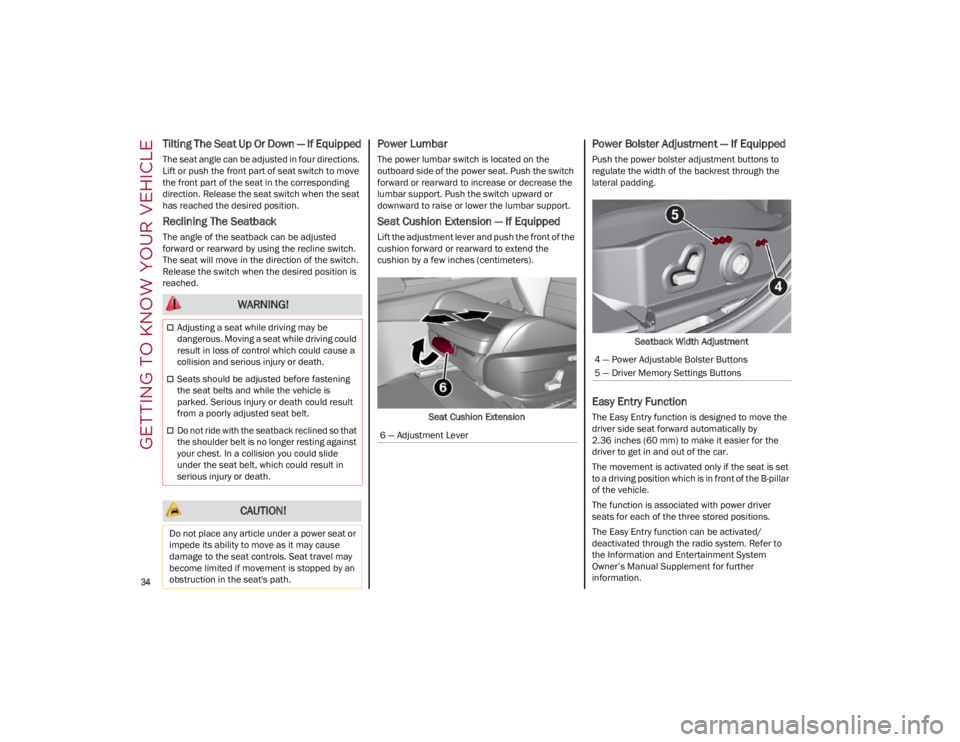
cushion by a few inches (centimeters).Seat Cushion Extension
Power Bolster Adjustment — If Equipped
Push the power bolster adjustment buttons to
regulate the width of the backrest through the
lateral padding.
Seatback Width Adjustment
Easy Entry Function
The Easy Entry function is designed to move the
driver side seat forward automatically by
2.36 inches (60 mm) to make it easier for the
driver to get in and out of the car.
The movement is activated only if the seat is set
to a driving position which is in front of the B-pillar
of the vehicle.
The function is associated with power driver
seats for each of the three stored positions.
The Easy Entry function can be activated/
deactivated through the radio system. Refer to
the Information and Entertainment System
Owner’s Manual Supplement for further
information.
WARNING!
Adjusting a seat while driving may be
dangerous. Moving a seat while driving could
result in loss of control which could cause a
collision and serious injury or death.
Seats should be adjusted before fastening
the seat belts and while the vehicle is
parked. Serious injury or death could result
from a poorly adjusted seat belt.
Do not ride with the seatback reclined so that
the shoulder belt is no longer resting against
your chest. In a collision you could slide
under the seat belt, which could result in
serious injury or death.
CAUTION!
Do not place any article under a power seat or
impede its ability to move as it may cause
damage to the seat controls. Seat travel may
become limited if movement is stopped by an
obstruction in the seat's path.
6 — Adjustment Lever
4 — Power Adjustable Bolster Buttons
5 — Driver Memory Settings Buttons
22_GA_OM_EN_USC_t.book Page 34
Page 37 of 248
35
(Continued)
HEATED SEATS — IF EQUIPPED
For information on use with the Remote Start
system, see
Ú
page 23.
Front Heated Seats — If Equipped
NOTE:
Quadrifoglio vehicles equipped with Sparco
Racing Seats will not be equipped with the heated
seat feature.A push of the heated seat buttons
located on the instrument panel, near
the climate controls, will select the heat
levels in order of highest to lowest. A
fourth push of the button will turn the heated seat
off.
NOTE:
The heated seat function can also be activated
through the radio system. Refer to the Informa -
tion and Entertainment System Owner’s Manual
Supplement for further information.
You can select three heating levels:
Maximum — three LED indicators illuminated
on the buttons
Average — two LED indicators illuminated on
the buttons
Minimum — one LED indicator illuminated on
the buttons
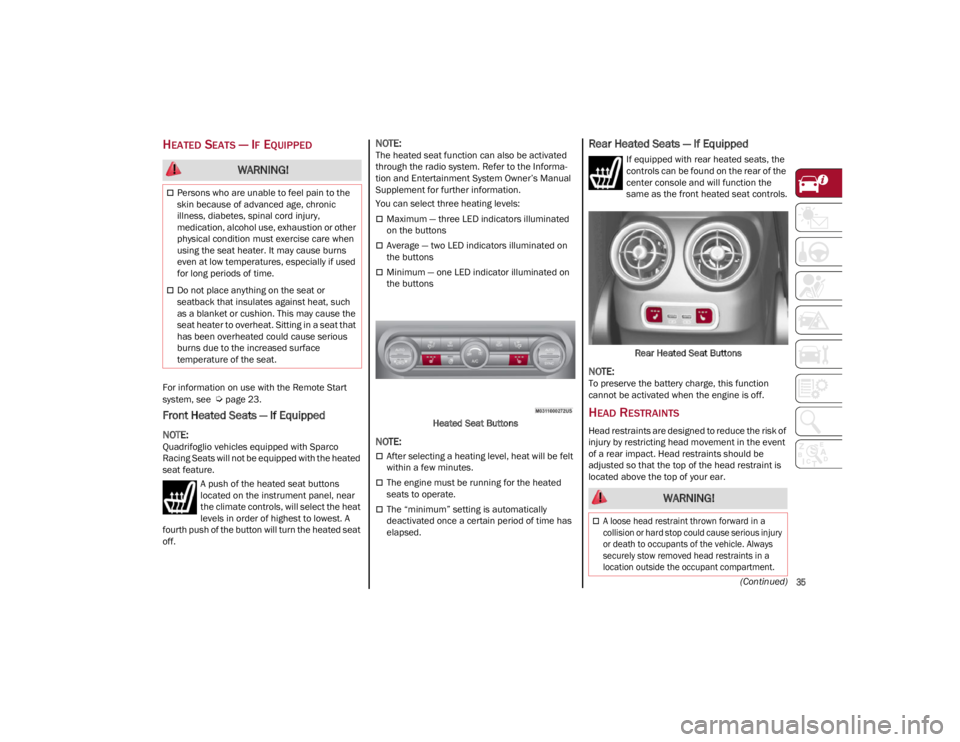
Heated Seat Buttons
NOTE:
After selecting a heating level, heat will be felt
within a few minutes.
The engine must be running for the heated
seats to operate.
The “minimum” setting is automatically
deactivated once a certain period of time has
elapsed.
Rear Heated Seats — If Equipped
If equipped with rear heated seats, the
controls can be found on the rear of the
center console and will function the
same as the front heated seat controls.
Rear Heated Seat Buttons
NOTE:
To preserve the battery charge, this function
cannot be activated when the engine is off.
HEAD RESTRAINTS
Head restraints are designed to reduce the risk of
injury by restricting head movement in the event
of a rear impact. Head restraints should be
adjusted so that the top of the head restraint is
located above the top of your ear.
WARNING!
Persons who are unable to feel pain to the
skin because of advanced age, chronic
illness, diabetes, spinal cord injury,
medication, alcohol use, exhaustion or other
physical condition must exercise care when
using the seat heater. It may cause burns
even at low temperatures, especially if used
for long periods of time.
Do not place anything on the seat or
seatback that insulates against heat, such
as a blanket or cushion. This may cause the
seat heater to overheat. Sitting in a seat that
has been overheated could cause serious
burns due to the increased surface
temperature of the seat.
WARNING!
A loose head restraint thrown forward in a
collision or hard stop could cause serious injury
or death to occupants of the vehicle. Always
securely stow removed head restraints in a
location outside the occupant compartment.
22_GA_OM_EN_USC_t.book Page 35
Page 59 of 248
57
WIRELESS CHARGING PAD —
I
F EQUIPPED
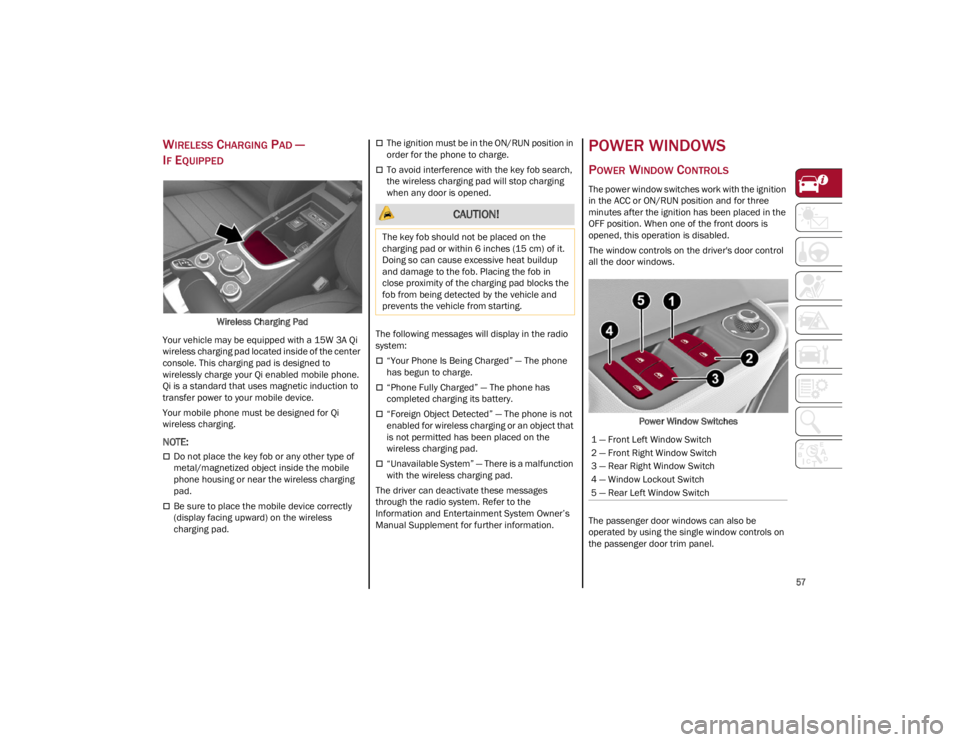
Wireless Charging Pad
Your vehicle may be equipped with a 15W 3A Qi
wireless charging pad located inside of the center
console. This charging pad is designed to
wirelessly charge your Qi enabled mobile phone.
Qi is a standard that uses magnetic induction to
transfer power to your mobile device.
Your mobile phone must be designed for Qi
wireless charging.
NOTE:
Do not place the key fob or any other type of
metal/magnetized object inside the mobile
phone housing or near the wireless charging
pad.
Be sure to place the mobile device correctly
(display facing upward) on the wireless
charging pad.
The ignition must be in the ON/RUN position in
order for the phone to charge.
To avoid interference with the key fob search,
the wireless charging pad will stop charging
when any door is opened.
The following messages will display in the radio
system:
“Your Phone Is Being Charged” — The phone
has begun to charge.
“Phone Fully Charged” — The phone has
completed charging its battery.
“Foreign Object Detected” — The phone is not
enabled for wireless charging or an object that
is not permitted has been placed on the
wireless charging pad.
“Unavailable System” — There is a malfunction
with the wireless charging pad.
The driver can deactivate these messages
through the radio system. Refer to the
Information and Entertainment System Owner’s
Manual Supplement for further information.
POWER WINDOWS
POWER WINDOW CONTROLS
The power window switches work with the ignition
in the ACC or ON/RUN position and for three
minutes after the ignition has been placed in the
OFF position. When one of the front doors is
opened, this operation is disabled.
The window controls on the driver's door control
all the door windows.
Power Window Switches
The passenger door windows can also be
operated by using the single window controls on
the passenger door trim panel.
CAUTION!
The key fob should not be placed on the
charging pad or within 6 inches (15 cm) of it.
Doing so can cause excessive heat buildup
and damage to the fob. Placing the fob in
close proximity of the charging pad blocks the
fob from being detected by the vehicle and
prevents the vehicle from starting.
1 — Front Left Window Switch
2 — Front Right Window Switch
3 — Rear Right Window Switch
4 — Window Lockout Switch
5 — Rear Left Window Switch
22_GA_OM_EN_USC_t.book Page 57
Page 138 of 248
SAFETY
136
NOTE:
In some cases, for a limited period of time, the
system may be activated by a lane with a single
median line.
In cases of good road surface conditions, the
system could correctly recognize other types of
valid lane markings (e.g. road edges, sidewalks,
etc.).
Hand Presence On The Steering Wheel Detection
The system is able to detect the presence of the
driver’s hands on the steering wheel.
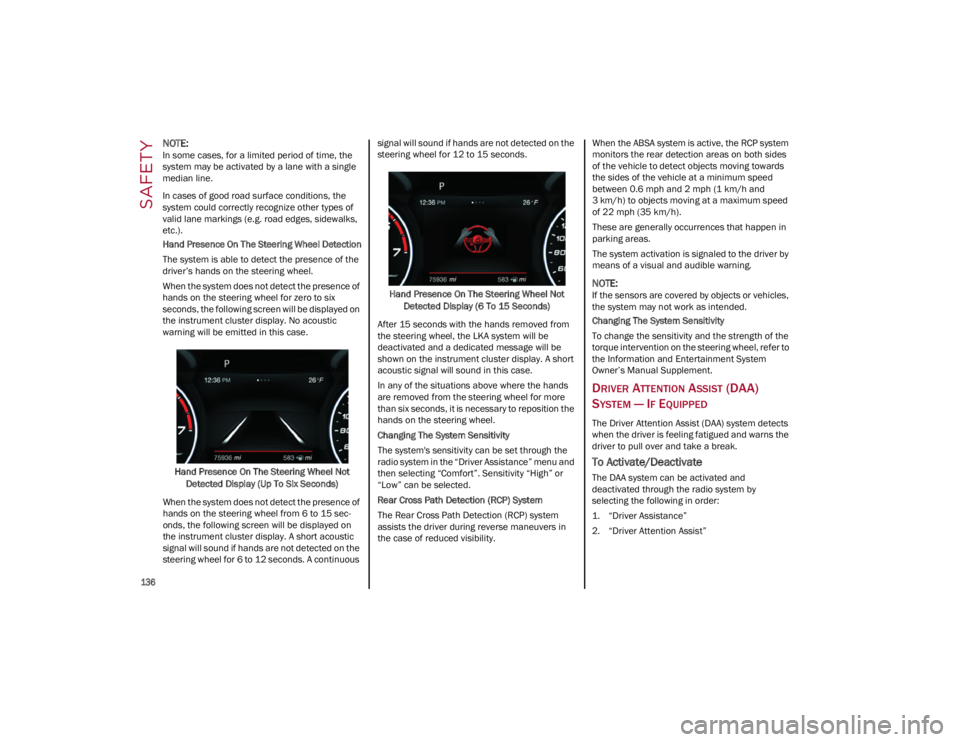
When the system does not detect the presence of
hands on the steering wheel for zero to six
seconds, the following screen will be displayed on
the instrument cluster display. No acoustic
warning will be emitted in this case.Hand Presence On The Steering Wheel Not Detected Display (Up To Six Seconds)
When the system does not detect the presence of
hands on the steering wheel from 6 to 15 sec-
onds, the following screen will be displayed on
the instrument cluster display. A short acoustic
signal will sound if hands are not detected on the
steering wheel for 6 to 12 seconds. A continuous signal will sound if hands are not detected on the
steering wheel for 12 to 15 seconds.
Hand Presence On The Steering Wheel Not Detected Display (6 To 15 Seconds)
After 15 seconds with the hands removed from
the steering wheel, the LKA system will be
deactivated and a dedicated message will be
shown on the instrument cluster display. A short
acoustic signal will sound in this case.
In any of the situations above where the hands
are removed from the steering wheel for more
than six seconds, it is necessary to reposition the
hands on the steering wheel.
Changing The System Sensitivity
The system's sensitivity can be set through the
radio system in the “Driver Assistance” menu and
then selecting “Comfort”. Sensitivity “High” or
“Low” can be selected.
Rear Cross Path Detection (RCP) System
The Rear Cross Path Detection (RCP) system
assists the driver during reverse maneuvers in
the case of reduced visibility. When the ABSA system is active, the RCP system
monitors the rear detection areas on both sides
of the vehicle to detect objects moving towards
the sides of the vehicle at a minimum speed
between 0.6 mph and 2 mph (1 km/h and
3 km/h) to objects moving at a maximum speed
of 22 mph (35 km/h).
These are generally occurrences that happen in
parking areas.
The system activation is signaled to the driver by
means of a visual and audible warning.
NOTE:
If the sensors are covered by objects or vehicles,
the system may not work as intended.
Changing The System Sensitivity
To change the sensitivity and the strength of the
torque intervention on the steering wheel, refer to
the Information and Entertainment System
Owner’s Manual Supplement.
DRIVER ATTENTION ASSIST (DAA)
S
YSTEM — IF EQUIPPED
The Driver Attention Assist (DAA) system detects
when the driver is feeling fatigued and warns the
driver to pull over and take a break.
To Activate/Deactivate
The DAA system can be activated and
deactivated through the radio system by
selecting the following in order:
1. “Driver Assistance”
2. “Driver Attention Assist”
22_GA_OM_EN_USC_t.book Page 136
Page 202 of 248
SERVICING AND MAINTENANCE
200
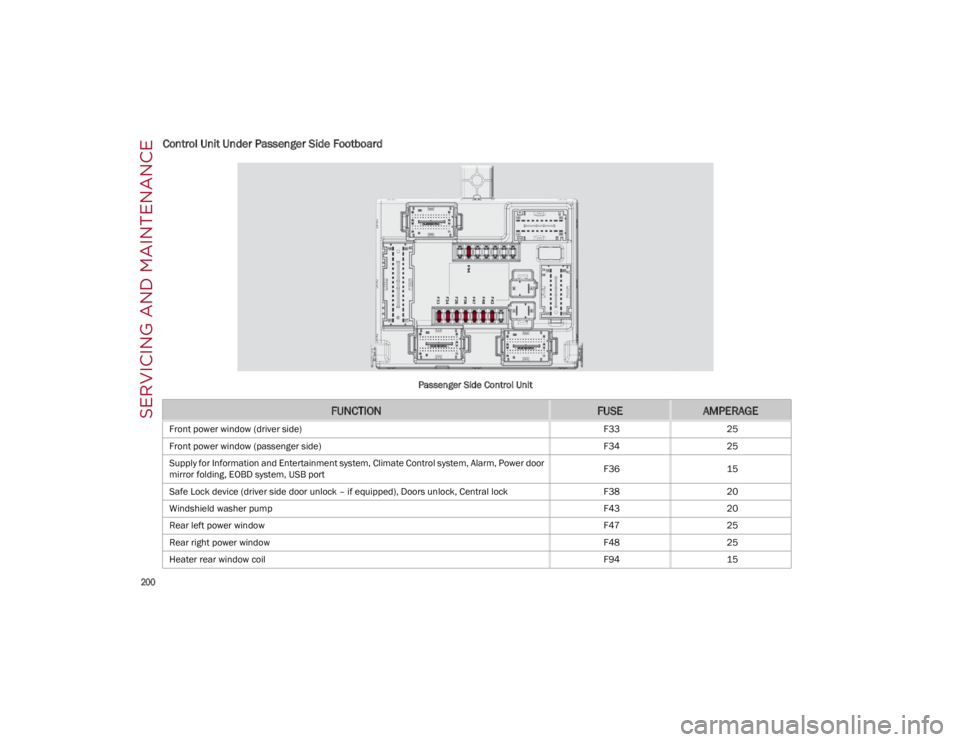
Control Unit Under Passenger Side Footboard
Passenger Side Control Unit
FUNCTIONFUSEAMPERAGE
Front power window (driver side)F3325
Front power window (passenger side) F3425
Supply for Information and Entertainment system, Climate Control system, Alarm, Power door
mirror folding, EOBD system, USB port F36
15
Safe Lock device (driver side door unlock – if equipped), Doors unlock, Central lock F3820
Windshield washer pump F4320
Rear left power window F4725
Rear right power window F4825
Heater rear window coil F9415
22_GA_OM_EN_USC_t.book Page 200