remote start ALFA ROMEO GIULIA 2023 User Guide
[x] Cancel search | Manufacturer: ALFA ROMEO, Model Year: 2023, Model line: GIULIA, Model: ALFA ROMEO GIULIA 2023Pages: 248, PDF Size: 9.62 MB
Page 177 of 248

175
JUMP STARTING
If your vehicle has a discharged battery, it can be
jump started from the remote battery
connections by using a set of jumper cables and
a battery in another vehicle, or by using a portable
battery booster pack. Jump starting can be
dangerous if done improperly, so please follow
the procedures in this section carefully.
NOTE:
When using a portable battery booster pack,
follow the manufacturer's operating instructions
and precautions.
REMOTE BATTERY CONNECTION POSTS
Your vehicle is equipped with remote battery
connection posts for jump starting. Depending on
the vehicle model, remote post locations may
vary.
Non Quadrifoglio Model
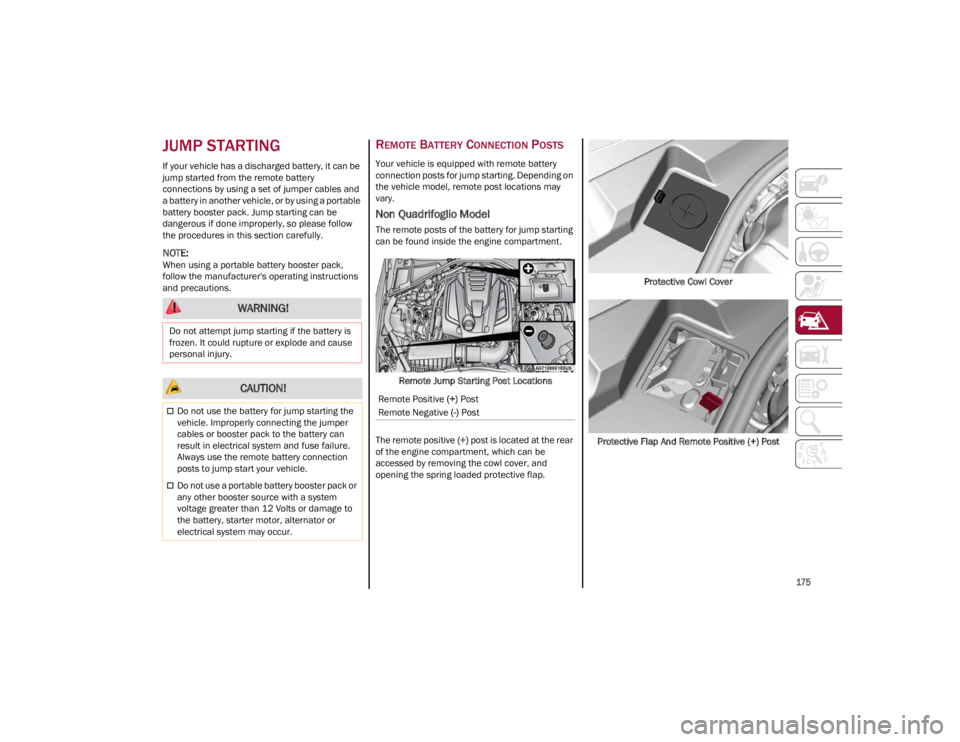
The remote posts of the battery for jump starting
can be found inside the engine compartment.Remote Jump Starting Post Locations
The remote positive (+) post is located at the rear
of the engine compartment, which can be
accessed by removing the cowl cover, and
opening the spring loaded protective flap. Protective Cowl Cover
Protective Flap And Remote Positive (+) Post
WARNING!
Do not attempt jump starting if the battery is
frozen. It could rupture or explode and cause
personal injury.
CAUTION!
Do not use the battery for jump starting the
vehicle. Improperly connecting the jumper
cables or booster pack to the battery can
result in electrical system and fuse failure.
Always use the remote battery connection
posts to jump start your vehicle.
Do not use a portable battery booster pack or
any other booster source with a system
voltage greater than 12 Volts or damage to
the battery, starter motor, alternator or
electrical system may occur.
Remote Positive (+) Post
Remote Negative (-) Post
23_GA_OM_EN_USC_t.book Page 175
Page 178 of 248

IN CASE OF EMERGENCY
176
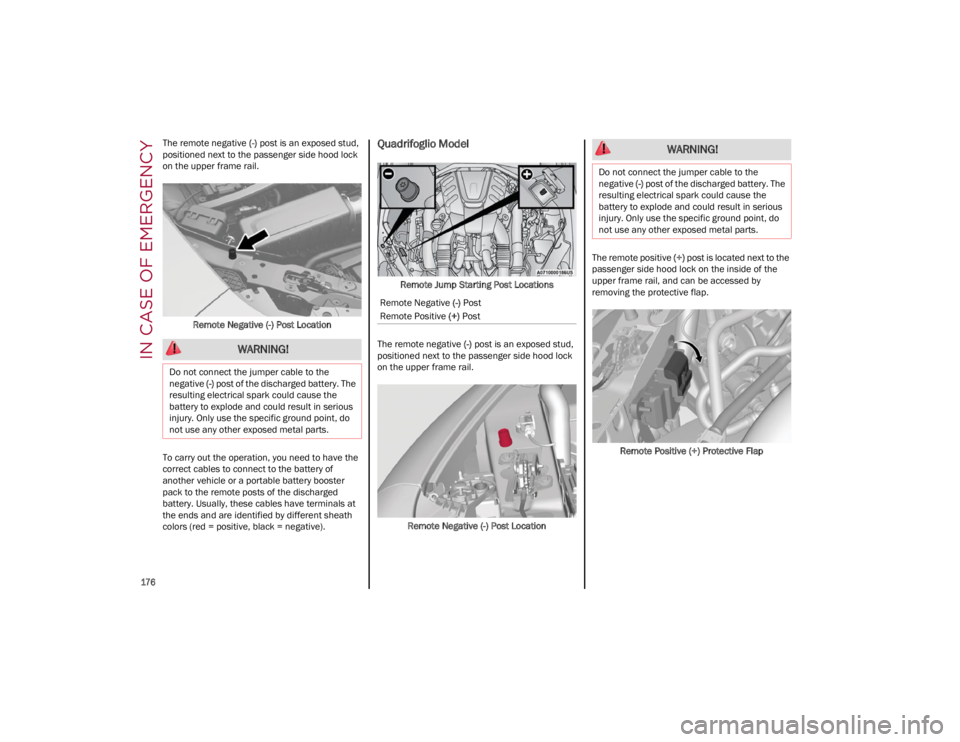
The remote negative (-) post is an exposed stud,
positioned next to the passenger side hood lock
on the upper frame rail.
Remote Negative (-) Post Location
To carry out the operation, you need to have the
correct cables to connect to the battery of
another vehicle or a portable battery booster
pack to the remote posts of the discharged
battery. Usually, these cables have terminals at
the ends and are identified by different sheath
colors (red = positive, black = negative).Quadrifoglio Model
Remote Jump Starting Post Locations
The remote negative (-) post is an exposed stud,
positioned next to the passenger side hood lock
on the upper frame rail.
Remote Negative (-) Post Location The remote positive
(+) post is located next to the
passenger side hood lock on the inside of the
upper frame rail, and can be accessed by
removing the protective flap.
Remote Positive (+) Protective Flap
WARNING!
Do not connect the jumper cable to the
negative (-) post of the discharged battery. The
resulting electrical spark could cause the
battery to explode and could result in serious
injury. Only use the specific ground point, do
not use any other exposed metal parts.
Remote Negative (-) Post
Remote Positive (+) Post
WARNING!
Do not connect the jumper cable to the
negative (-) post of the discharged battery. The
resulting electrical spark could cause the
battery to explode and could result in serious
injury. Only use the specific ground point, do
not use any other exposed metal parts.
23_GA_OM_EN_USC_t.book Page 176
Page 179 of 248

177
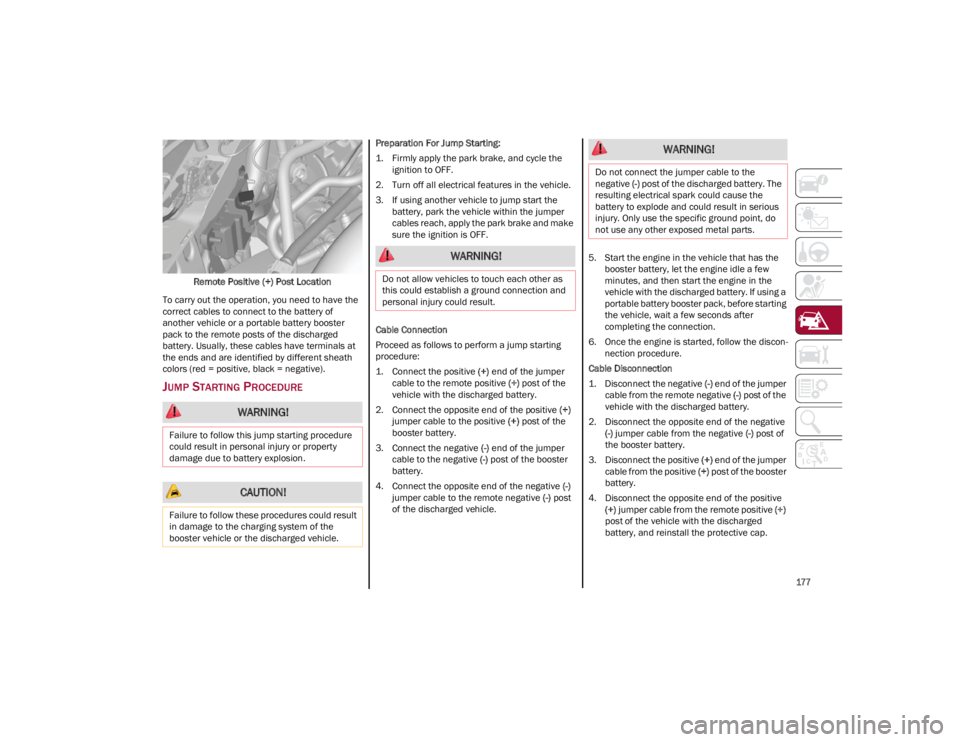
Remote Positive (+) Post Location
To carry out the operation, you need to have the
correct cables to connect to the battery of
another vehicle or a portable battery booster
pack to the remote posts of the discharged
battery. Usually, these cables have terminals at
the ends and are identified by different sheath
colors (red = positive, black = negative).
JUMP STARTING PROCEDURE
Preparation For Jump Starting:
1. Firmly apply the park brake, and cycle the ignition to OFF.
2. Turn off all electrical features in the vehicle.
3. If using another vehicle to jump start the battery, park the vehicle within the jumper
cables reach, apply the park brake and make
sure the ignition is OFF.
Cable Connection
Proceed as follows to perform a jump starting
procedure:
1. Connect the positive (+) end of the jumper
cable to the remote positive (+) post of the
vehicle with the discharged battery.
2. Connect the opposite end of the positive (+)
jumper cable to the positive (+) post of the
booster battery.
3. Connect the negative (-) end of the jumper
cable to the negative (-) post of the booster
battery.
4. Connect the opposite end of the negative (-)
jumper cable to the remote negative (-) post
of the discharged vehicle. 5. Start the engine in the vehicle that has the
booster battery, let the engine idle a few
minutes, and then start the engine in the
vehicle with the discharged battery. If using a
portable battery booster pack, before starting
the vehicle, wait a few seconds after
completing the connection.
6. Once the engine is started, follow the discon -
nection procedure.
Cable Disconnection
1. Disconnect the negative (-) end of the jumper
cable from the remote negative (-) post of the
vehicle with the discharged battery.
2. Disconnect the opposite end of the negative (-) jumper cable from the negative (-) post of
the booster battery.
3. Disconnect the positive (+) end of the jumper
cable from the positive (+) post of the booster
battery.
4. Disconnect the opposite end of the positive (+) jumper cable from the remote positive (+)
post of the vehicle with the discharged
battery, and reinstall the protective cap.
WARNING!
Failure to follow this jump starting procedure
could result in personal injury or property
damage due to battery explosion.
CAUTION!
Failure to follow these procedures could result
in damage to the charging system of the
booster vehicle or the discharged vehicle.
WARNING!
Do not allow vehicles to touch each other as
this could establish a ground connection and
personal injury could result.
WARNING!
Do not connect the jumper cable to the
negative (-) post of the discharged battery. The
resulting electrical spark could cause the
battery to explode and could result in serious
injury. Only use the specific ground point, do
not use any other exposed metal parts.
23_GA_OM_EN_USC_t.book Page 177
Page 245 of 248

243
Rear Cross Path .........................................132
Reformulated Gasoline .............................. 230
Refueling Procedure ..................................124
Refueling The Vehicle ................................ 124
Refuelling.................................................... 231
Reminder, Seat Belt ...................................145
Remote ControlStarting System........................................ 23
Remote Keyless Entry .................................. 19
Remote Starting Exit Remote Start Mode .......................... 23
Remote Starting System ....................... 23, 81
Remote Trunk Release ................................ 61
Replacement Bulbs..................202, 203, 204
Replacement Tires ..................................... 215
Reporting Safety Defects ...........................238
Restraints, Child .........................................158
Rims And Tires ...........................................206
Roll Over Warning........................................... 3
S
Safety Checks Inside Vehicle ....................167
Safety Checks Outside Vehicle.................. 168
Safety Defects, Reporting ..........................238
Safety Information, Tire .............................206
Safety Tips ..................................................166
Safety, Exhaust Gas ...................................168
Saving Fuel .................................................126
Scheduled Servicing ..................................182
Scheduled Servicing Program (2.0 T4
MAir Engine Versions) ................................ 183
Scheduled Servicing Program (2.9 V6
Gasoline Engine Versions) ......................... 185
Seat Belt Reminder ...................................... 71 Seat Belts.......................................... 144, 167
Child Restraints ..................................... 158
Energy Management Feature ............... 148
Front Seat ..................................... 144, 145
Inspection .............................................. 167
Lap/Shoulder Belt Untwisting .............. 147
Lap/Shoulder Belts ............................... 145
Pregnant Women................................... 148
Pretensioners ........................................ 148
Rear Seat ............................................... 145
Reminder ............................................... 145
Seat Belt Pretensioner .......................... 148
Untwisting Procedure ............................ 147
Seats ...................................................... 31, 34 Adjustment ........................................ 31, 34
Head Restraints .......................................36
Heated ...................................................... 35
Power ........................................................34
Security Alarm............................................... 24
Service Assistance .................................... 236
Service Contract ........................................ 237
Service Manuals ........................................ 238
Servicing Procedures ................................ 192
Shoulder Belts ........................................... 145
Signals, Turn ........................................74, 168
Snow Chains .............................................. 218
Snow Tires.................................................. 218
Spare Tires ................................................. 216
Speed Control Accel/Decel ..............................................99
Accel/Decel (ACC Only) ......................... 102Cancel .......................................................99
Distance Setting (ACC Only).................. 103
Resume .....................................................99
Set .............................................................98 Speed Control (Cruise Control) ................... 97
Speed Limiting System ................................ 96
Starting Button....................................................... 22Cold Weather ........................................... 82
Remote ..................................................... 23
Starting The Engine ..................................... 81
Steering Tilt Column ............................................... 29
Wheel, Heated ......................................... 30
Wheel, Tilt ................................................ 29
Steering System ......................................... 226
Stop/Start System ....................................... 94
Storage Console .................................................... 55
Glove Compartment ................................ 55
Suggestions For Driving............................. 126
Sun Roof .................................................58, 60
Sun Visor ...................................................... 38
Supplemental Restraint System –
Air Bag ........................................................ 150
Suspension ................................................ 226
Symbols ........................................................... 6
System, Remote Starting ............................ 23
T
Tie Down Hooks, Cargo ............................... 62
Tire And Loading Information Placard ...... 209
Tire Markings ............................................. 206
Tire Safety Information .............................. 206
Tire Service Kit ........................................... 171
23_GA_OM_EN_USC_t.book Page 243