wheel Alfa Romeo Giulietta 2014 Owner's Manual
[x] Cancel search | Manufacturer: ALFA ROMEO, Model Year: 2014, Model line: Giulietta, Model: Alfa Romeo Giulietta 2014Pages: 280, PDF Size: 6.65 MB
Page 2 of 280
We really know your car because we invented, designed and built it: we really know every single detail.
At Alfa Romeo Service authorised workshopsyou can find technicians directly trained by us,
offering quality and professionalism for all service operations.
Alfa Romeo workshops are always close to you for the regular servicing operations, season checks
and practical recommendations by our experts.
With Alfa Romeo Genuine Parts you keep the reliability, comfort and performance features
of your new car unchanged in time: that's why you bought it for.
Always ask for Genuine Parts for the components used on our cars; we recommend them because
they come from our steady commitment in research and development of highly innovative technologies.
For all these reasons: rely on Genuine Parts, because they are the only ones
designed by Alfa Romeo for your car.
SAFETY:
BRAKING SYSTEM
ENVIRONMENT: PARTICULATE FILTERS,
CLIMATE CONTROL MAINTENANCE
COMFORT: SUSPENSION
AND WINDSCREEN WIPERS
PERFORMANCE: SPARK PLUGS,
INJECTORS AND BATTERIES
LINEACCESSORI
ROOF RACK BARS, WHEEL RIMS
WHY CHOOSING
GENUINE PARTS
Page 9 of 280
GRAPHICAL INDEX
.
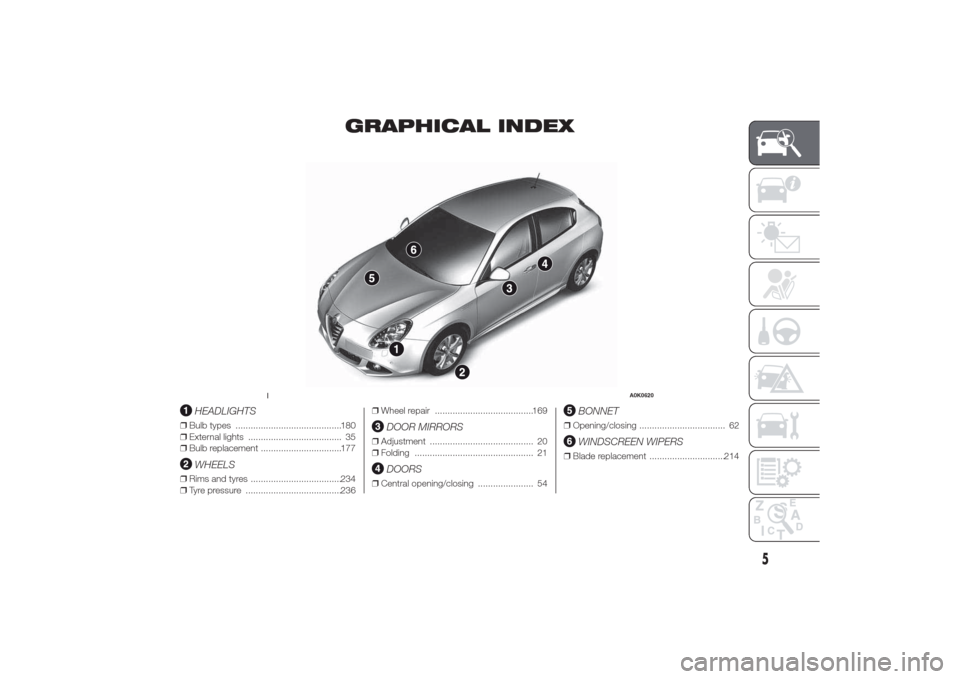
HEADLIGHTS
❒Bulb types ..........................................180
❒External lights ..................................... 35
❒Bulb replacement ................................177
WHEELS
❒Rims and tyres ....................................234
❒Tyre pressure ......................................236❒Wheel repair .......................................169
DOOR MIRRORS
❒Adjustment ......................................... 20
❒Folding ............................................... 21
DOORS
❒Central opening/closing ...................... 54
BONNET
❒Opening/closing .................................. 62
WINDSCREEN WIPERS
❒Blade replacement ..............................214
1
A0K0620
5
Page 11 of 280
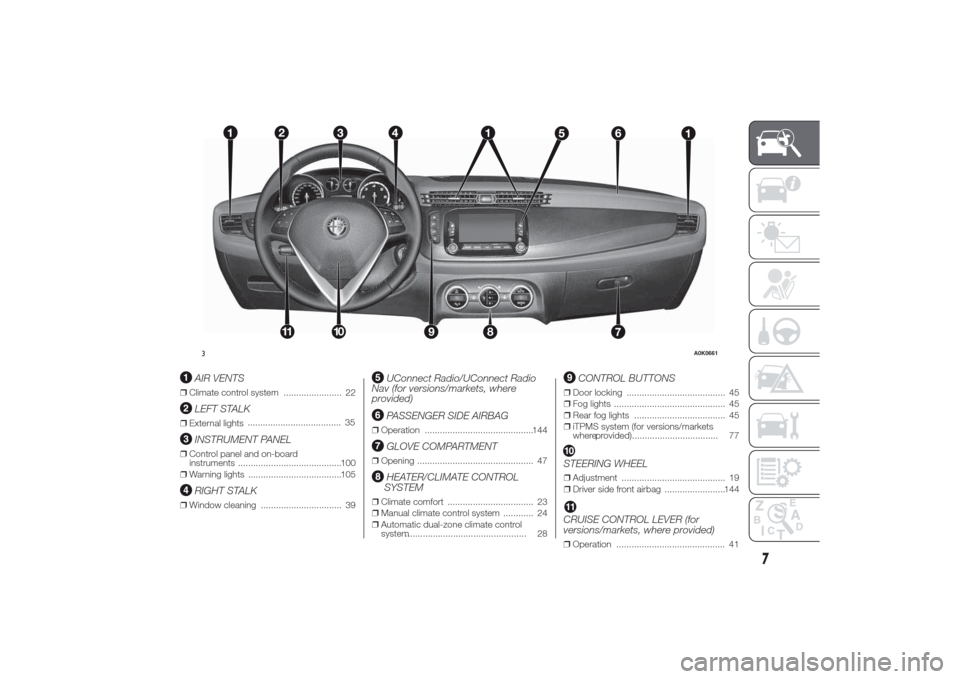
AIR VENTS
❒Climate control system ....................... 22
LEFT STALK
❒External lights
INSTRUMENT PANEL
❒Control panel and on-board
instruments .........................................100
❒Warning lights .....................................105
RIGHT STALK
❒Window cleaning ................................ 39
UConnect Radio/UConnect Radio
Nav (for versions/markets, where
provided)PASSENGER SIDE AIRBAG
❒Operation ...........................................144
GLOVE COMPARTMENT
❒Opening .............................................. 47
HEATER/CLIMATE CONTROL
SYSTEM
❒Climate comfort .................................. 23
❒Manual climate control system ............ 24
❒Automatic dual-zone climate control
system................................................ 28
CONTROL BUTTONS
❒Door locking ....................................... 45
❒Fog lights ............................................ 45
❒Rear fog lights .................................... 45
❒iTPMS system (for versions/markets
whereprovided).................................. 77STEERING WHEEL❒Adjustment ......................................... 19
❒Driver side front airbag ........................144
1
2
67
1110
8
9
3
A0K0661
7
CRUISE CONTROL LEVER (for
versions/markets, where provided)❒Operation ........................................... 41 .................. .............. 35.....
Page 13 of 280
GETTING TO KNOW YOUR CAR
In-depth knowledge of your new car
starts here.
The booklet that you are reading simply
and directly explains how it is made
and how it works.
That’s why we advise you to read it
seated comfortably on board, so that
you can see what is described here for
yourself.SYMBOLS ...................................... 10
ALFA ROMEO CODE SYSTEM ....... 10
THE KEYS....................................... 11
ALARM ........................................... 14
IGNITION DEVICE ........................... 15
SEATS ............................................ 17
HEAD RESTRAINTS ........................ 18
STEERING WHEEL ......................... 19
REAR VIEW MIRRORS .................... 20
CLIMATE CONTROL ....................... 22
CLIMATIC COMFORT ..................... 23
MANUAL CLIMATE CONTROL........ 24
AUTOMATIC DUAL ZONE
CLIMATE CONTROL ....................... 28
EXTERNAL LIGHTS......................... 35
WINDOW CLEANING ...................... 39
CRUISE CONTROL ......................... 41
ROOF LIGHTS ................................ 42
CONTROLS .................................... 45
INTERIOR FITTINGS ....................... 47
ELECTRIC SUN ROOF .................... 52
DOORS ........................................... 54
ELECTRIC WINDOWS .................... 56
LUGGAGE COMPARTMENT ........... 59
BONNET ......................................... 62
ROOF RACK/SKI RACK .................. 63
HEADLIGHTS.................................. 64ESC SYSTEM ................................. 65
“ALFA DNA” SYSTEM (CAR
DYNAMIC CONTROL SYSTEM) ...... 69
START&STOP SYSTEM .................. 73
ITPMS (INDIRECT TYRE
PRESSURE MONITORING
SYSTEM) ........................................ 77
EOBD SYSTEM (EUROPEAN ON
BOARD DIAGNOSIS) ...................... 79
DUAL PINION ACTIVE STEERING... 79
WIRING FOR RADIO SYSTEM ........ 80
ACCESSORIES PURCHASED BY
THE OWNER .................................. 81
PARKING SENSORS....................... 82
REFUELLING THE CAR .................. 85
PROTECTING THE
ENVIRONMENT .............................. 87
9
Page 20 of 280
STEERING LOCK
Engagement
When the key is at STOP, remove the
key and turn the steering wheel until
it locks.
Disengagement
Move the steering wheel slightly and
turn the ignition key to MAR-ON.
4) 5)
WARNING
2) If the ignition device has been
tampered with (e.g. an attempted
theft), have it checked over by a
Alfa Romeo Dealership as soon as
possible.
3) When getting out of the car,
always remove the key to prevent
someone from accidentally
activating the controls.
Remember to engage the
handbrake. Engage 1
stgear if the
car is parked uphill or reverse if
the car is parked downhill. Never
leave children unattended in the
car.4) It is absolutely forbidden to carry
out any after-market operation
involving steering system or
steering column modifications
(e.g.: installation of anti-theft
device). This could badly affect
performance and safety,
invalidate the warranty and also
result in the non-compliance
of the car with approval
requirements.
5) Never remove the key while the
car is moving. The steering wheel
will lock as soon as it is turned.
This holds true for cars being
towed as well.
SEATSFRONT SEATS
Lengthwise adjustment
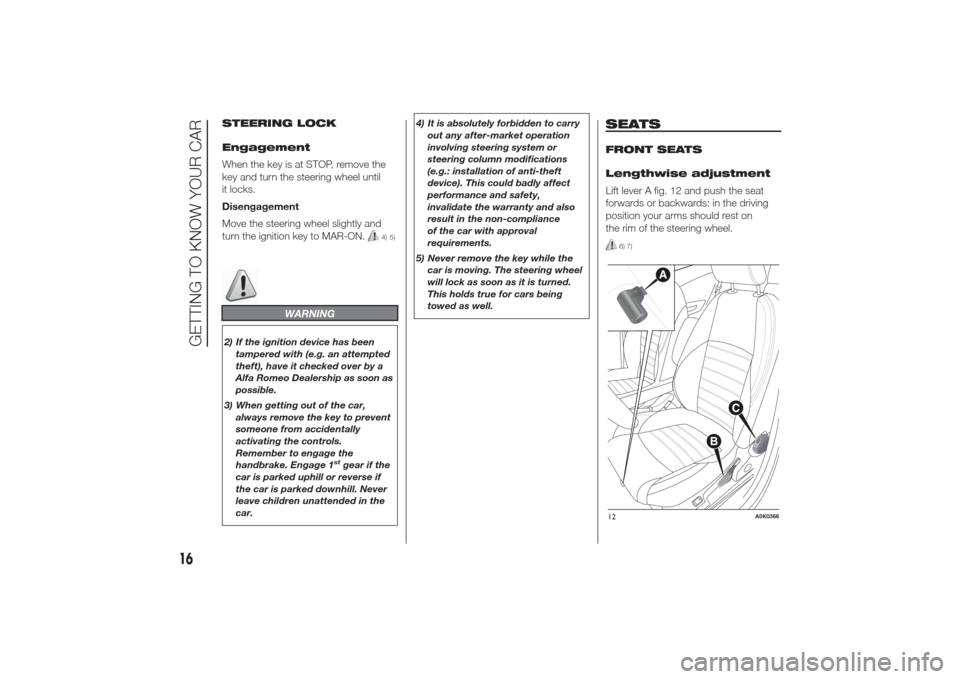
Lift lever A fig. 12 and push the seat
forwards or backwards: in the driving
position your arms should rest on
the rim of the steering wheel.
6) 7)
12
A0K0366
16
GETTING TO KNOW YOUR CAR
Page 23 of 280
“Anti-Whiplash” device
The head restraints are equipped with
an “Anti-Whiplash” device, which
reduces the distance between head
and head restraint in the event of a rear
impact, thus mitigating the “whiplash”
effect.
The head restraint may move when the
backrest is pressed by the occupant's
torso or hand: this behaviour is caused
by the system and should not be
considered a malfunction.
REAR
Two height-adjustable head restraints
are provided for the back seats (for the
adjustment see the previous
paragraph).
On some versions a head restraint is
also provided for the central seat.
Proceed as follows to remove the head
restraints:
❒raise the head restraints to their
maximum height;
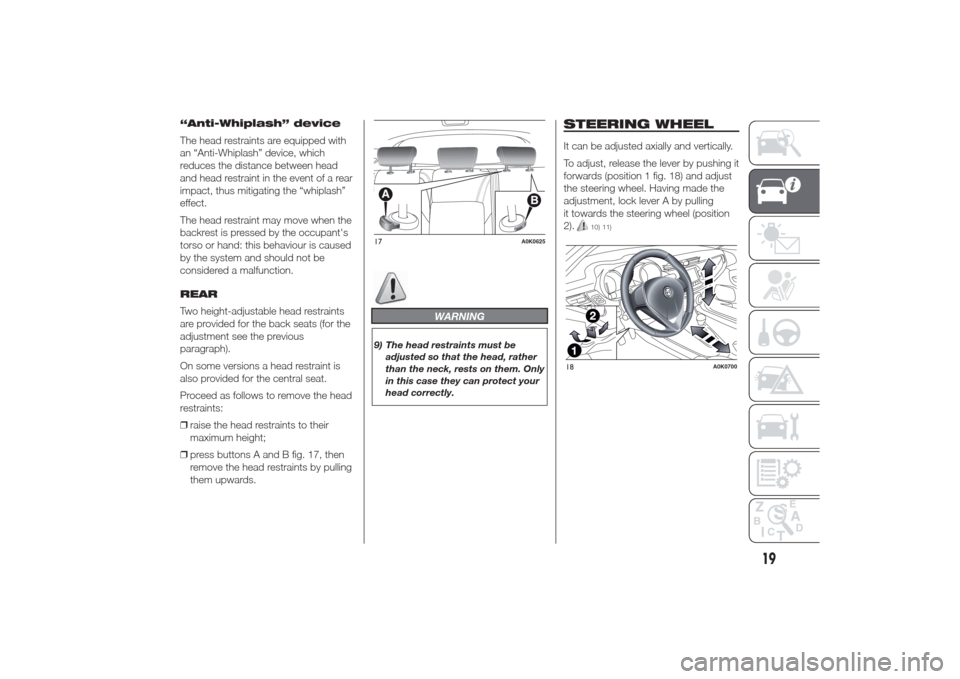
❒press buttons A and B fig. 17, then
remove the head restraints by pulling
them upwards.
WARNING
9) The head restraints must be
adjusted so that the head, rather
than the neck, rests on them. Only
in this case they can protect your
head correctly.
STEERING WHEELIt can be adjusted axially and vertically.
To adjust, release the lever by pushing it
forwards (position 1 fig. 18) and adjust
the steering wheel. Having made the
adjustment, lock lever A by pulling
it towards the steering wheel (position
2).
10) 11)
17
A0K0625
18
A0K0700
19
Page 24 of 280
WARNING
10) Any adjustment of the steering
wheel position must be carried
out only with the car stationary
and the engine turned off.
11) It is absolutely forbidden to carry
out any after-market operation
involving steering system or
steering column modifications
(e.g. installation of anti-theft
device) that could adversely affect
performance and safety,
invalidate the warranty and also
result in the car not meeting
type-approval requirements.
REAR VIEW
MIRRORSINTERNAL MIRROR
The rear view mirror has two different
positions: normal or anti-glare.
Adjustment
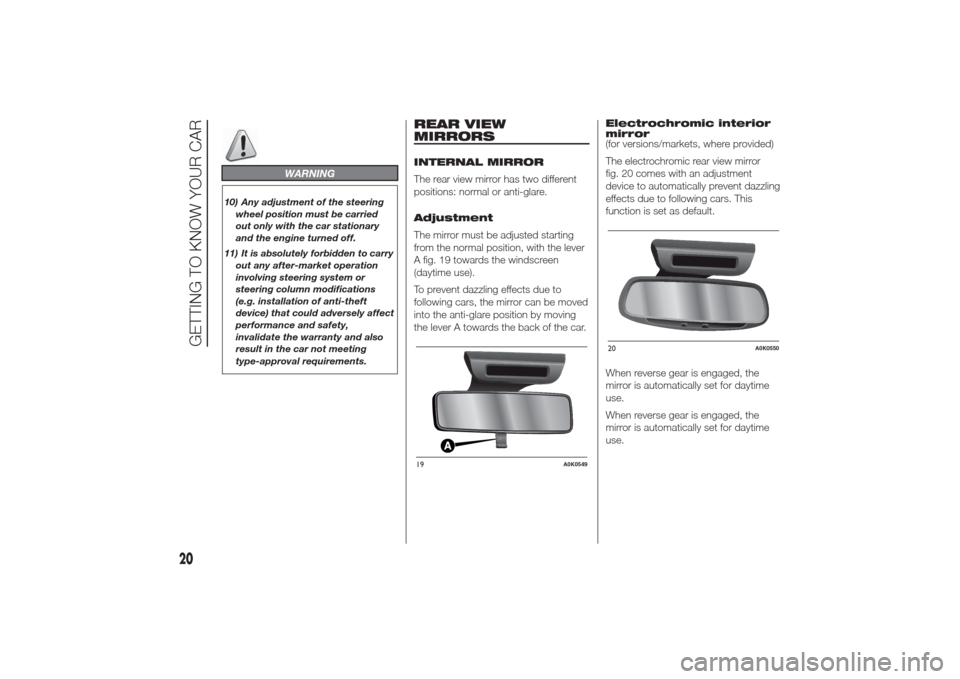
The mirror must be adjusted starting
from the normal position, with the lever
A fig. 19 towards the windscreen
(daytime use).
To prevent dazzling effects due to
following cars, the mirror can be moved
into the anti-glare position by moving
the lever A towards the back of the car.Electrochromic interior
mirror
(for versions/markets, where provided)
The electrochromic rear view mirror
fig. 20 comes with an adjustment
device to automatically prevent dazzling
effects due to following cars. This
function is set as default.
When reverse gear is engaged, the
mirror is automatically set for daytime
use.
When reverse gear is engaged, the
mirror is automatically set for daytime
use.19
A0K0549
20
A0K0550
20
GETTING TO KNOW YOUR CAR
Page 26 of 280
CLIMATE CONTROLSIDE AIR DIFFUSERS
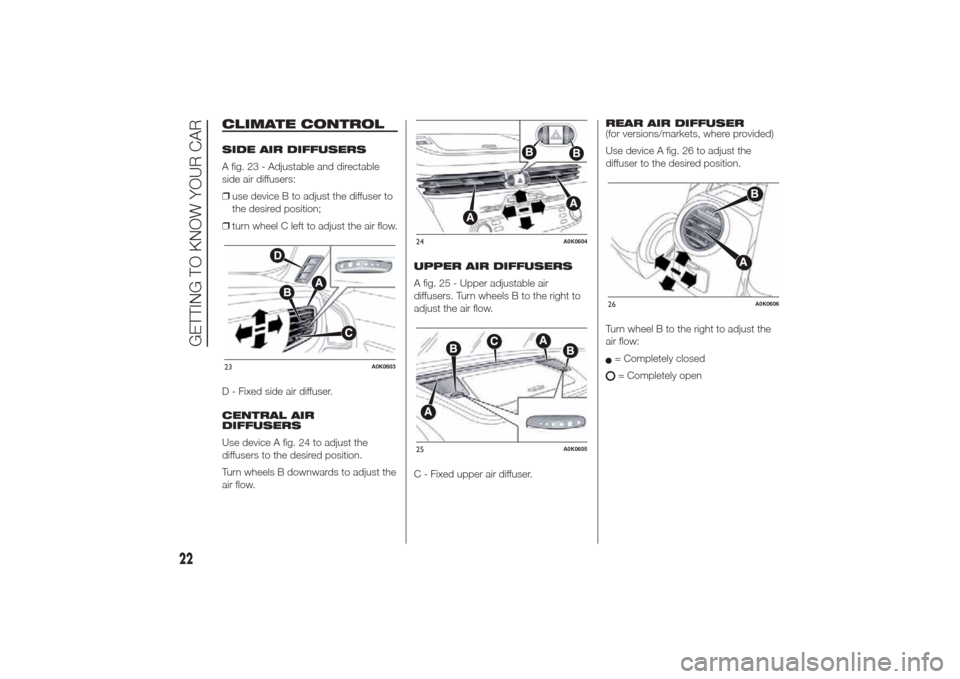
A fig. 23 - Adjustable and directable
side air diffusers:
❒use device B to adjust the diffuser to
the desired position;
❒turn wheel C left to adjust the air flow.
D - Fixed side air diffuser.
CENTRAL AIR
DIFFUSERS
Use device A fig. 24 to adjust the
diffusers to the desired position.
Turn wheels B downwards to adjust the
air flow.UPPER AIR DIFFUSERS
A fig. 25 - Upper adjustable air
diffusers. Turn wheels B to the right to
adjust the air flow.
C - Fixed upper air diffuser.REAR AIR DIFFUSER
(for versions/markets, where provided)
Use device A fig. 26 to adjust the
diffuser to the desired position.
Turn wheel B to the right to adjust the
air flow:
= Completely closed= Completely open
23
A0K0603
24
A0K0604
25
A0K0605
26
A0K0606
22
GETTING TO KNOW YOUR CAR
Page 41 of 280
When the lights have been activated
automatically and are then switched off
by the sensor, the dipped beam
headlights are switched off first,
followed by the side lights a few
seconds later.
If the sensor is activated but is
malfunctioning, the side lights and
dipped beam headlights are switched
on irrespective of the outside light
level and the sensor failure is indicated
on the display.
It is also possible to deactivate the
sensor and switch on the side lights
and dipped beam headlights.MAIN BEAM HEADLIGHTS
To activate the main beam headlights,
with ring nut A fig. 31 at
, pull the
stalk towards the steering wheel
beyond the end of travel position. The
warning light switches on in the
instrument panel.
When the stalk is pulled towards the
steering wheel again, beyond the end
of travel position, the main beam
headlights deactivate, the dipped beam
headlights reactivate and thewarning light switches off.
It is not possible to switch on the main
beam headlights constantly if automatic
light control is active.
FLASHING
To do this, pull the stalk towards the
steering wheel (unstable position)
regardless of the position of ring nut A
fig. 31. The
warning light switches
on in the instrument panel.
REAR FOG LIGHTS
For the activation and deactivation of
the rear fog lights, refer to the
"Controls" section.DIRECTION INDICATORS
Bring the stalk to the (stable) position:
❒upwards: activates right direction
indicator;
❒downwards: activates left direction
indicator.
Warning light
or
will blink on the
instrument panel.
The direction indicators are switched off
automatically when the steering wheel
is straightened.
"Lane change" function
If you wish to signal a lane change,
place the left stalk in the unstable
position for less than half a second. The
direction indicator on the side selected
will flash five times and then switch
off automatically.
37
Page 42 of 280
“FOLLOW ME HOME”
DEVICE
This device allows you to illuminate the
area in front of the car for a certain
amount of time.
Activation
With the key turned to STOP or
removed, pull stalk A towards the
steering wheel within 2 minutes from
when the engine is turned off.
Each time the stalk is moved, the lights
stay on for an extra 30 seconds up to
a maximum of 210 seconds; then
the lights are switched off automatically.
Also, each time the stalk is operated,
the
warning light on the
instrument panel switches on. The
display shows the time set for the
function and the corresponding
graphics.
The warning light comes on when the
lever is operated and stays on until
the function is automatically
deactivated. Each movement of the
stalk only increases the amount of time
the lights stay on.Deactivation
Keep the stalk pulled towards the
steering wheel for more than 2
seconds.
EXTERNAL COURTESY
LIGHTS
These light up the car and the space in
front of it when the doors are unlocked.
Activation
When the car is parked and the doors
are unlocked by pressing the
button
on the remote control (or the luggage
compartment is unlocked by pressing
), the dipped beam headlights, rear
side lights and number plate lights are
activated.
The lights stay on for approximately 25
seconds unless the doors and luggage
compartment are locked again with
the remote control or the doors (or
luggage compartment) are opened and
reclosed. In these cases they switch
off after 5 seconds.
The external courtesy lights can be
enabled/disabled using the Setup Menu
(see the “Menu Items” paragraph in
this chapter).AFS ADAPTIVE LIGHTS
(Adaptive Frontlight System)
(for versions/markets, where provided)
This is a system combined with Xenon
headlamps which directs the main
light beam and adapts it to the driving
conditions round bends/when
cornering, continuously and
automatically.
The system directs the light beam to
light up the road in the best way, taking
into account the speed of the car, the
bend/corner angle and the speed of
steering.
The adaptive lights are automatically
activated when the car is started.
To activate/deactivate the lights use the
Setup Menu (see paragraph “Menu
Items” in the “Knowing the instrument
panel” section).
38
GETTING TO KNOW YOUR CAR