set clock Alfa Romeo GT 2007 Owner handbook (in English)
[x] Cancel search | Manufacturer: ALFA ROMEO, Model Year: 2007, Model line: GT, Model: Alfa Romeo GT 2007Pages: 271, PDF Size: 5.57 MB
Page 60 of 271
GETTING TO KNOW YOUR CAR
58
DIGITAL MULTIFUNCTION DISPLAY (where fitted)
The digital multifunction display shows the following: clock, outside temperature, buzzer setting (buzzer on/off), rheostat (light adjustment),
condition of the inertial fuel cut-off switch (FPS on).
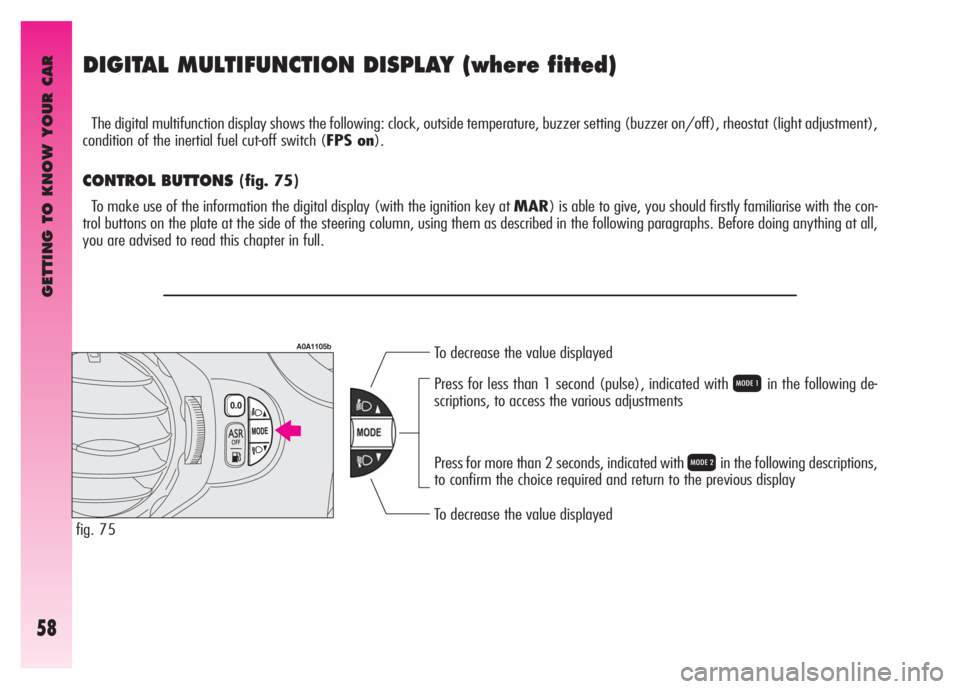
CONTROL BUTTONS (fig. 75)
To make use of the information the digital display (with the ignition key at MAR) is able to give, you should firstly familiarise with the con-
trol buttons on the plate at the side of the steering column, using them as described in the following paragraphs. Before doing anything at all,
you are advised to read this chapter in full.
To decrease the value displayed
To decrease the value displayed Press for less than 1 second (pulse), indicated with
Qin the following de-
scriptions, to access the various adjustments
Press for more than 2 seconds, indicated with
Rin the following descriptions,
to confirm the choice required and return to the previous display
fig. 75
A0A1105b
Page 61 of 271
GETTING TO KNOW YOUR CAR
59
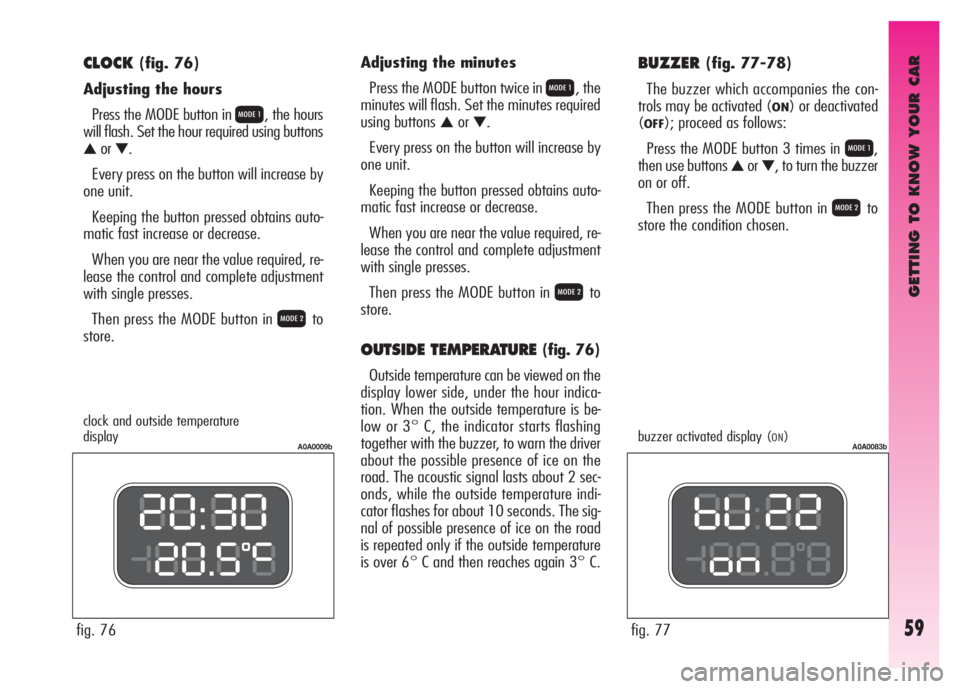
CLOCK(fig. 76)
Adjusting the hours
Press the MODE button in
Q, the hours
will flash. Set the hour required using buttons
▲or▼.
Every press on the button will increase by
one unit.
Keeping the button pressed obtains auto-
matic fast increase or decrease.
When you are near the value required, re-
lease the control and complete adjustment
with single presses.
Then press the MODE button in
Rto
store.
fig. 76Adjusting the minutes
Press the MODE button twice in
Q, the
minutes will flash. Set the minutes required
using buttons
▲or▼.
Every press on the button will increase by
one unit.
Keeping the button pressed obtains auto-
matic fast increase or decrease.
When you are near the value required, re-
lease the control and complete adjustment
with single presses.
Then press the MODE button in
Rto
store.
OUTSIDE TEMPERATURE (fig. 76)
Outside temperature can be viewed on the
display lower side, under the hour indica-
tion. When the outside temperature is be-
low or 3° C, the indicator starts flashing
together with the buzzer, to warn the driver
about the possible presence of ice on the
road. The acoustic signal lasts about 2 sec-
onds, while the outside temperature indi-
cator flashes for about 10 seconds. The sig-
nal of possible presence of ice on the road
is repeated only if the outside temperature
is over 6° C and then reaches again 3° C.
A0A0009b
fig. 77
A0A0083b
BUZZER(fig. 77-78)
The buzzer which accompanies the con-
trols may be activated (
ON) or deactivated
(
OFF); proceed as follows:
Press the MODE button 3 times in
Q,
then use buttons
▲or▼, to turn the buzzer
on or off.
Then press the MODE button in
Rto
store the condition chosen.
clock and outside temperature
display buzzer activated display (ON)
Page 62 of 271
GETTING TO KNOW YOUR CAR
60
fig. 79
A0A0012b
fig. 80
A0A0013b
fig. 81
A0A0007b
ing is turned off with the exception of the
speedometer.
Keeping button
▲pressed (on the plate
at the side of the steering column) for more
than 4 seconds the complete instrument
cluster lighting is turned on again.
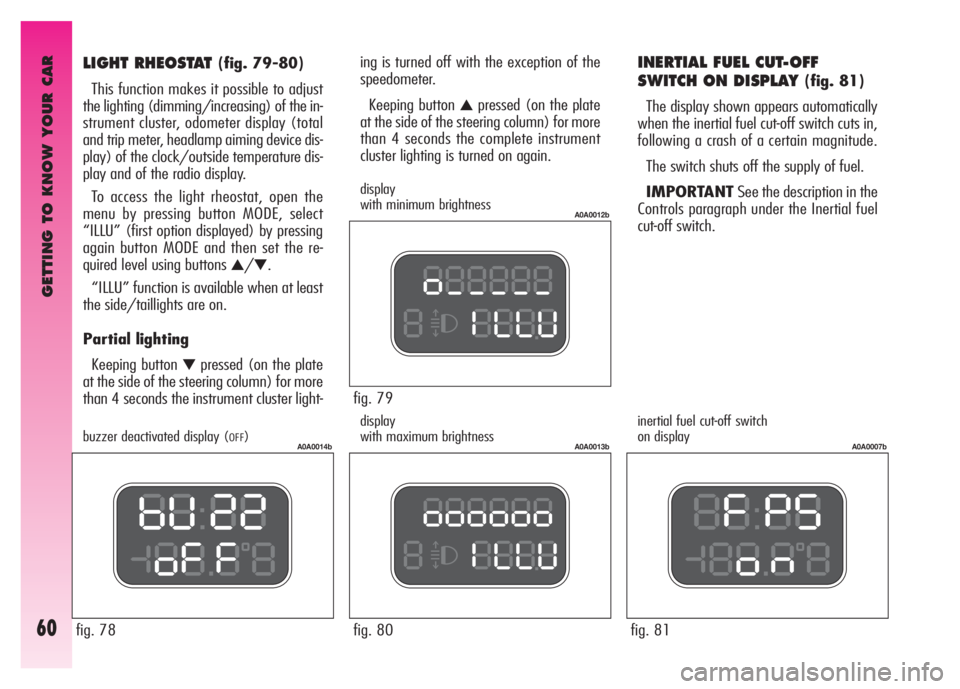
INERTIAL FUEL CUT-OFF
SWITCH ON DISPLAY
(fig. 81)
The display shown appears automatically
when the inertial fuel cut-off switch cuts in,
following a crash of a certain magnitude.
The switch shuts off the supply of fuel.
IMPORTANTSee the description in the
Controls paragraph under the Inertial fuel
cut-off switch.
display
with minimum brightness
display
with maximum brightnessinertial fuel cut-off switch
on display
fig. 78
A0A0014bbuzzer deactivated display (OFF)
LIGHT RHEOSTAT (fig. 79-80)
This function makes it possible to adjust
the lighting (dimming/increasing) of the in-
strument cluster, odometer display (total
and trip meter, headlamp aiming device dis-
play) of the clock/outside temperature dis-
play and of the radio display.
To access the light rheostat, open the
menu by pressing button MODE, select
“ILLU” (first option displayed) by pressing
again button MODE and then set the re-
quired level using buttons
▲/▼.
“ILLU” function is available when at least
the side/taillights are on.
Partial lighting
Keeping button
▼pressed (on the plate
at the side of the steering column) for more
than 4 seconds the instrument cluster light-
Page 67 of 271
GETTING TO KNOW YOUR CAR
65
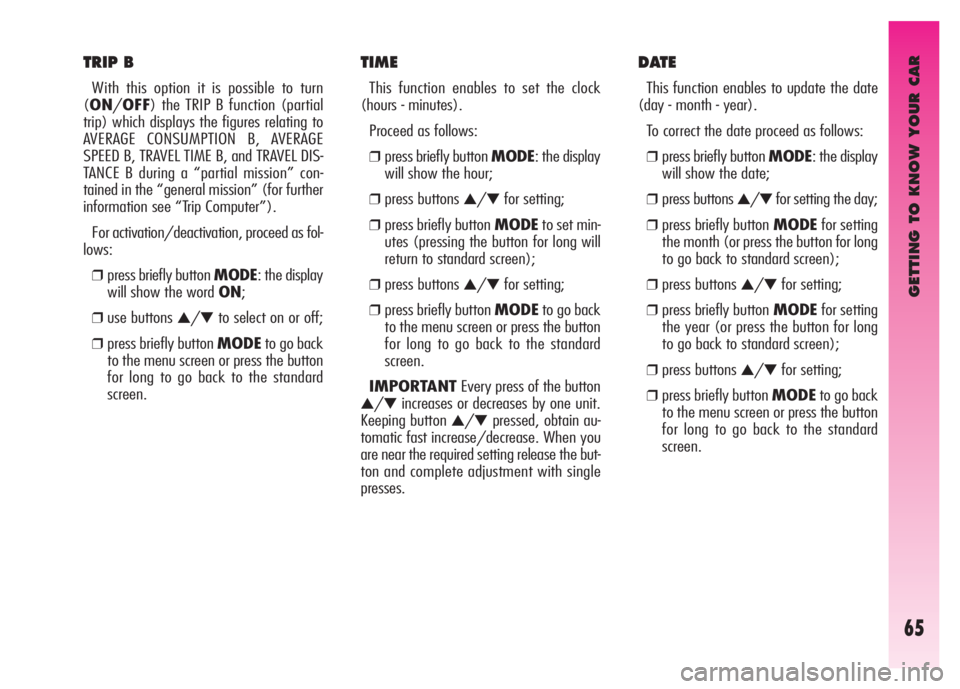
TIME
This function enables to set the clock
(hours - minutes).
Proceed as follows:
❒press briefly button MODE: the display
will show the hour;
❒press buttons ▲/▼for setting;
❒press briefly button MODEto set min-
utes (pressing the button for long will
return to standard screen);
❒press buttons ▲/▼for setting;
❒press briefly button MODEto go back
to the menu screen or press the button
for long to go back to the standard
screen.
IMPORTANTEvery press of the button
▲/▼increases or decreases by one unit.
Keeping button
▲/▼pressed, obtain au-
tomatic fast increase/decrease. When you
are near the required setting release the but-
ton and complete adjustment with single
presses.
DATE
This function enables to update the date
(day - month - year).
To correct the date proceed as follows:
❒press briefly button MODE: the display
will show the date;
❒press buttons ▲/▼for setting the day;
❒press briefly button MODEfor setting
the month (or press the button for long
to go back to standard screen);
❒press buttons ▲/▼for setting;
❒press briefly button MODEfor setting
the year (or press the button for long
to go back to standard screen);
❒press buttons ▲/▼for setting;
❒press briefly button MODEto go back
to the menu screen or press the button
for long to go back to the standard
screen.
TRIP B
With this option it is possible to turn
(ON/OFF) the TRIP B function (partial
trip) which displays the figures relating to
AVERAGE CONSUMPTION B, AVERAGE
SPEED B, TRAVEL TIME B, and TRAVEL DIS-
TANCE B during a “partial mission” con-
tained in the “general mission” (for further
information see “Trip Computer”).
For activation/deactivation, proceed as fol-
lows:
❒press briefly button MODE: the display
will show the word ON;
❒use buttons ▲/▼to select on or off;
❒press briefly button MODEto go back
to the menu screen or press the button
for long to go back to the standard
screen.
Page 68 of 271
GETTING TO KNOW YOUR CAR
66
MODE 12/24
This option enables to set the clock in the
12h or 24h mode.
To adjust, proceed as follows:
❒press briefly button MODE: the display
will show 12h;
❒press buttons ▲/▼for setting (12h
or24h);
❒press briefly button MODEto go back
to the menu screen or press the button
for long to go back to the standard
screen.
RADIO
This option enables to activate/deactivate
(ON/OFF) the repetition of the informa-
tion displayed by the radio front panel on
the instrument panel display.
For activation/deactivation, proceed as fol-
lows:
❒press briefly button MODE: the display
will show the word ON;
❒use buttons ▲/▼to select on or off;
❒press briefly button MODEto go back
to the menu screen or press the button
for long to go back to the standard screen.
Selecting and activating “RADIO DIS-
PLAY ON”, when turning the radio on, the
display repeats the information displayed by
the radio front panel.
TELEPHONE
This option enables to activate/deactivate
(ON/OFF) displaying of the name (if in
the list) and phone number of the caller on
the instrument panel display.
For activation/deactivation, proceed as fol-
lows:
❒press briefly button MODE: the display
will show the word ON;
❒use buttons ▲/▼to select on or off;
❒press briefly button MODEto go back
to the menu screen or press the button
for long to go back to the standard
screen.
Selecting and activating “TELEPHONE
DISPLAY ON”, when a phone call arrives,
the display shows the name (if in the list)
and the phone number of the caller.
DST (SUMMER TIME)
This option enables to turn ON/OFFthe
summer time function (which corresponds
to + 1 hour in relation to the daylight time).
For activation/deactivation, proceed as fol-
lows:
❒press briefly button MODE: the display
will show the word ON;
❒use buttons ▲/▼to select on or off;
❒press briefly button MODEto go back
to the menu screen or press the button
for long to go back to the standard
screen.
Selecting and activating the “DST ON”
function, the display switches from daylight
time to summer time and vice versa, with
no need to intervene manually on the
“TIME” function described previously.
Page 90 of 271

GETTING TO KNOW YOUR CAR
88
HEATING (fig. 95)
To obtain the temperature required, pro-
ceed as follows:
- temperature adjustment knob pointer
(1) on the red sector as required;
- air quantity adjustment knob pointer
(2) on the fan speed required to person-
alise the amount of air admitted;
- air distribution knob pointer (3) on the
required position.
To obtain the maximum heating power
proceed as follows:
- knob pointer (1) as far as it will go clock-
wise (maximum temperature red sector);
- knob pointer (2) on maximum fan
speed;
- air distribution knob pointer (3) on the
required position (position
w) is recom-
mended.
IMPORTANTTo be able to obtain sat-
isfactory passenger compartment warm-
ing, the engine should have reached nor-
mal operating temperature. The filter has the specific capability of fil-
tering external air, thus admitting to the
passenger compartment purified air, free
from particles such as dust, pollen, etc.
In addition to the above mentioned func-
tions, is also reduces the concentration of
pollutants.
The filtering action is active in all air inlet
conditions and it is clearly more effective
with the windows closed.
Have the conditions of the filter checked
at least once a year, preferably at the
onset of summer by Alfa Romeo
Authorised Services. If the car is habitually used in dusty or
polluted areas, the filter should be
checked and replaced at shorter intervals
than those specified in the Programmed
Maintenance Schedule.
If the filter is not replaced
the efficiency of the cli-
mate control system may
be seriously compromised up to
blocking the air flow at the outlets
and vents.
POLLEN FILTER
(for versions/markets where applicable)
A0A0734b
fig. 95
Page 96 of 271

GETTING TO KNOW YOUR CAR
94
AIR TEMPERATURE
ADJUSTMENT KNOBS
(fig. 98)
Turning the rings of knobs (2or6),
clockwise or counter-clockwise, respective-
ly highers or lowers the temperature of
the air required respectively in the left
zone (knob 2) or right zone (knob 6) of
the passenger compartment. The temper-
atures set are shown on the displays (1)
and (5) above the knobs.
Separate operation of the temperatures
set is restored automatically using knob
(6).
Turning the knob rings clockwise or
counter-clockwise until they reach the
extreme selections HIorLO, the maxi-
mum heating or cooling functions are
respectively engaged:
A0A0204b
fig. 98