instrument panel Alfa Romeo MiTo 2011 Owner handbook (in English)
[x] Cancel search | Manufacturer: ALFA ROMEO, Model Year: 2011, Model line: MiTo, Model: Alfa Romeo MiTo 2011Pages: 262, PDF Size: 6.46 MB
Page 6 of 262
GETTING TO KNOW YOUR CAR5
1
Dashboard............................................................................................... 7
Instrument panel and on-board instruments ................................................... 8
Display .................................................................................................... 26
Menu items.............................................................................................. 32
Trip Computer ........................................................................................... 42
Symbols .................................................................................................. 46
Alfa Romeo Code System ............................................................................ 46
The keys ................................................................................................. 47
Alarm ..................................................................................................... 53
Ignition device .......................................................................................... 55
Seats...................................................................................................... 56
Head restraints.......................................................................................... 59
Steering wheel......................................................................................... 60
Rearview mirrors ...................................................................................... 61
Climatic comfort........................................................................................ 63
Heating/climate control system .................................................................. 64
Two-zone automatic climate control system ................................................... 68
External lights .......................................................................................... 76
Window washing ...................................................................................... 79
Cruise Control ........................................................................................... 81
Courtesy lights ......................................................................................... 83
Controls.................................................................................................. 86
Page 8 of 262
GETTING TO KNOW YOUR CAR7
1DASHBOARD
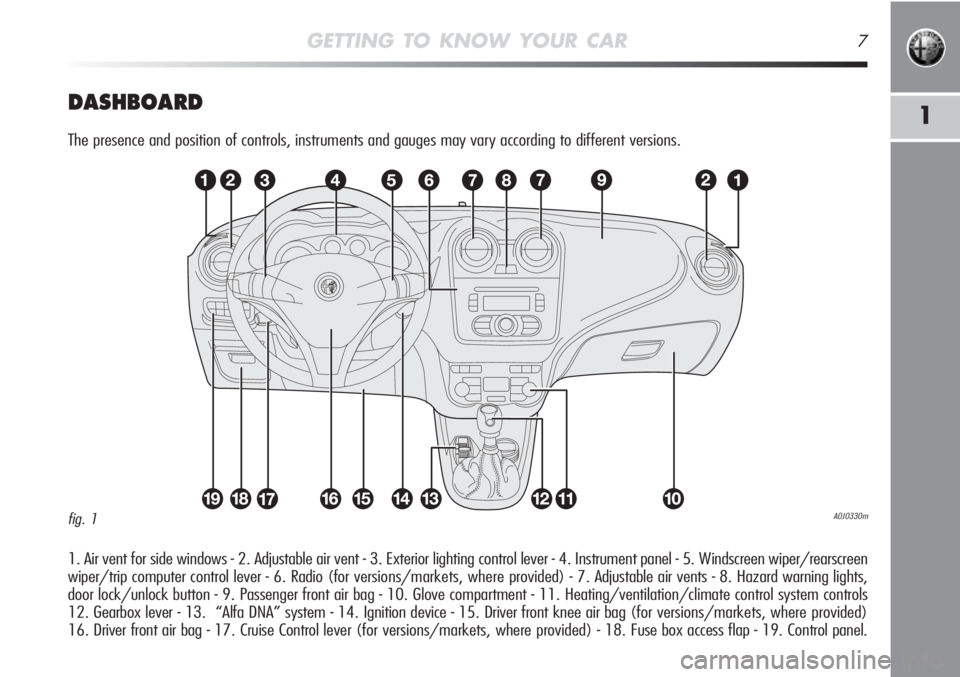
The presence and position of controls, instruments and gauges may vary according to different versions.
1. Air vent for side windows - 2. Adjustable air vent - 3. Exterior lighting control lever - 4. Instrument panel - 5. Windscreen wiper/rearscreen
wiper/trip computer control lever - 6. Radio (for versions/markets, where provided) - 7. Adjustable air vents - 8. Hazard warning lights,
door lock/unlock button - 9. Passenger front air bag - 10. Glove compartment - 11. Heating/ventilation/climate control system controls
12. Gearbox lever - 13. “Alfa DNA” system - 14. Ignition device - 15. Driver front knee air bag (for versions/markets, where provided)
16. Driver front air bag - 17. Cruise Control lever (for versions/markets, where provided) - 18. Fuse box access flap - 19. Control panel.
A0J0330mfig. 1
Page 9 of 262
8GETTING TO KNOW YOUR CAR
INSTRUMENT PANEL AND ONBOARD INSTRUMENTS
AC
DE
B
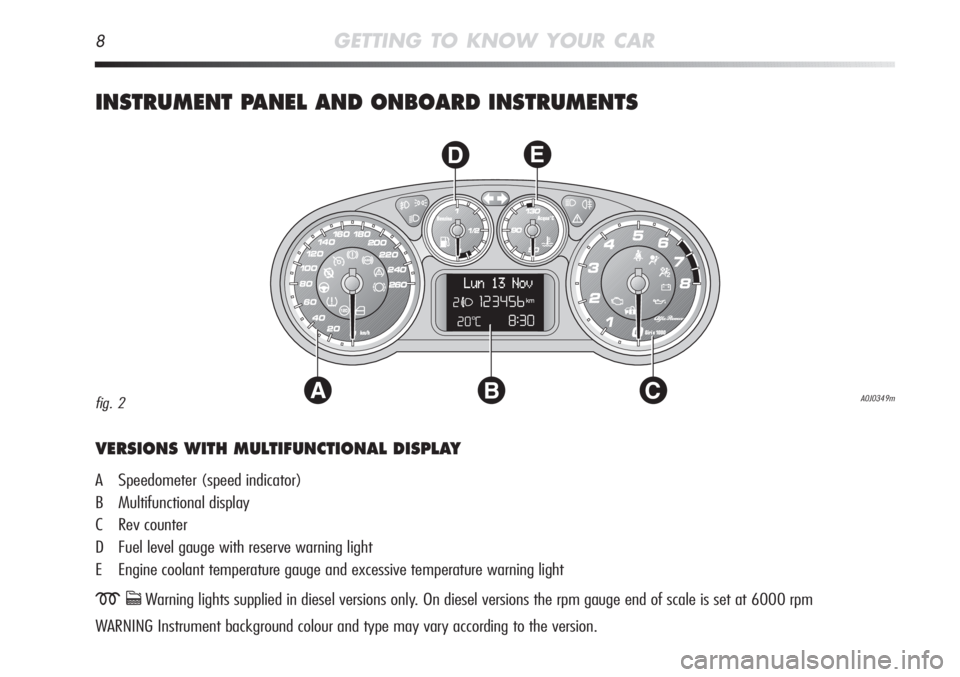
VERSIONS WITH MULTIFUNCTIONAL DISPLAY
A Speedometer (speed indicator)
B Multifunctional display
C Rev counter
D Fuel level gauge with reserve warning light
E Engine coolant temperature gauge and excessive temperature warning light
mcWarning lights supplied in diesel versions only. On diesel versions the rpm gauge end of scale is set at 6000 rpm
WARNING Instrument background colour and type may vary according to the version.
A0J0349mfig. 2
Page 12 of 262
GETTING TO KNOW YOUR CAR11
1
INSTRUMENT PANEL WARNING LIGHTS
General warnings
The lighting up of a warning light is associated with a specific
message and/or buzzer when applicable. These indications are
brief and precautionary and as such must not be considered as
exhaustive and/or an alternative to the information contained in
the Owner Handbook, which you are recommended to read care-
fully in all cases. Always refer to the information in this chapter in
the event of a failure indication.
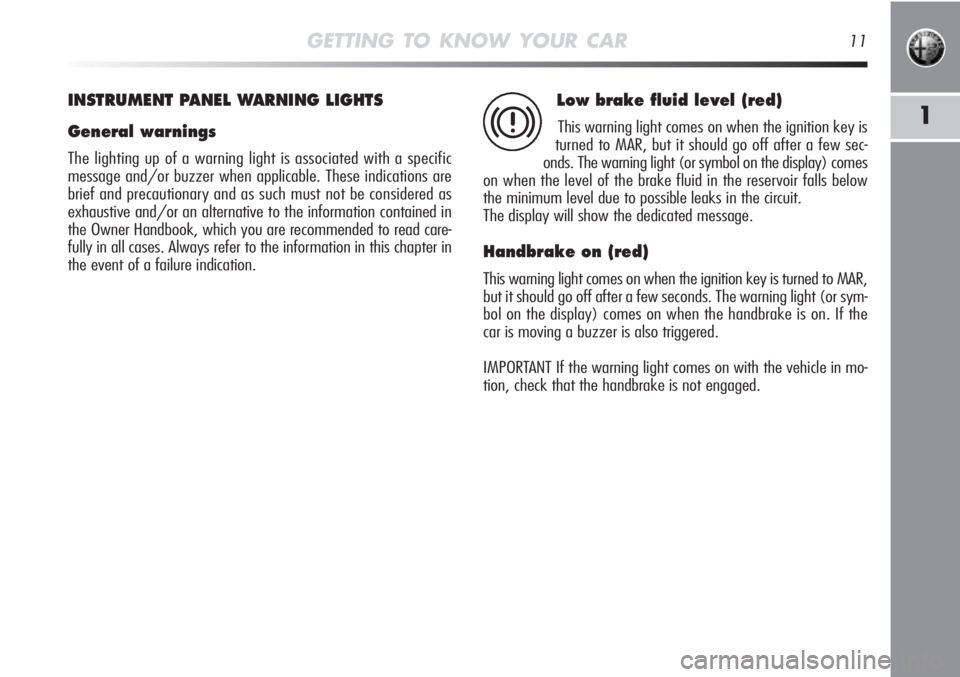
Low brake fluid level (red)
This warning light comes on when the ignition key is
turned to MAR, but it should go off after a few sec-
onds. The warning light (or symbol on the display) comes
on when the level of the brake fluid in the reservoir falls below
the minimum level due to possible leaks in the circuit.
The display will show the dedicated message.
Handbrake on (red)
This warning light comes on when the ignition key is turned to MAR,
but it should go off after a few seconds. The warning light (or sym-
bol on the display) comes on when the handbrake is on. If the
car is moving a buzzer is also triggered.
IMPORTANT If the warning light comes on with the vehicle in mo-
tion, check that the handbrake is not engaged.
x
Page 20 of 262
GETTING TO KNOW YOUR CAR19
1
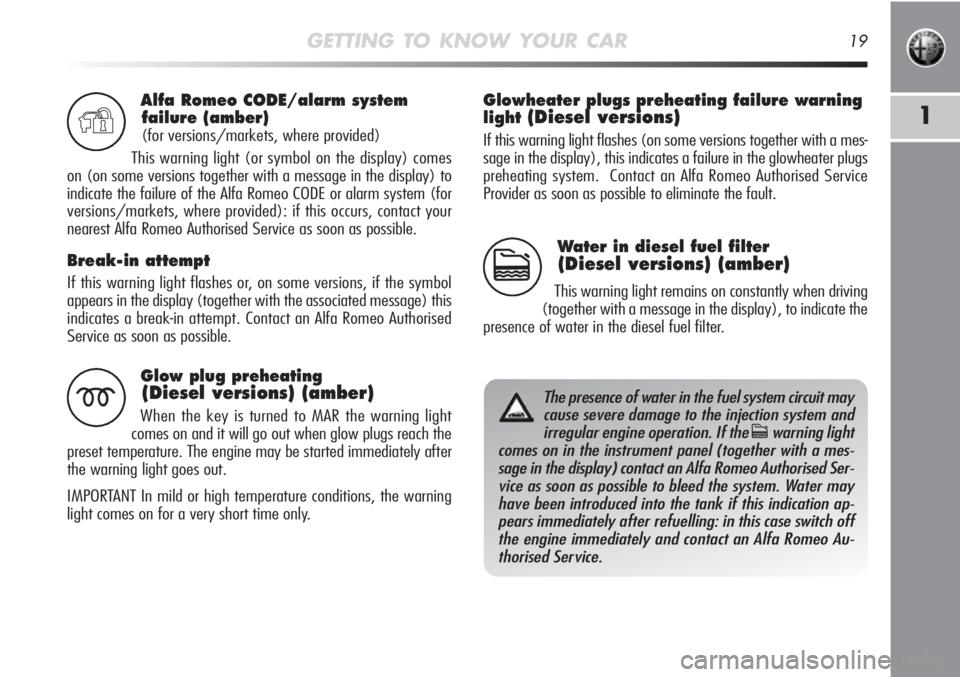
Alfa Romeo CODE/alarm system
failure (amber)
(for versions/markets, where provided)
This warning light (or symbol on the display) comes
on (on some versions together with a message in the display) to
indicate the failure of the Alfa Romeo CODE or alarm system (for
versions/markets, where provided): if this occurs, contact your
nearest Alfa Romeo Authorised Service as soon as possible.
Break-in attempt
If this warning light flashes or, on some versions, if the symbol
appears in the display (together with the associated message) this
indicates a break-in attempt. Contact an Alfa Romeo Authorised
Service as soon as possible.
Y
Glow plug preheating
(Diesel versions) (amber)
When the key is turned to MAR the warning light
comes on and it will go out when glow plugs reach the
preset temperature. The engine may be started immediately after
the warning light goes out.
IMPORTANT In mild or high temperature conditions, the warning
light comes on for a very short time only.m
Water in diesel fuel filter
(Diesel versions) (amber)
This warning light remains on constantly when driving
(together with a message in the display), to indicate the
presence of water in the diesel fuel filter.c
The presence of water in the fuel system circuit may
cause severe damage to the injection system and
irregular engine operation. If the
cwarning light
comes on in the instrument panel (together with a mes-
sage in the display) contact an Alfa Romeo Authorised Ser-
vice as soon as possible to bleed the system. Water may
have been introduced into the tank if this indication ap-
pears immediately after refuelling: in this case switch off
the engine immediately and contact an Alfa Romeo Au-
thorised Service.
Glowheater plugs preheating failure warning
light
(Diesel versions)
If this warning light flashes (on some versions together with a mes-
sage in the display), this indicates a failure in the glowheater plugs
preheating system. Contact an Alfa Romeo Authorised Service
Provider as soon as possible to eliminate the fault.
Page 29 of 262
28GETTING TO KNOW YOUR CAR
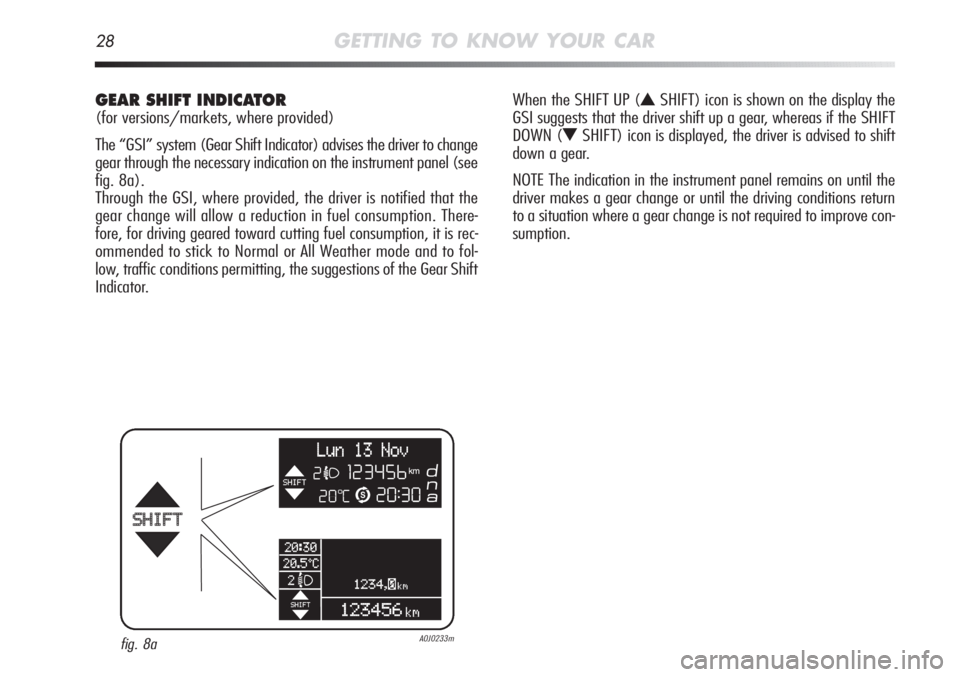
GEAR SHIFT INDICATOR
(for versions/markets, where provided)
The “GSI” system (Gear Shift Indicator) advises the driver to change
gear through the necessary indication on the instrument panel (see
fig. 8a).
Through the GSI, where provided, the driver is notified that the
gear change will allow a reduction in fuel consumption. There-
fore, for driving geared toward cutting fuel consumption, it is rec-
ommended to stick to Normal or All Weather mode and to fol-
low, traffic conditions permitting, the suggestions of the Gear Shift
Indicator.When the SHIFT UP (
NSHIFT) icon is shown on the display the
GSI suggests that the driver shift up a gear, whereas if the SHIFT
DOWN (
OSHIFT) icon is displayed, the driver is advised to shift
down a gear.
NOTE The indication in the instrument panel remains on until the
driver makes a gear change or until the driving conditions return
to a situation where a gear change is not required to improve con-
sumption.
fig. 8aA0J0233m
Page 47 of 262
46GETTING TO KNOW YOUR CAR
SYMBOLS
Some vehicle components have coloured labels whose symbols in-
dicate precautions to be observed when using this component.
There is also a label under the bonnet that summarises all the sym-
bols.
ALFA ROMEO CODE SYSTEM
This is an electrical engine locking system which increases protec-
tion against an attempted theft of the car. It is automatically acti-
vated when the ignition key is extracted.
Each key contains an electronic device which modulates the sig-
nal emitted during ignition by an antenna built into the ignition de-
vice. This signal is the ‘password’ which changes at each ignition
and which the control unit uses to recognise the key and enable
ignition.
OPERATION
Each time the car is started by turning the ignition key to MAR, the
Alfa Romeo CODE system control unit sends an acknowledgement
code to the engine management control unit to deactivate the in-
hibitor.
The code is sent only if the Alfa Romeo CODE system control unit
has recognised the code transmitted from the key.
Each time the ignition key is turned to STOP, the Alfa Romeo
CODE system deactivates the functions of the engine management
control unit. If the code is not recognised correctly during ignition,
the
Ywarning light comes on in the instrument panel. In this
case turn the key to STOP and then to MAR; if the lock persists
try again with the spare set of keys. If you are still unable to
start the engine contact an Alfa Romeo Authorised Service.
Page 55 of 262
54GETTING TO KNOW YOUR CAR
SWITCHING OFF THE ALARM
Press the Ëbutton. The following operations are performed (ex-
cluding some versions for specific markets):
❍the direction indicators flash twice;
❍two brief acoustic signals are emitted;
❍the doors are unlocked.
IMPORTANT If the central door locking system is engaged using the
metal insert of the key, the alarm is not disabled.
VOLUME SENSING/ANTI-TILT PROTECTION
To guarantee the correct operation of the protection, close the side
windows and any sunroof completely (for versions/markets, where
provided).
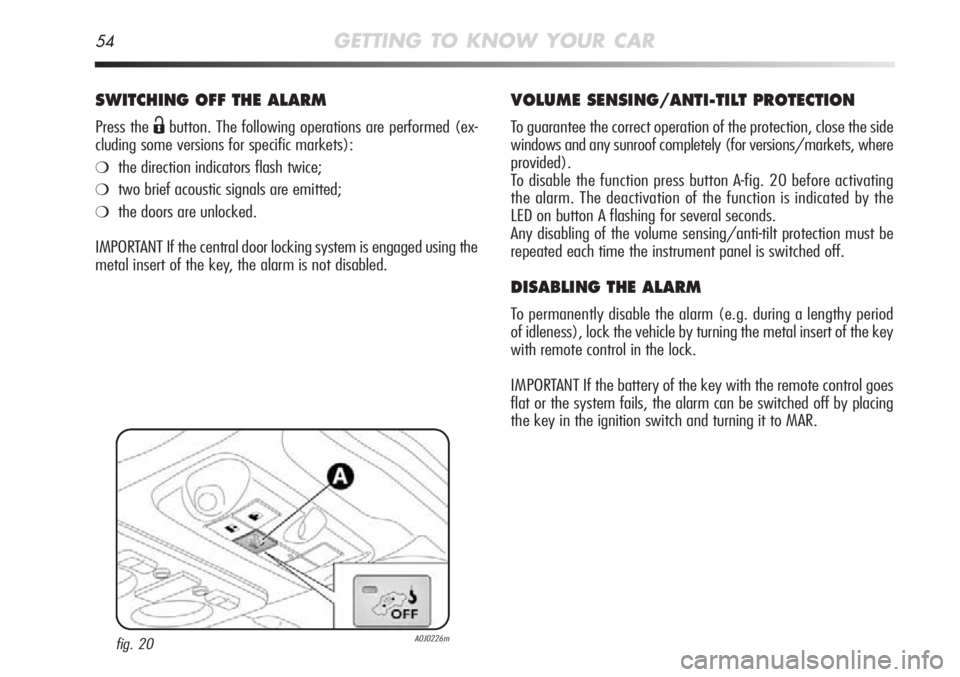
To disable the function press button A-fig. 20 before activating
the alarm. The deactivation of the function is indicated by the
LED on button A flashing for several seconds.
Any disabling of the volume sensing/anti-tilt protection must be
repeated each time the instrument panel is switched off.
DISABLING THE ALARM
To permanently disable the alarm (e.g. during a lengthy period
of idleness), lock the vehicle by turning the metal insert of the key
with remote control in the lock.
IMPORTANT If the battery of the key with the remote control goes
flat or the system fails, the alarm can be switched off by placing
the key in the ignition switch and turning it to MAR.
fig. 20A0J0226m
Page 77 of 262
76GETTING TO KNOW YOUR CAR
SIDE LIGHTS/DIPPED BEAM HEADLIGHTS
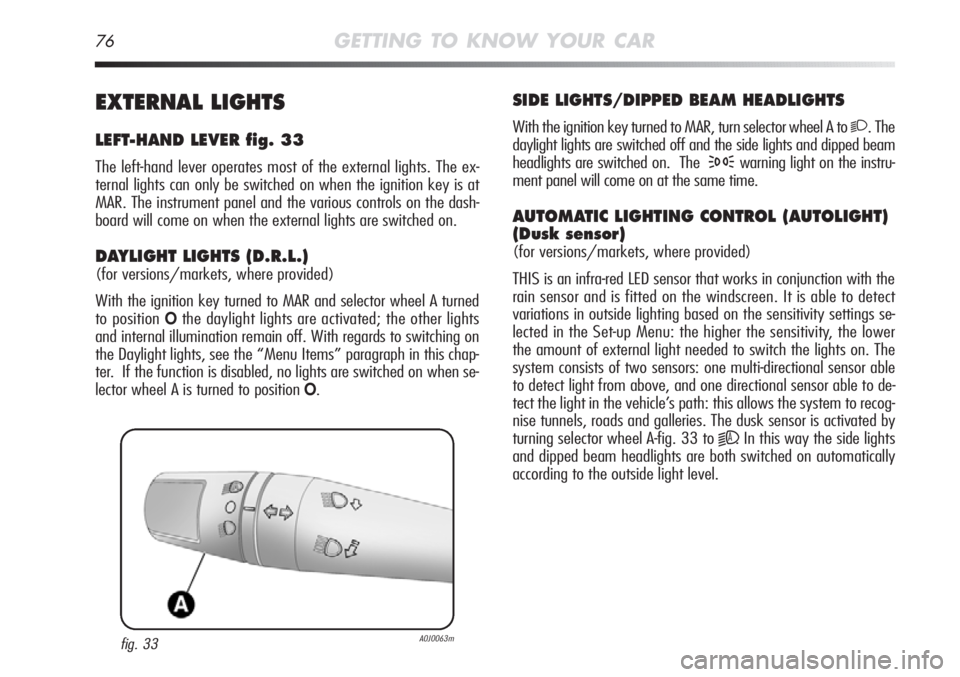
With the ignition key turned to MAR, turn selector wheel A to 2. The
daylight lights are switched off and the side lights and dipped beam
headlights are switched on. The
3warning light on the instru-
ment panel will come on at the same time.
AUTOMATIC LIGHTING CONTROL (AUTOLIGHT)
(Dusk sensor)
(for versions/markets, where provided)
THIS is an infra-red LED sensor that works in conjunction with the
rain sensor and is fitted on the windscreen. It is able to detect
variations in outside lighting based on the sensitivity settings se-
lected in the Set-up Menu: the higher the sensitivity, the lower
the amount of external light needed to switch the lights on. The
system consists of two sensors: one multi-directional sensor able
to detect light from above, and one directional sensor able to de-
tect the light in the vehicle’s path: this allows the system to recog-
nise tunnels, roads and galleries. The dusk sensor is activated by
turning selector wheel A-fig. 33 to
2A. In this way the side lights
and dipped beam headlights are both switched on automatically
according to the outside light level.
EXTERNAL LIGHTS
LEFT-HAND LEVER fig. 33
The left-hand lever operates most of the external lights. The ex-
ternal lights can only be switched on when the ignition key is at
MAR. The instrument panel and the various controls on the dash-
board will come on when the external lights are switched on.
DAYLIGHT LIGHTS (D.R.L.)
(for versions/markets, where provided)
With the ignition key turned to MAR and selector wheel A turned
to position
Othe daylight lights are activated; the other lights
and internal illumination remain off. With regards to switching on
the Daylight lights, see the “Menu Items” paragraph in this chap-
ter. If the function is disabled, no lights are switched on when se-
lector wheel A is turned to position
O.
fig. 33A0J0063m
Page 78 of 262
GETTING TO KNOW YOUR CAR77
1
MAIN BEAM HEADLIGHTS
With selector wheel A in position 2pull the lever towards the
steering wheel (stable position). The
1warning light will come
on in the instrument panel. To turn the main beams off, pull the
lever again towards the steering wheel (dipped beams will remain
on). It is not possible to switch on the main beam headlights in
fixed mode if the automatic lighting control system is active.
FLASHING THE HEADLIGHTS
Pull the lever towards the steering wheel (unstable position) re-
gardless of the position of selector wheel A. The
1warning light
will come on in the instrument panel.
DIRECTION INDICATORS
Push the lever to (stable) position:
❍upward adjustment: right-hand indicator ON;
❍downward adjustment: left-hand indicator ON.
Warning light
Îor¥will blink on the instrument panel. The di-
rection indicators are switched off automatically when the steering
wheel is straightened.
Lane change function
If you want to signal that you are changing lane, hold the left lever
in the unstable position for less than half a second. The direction
indicator on the selected side flashes three times and then switch-
es off automatically. IMPORTANT the sensor is not able to detect the presence of fog.
The fog lights must therefore be switched on manually if required.
When the lights are switched on by the sensor, the front and rear
fog lights ((for versions/markets, where provided) can also be
switched on. When the lights are automatically switched off, the
front and rear fog lights (if activated) are also switched off. The
next time the lights are switched on automatically, the fog lights
must be reactivated manually (if required).
With the sensor active, it is possible to flash the headlights but
the main beam headlights cannot be switched on. If you wish to
switch on the main beam headlights, rotate selector wheel
A-fig. 33 to
1and activate the fixed main beam headlights.
When the lights have been activated automatically and are then
switched off by the sensor, the dipped beam headlights are switched
off first, followed by the side lights a few seconds later.
If the sensor is activated but is malfunctioning, the side lights and
dipped beam headlights are switched on independently of the out-
side light level and the sensor failure is indicated on the instrument
panel display. It is also possible to deactivate the sensor and switch
on the side lights and dipped beam headlights.