steering wheel Alfa Romeo MiTo 2020 Owner handbook (in English)
[x] Cancel search | Manufacturer: ALFA ROMEO, Model Year: 2020, Model line: MiTo, Model: Alfa Romeo MiTo 2020Pages: 212, PDF Size: 5.18 MB
Page 98 of 212
SYSTEM MANUAL ACTIVATION /
DEACTIVATION
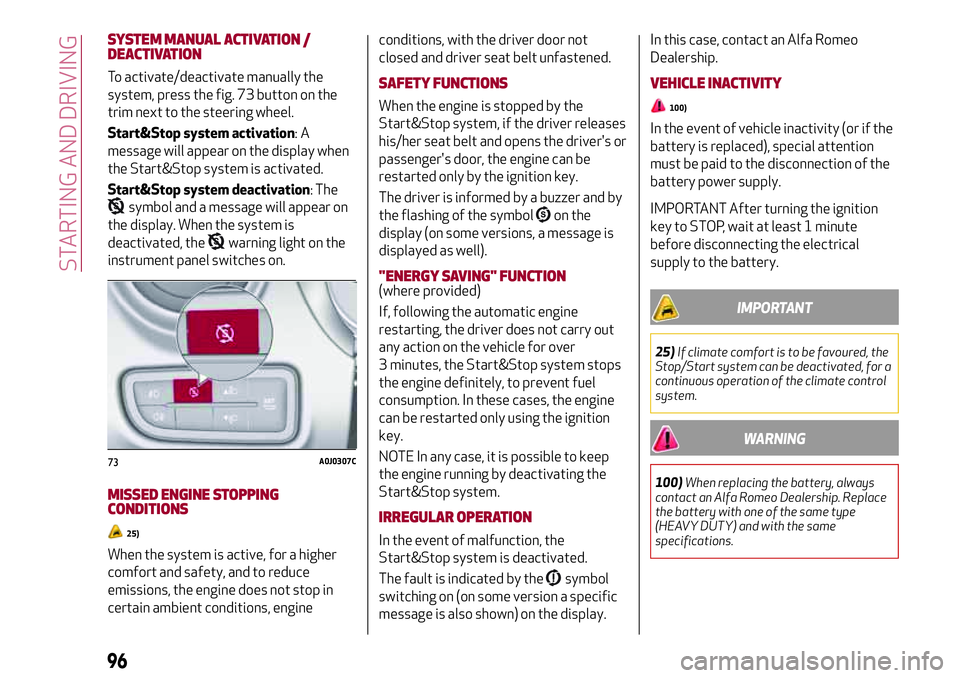
To activate/deactivate manually the
system, press the fig. 73 button on the
trim next to the steering wheel.
Start&Stop system activation:A
message will appear on the display when
the Start&Stop system is activated.
Start&Stop system deactivation: The
symbol and a message will appear on
the display. When the system is
deactivated, the
warning light on the
instrument panel switches on.
MISSED ENGINE STOPPING
CONDITIONS
25)
When the system is active, for a higher
comfort and safety, and to reduce
emissions, the engine does not stop in
certain ambient conditions, engineconditions, with the driver door not
closed and driver seat belt unfastened.
SAFETY FUNCTIONS
When the engine is stopped by the
Start&Stop system, if the driver releases
his/her seat belt and opens the driver's or
passenger's door, the engine can be
restarted only by the ignition key.
The driver is informed by a buzzer and by
the flashing of the symbol
on the
display (on some versions, a message is
displayed as well).
"ENERGY SAVING" FUNCTION(where provided)
If, following the automatic engine
restarting, the driver does not carry out
any action on the vehicle for over
3 minutes, the Start&Stop system stops
the engine definitely, to prevent fuel
consumption. In these cases, the engine
can be restarted only using the ignition
key.
NOTE In any case, it is possible to keep
the engine running by deactivating the
Start&Stop system.
IRREGULAR OPERATION
In the event of malfunction, the
Start&Stop system is deactivated.
The fault is indicated by the
symbol
switching on (on some version a specific
message is also shown) on the display.In this case, contact an Alfa Romeo
Dealership.
VEHICLE INACTIVITY
100)
In the event of vehicle inactivity (or if the
battery is replaced), special attention
must be paid to the disconnection of the
battery power supply.
IMPORTANT After turning the ignition
key to STOP, wait at least 1 minute
before disconnecting the electrical
supply to the battery.
IMPORTANT
25)If climate comfort is to be favoured, the
Stop/Start system can be deactivated, for a
continuous operation of the climate control
system.
WARNING
100)When replacing the battery, always
contact an Alfa Romeo Dealership. Replace
the battery with one of the same type
(HEAVY DUTY) and with the same
specifications.
73A0J0307C
96
STARTING AND DRIVING
Page 121 of 212
WARNING
117)The space-saver wheel is specific for
your car. Do not use it on cars of different
models. Do not use space-saver wheels of
different models on your car. The
space-saver wheel must only be used in the
event of an emergency. Never use it for more
than strictly necessary and never exceed
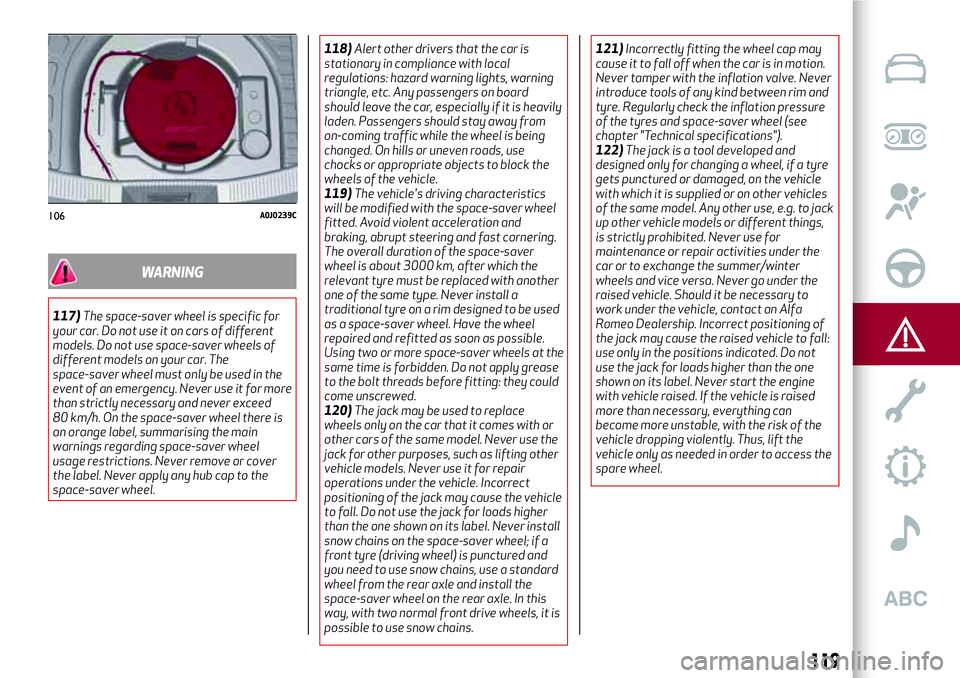
80 km/h. On the space-saver wheel there is
an orange label, summarising the main
warnings regarding space-saver wheel
usage restrictions. Never remove or cover
the label. Never apply any hub cap to the
space-saver wheel.118)Alert other drivers that the car is
stationary in compliance with local
regulations: hazard warning lights, warning
triangle, etc. Any passengers on board
should leave the car, especially if it is heavily
laden. Passengers should stay away from
on-coming traffic while the wheel is being
changed. On hills or uneven roads, use
chocks or appropriate objects to block the
wheels of the vehicle.
119)The vehicle's driving characteristics
will be modified with the space-saver wheel
fitted. Avoid violent acceleration and
braking, abrupt steering and fast cornering.
The overall duration of the space-saver
wheel is about 3000 km, after which the
relevant tyre must be replaced with another
one of the same type. Never install a
traditional tyre on a rim designed to be used
as a space-saver wheel. Have the wheel
repaired and refitted as soon as possible.
Using two or more space-saver wheels at the
same time is forbidden. Do not apply grease
to the bolt threads before fitting: they could
come unscrewed.
120)The jack may be used to replace
wheels only on the car that it comes with or
other cars of the same model. Never use the
jack for other purposes, such as lifting other
vehicle models. Never use it for repair
operations under the vehicle. Incorrect
positioning of the jack may cause the vehicle
to fall. Do not use the jack for loads higher
than the one shown on its label. Never install
snow chains on the space-saver wheel; if a
front tyre (driving wheel) is punctured and
you need to use snow chains, use a standard
wheel from the rear axle and install the
space-saver wheel on the rear axle. In this
way, with two normal front drive wheels, it is
possible to use snow chains.121)Incorrectly fitting the wheel cap may
cause it to fall off when the car is in motion.
Never tamper with the inflation valve. Never
introduce tools of any kind between rim and
tyre. Regularly check the inflation pressure
of the tyres and space-saver wheel (see
chapter "Technical specifications").
122)The jack is a tool developed and
designed only for changing a wheel, if a tyre
gets punctured or damaged, on the vehicle
with which it is supplied or on other vehicles
of the same model. Any other use, e.g. to jack
up other vehicle models or different things,
is strictly prohibited. Never use for
maintenance or repair activities under the
car or to exchange the summer/winter
wheels and vice versa. Never go under the
raised vehicle. Should it be necessary to
work under the vehicle, contact an Alfa
Romeo Dealership. Incorrect positioning of
the jack may cause the raised vehicle to fall:
use only in the positions indicated. Do not
use the jack for loads higher than the one
shown on its label. Never start the engine
with vehicle raised. If the vehicle is raised
more than necessary, everything can
become more unstable, with the risk of the
vehicle dropping violently. Thus, lift the
vehicle only as needed in order to access the
spare wheel.
106A0J0239C
119
Page 126 of 212
ignition key turned to the OFF
position;
turn the ignition key to the MAR-ON
position.
Versions with LPG system
In case of impact, petrol supply is
immediately cut-off, the LPG safety
valves are closed and the injection is
interrupted, switching off the engine.
WARNING
126)If, after an impact, you smell fuel or
notice leaks from the fuel system, do not
reactivate the system to avoid the risk of
fire.
ALFA TCT TRANSMISSION - KEY
REMOVAL
36)
The ignition key can be removed only if
the gear lever is in position P (Park).
If the battery is flat and the ignition key is
engaged, the latter is locked in position.
To remove the key manually, proceed as
follows:
apply the handbrake;
release the steering wheel position
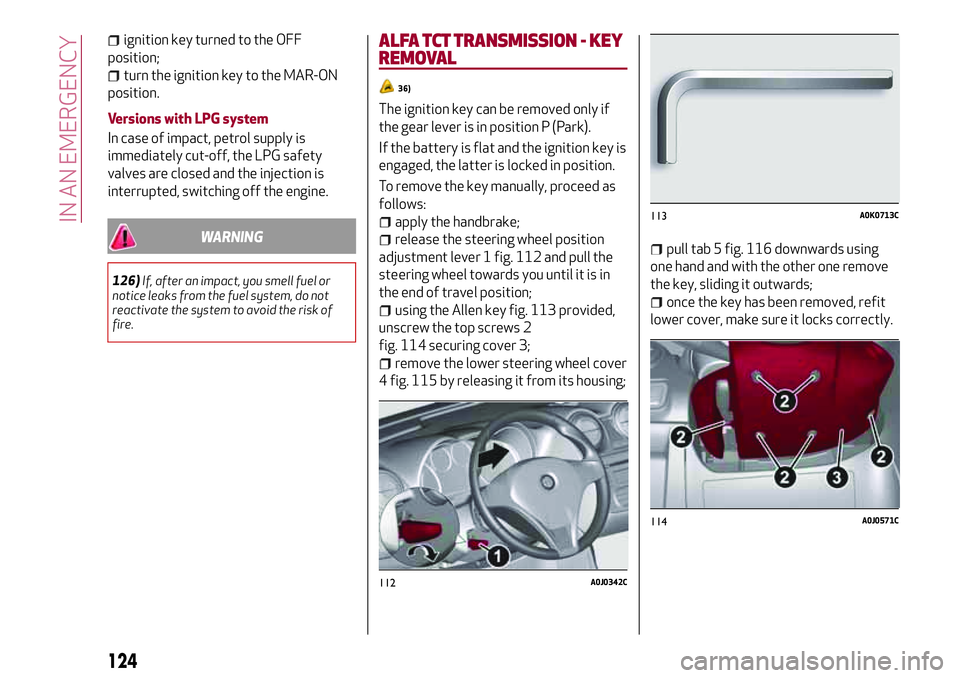
adjustment lever 1 fig. 112 and pull the
steering wheel towards you until it is in
the end of travel position;
using the Allen key fig. 113 provided,
unscrew the top screws 2
fig. 114 securing cover 3;
remove the lower steering wheel cover
4 fig. 115 by releasing it from its housing;
pull tab 5 fig. 116 downwards using
one hand and with the other one remove
the key, sliding it outwards;
once the key has been removed, refit
lower cover, make sure it locks correctly.
112A0J0342C
113A0K0713C
114A0J0571C
124
IN AN EMERGENCY
Page 128 of 212
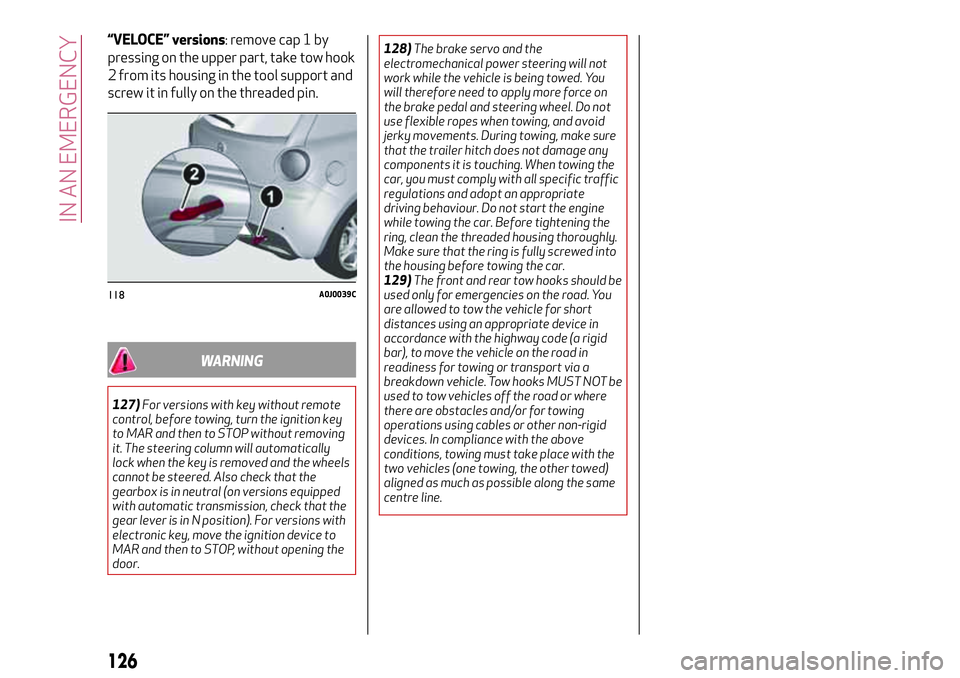
“VELOCE” versions: remove cap 1 by
pressing on the upper part, take tow hook
2 from its housing in the tool support and
screw it in fully on the threaded pin.
WARNING
127)For versions with key without remote
control, before towing, turn the ignition key
to MAR and then to STOP without removing
it. The steering column will automatically
lock when the key is removed and the wheels
cannot be steered. Also check that the
gearbox is in neutral (on versions equipped
with automatic transmission, check that the
gear lever is in N position). For versions with
electronic key, move the ignition device to
MAR and then to STOP, without opening the
door.128)The brake servo and the
electromechanical power steering will not
work while the vehicle is being towed. You
will therefore need to apply more force on
the brake pedal and steering wheel. Do not
use flexible ropes when towing, and avoid
jerky movements. During towing, make sure
that the trailer hitch does not damage any
components it is touching. When towing the
car, you must comply with all specific traffic
regulations and adopt an appropriate
driving behaviour. Do not start the engine
while towing the car. Before tightening the
ring, clean the threaded housing thoroughly.
Make sure that the ring is fully screwed into
the housing before towing the car.
129)The front and rear tow hooks should be
used only for emergencies on the road. You
are allowed to tow the vehicle for short
distances using an appropriate device in
accordance with the highway code (a rigid
bar), to move the vehicle on the road in
readiness for towing or transport via a
breakdown vehicle. Tow hooks MUST NOT be
used to tow vehicles off the road or where
there are obstacles and/or for towing
operations using cables or other non-rigid
devices. In compliance with the above
conditions, towing must take place with the
two vehicles (one towing, the other towed)
aligned as much as possible along the same
centre line.
118A0J0039C
126
IN AN EMERGENCY
Page 146 of 212
be correctly reconnected to the battery,
i.e. the positive cable (+) to the positive
terminal and the negative cable (–) to the
negative terminal. The battery terminals
are marked with the positive (+) and
negative (–) symbols, and are shown on
the battery cover. The battery terminals
must also be corrosion-free and firmly
secured to the terminals.
VERSIONS WITHOUT START&STOP
SYSTEM
(where provided)
To recharge, proceed as follows:
disconnect the terminal from the
negative battery pole;
connect the charger cables to the
battery terminals, observing the polarity;
turn on the charger;
when it is recharged, turn the charger
off before disconnecting it from the
battery;
reconnect the terminal to the negative
battery pole.
VERSIONS WITH START&STOP
SYSTEM
To recharge, proceed as follows:
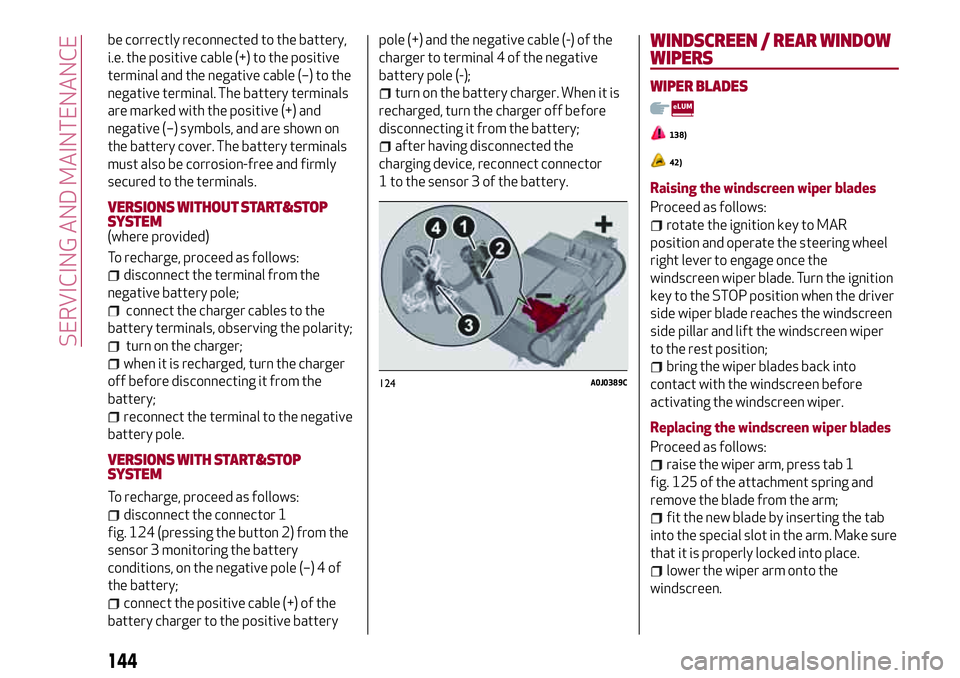
disconnect the connector 1
fig. 124 (pressing the button 2) from the
sensor 3 monitoring the battery
conditions, on the negative pole (–) 4 of
the battery;
connect the positive cable (+) of the
battery charger to the positive batterypole (+) and the negative cable (-) of the
charger to terminal 4 of the negative
battery pole (-);
turn on the battery charger. When it is
recharged, turn the charger off before
disconnecting it from the battery;
after having disconnected the
charging device, reconnect connector
1 to the sensor 3 of the battery.
WINDSCREEN / REAR WINDOW
WIPERS
WIPER BLADES
138)
42)
Raising the windscreen wiper blades
Proceed as follows:
rotate the ignition key to MAR
position and operate the steering wheel
right lever to engage once the
windscreen wiper blade. Turn the ignition
key to the STOP position when the driver
side wiper blade reaches the windscreen
side pillar and lift the windscreen wiper
to the rest position;
bring the wiper blades back into
contact with the windscreen before
activating the windscreen wiper.
Replacing the windscreen wiper blades
Proceed as follows:
raise the wiper arm, press tab 1
fig. 125 of the attachment spring and
remove the blade from the arm;
fit the new blade by inserting the tab
into the special slot in the arm. Make sure
that it is properly locked into place.
lower the wiper arm onto the
windscreen.
124A0J0389C
144
SERVICING AND MAINTENANCE
Page 187 of 212

STEERING WHEEL CONTROLS
Description
The controls for the main system functions are present on the steering wheel fig. 133 to make control easier.
The activation of the function selected is controlled, in some cases, by how long the button is pressed (short or long press) as
described in the table below.
133A0J0052C
185
Page 188 of 212
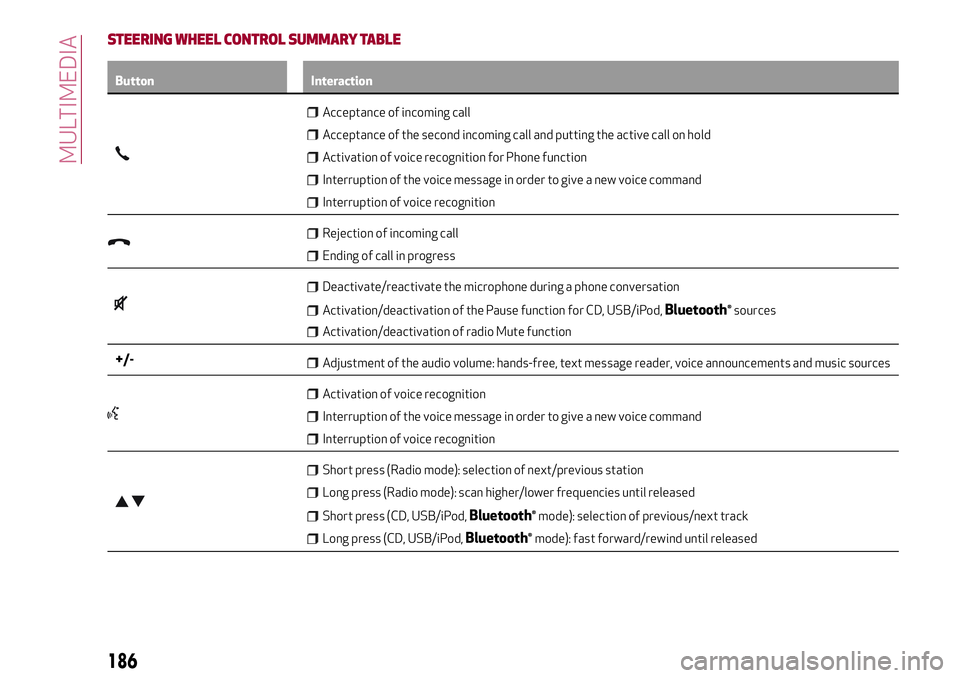
STEERING WHEEL CONTROL SUMMARY TABLE
Button Interaction
Acceptance of incoming call
Acceptance of the second incoming call and putting the active call on hold
Activation of voice recognition for Phone function
Interruption of the voice message in order to give a new voice command
Interruption of voice recognition
Rejection of incoming call
Ending of call in progress
Deactivate/reactivate the microphone during a phone conversation
Activation/deactivation of the Pause function for CD, USB/iPod,Bluetooth®sources
Activation/deactivation of radio Mute function
+/-Adjustment of the audio volume: hands-free, text message reader, voice announcements and music sources
Activation of voice recognition
Interruption of the voice message in order to give a new voice command
Interruption of voice recognition
Short press (Radio mode): selection of next/previous station
Long press (Radio mode): scan higher/lower frequencies until released
Short press (CD, USB/iPod,Bluetooth®mode): selection of previous/next track
Long press (CD, USB/iPod,Bluetooth®mode): fast forward/rewind until released
186
MULTIMEDIA
Page 189 of 212
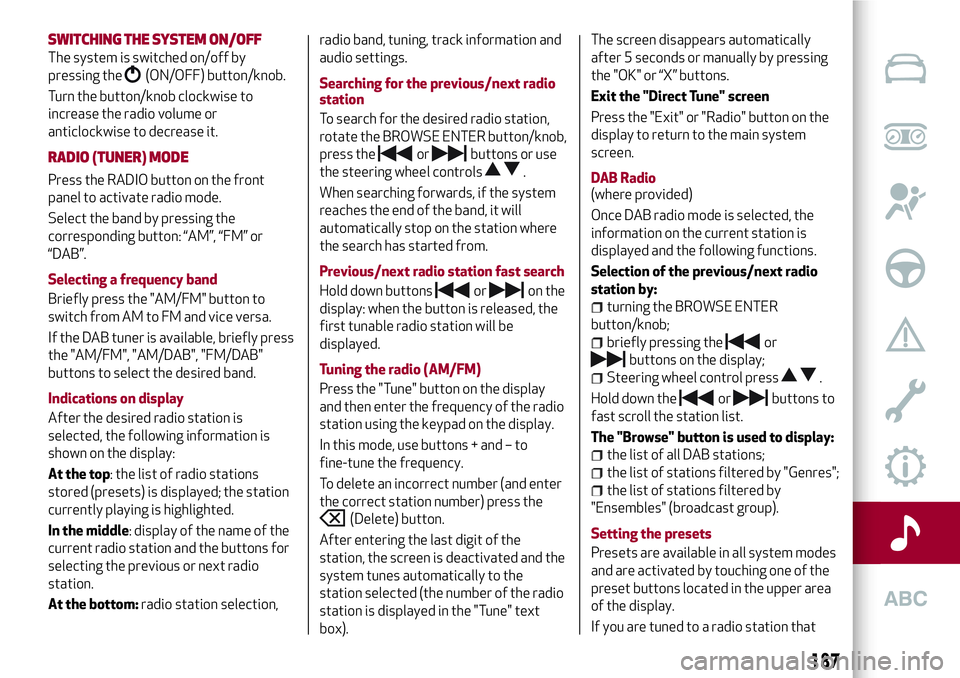
SWITCHING THESYSTEM ON/OFF
The system is switched on/off by
pressing the
(ON/OFF) button/knob.
Turn the button/knob clockwise to
increase the radio volume or
anticlockwise to decrease it.
RADIO (TUNER) MODE
Press the RADIO button on the front
panel to activate radio mode.
Select the band by pressing the
corresponding button: “AM”, “FM” or
“DAB”.
Selecting a frequency band
Briefly press the "AM/FM" button to
switch from AM to FM and vice versa.
If the DAB tuner is available, briefly press
the "AM/FM", "AM/DAB", "FM/DAB"
buttons to select the desired band.
Indications on display
After the desired radio station is
selected, the following information is
shown on the display:
At the top: the list of radio stations
stored (presets) is displayed; the station
currently playing is highlighted.
In the middle: display of the name of the
current radio station and the buttons for
selecting the previous or next radio
station.
At the bottom:radio station selection,radio band, tuning, track information and
audio settings.
Searching for the previous/next radio
station
To search for the desired radio station,
rotate the BROWSE ENTER button/knob,
press the
orbuttons or use
the steering wheel controls
.
When searching forwards, if the system
reaches the end of the band, it will
automatically stop on the station where
the search has started from.
Previous/next radio station fast search
Hold down buttons
oron the
display: when the button is released, the
first tunable radio station will be
displayed.
Tuning the radio (AM/FM)
Press the "Tune" button on the display
and then enter the frequency of the radio
station using the keypad on the display.
In this mode, use buttons + and – to
fine-tune the frequency.
To delete an incorrect number (and enter
the correct station number) press the
(Delete) button.
After entering the last digit of the
station, the screen is deactivated and the
system tunes automatically to the
station selected (the number of the radio
station is displayed in the "Tune" text
box).The screen disappears automatically
after 5 seconds or manually by pressing
the "OK" or “X” buttons.
Exit the "Direct Tune" screen
Press the "Exit" or "Radio" button on the
display to return to the main system
screen.
DAB Radio
(where provided)
Once DAB radio mode is selected, the
information on the current station is
displayed and the following functions.
Selection of the previous/next radio
station by:
turning the BROWSE ENTER
button/knob;
briefly pressing theor
buttons on the display;
Steering wheel control press.
Hold down the
orbuttons to
fast scroll the station list.
The "Browse" button is used to display:
the list of all DAB stations;
the list of stations filtered by "Genres";
the list of stations filtered by
"Ensembles" (broadcast group).
Setting the presets
Presets are available in all system modes
and are activated by touching one of the
preset buttons located in the upper area
of the display.
If you are tuned to a radio station that
187
Page 190 of 212
you wish to store, hold down the button
on the display which corresponds to the
desired preset or until an acoustic
confirmation signal is emitted.
The system can store up to 12 radio
stations in each mode: 3 radio stations
are displayed in the upper area.
Press the "All" button on the display to
show all the radio stations stored in the
frequency band selected.
Audio
To access the “Audio” menu, press the
APPS button on the front panel, scroll
through the menu, then select and press
the “Audio” option on the display.
The following adjustments can be carried
out using the "Audio" menu:
“Equaliser” (where provided): to adjust
the bass, medium and treble tones;
“Balance/Fader” (left/right and
front/rear audio balance adjustment);
“Volume/Speed” (excluding versions
with Hi-Fi system) speed-dependent
automatic volume adjustment;
“Loudness” (where provided):
improves audio quality at low volumes;
“Auto-On Radio”: provides the options
of radio on, radio off or restore status
when the ignition key was last turned to
STOP;
“Radio Off Delay”: keeps the radio on
for a preset time after the ignition key is
turned to STOP.
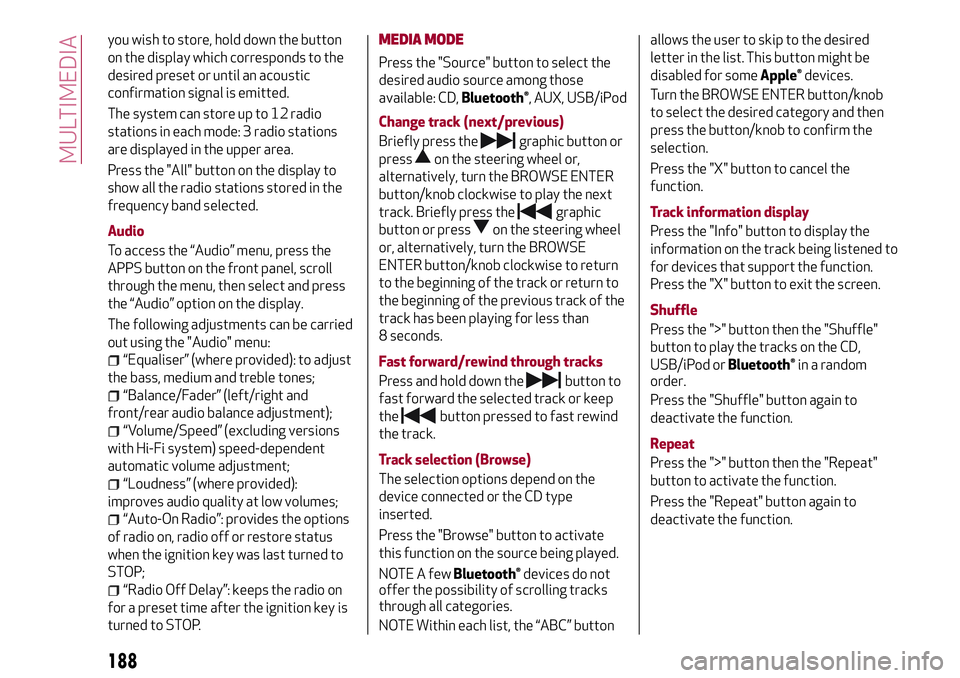
MEDIA MODE
Press the "Source" button to select the
desired audio source among those
available: CD,
Bluetooth®, AUX, USB/iPod
Change track (next/previous)
Briefly press the
graphic button or
press
on the steering wheel or,
alternatively, turn the BROWSE ENTER
button/knob clockwise to play the next
track. Briefly press the
graphic
button or press
on the steering wheel
or, alternatively, turn the BROWSE
ENTER button/knob clockwise to return
to the beginning of the track or return to
the beginning of the previous track of the
track has been playing for less than
8 seconds.
Fast forward/rewind through tracks
Press and hold down the
button to
fast forward the selected track or keep
the
button pressed to fast rewind
the track.
Track selection (Browse)
The selection options depend on the
device connected or the CD type
inserted.
Press the "Browse" button to activate
this function on the source being played.
NOTE A few
Bluetooth®devices do not
offer the possibility of scrolling tracks
through all categories.
NOTE Within each list, the “ABC” buttonallows the user to skip to the desired
letter in the list. This button might be
disabled for some
Apple®devices.
Turn the BROWSE ENTER button/knob
to select the desired category and then
press the button/knob to confirm the
selection.
Press the "X" button to cancel the
function.
Track information display
Press the "Info" button to display the
information on the track being listened to
for devices that support the function.
Press the "X" button to exit the screen.
Shuffle
Press the ">" button then the "Shuffle"
button to play the tracks on the CD,
USB/iPod or
Bluetooth®in a random
order.
Press the "Shuffle" button again to
deactivate the function.
Repeat
Press the ">" button then the "Repeat"
button to activate the function.
Press the "Repeat" button again to
deactivate the function.
188
MULTIMEDIA
Page 192 of 212
list” in theUconnect™attachments).
Main functions
Use the buttons on the display to:
dial the phone number (using the
graphic keypad on the display);
display and call the contacts in the
mobile phone phonebook;
display and call contacts from the
registers of previous calls;
pair up to 10 phones/audio devices to
make access and connection easier and
quicker;
transfer calls from the system to the
mobile phone and vice versa and
deactivate the microphone audio for
private conversations.
Pairing a mobile phone
To pair the mobile phone, proceed as
follows:
activate theBluetooth®function on
the mobile phone;
press the PHONE button on the front
panel;
if no phone is paired with the system
yet, the display shows a dedicated
screen;
select “Yes” to start the pairing
procedure, then search for the
Uconnect™device on the mobile phone;
when prompted by the mobile phone,
use its keypad to enter the PIN code
shown on the system display or confirm
on the mobile phone the PIN displayed;
from the “Phone” screen you can
always pair a mobile phone by pressing
the “Settings” button: press the “Add
Device” button and proceed as described
above;
select “Yes” or “No” at the request to
pair the mobile phone as the preferred
device;
NOTE After updating the phone software,
for proper operation, it is recommended
to remove the phone from the list of
devices linked to the radio, delete the
previous system pairing also from the list
of
Bluetooth®devices on the phone and
make a new pairing.
Storing names/numbers in the mobile
phone phonebook
Before pairing your mobile phone, make
sure you have stored the names you want
to contact in the phonebook on your
mobile phone so that you can call them
using the car's hands-free system.
Transferring phone data (phonebook
and recent calls)
If your mobile phone has a function for
sending the phonebook via
Bluetooth®
technology.
Answer “Yes” when asked to copy the
phonebook to the system. Answer “No” to
carry out the operation later on.Making a phone call
The operations described below can only
be accessed if supported by the mobile
phone in use.
A call can be made by:
selecting theicon (mobile phone
phonebook);
selecting “Recent Calls”;
selecting the icon(Keypad);
pressing the “Redial” button.
Handling an incoming call
The buttons on the display allow the
following phone call functions to be
managed:
To answer a call: press the “Answer”
button or the
button on the steering
wheel controls;
To end a call: press the “Ignore” button
or the
button on the steering wheel
controls;
Ignore;
Put on hold/resume;
Deactivate/activate the microphone;
Transfer the call;
Switch from one call to the other;
Conference/merge two active calls.
Text message reader
To use this function the mobile phone
must support the SMS exchange function
through
Bluetooth®.
If this function is not supported by the
190
MULTIMEDIA