tow bar Alfa Romeo Stelvio 2018 Owner's Manual
[x] Cancel search | Manufacturer: ALFA ROMEO, Model Year: 2018, Model line: Stelvio, Model: Alfa Romeo Stelvio 2018Pages: 276, PDF Size: 5.79 MB
Page 58 of 276
Caution!
Do not open the sun roof if a roof rack or
crossbars are fitted. Do not open the sun
roof if there is snow or ice on it: you may
damage it.
Closing
From the complete open position, push
the open/close button toward the front
of the vehicle. The roof will close
completely.
The automatic motion can be interrupted
in any position by pushing the open/close
button again.
Vent Opening
To bring the roof into vent position, push
and release the vent button.
This type of vent opening can be
activated regardless of the position of
the sunroof. When starting with the roof
in the closed position, pushing the vent
button automatically causes the sunroof
to open to the vent position. If the roof is
already open, the button must be held
until the roof reaches the vent-opening
position.
Pushing the vent button again during
automatic movement of the roof will stop
it.
Power Sun Shade
The sunshade is power operated.
Push the Power Shade open/close button
toward the rear of the vehicle to open the
sun shade.
Push the Power Shade open/close button
toward the front of the vehicle to close
the sun shade.
The automatic motion can be interrupted
in any position by pushing the Power
Shade on/off button again.
Pinch Protect Feature
The sunroof has an anti-pinch safety
system capable of detecting the
presence of an obstacle during the
closing movement. If an obstacle is
detected, the system intervenes and the
movement of the sunroof is immediately
reversed into opening.
Initialization Procedure
Automatic operation of the sunroof must
be initialized again in case of faulty
sunroof operation. It may also be
necessary to initialize the sunroof after
the vehicle’s battery as been
disconnected and then reconnected.Proceed as follows:
1. Push the open/close button to bring
the roof into the completely closed
position.
2. Cycle the ignition to STOP mode and
wait at least ten seconds.
3. Cycle the ignition to AVV mode. Refer
to “Ignition System” in this chapter for
further information.
4. Hold the open/close button down for
at least ten seconds. You should then
hear the mechanical stop of the roof
motor.
5. Within five seconds, hold the
open/close button down. The roof will
perform a complete opening and closing
cycle (to indicate that the initialization
procedure has been successful). If this
does not occur, the procedure must be
restarted from the beginning.
56
GETTING TO KNOW YOUR VEHICLE
Page 110 of 276
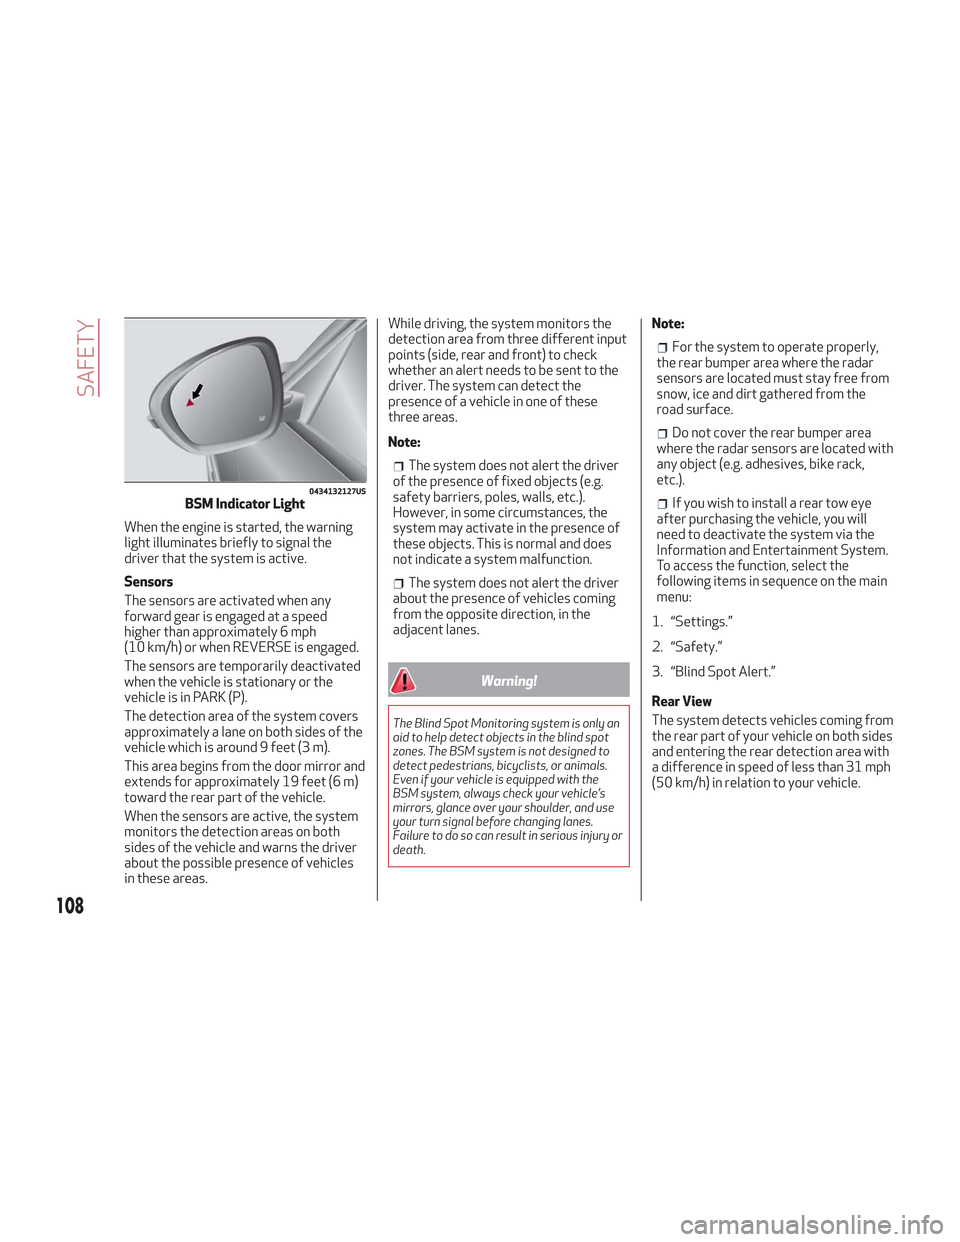
When the engine is started, the warning
light illuminates briefly to signal the
driver that the system is active.
Sensors
The sensors are activated when any
forward gear is engaged at a speed
higher than approximately 6 mph
(10 km/h) or when REVERSE is engaged.
The sensors are temporarily deactivated
when the vehicle is stationary or the
vehicle is in PARK (P).
The detection area of the system covers
approximately a lane on both sides of the
vehicle which is around 9 feet (3 m).
This area begins from the door mirror and
extends for approximately 19 feet (6 m)
toward the rear part of the vehicle.
When the sensors are active, the system
monitors the detection areas on both
sides of the vehicle and warns the driver
about the possible presence of vehicles
in these areas.While driving, the system monitors the
detection area from three different input
points (side, rear and front) to check
whether an alert needs to be sent to the
driver. The system can detect the
presence of a vehicle in one of these
three areas.
Note:
The system does not alert the driver
of the presence of fixed objects (e.g.
safety barriers, poles, walls, etc.).
However, in some circumstances, the
system may activate in the presence of
these objects. This is normal and does
not indicate a system malfunction.
The system does not alert the driver
about the presence of vehicles coming
from the opposite direction, in the
adjacent lanes.
Warning!
The Blind Spot Monitoring system is only an
aid to help detect objects in the blind spot
zones. The BSM system is not designed to
detect pedestrians, bicyclists, or animals.
Even if your vehicle is equipped with the
BSM system, always check your vehicle’s
mirrors, glance over your shoulder, and use
your turn signal before changing lanes.
Failure to do so can result in serious injury or
death.
Note:
For the system to operate properly,
the rear bumper area where the radar
sensors are located must stay free from
snow, ice and dirt gathered from the
road surface.
Do not cover the rear bumper area
where the radar sensors are located with
any object (e.g. adhesives, bike rack,
etc.).
If you wish to install a rear tow eye
after purchasing the vehicle, you will
need to deactivate the system via the
Information and Entertainment System.
To access the function, select the
following items in sequence on the main
menu:
1. “Settings.”
2. “Safety.”
3. “Blind Spot Alert.”
Rear View
The system detects vehicles coming from
the rear part of your vehicle on both sides
and entering the rear detection area with
a difference in speed of less than 31 mph
(50 km/h) in relation to your vehicle.0434132127USBSM Indicator Light
108
SAFETY
Page 139 of 276
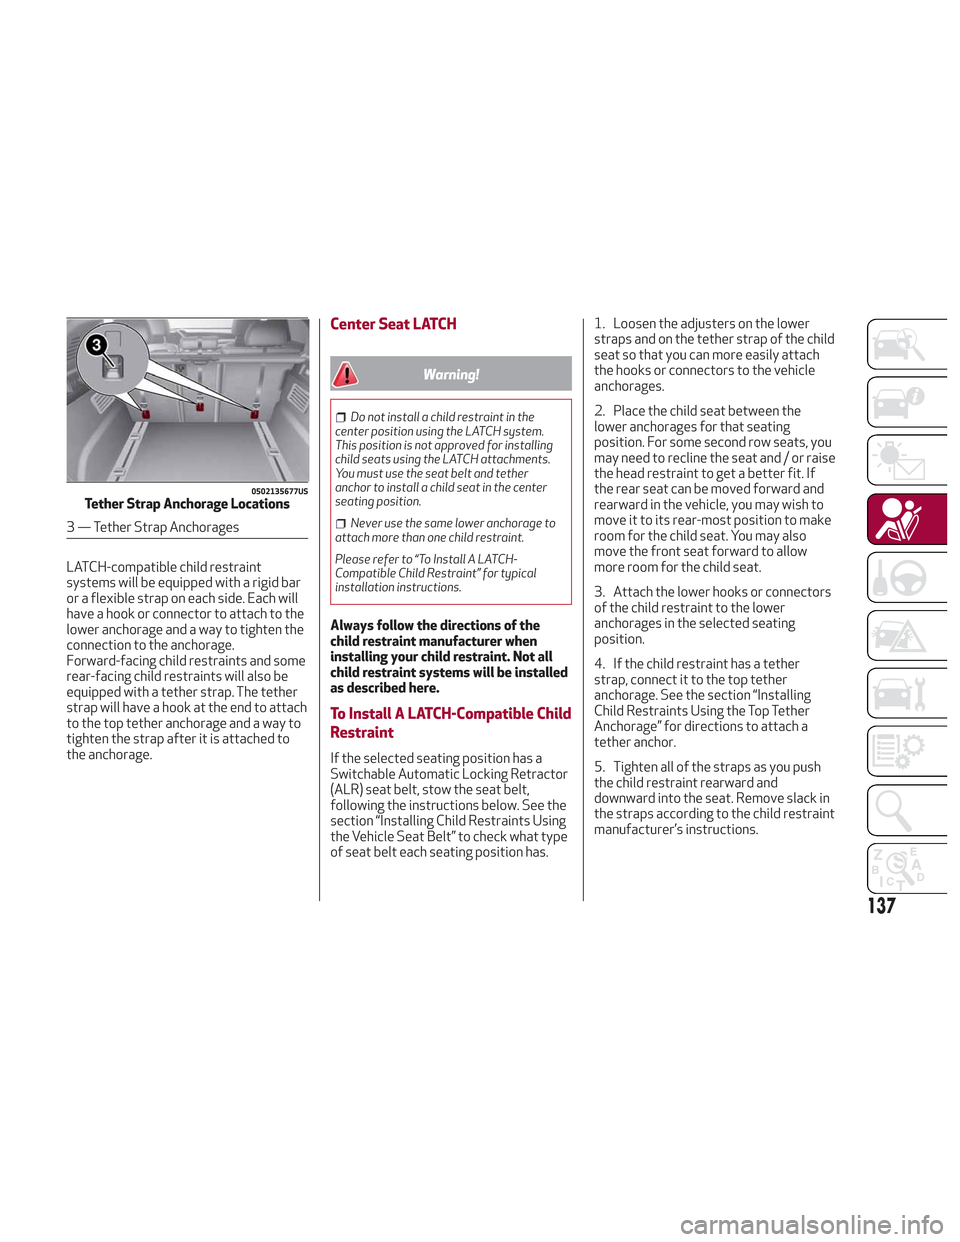
LATCH-compatible child restraint
systems will be equipped with a rigid bar
or a flexible strap on each side. Each will
have a hook or connector to attach to the
lower anchorage and a way to tighten the
connection to the anchorage.
Forward-facing child restraints and some
rear-facing child restraints will also be
equipped with a tether strap. The tether
strap will have a hook at the end to attach
to the top tether anchorage and a way to
tighten the strap after it is attached to
the anchorage.
Center Seat LATCH
Warning!
Do not install a child restraint in the
center position using the LATCH system.
This position is not approved for installing
child seats using the LATCH attachments.
You must use the seat belt and tether
anchor to install a child seat in the center
seating position.
Never use the same lower anchorage to
attach more than one child restraint.
Please refer to “To Install A LATCH-
Compatible Child Restraint” for typical
installation instructions.
Always follow the directions of the
child restraint manufacturer when
installing your child restraint. Not all
child restraint systems will be installed
as described here.
To Install A LATCH-Compatible Child
Restraint
If the selected seating position has a
Switchable Automatic Locking Retractor
(ALR) seat belt, stow the seat belt,
following the instructions below. See the
section “Installing Child Restraints Using
the Vehicle Seat Belt” to check what type
of seat belt each seating position has. 1. Loosen the adjusters on the lower
straps and on the tether strap of the child
seat so that you can more easily attach
the hooks or connectors to the vehicle
anchorages.
2. Place the child seat between the
lower anchorages for that seating
position. For some second row seats, you
may need to recline the seat and / or raise
the head restraint to get a better fit. If
the rear seat can be moved forward and
rearward in the vehicle, you may wish to
move it to its rear-most position to make
room for the child seat. You may also
move the front seat forward to allow
more room for the child seat.
3. Attach the lower hooks or connectors
of the child restraint to the lower
anchorages in the selected seating
position.
4. If the child restraint has a tether
strap, connect it to the top tether
anchorage. See the section “Installing
Child Restraints Using the Top Tether
Anchorage” for directions to attach a
tether anchor.
5. Tighten all of the straps as you push
the child restraint rearward and
downward into the seat. Remove slack in
the straps according to the child restraint
manufacturer’s instructions.
0502135677USTether Strap Anchorage Locations
3 — Tether Strap Anchorages
137
Page 199 of 276
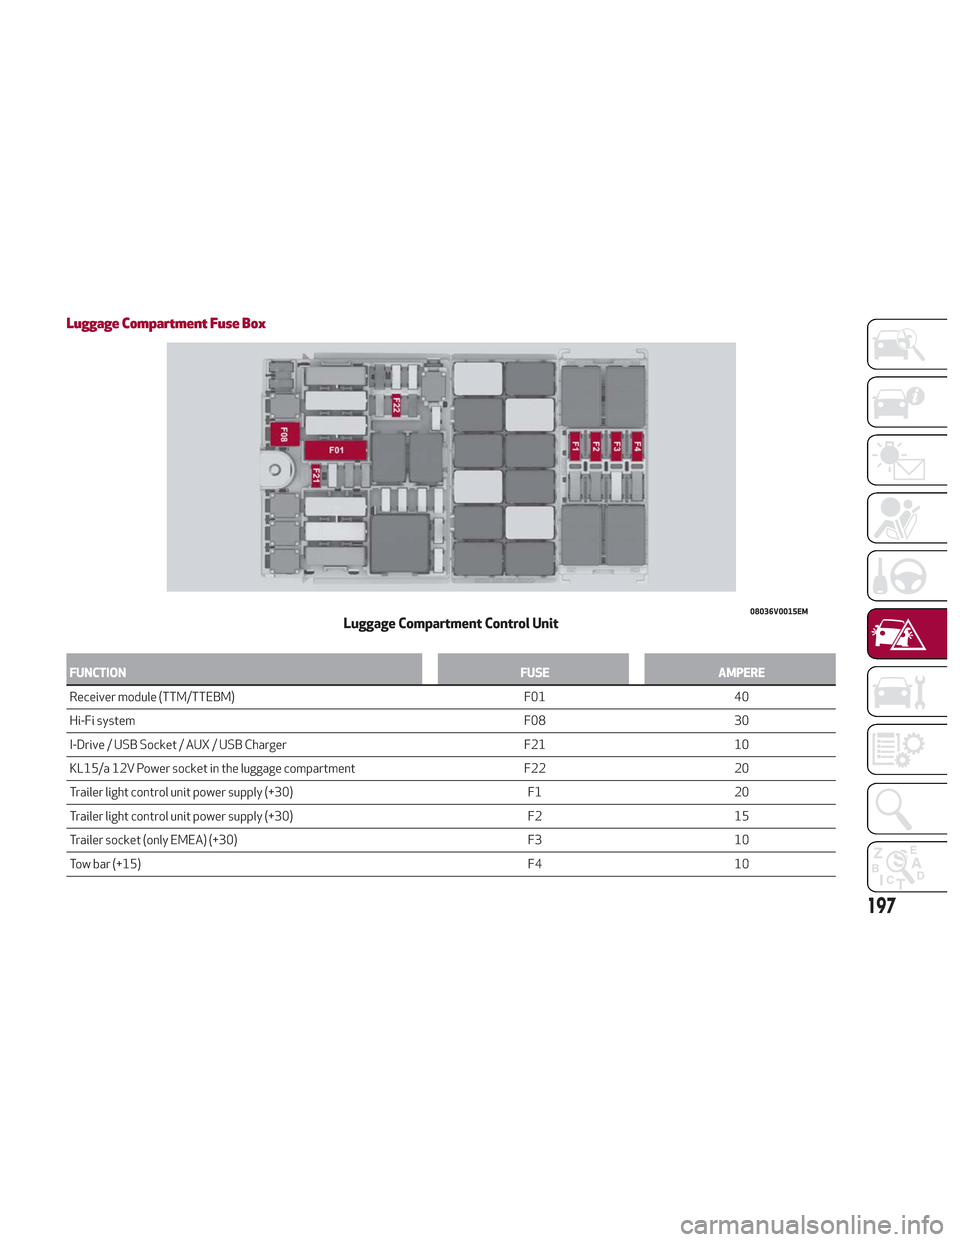
Luggage Compartment Fuse Box
FUNCTIONFUSEAMPERE
Receiver module (TTM/TTEBM) F0140
Hi-Fi
system F0830
I-Drive / USB Socket / AUX / USB Charger F2110
KL15/a 12V Power socket in the luggage compartment F2220
Trailer light control unit power supply (+30) F120
Trailer light control unit power supply (+30) F215
Trailer socket (only EMEA) (+30) F310
Tow bar (+15) F410
08036V0015EMLuggage Compartment Control Unit
197
Page 208 of 276
TOW EYES
If the vehicle has been in an accident or
has broken down, a tow eye is provided in
the tools container located inside the
luggage compartment for vehicle towing.
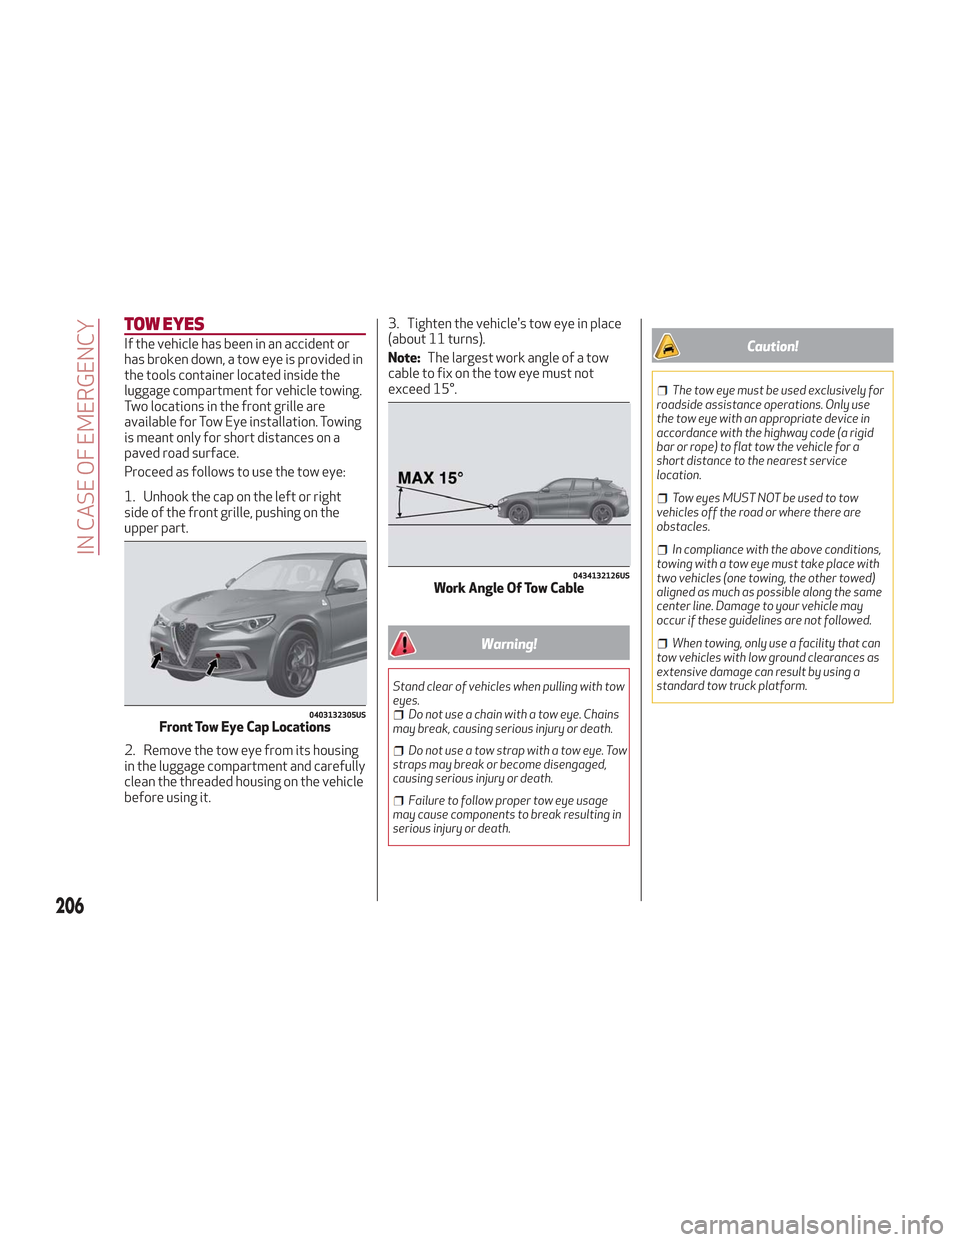
Two locations in the front grille are
available for Tow Eye installation. Towing
is meant only for short distances on a
paved road surface.
Proceed as follows to use the tow eye:
1. Unhook the cap on the left or right
side of the front grille, pushing on the
upper part.
2. Remove the tow eye from its housing
in the luggage compartment and carefully
clean the threaded housing on the vehicle
before using it.3. Tighten the vehicle's tow eye in place
(about 11 turns).
Note:
The largest work angle of a tow
cable to fix on the tow eye must not
exceed 15°.
Warning!
Stand clear of vehicles when pulling with tow
eyes.
Do not use a chain with a tow eye. Chains
may break, causing serious injury or death.
Do not use a tow strap with a tow eye. Tow
straps may break or become disengaged,
causing serious injury or death.
Failure to follow proper tow eye usage
may cause components to break resulting in
serious injury or death.
Caution!
The tow eye must be used exclusively for
roadside assistance operations. Only use
the tow eye with an appropriate device in
accordance with the highway code (a rigid
bar or rope) to flat tow the vehicle for a
short distance to the nearest service
location.
Tow eyes MUST NOT be used to tow
vehicles off the road or where there are
obstacles.
In compliance with the above conditions,
towing with a tow eye must take place with
two vehicles (one towing, the other towed)
aligned as much as possible along the same
center line. Damage to your vehicle may
occur if these guidelines are not followed.
When towing, only use a facility that can
tow vehicles with low ground clearances as
extensive damage can result by using a
standard tow truck platform.
0403132305USFront Tow Eye Cap Locations
0434132126USWork Angle Of Tow Cable
206
IN CASE OF EMERGENCY