park assist ALFA ROMEO STELVIO 2023 User Guide
[x] Cancel search | Manufacturer: ALFA ROMEO, Model Year: 2023, Model line: STELVIO, Model: ALFA ROMEO STELVIO 2023Pages: 268, PDF Size: 10.36 MB
Page 83 of 268
81
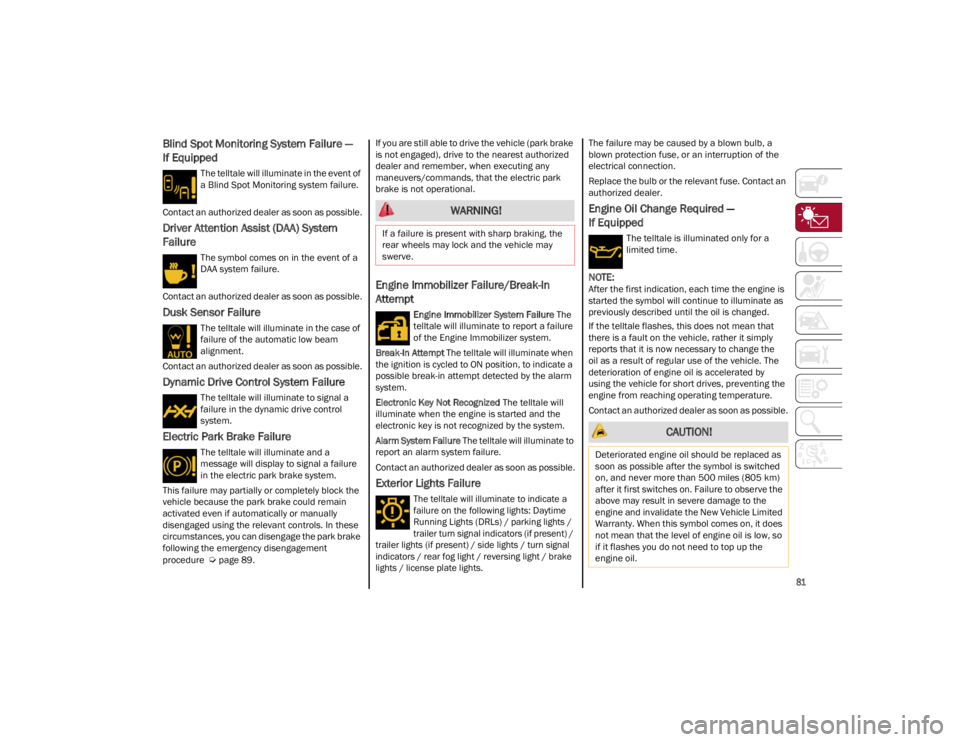
Blind Spot Monitoring System Failure —
If Equipped
The telltale will illuminate in the event of
a Blind Spot Monitoring system failure.
Contact an authorized dealer as soon as possible.
Driver Attention Assist (DAA) System
Failure
The symbol comes on in the event of a
DAA system failure.
Contact an authorized dealer as soon as possible.
Dusk Sensor Failure
The telltale will illuminate in the case of
failure of the automatic low beam
alignment.
Contact an authorized dealer as soon as possible.
Dynamic Drive Control System Failure
The telltale will illuminate to signal a
failure in the dynamic drive control
system.
Electric Park Brake Failure
The telltale will illuminate and a
message will display to signal a failure
in the electric park brake system.
This failure may partially or completely block the
vehicle because the park brake could remain
activated even if automatically or manually
disengaged using the relevant controls. In these
circumstances, you can disengage the park brake
following the emergency disengagement
procedure
Ú
page 89. If you are still able to drive the vehicle (park brake
is not engaged), drive to the nearest authorized
dealer and remember, when executing any
maneuvers/commands, that the electric park
brake is not operational.
Engine Immobilizer Failure/Break-In
Attempt
Engine Immobilizer System Failure
The
telltale will illuminate to report a failure
of the Engine Immobilizer system.
Break-In Attempt The telltale will illuminate when
the ignition is cycled to ON position, to indicate a
possible break-in attempt detected by the alarm
system.
Electronic Key Not Recognized The telltale will
illuminate when the engine is started and the
electronic key is not recognized by the system.
Alarm System Failure The telltale will illuminate to
report an alarm system failure.
Contact an authorized dealer as soon as possible.
Exterior Lights Failure
The telltale will illuminate to indicate a
failure on the following lights: Daytime
Running Lights (DRLs) / parking lights /
trailer turn signal indicators (if present) /
trailer lights (if present) / side lights / turn signal
indicators / rear fog light / reversing light / brake
lights / license plate lights.
The failure may be caused by a blown bulb, a
blown protection fuse, or an interruption of the
electrical connection.
Replace the bulb or the relevant fuse. Contact an
authorized dealer.
Engine Oil Change Required —
If Equipped
The telltale is illuminated only for a
limited time.
NOTE:
After the first indication, each time the engine is
started the symbol will continue to illuminate as
previously described until the oil is changed.
If the telltale flashes, this does not mean that
there is a fault on the vehicle, rather it simply
reports that it is now necessary to change the
oil as a result of regular use of the vehicle. The
deterioration of engine oil is accelerated by
using the vehicle for short drives, preventing the
engine from reaching operating temperature.
Contact an authorized dealer as soon as possible.
WARNING!
If a failure is present with sharp braking, the
rear wheels may lock and the vehicle may
swerve.
CAUTION!
Deteriorated engine oil should be replaced as
soon as possible after the symbol is switched
on, and never more than 500 miles (805 km)
after it first switches on. Failure to observe the
above may result in severe damage to the
engine and invalidate the New Vehicle Limited
Warranty. When this symbol comes on, it does
not mean that the level of engine oil is low, so
if it flashes you do not need to top up the
engine oil.
23_GU_OM_EN_USC_t.book Page 81
Page 84 of 268
GETTING TO KNOW YOUR INSTRUMENT PANEL
82
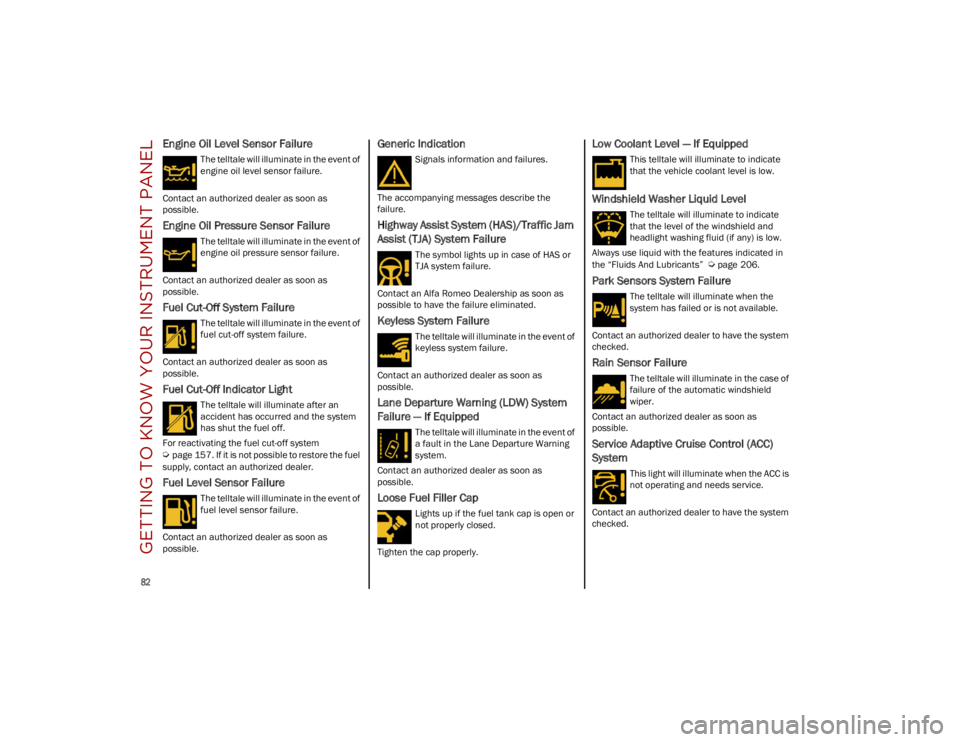
Engine Oil Level Sensor Failure
The telltale will illuminate in the event of
engine oil level sensor failure.
Contact an authorized dealer as soon as
possible.
Engine Oil Pressure Sensor Failure
The telltale will illuminate in the event of
engine oil pressure sensor failure.
Contact an authorized dealer as soon as
possible.
Fuel Cut-Off System Failure
The telltale will illuminate in the event of
fuel cut-off system failure.
Contact an authorized dealer as soon as
possible.
Fuel Cut-Off Indicator Light
The telltale will illuminate after an
accident has occurred and the system
has shut the fuel off.
For reactivating the fuel cut-off system
Ú
page 157. If it is not possible to restore the fuel
supply, contact an authorized dealer.
Fuel Level Sensor Failure
The telltale will illuminate in the event of
fuel level sensor failure.
Contact an authorized dealer as soon as
possible.
Generic Indication
Signals information and failures.
The accompanying messages describe the
failure.
Highway Assist System (HAS)/Traffic Jam
Assist (TJA) System Failure
The symbol lights up in case of HAS or
TJA system failure.
Contact an Alfa Romeo Dealership as soon as
possible to have the failure eliminated.
Keyless System Failure
The telltale will illuminate in the event of
keyless system failure.
Contact an authorized dealer as soon as
possible.
Lane Departure Warning (LDW) System
Failure — If Equipped
The telltale will illuminate in the event of
a fault in the Lane Departure Warning
system.
Contact an authorized dealer as soon as
possible.
Loose Fuel Filler Cap
Lights up if the fuel tank cap is open or
not properly closed.
Tighten the cap properly.
Low Coolant Level — If Equipped
This telltale will illuminate to indicate
that the vehicle coolant level is low.
Windshield Washer Liquid Level
The telltale will illuminate to indicate
that the level of the windshield and
headlight washing fluid (if any) is low.
Always use liquid with the features indicated in
the “Fluids And Lubricants”
Ú
page 206.
Park Sensors System Failure
The telltale will illuminate when the
system has failed or is not available.
Contact an authorized dealer to have the system
checked.
Rain Sensor Failure
The telltale will illuminate in the case of
failure of the automatic windshield
wiper.
Contact an authorized dealer as soon as
possible.
Service Adaptive Cruise Control (ACC)
System
This light will illuminate when the ACC is
not operating and needs service.
Contact an authorized dealer to have the system
checked.
23_GU_OM_EN_USC_t.book Page 82
Page 91 of 268
89
ENGINE BREAK-IN
RECOMMENDATIONS
ENGINE BREAK-IN
For both engines, use the following engine
break-in recommendations:
NOTE:
A new engine may consume some oil during its
first few thousand miles (kilometers) of opera-
tion. This should be considered a normal part of
the break-in period and not interpreted as an indi -
cation of a problem. Please monitor your oil level
during the break-in period and add oil as
required.
It is recommended for the operator to observe the
following driving behaviors during the new vehicle
break-in period:
0 to 100 miles (0 to 160 km):
Do not allow the engine to operate at idle for an
extended period of time.
Press the accelerator pedal slowly and not
more than halfway to avoid rapid acceleration.
Avoid aggressive braking.
Drive with the engine speed less than
3,500 RPM.
Maintain vehicle speed below 55 mph
(88 km/h) and observe local speed limits. 100 to 300 miles (160 to 483 km):
Press the accelerator pedal slowly and not
more than halfway to avoid rapid acceleration
in lower gears (FIRST to THIRD gears).
Avoid aggressive braking.
Drive with the engine speed less than
5,000 RPM.
Maintain vehicle speed below 70 mph
(112 km/h) and observe local speed limits.
300 to 500 miles (483 to 805 km):
Exercise the full engine RPM range, shifting
manually (paddles or gear shift) at higher RPM
when possible.
Do not perform sustained operation with the
accelerator pedal at wide open throttle.
Maintain vehicle speed below 85 mph
(136 km/h) and observe local speed limits.
For the first 1,500 miles (2,414 km):
Do not participate in track events, sport driving
schools, or similar activities during the first
1,500 miles (2,414 km).
NOTE:
Monitor engine oil with every refueling and add if
necessary. Oil and fuel consumption may be
higher through the first oil change interval.
ELECTRIC PARK BRAKE
(EPB)
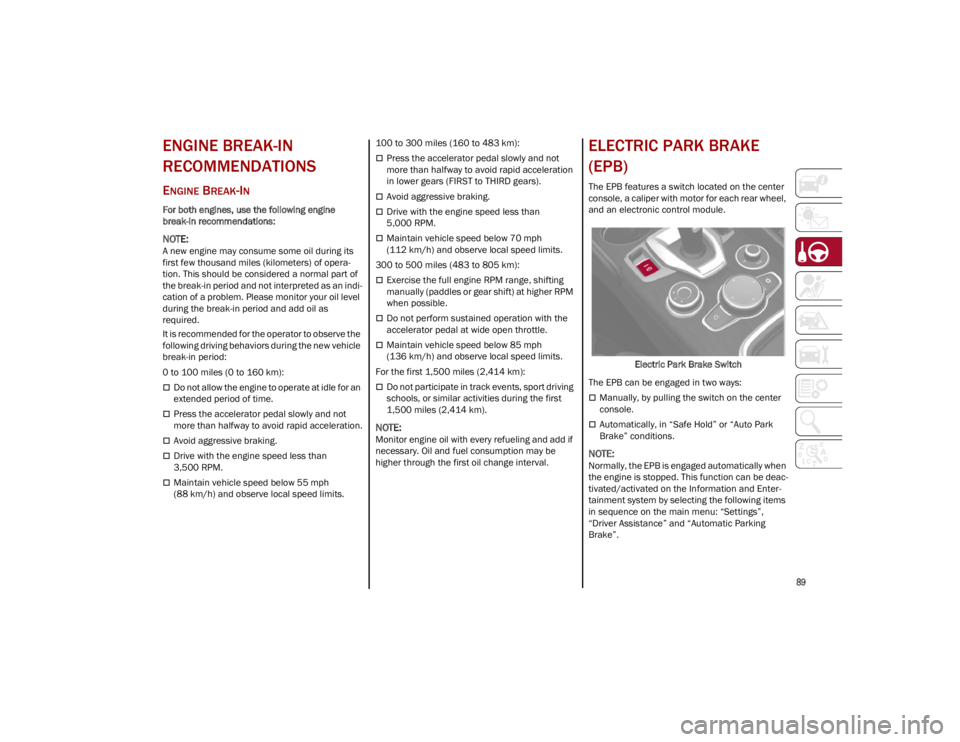
The EPB features a switch located on the center
console, a caliper with motor for each rear wheel,
and an electronic control module.
Electric Park Brake Switch
The EPB can be engaged in two ways:
Manually, by pulling the switch on the center
console.
Automatically, in “Safe Hold” or “Auto Park
Brake” conditions.
NOTE:
Normally, the EPB is engaged automatically when
the engine is stopped. This function can be deac -
tivated/activated on the Information and Enter -
tainment system by selecting the following items
in sequence on the main menu: “Settings”,
“Driver Assistance” and “Automatic Parking
Brake”.
23_GU_OM_EN_USC_t.book Page 89
Page 97 of 268
95
Deactivation
To deactivate the sequential driving mode, bring
the gear selector back in position DRIVE (D)
("automatic" driving mode).
NOTE:
To select the correct gear for maximum
deceleration (engine brake), keep the gear
paddle pulled (–): the transmission goes to
an operating mode in which the vehicle can
slow down easily.
The vehicle will keep the gear selected by the
driver until the safety conditions allow it.
This means, for example, that the system will
try to prevent the engine from switching off,
automatically downshifting if the engine speed
is too low.
AUTOMATIC TRANSMISSION LIMP HOME
M
ODE
Transmission function is monitored electronically
for abnormal conditions. If a condition is detected
that could result in transmission damage,
Transmission Limp Home Mode is activated. In this condition, the transmission stays in
FOURTH gear, regardless of the selected gear.
Positions PARK (P), REVERSE (R) and
NEUTRAL (N) still work.
The symbol might light up in the instrument
cluster.
Temporary failure
In the event of a momentary problem, the
transmission can be reset to regain all forward
gears by performing the following steps:
1. Stop the vehicle.
2. Shift the transmission into PARK (P), if
possible. If not, shift the transmission to
NEUTRAL (N).
3. Push and hold the ignition until the engine turns off.
4. Wait for about 10 seconds, then restart the engine.
5. Shift into the desired gear range. If the problem is no longer detected, the transmis -
sion will return to normal operation.
NOTE:
Even if the transmission can be reset, we recom -
mend that you visit an authorized dealer at your
earliest possible convenience. An authorized
dealer has diagnostic equipment to determine if
the problem could reoccur. If the transmission
cannot be reset, service is required at an autho -
rized dealer.
BRAKE TRANSMISSION SHIFT INTERLOCK
(BTSI) S
YSTEM
This vehicle is equipped with a BTSI that holds the
gear selector in PARK (P) unless the brakes are
applied.
This system prevents you from moving the gear
selector from position PARK (P) unless the brakes
are applied.
To shift the transmission out of PARK (P), the
ignition must be cycled to the ON/RUN position
(engine running or not) and the brake pedal must
be pressed.
Brake Transmission Shift Interlock Disabling
Only if strictly necessary (e.g. pushing the vehicle,
conveyor vehicle washing systems), place the
vehicle in the NEUTRAL (N) position when
stopping the engine. See the following steps:
1. Bring the vehicle to a standstill.
2. Place the transmission in the NEUTRAL (N)
position.
3. Push the ignition button for at least three seconds.
The automatic activation of PARK (P) when the
engine is stopped can also be deactivated on the
Information and Entertainment system by
selecting the following functions on the main
menu: "Settings", "Driver Assistance" and
"Automatic Parking Brake".
WARNING!
Do not downshift for additional engine braking
on a slippery surface. The drive wheels could
lose their grip and the vehicle could skid,
causing a collision or personal injury.
23_GU_OM_EN_USC_t.book Page 95
Page 102 of 268
STARTING AND OPERATING
100
STOP/START SYSTEM
The Stop/Start system automatically shuts off
the engine during a vehicle stop if the required
conditions are met. Releasing the brake pedal or
pressing the accelerator pedal will automatically
restart the engine.
The function was designed to increase vehicle
efficiency by reducing fuel consumption, gas
emissions, and sound pollution.
NOTE:
When the Stop/Start system stops the engine,
the power steering is also disabled.
OPERATING MODE
Stopping The Engine
With the vehicle at a standstill and brake pedal
pressed, the Stop/Start system shuts off the
engine if the gear selector is in a position other
than REVERSE (R).
The system does not operate when the gear
selector is in REVERSE (R), in order to make
parking maneuvers easier.
In the event of uphill stops, the Stop/Start system
is disabled to make the “Hill Start Assist” function
available (works only with running engine).
NOTE:
The engine can only be automatically stopped
after having run at about 6 mph (10 km/h). After
an automatic restart, the vehicle only needs to
exceed a speed of 0.3 mph (0.5 km/h) to stop the engine.
Engine stopping is signaled by the symbol
lighting up on the instrument cluster display. Restarting The Engine
To restart the engine, release the brake pedal or,
turn the steering wheel slightly (if equipped).
With the brake pressed and the transmission in
automatic mode DRIVE (D), the engine will restart
by shifting to REVERSE (R), to PARK (P) or to
“AutoStick”
Ú
page 93.
With brake pressed if the gear selector is in
“AutoStick” mode, the engine will restart by
shifting to PARK (P) or by moving the selector
to + or -
Ú
page 93.
SYSTEM MANUAL ACTIVATION/
D
EACTIVATION
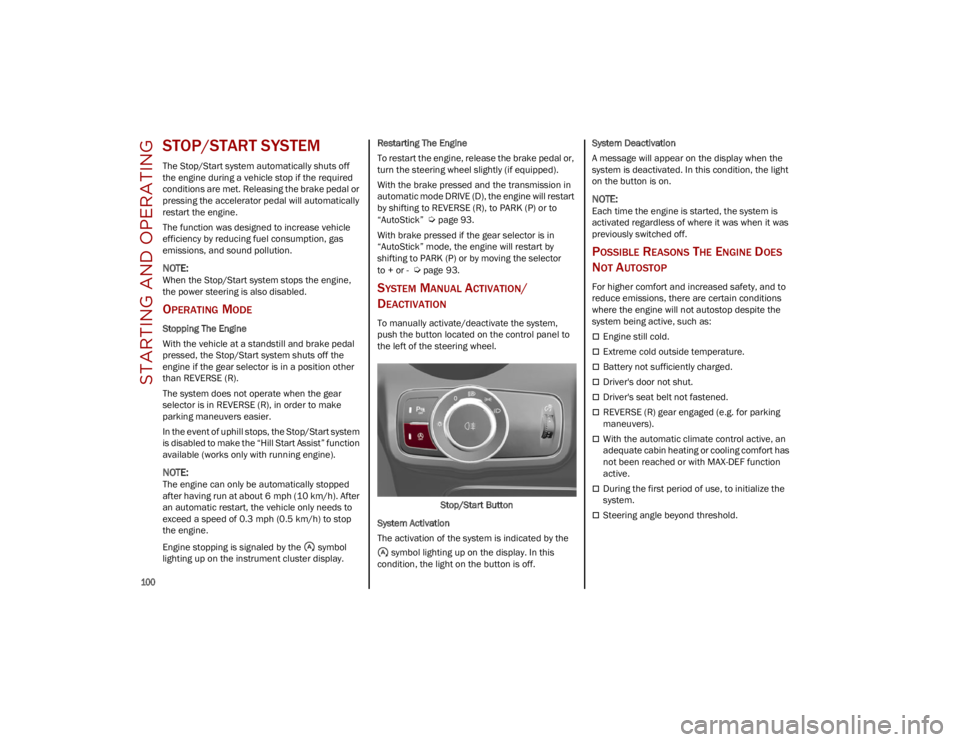
To manually activate/deactivate the system,
push the button located on the control panel to
the left of the steering wheel.
Stop/Start Button
System Activation
The activation of the system is indicated by the symbol lighting up on the display. In this
condition, the light on the button is off. System Deactivation
A message will appear on the display when the
system is deactivated. In this condition, the light
on the button is on.
NOTE:
Each time the engine is started, the system is
activated regardless of where it was when it was
previously switched off.
POSSIBLE REASONS THE ENGINE DOES
N
OT AUTOSTOP
For higher comfort and increased safety, and to
reduce emissions, there are certain conditions
where the engine will not autostop despite the
system being active, such as:
Engine still cold.
Extreme cold outside temperature.
Battery not sufficiently charged.
Driver's door not shut.
Driver's seat belt not fastened.
REVERSE (R) gear engaged (e.g. for parking
maneuvers).
With the automatic climate control active, an
adequate cabin heating or cooling comfort has
not been reached or with MAX-DEF function
active.
During the first period of use, to initialize the
system.
Steering angle beyond threshold.
23_GU_OM_EN_USC_t.book Page 100
Page 113 of 268
111
This equipment has been tested and found to
comply with the limits for a Class A digital device,
pursuant to Part 15 of the FCC Rules. These limits
are designed to provide reasonable protection
against harmful interference when the
equipment is operated in a commercial
environment. This equipment generates, uses,
and can radiate radio frequency energy and, if not
installed and used in accordance with the
instruction manual, may cause harmful
interference to radio communications. Operation
of this equipment in a residential area is likely to
cause harmful interference in which case the
user will be required to correct the interference at
his own expense.
Toutes modifications apportées à cet
équipement qui ne sont pas expressément
homologuées par Robert BOSCH GmbH peuvent
annuler l'autorisation de la FCC de faire
fonctionner cet équipement.
Cet appareil a été vérifié et s'est révélé conforme
aux normes applicables aux appareils
numériques de catégorie A, en vertu de la section
15 des règlements de la FCC. Ces normes sont
définies pour fournir une protection raisonnable
contre les interférences nuisibles lorsque
l'équipement est utilisé dans les installations
résidentielles. Cet appareil génère, utilise et peut
émettre des ondes radioélectriques et, s'il n'est
pas installé et utilisé conformément au manuel
d’instruction, peut causer un brouillage radioélec-
trique nuisible aux communications radio. Le
fonctionnement de cet équipement dans une
zone résidentielle est susceptible de causer des
interférences nuisibles; dans ce cas, l'usager doit
corriger les interférences à ses propres frais. Radio Frequency Exposure Information
This equipment complies with FCC radiation
exposure limits set forth for an uncontrolled
environment. This equipment should be installed
and operated with minimum distance of 20 cm
between the radiator and your body.
This transmitter must not be co-located or
operating in conjunction with any other antenna
or transmitter.
Déclaration d’exposition aux radiations
Cet équipement est conforme aux limites
d'exposition aux rayonnements IC établies pour
un environnement non contrôlé. Cet équipement
doit être installé et utilisé avec un minimum de
20 cm de distance entre la source de
rayonnement et votre corps.
Ce transmetteur ne doit pas etre place au meme
endroit ou utilise simultanement avec un autre
transmetteur ou antenne.
HIGHWAY ASSIST SYSTEM
(HAS) — IF EQUIPPED
The Highway Assist System (HAS) is a driving
assistance system that is only available when
driving on highways. The system operates up to
speeds of 90 mph (145 km/h).
The system uses information from the front
camera and radar to help keep the vehicle in the
center of the lane and at a constant speed.
HAS combines Adaptive Cruise Control (ACC)
functions with lane centering logic to control the
trajectory of the vehicle. HAS requires the driver’s
hands to remain on the steering wheel. Once HAS is activated, a dedicated screen will
appear on the instrument cluster display.
TO ACTIVATE/DEACTIVATE
To Activate
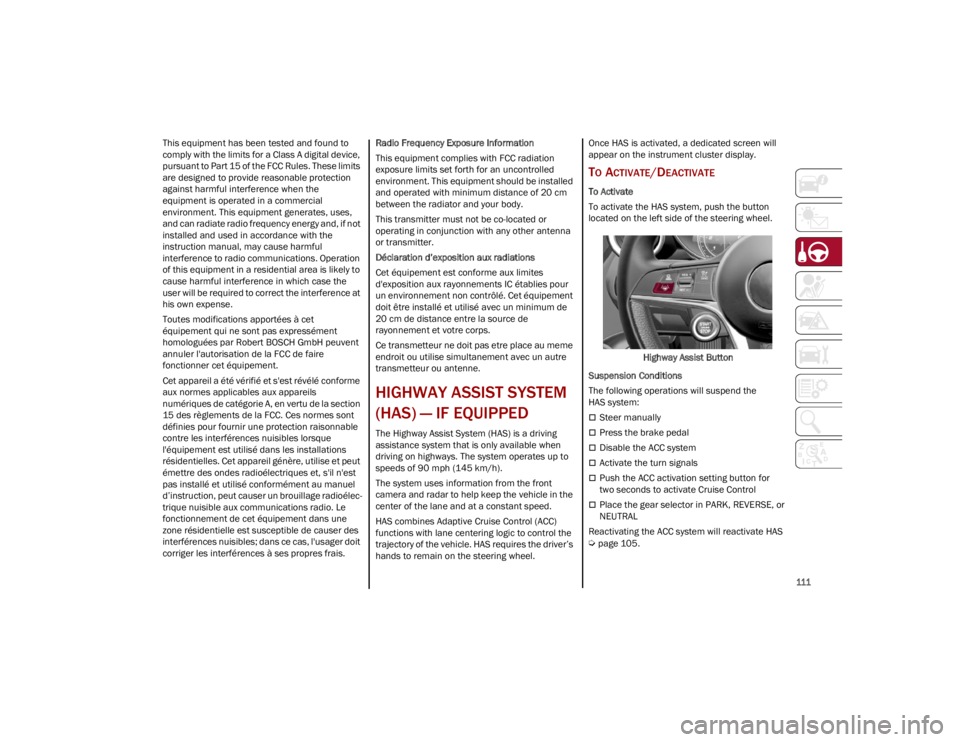
To activate the HAS system, push the button
located on the left side of the steering wheel.
Highway Assist Button
Suspension Conditions
The following operations will suspend the
HAS system:
Steer manually
Press the brake pedal
Disable the ACC system
Activate the turn signals
Push the ACC activation setting button for
two seconds to activate Cruise Control
Place the gear selector in PARK, REVERSE, or
NEUTRAL
Reactivating the ACC system will reactivate HAS
Ú
page 105.
23_GU_OM_EN_USC_t.book Page 111
Page 117 of 268
115
NOTE:
Do not use the TJA system while driving in urban
areas.
TO ACTIVATE/DEACTIVATE
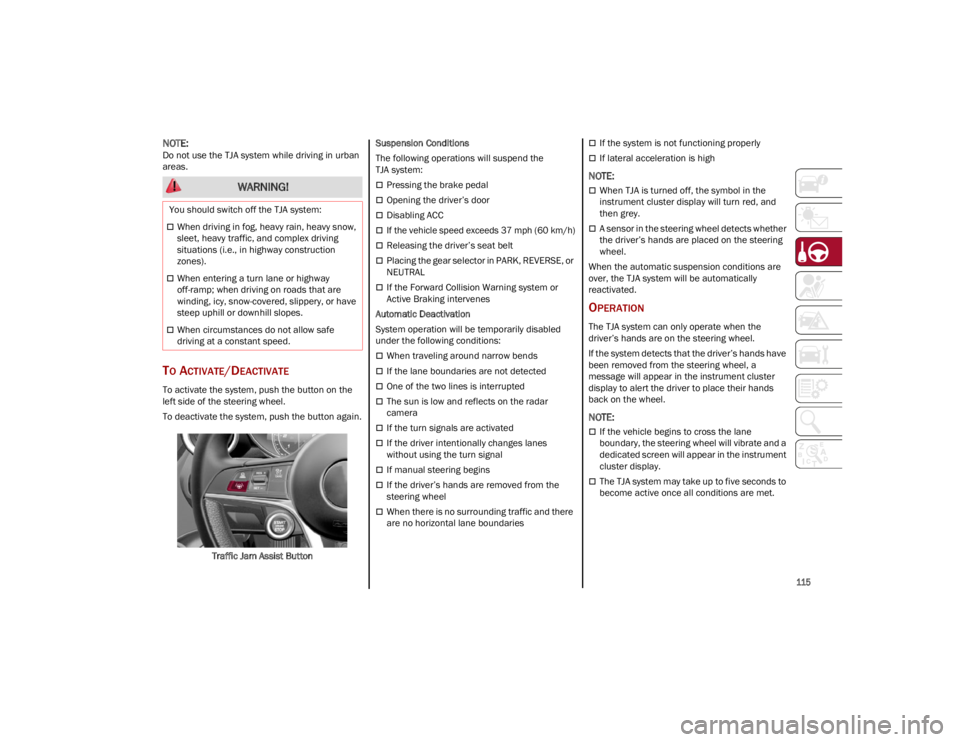
To activate the system, push the button on the
left side of the steering wheel.
To deactivate the system, push the button again.Traffic Jam Assist Button Suspension Conditions
The following operations will suspend the
TJA system:
Pressing the brake pedal
Opening the driver’s door
Disabling ACC
If the vehicle speed exceeds 37 mph (60 km/h)
Releasing the driver’s seat belt
Placing the gear selector in PARK, REVERSE, or
NEUTRAL
If the Forward Collision Warning system or
Active Braking intervenes
Automatic Deactivation
System operation will be temporarily disabled
under the following conditions:
When traveling around narrow bends
If the lane boundaries are not detected
One of the two lines is interrupted
The sun is low and reflects on the radar
camera
If the turn signals are activated
If the driver intentionally changes lanes
without using the turn signal
If manual steering begins
If the driver’s hands are removed from the
steering wheel
When there is no surrounding traffic and there
are no horizontal lane boundaries
If the system is not functioning properly
If lateral acceleration is high
NOTE:
When TJA is turned off, the symbol in the
instrument cluster display will turn red, and
then grey.
A sensor in the steering wheel detects whether
the driver’s hands are placed on the steering
wheel.
When the automatic suspension conditions are
over, the TJA system will be automatically
reactivated.
OPERATION
The TJA system can only operate when the
driver’s hands are on the steering wheel.
If the system detects that the driver’s hands have
been removed from the steering wheel, a
message will appear in the instrument cluster
display to alert the driver to place their hands
back on the wheel.
NOTE:
If the vehicle begins to cross the lane
boundary, the steering wheel will vibrate and a
dedicated screen will appear in the instrument
cluster display.
The TJA system may take up to five seconds to
become active once all conditions are met.
WARNING!
You should switch off the TJA system:
When driving in fog, heavy rain, heavy snow,
sleet, heavy traffic, and complex driving
situations (i.e., in highway construction
zones).
When entering a turn lane or highway
off-ramp; when driving on roads that are
winding, icy, snow-covered, slippery, or have
steep uphill or downhill slopes.
When circumstances do not allow safe
driving at a constant speed.
23_GU_OM_EN_USC_t.book Page 115
Page 122 of 268
STARTING AND OPERATING
120
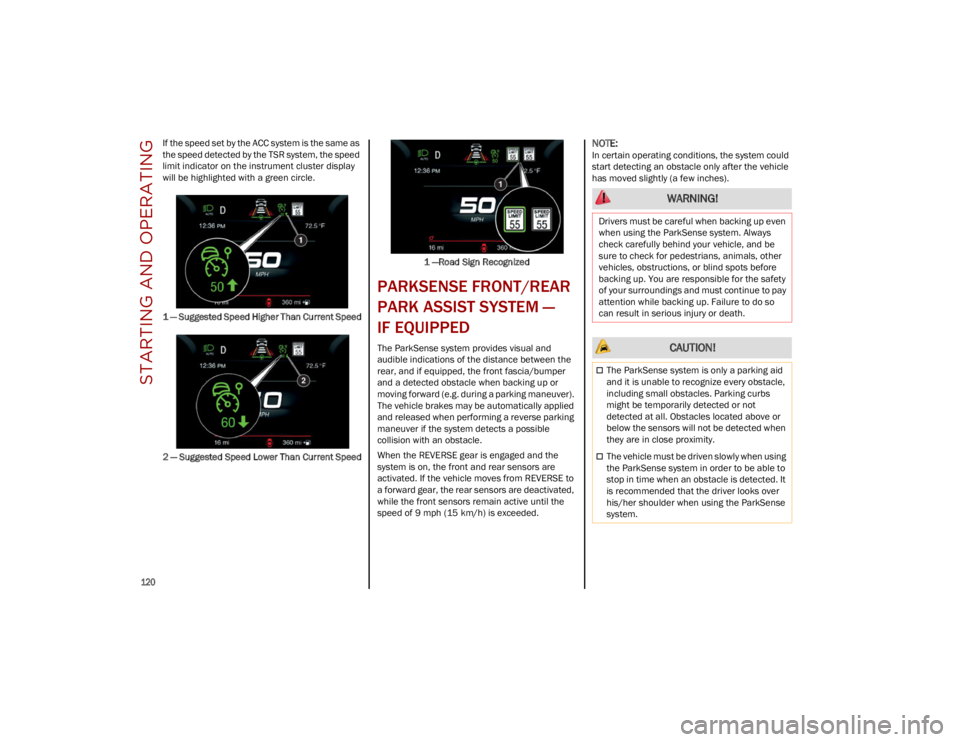
If the speed set by the ACC system is the same as
the speed detected by the TSR system, the speed
limit indicator on the instrument cluster display
will be highlighted with a green circle.
1 — Suggested Speed Higher Than Current Speed
2 — Suggested Speed Lower Than Current Speed1 —Road Sign Recognized
PARKSENSE FRONT/REAR
PARK ASSIST SYSTEM —
IF EQUIPPED
The ParkSense system provides visual and
audible indications of the distance between the
rear, and if equipped, the front fascia/bumper
and a detected obstacle when backing up or
moving forward (e.g. during a parking maneuver).
The vehicle brakes may be automatically applied
and released when performing a reverse parking
maneuver if the system detects a possible
collision with an obstacle.
When the REVERSE gear is engaged and the
system is on, the front and rear sensors are
activated. If the vehicle moves from REVERSE to
a forward gear, the rear sensors are deactivated,
while the front sensors remain active until the
speed of 9 mph (15 km/h) is exceeded.
NOTE:
In certain operating conditions, the system could
start detecting an obstacle only after the vehicle
has moved slightly (a few inches).
WARNING!
Drivers must be careful when backing up even
when using the ParkSense system. Always
check carefully behind your vehicle, and be
sure to check for pedestrians, animals, other
vehicles, obstructions, or blind spots before
backing up. You are responsible for the safety
of your surroundings and must continue to pay
attention while backing up. Failure to do so
can result in serious injury or death.
CAUTION!
The ParkSense system is only a parking aid
and it is unable to recognize every obstacle,
including small obstacles. Parking curbs
might be temporarily detected or not
detected at all. Obstacles located above or
below the sensors will not be detected when
they are in close proximity.
The vehicle must be driven slowly when using
the ParkSense system in order to be able to
stop in time when an obstacle is detected. It
is recommended that the driver looks over
his/her shoulder when using the ParkSense
system.
23_GU_OM_EN_USC_t.book Page 120
Page 123 of 268
121
PARKSENSE SENSORS
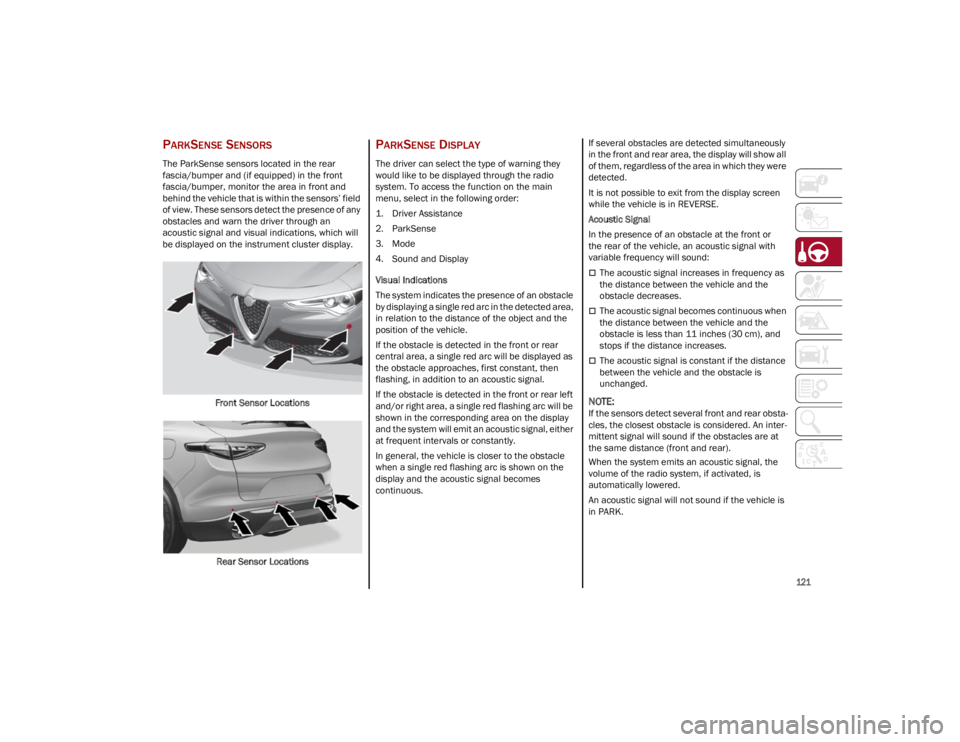
The ParkSense sensors located in the rear
fascia/bumper and (if equipped) in the front
fascia/bumper, monitor the area in front and
behind the vehicle that is within the sensors’ field
of view. These sensors detect the presence of any
obstacles and warn the driver through an
acoustic signal and visual indications, which will
be displayed on the instrument cluster display.Front Sensor Locations
Rear Sensor Locations
PARKSENSE DISPLAY
The driver can select the type of warning they
would like to be displayed through the radio
system. To access the function on the main
menu, select in the following order:
1. Driver Assistance
2. ParkSense
3. Mode
4. Sound and Display
Visual Indications
The system indicates the presence of an obstacle
by displaying a single red arc in the detected area,
in relation to the distance of the object and the
position of the vehicle.
If the obstacle is detected in the front or rear
central area, a single red arc will be displayed as
the obstacle approaches, first constant, then
flashing, in addition to an acoustic signal.
If the obstacle is detected in the front or rear left
and/or right area, a single red flashing arc will be
shown in the corresponding area on the display
and the system will emit an acoustic signal, either
at frequent intervals or constantly.
In general, the vehicle is closer to the obstacle
when a single red flashing arc is shown on the
display and the acoustic signal becomes
continuous. If several obstacles are detected simultaneously
in the front and rear area, the display will show all
of them, regardless of the area in which they were
detected.
It is not possible to exit from the display screen
while the vehicle is in REVERSE.
Acoustic Signal
In the presence of an obstacle at the front or
the rear of the vehicle, an acoustic signal with
variable frequency will sound:
The acoustic signal increases in frequency as
the distance between the vehicle and the
obstacle decreases.
The acoustic signal becomes continuous when
the distance between the vehicle and the
obstacle is less than 11 inches (30 cm), and
stops if the distance increases.
The acoustic signal is constant if the distance
between the vehicle and the obstacle is
unchanged.
NOTE:
If the sensors detect several front and rear obsta
-
cles, the closest obstacle is considered. An inter -
mittent signal will sound if the obstacles are at
the same distance (front and rear).
When the system emits an acoustic signal, the
volume of the radio system, if activated, is
automatically lowered.
An acoustic signal will not sound if the vehicle is
in PARK.
23_GU_OM_EN_USC_t.book Page 121
Page 131 of 268
129
When enabled in the radio settings, active
guidelines are overlaid on the image to illustrate
the width of the vehicle and its projected back up
path based on the steering wheel position. A
dashed center line overlay indicates the center of
the vehicle to assist in rear parking maneuvers or
trailer hitch alignment. Different colored zones
indicate the distance to the rear of the vehicle.
The following table shows the approximate
distances for each zone:
Messages On The Display
If the liftgate is opened, the camera will not detect
any obstacle behind the vehicle. The display will
show a dedicated warning message.
Make sure the liftgate is closed by pushing next to
the lock until it clicks.Important Notes
Ice, snow or mud on the surface of the camera
may reduce its sensitivity. It is important to
keep the camera surface clean, and free from
debris.
When parking, be aware of obstacles that may
be above or below the camera range.
REFUELING THE VEHICLE
Before refueling, make sure that the fuel type is
correct
Ú
page 249.
Also, stop the engine before refueling.
NOTE:
An inefficient catalytic converter leads to
harmful exhaust emissions, thus contributing to
air pollution.
REFUELING CAPACITY
To ensure that you fill the tank completely, top off
twice after the first click of the fuel nozzle.
Further top-off could cause faults in the fuel
feeding system.
AreaDistance From The
Rear Of The Vehicle
Red 0–11.8 inches
(0–30 cm)
Yellow 11.8 inches to 3.3 feet
(30 cm–1 m)
Green 3.3 feet or more
(1 m or more)
WARNING!
Drivers must be careful when backing up even
when using the Rear Back Up Camera. Always
check carefully behind your vehicle, and be
sure to check for pedestrians, animals, other
vehicles, obstructions, or blind spots before
backing up. You are responsible for the safety
of your surroundings and must continue to pay
attention while backing up. Failure to do so
can result in serious injury or death.
CAUTION!
To avoid vehicle damage, Rear Back Up
Camera should only be used as a parking aid.
The Rear Back Up Camera is unable to view
every obstacle or object in your drive path.
To avoid vehicle damage, the vehicle must
be driven slowly when using the Rear Back
Up Camera to be able to stop in time when an
obstacle is seen. It is recommended that the
driver look frequently over his/her shoulder
when using the Rear Back Up Camera.
CAUTION!
Never introduce leaded fuel to the tank,
even in small amounts in an emergency, as
this would damage the catalytic converter
beyond repair.
23_GU_OM_EN_USC_t.book Page 129