brake ASTON MARTIN DB AR1 Q 2003 Owners Guide
[x] Cancel search | Manufacturer: ASTON MARTIN, Model Year: 2003, Model line: DB AR1 Q, Model: ASTON MARTIN DB AR1 Q 2003Pages: 279, PDF Size: 3.77 MB
Page 11 of 279

xi
Regular Checks
In the interests of safety and reliability, it is advisable to carry out the
following checks at the intervals suggested (more frequently if the vehicle is
heavily used or operating in adverse conditions), and always before starting
on a long journey. Refer to the Owner Maintenance section of this guide.
Each Day
Check that there is sufficient fuel for the intended journey, particularly at
night and before entering highways.
Weekly - (Daily if covering high mileage or touring)
Tyres - Check the tyres, including the spare (if fitted) for condition and
pressure. See the 'Specifications' section for the recommended tyre pressures.
Lights - Check that all exterior lights and direction indicators function
correctly and that the lenses are clean.
Engine Oil - With the vehicle standing on level ground, check the oil level
and top up if necessary with oil of the correct grade.
Engine Cooling System - With the engine cold, check the level of the engine
coolant. Top-up if necessary with coolant containing the required percentage
of anti-freeze. Any significant coolant loss should be investigated by your
Aston Martin Dealer.
Brake Fluid - Check the level of the fluid in the brake reservoir. Top-up if
necessary with the specified brake fluid from a new unopened container.
Power Steering Fluid - Check and top-up the level of fluid in the power
steering reservoir with fluid of the correct specification.
DB AR1 Owners Guide
Page 12 of 279

xii
DB AR1 Owner's Guide
Monthly
Windscreen Washer - Top-up with the recommended windscreen wash
fluid. Check the operation of the windscreen washers. Use the recommended
concentration of additives to prevent freezing in winter conditions. Check
the windscreen wash fluid level more frequently if the wash system is being
heavily used.
Safety Warning
Engine exhaust, some of its constituents, and certain vehicle components contain
or emit chemicals known to the state of California to cause cancer, and birth
defects or other reproductive harm. In addition, certain fluids contained in
vehicles and certain products of component wear contain or emit chemicals
known to the state of California to cause cancer, and birth defects or other
reproductive harm.
Glossary of Terms
The following glossary contains frequently used alternative names or
spellings for vehicle components mentioned in this Owner's Guide:
Bonnet Hood
Boot Trunk
Brake Disc Rotor
Handbrake Parking Brake
Petrol Gasoline
Tyre Tire
Wing Fender
Windscreen Windshield
Page 40 of 279

B - Controls
1-B-4
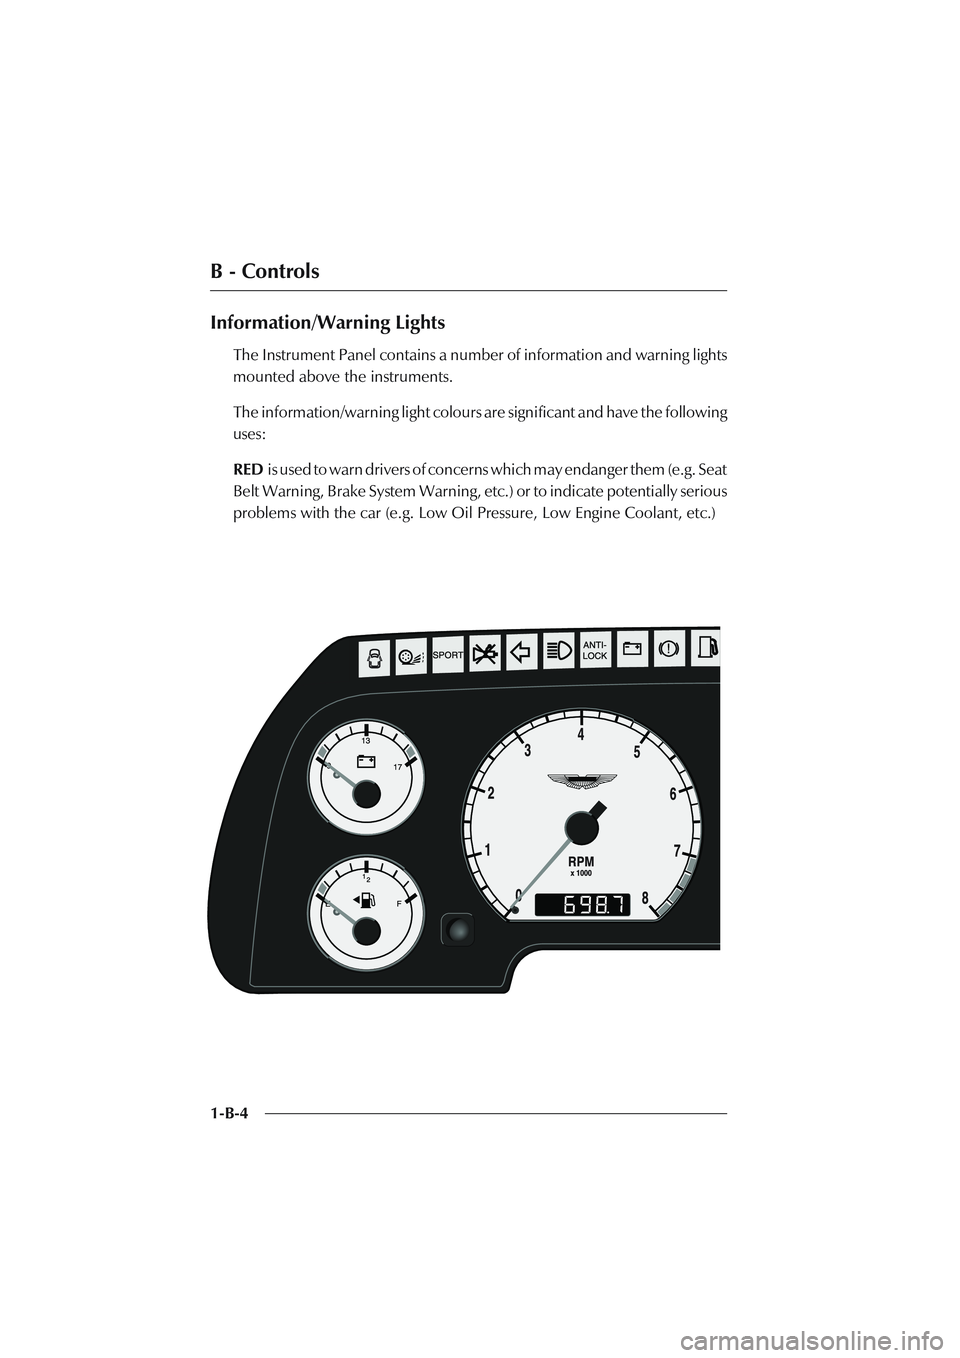
Information/Warning Lights
The Instrument Panel contains a number of information and warning lights
mounted above the instruments.
The information/warning light colours are significant and have the following
uses:
RED is used to warn drivers of concerns which may endanger them (e.g. Seat
Belt Warning, Brake System Warning, etc.) or to indicate potentially serious
problems with the car (e.g. Low Oil Pressure, Low Engine Coolant, etc.)
Page 42 of 279

B - Controls
1-B-6
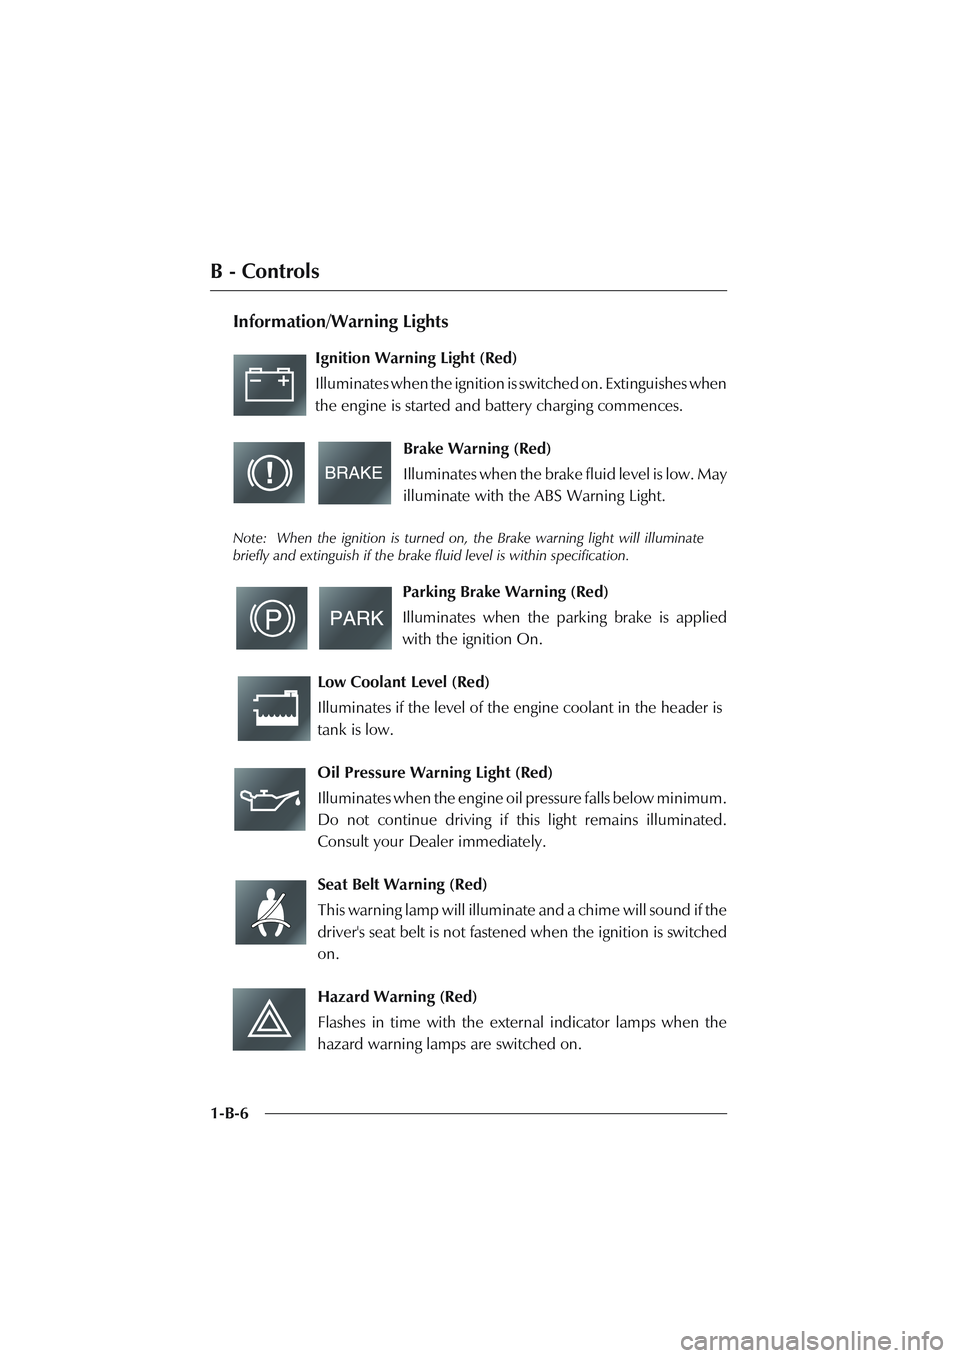
Information/Warning Lights
Ignition Warning Light (Red)
Illuminates when the ignition is switched on. Extinguishes when
the engine is started and battery charging commences.
Brake Warning (Red)
Illuminates when the brake fluid level is low. May
illuminate with the ABS Warning Light.
Note: When the ignition is turned on, the Brake warning light will illuminate
briefly and extinguish if the brake fluid level is within specification.
Parking Brake Warning (Red)
Illuminates when the parking brake is applied
with the ignition On.
Low Coolant Level (Red)
Illuminates if the level of the engine coolant in the header is
tank is low.
Oil Pressure Warning Light (Red)
Illuminates when the engine oil pressure falls below minimum.
Do not continue driving if this light remains illuminated.
Consult your Dealer immediately.
Seat Belt Warning (Red)
This warning lamp will illuminate and a chime will sound if the
driver's seat belt is not fastened when the ignition is switched
on.
Hazard Warning (Red)
Flashes in time with the external indicator lamps when the
hazard warning lamps are switched on.
Page 45 of 279

B - Controls
1-B-9 Headlights (Blue)
Shows when the main beam of the headlights are in use.
Instrument Pack Chime
A warning chime will sound briefly to attract your attention if any of the
following warning lamps illuminate - ABS, Low brake fluid, Low coolant
level, Low fuel level, Low oil pressure, Boot open or a Frost warning.
The warning will be repeated each time the ignition is switched on until the
cause is cleared.
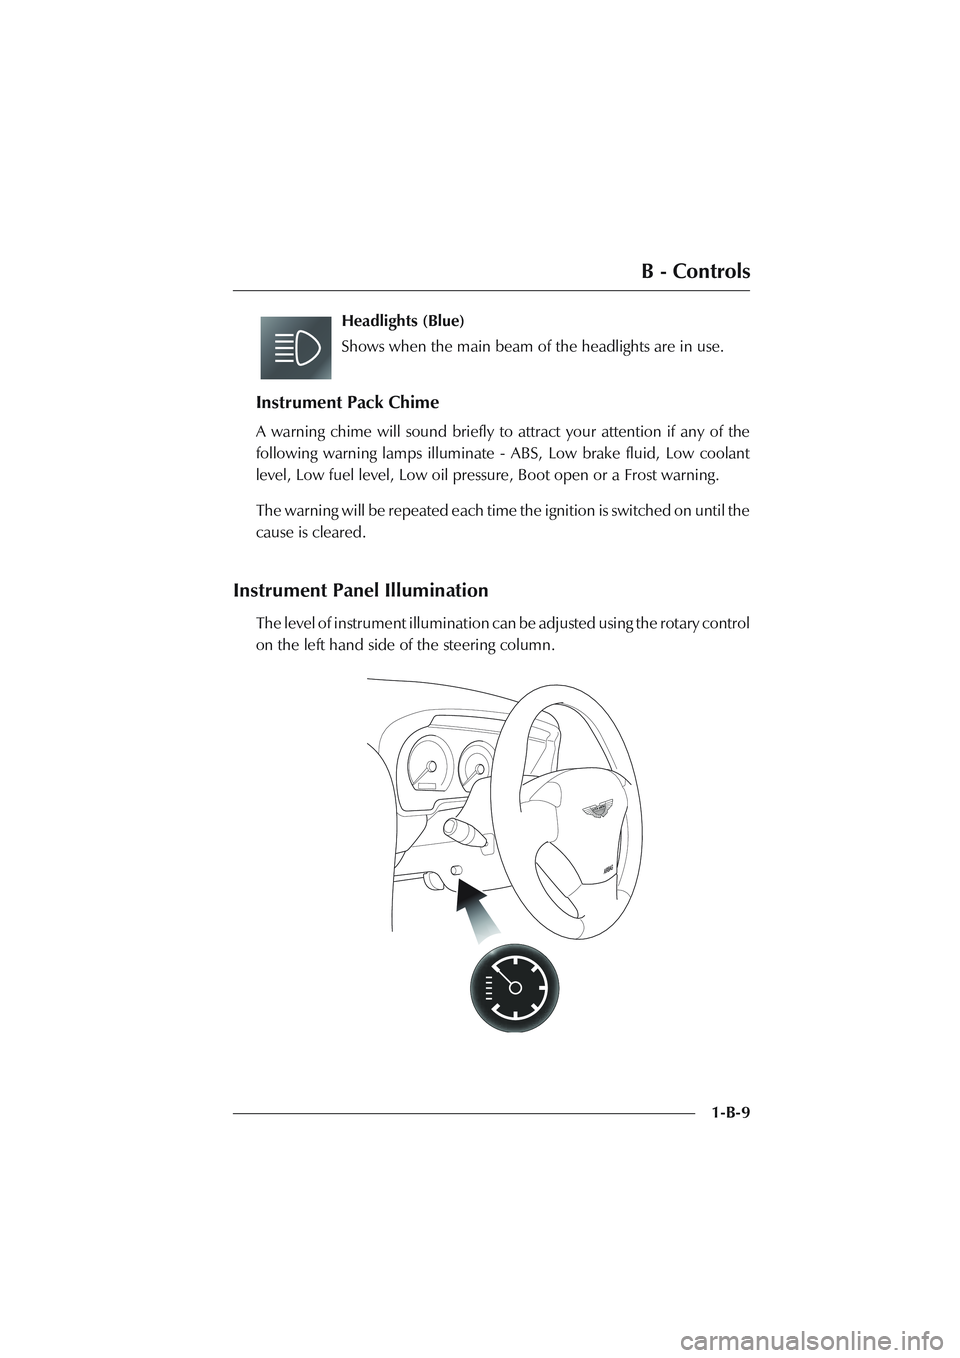
Instrument Panel Illumination
The level of instrument illumination can be adjusted using the rotary control
on the left hand side of the steering column.
Page 71 of 279

C - Driving
1-C-6
Warning Light Indications at Ignition On
As the ignition is switched on, the DB AR1 electronic control units each
complete a self check to ensure correct operation. During these checks, the
warning lights on the instrument panel will illuminate as follows:
• Bulb Check - All warning lamps illuminate for about three seconds as a
bulb check. (The Sport and Transmission Fail lamps are not illuminated
on manual transmission vehicles).
• The Ignition and Oil Pressure warning lights illuminate until the engine
starts.
• The Check Engine light will illuminate during the engine management
self-check and will extinguish when the starter button is pressed.
• The Seat Belt warning light illuminates and a gong sounds for six seconds
if the driver's seat belt is not fastened. On fastening the seat belt, the gong
immediately ceases. The warning lamp extinguishes at the end of the six
second warning period.
• The ABS and Traction Control warning lights illuminate and extinguish
if the system self checks are satisfactory.
• The Brake warning light will illuminate and extinguish if the brake fluid
level is within specification.
• The SRS Airbag warning light will illuminate and extinguish if the SRS
Airbag control system check is satisfactory.
Only the handbrake (parking brake) warning light should stay on after the
engine has started and is running correctly. The handbrake warning light will
extinguish as the handbrake is fully released.
Note: Other Information lights may remain on (e.g. Main Beam Warning or Low
Screen Wash) dependant on the vehicle state and switch settings at the time.
Page 72 of 279

C - Driving
1-C-7 If either the ABS or Brake Fluid Warning lights remain illuminated, refer to
the description of Brake Warnings during Driving later in this section.
Starting the Engine - Hot or Cold
WARNINGS:
Before driving the vehicle, ensure that you are wearing appropriate footwear to
efficiently operate the floor mounted pedals.
Ensure that floor mounted pedal movement is not restricted by floor mats or
other objects trapped beneath the pedals.
Manual Transmission - The engine can only be started with the clutch
pedal fully depressed.
Touchtronic Transmission - The engine can only be started when the gear
selector lever is in Park or Neutral.
Place the gear selector lever in Neutral (Park on Touchtronic vehicles) and
check that the handbrake is applied. Fully depress the clutch pedal on
manual transmission vehicles.
Insert the ignition key and rotate it to position II. Press the
starter button, wait until the engine fires, then release the
starter button.
Note: Do not press the accelerator during engine starting. The Electronic Engine
Management System automatically compensates for cold or hot start conditions
and makes appropriate adjustments to the fuel/air mixture and engine idle speed
without driver intervention.
Page 83 of 279

C - Driving
1-C-18Traction Control Operation
WARNING: In all cases it remains the drivers responsibility to drive safely
according to the law and with due regard to prevailing conditions. The fact that
a vehicle is equipped with Traction Control must never allow the driver to be
tempted into taking risks which could affect his/her safety or that of other road
users. The addition of Traction Control cannot overcome the consequences of
applying too much engine power for the prevailing conditions.
The traction control system is designed to limit engine power when driven
wheel slip is detected. This most commonly happens when accelerating on
a slippery road or loose surface.
The system uses the vehicles ABS sensors to monitor the wheel speed of all
four road wheels. As soon as a driven rear wheel starts to spin due to the
application of too much power for the available grip, the system automatically
reduces engine power by temporarily adjusting the fuel supply. The brake
on the slipping wheel will also be applied as necessary until the wheel speed
matches that of the other wheels.
During activation, the system warning light will flash. The driver may
experience a loss in power or temporary 'misfire' as engine power is
reduced. These symptoms are normal and will clear as wheel spin is
eliminated and normal engine power is restored.
If traction control cuts in when driving on extended icy or slippery surfaces,
reduce engine power as necessary until the traction control warning light is
extinguished.
Caution: Do not maintain engine power at such a level that traction control is
activated for long periods (more than about one minute). The reduced fuelling levels
to the engine will cause the exhaust catalysts to overheat. Overheating of the exhaust
catalysts can destroy them.
Page 84 of 279

C - Driving
1-C-19
The Braking Systems
The Footbrake System
Your DB AR1 uses a vacuum boosted hydraulic braking system with anti-
lock (ABS) function. This system ensures braking performance in keeping
with the vehicle performance.
The Anti-Lock Braking System (ABS) is continually monitored for correct
operation whilst the ignition is switched on. Should a fault occur, it will be
signalled by the Anti-Lock Warning Light.
Brake System Safety Features
The brake system tandem master cylinder is designed so that in the worst
case (barring major accident damage), only half the brake system could fail.
Even in the event of a major brake pipe fracture, at least two wheels will have
fully operative brakes.
Page 85 of 279

C - Driving
1-C-20
Bedding-In of New/Replacement Brake Pads
To ensure that brake pads and discs are correctly 'bedded-in' on new cars,
the factory road test the car and perform the following brake bedding-in
procedure:
1. Three light brake applications from 80-50 kph (50-30 mph) using normal
acceleration to 80 kph.
2. Three medium applications from 110-65 kph (70-40) mph using normal
acceleration up to 110 kph.
3. Two hard applications from high speed to 50 kph (30 mph), again using
normal acceleration.
4. Drive a further 8 km (5 miles) with minimal brake use.
5. Stop and allow the brakes to cool.
6. Drive a further 8 km (5 miles) back to the workshop with normal brake
use.
Aston Martin dealers are required to perform this routine each time brake
pads / discs are replaced.
Aston Martin require owners to perform this routine if pads or discs are
replaced by a non-franchised workshop who will not know of the correct
bedding in procedure.
Failure to bed-in the brake pads / discs will result in reduced brake
performance and possible brake judder or squeal.