check engine light AUDI A3 CABRIOLET 2015 User Guide
[x] Cancel search | Manufacturer: AUDI, Model Year: 2015, Model line: A3 CABRIOLET, Model: AUDI A3 CABRIOLET 2015Pages: 302, PDF Size: 73.83 MB
Page 204 of 302
202 Trailer towing
"Full load" on the label located on the driver's
side B-pillar (visible when the door is open).
Inflate trailer tires to trai ler and t ire manufac
turers' specif ications.
Lights
Check to make sure both vehicle and trailer
lights are working properly.
Safety chains
Be sure trailer safety chains are properly con
nected from the trailer to the hitch on the ve
hicle. Leave enough slack in the chains to per
mit turning corners. When you install safety
chains, make sure they wi ll not drag on the
road when you are driving.
The chains should cross under the trailer
tongue to prevent it from dropping in case of
separation from the hitch.
Driving instructions
Driving with a trailer always requires extra
care and consideration.
To obtain the best possible handling of vehicle
and trailer, please note the following:
.. Do not tow a loaded tra iler when your car it
self is not loaded.
.,. Be espec ially car efu l when passing other
vehicles.
.. Observe speed limits.
.. Do not drive at the maximum permissible
speed.
.. Always apply brakes early .
.. Monitor the temperature gauge.
Weight distribution
Towing a loa ded trai ler with an empty ca r re
sults in a high ly unstable distribution of
weight . If this cannot be avoided, drive at very
low speeds only to avoid the risk of losing
steering control.
A "balanced" rig is easier to operate and con
trol. This means that the tow vehicle should be loaded to the extent poss ible and permissi
ble, while keeping the trailer as light as possi
ble under the circumstances . Whenever possi- ble,
transfer some cargo to the luggage com
partment of the tow vehicle while observing
tong ue load requirements and vehicle loading
considerations.
Speed
T he higher the speed, the more difficult it be
comes for the driver to control the rig. Do not
drive at the maximum permissible speed . Re
duce your speed even more if load, weather or
wind conditions are unfavorable -particularly
when going downhill.
Reduce vehicle speed
immediately if the trail
er shows the slightest sign of sway ing.
Do not
try to stop the swaying by accelerating.
Observe speed limits . In some areas, speeds
for vehicles towing trai lers are lower than for
regular vehicles .
Always apply brakes early. When driving
downhi ll, shift into a lower gear to use the en
gine braking effect to s low the vehicle. Use of
the brakes alone can cause them to overheat
and fail.
Coolant temperature
The coolant temperature gauge~ page 12
must be observed carefu lly. The coolant tem
perature can increase if you drive on long in
clines in a low gear at high engine speeds. Re
duce your speed immediately if the LEDs in
the top part of the d isplay turn on .
For more information about indicator lights,
refer to. ~
page 19 .
A WARNING
Anyone not properly restrained in a mov
ing vehicle is at a much greater risk in an
accident. Never let anyone ride in your car
who is not properly wearing the restraints
provided by Audi.
Trailer towing tips
Important to know
Your vehicle handles differently when towing
a trai ler because of the additional weight and ..,.
Page 212 of 302
210 Checking and Filling
Checking and Filling
Fuel supply
Applies to vehicles: with gasoline engine
Using the right fuel helps keep the environ
ment clean and prevents engine damage.
Fuel recommendation
The fuel recommended for your vehicle is un
leaded premium
grade gasoline . Audi recom
mends using TOP TIER Detergent Gasoline
with a minimum octane rating of 91 AKI (95
RON). For more information on TOP TIER De
tergent Gasoline, please go to the off icia l
website (www.toptiergas.com).
The recommended gasoline octane rating for
your engine can a lso be found on a label locat
ed on the inside of the fuel filler flap. This rat
ing may be specified as AKI or RON.
Your vehicle may also be operated using un leaded regular gasoline with a minimum oc
tane rating of
87 AKI/91 RON. However, using
87 AKI/91 RON octane fuel w ill slightly re
duce eng ine performance.
Use unleaded gasoline only. Unleaded gaso
line is available throughout the USA, Canada,
and in most European countries. We recom
mend that you do not take your vehicle to
areas or countries where unleaded gasoline
may not be ava ilable .
For more informat ion on refueling your vehi
cle, see
c:> page 211 .
Octane rating
Octane rating indicates a gasoline's ability to
res ist engine damaging "knock" caused by
premature ign ition and detonation. Therefore,
buying the correct grade of gasoline is very
important to help prevent possible engine
damage and a loss of engine performance .
Gasoline most commonly used in the United
States and Canada has the following octane
ratings that can usually be found on the filler
pump:
- Prem ium Grade : 91- 96 AKI -
Regular Grade:
87 -90 AKI
E xplanation of the abbreviations:
AK I=
Anti Knock Index = (R +M)/2 = (RON
+MON)/2
RON= Research Octane Number
MON = Motor Octane Number.
(D Note
- Do not use any fuel w ith octane rat ings
lower than
87 AK I or 91 RON otherwise
expensive engine damage will occur .
- Do
not us e leaded gasoline. The use of
leaded gasoline w ill severely damage
your vehicle's catalytic converter and its
ability to control exhaust emissions.
Blended gasoline
Applies to vehicles: with gasoline engine
Use of gasoline containing alcohol or
MTBE (methyl tertiary butyl ether)
You may use unleaded gasoline blended with
alcohol or MTBE (commonly referred to as
oxygenates) if the blended mixture meets the
follow ing criteria:
Blend of gasoline methanol (wood alcohol or
methyl alcohol)
-Anti -knock index must be 87 AKI or higher.
- Blend must contain no more than 3% meth-
anol.
- Blend must contain more than 2% co-sol -
vents .
Blend of gasoline and ethanol (grain alcohol
or ethyl alcohol)
-Anti-knock index must be 87 AKI or higher.
- Blend must not co nta in more than 15%
ethanol.
Blend of gasoline and MTBE
-Anti-knock index must be 87 AKI or higher.
- Blend must contain not more than 15%
MTBE.
Seasonally adjusted gasoline
Page 217 of 302
....,
N
r--. > co
rl I.O
"' rl
"' rl
fan belt or other moving components or do not come into contact w ith hot
components. T ie back long hair before
beginning work and do not wear cloth ing that can hang down into the en
g ine .
- Limit your exposure to exhaust and
chemicals to as short a time as poss ible
c::;, &. .
& WARNING
California P ropos ition 65 Warning:
- Engine exhaust, some of its constituents,
and certain veh icle components conta in
o r emit chemicals known to the State of
Californ ia to cause cancer and b irth de
fec ts and reproduct ive harm . In addition,
certain fluids conta ined in vehicles and
certain products of component wear con
tain or emit chemicals known to the State of California to cause cancer and
birth defects or other reproductive harm.
- Battery posts, terminals and related ac
cessories contain lead and lead com pounds , chemicals known to the State of
Californ ia to cause cancer a nd reproduc
t ive harms . Wash hands after handling .
(D Note
When filling fluids, be sure not to m ix the
fluids up. Othe rwise severe malfunctions
and e ng ine damage will occur .
@ For the sake of the environment
You should regularly check the ground un
der your vehicle in orde r to detect leaks
quickly . If there are visible spots from oil
or other fluids, b ring your veh icle to an au
thori zed Audi dealer or qualified repair fa
cility to be checked .
Checking and Fillin g 215
Opening the hood
The hood is released from the interior .
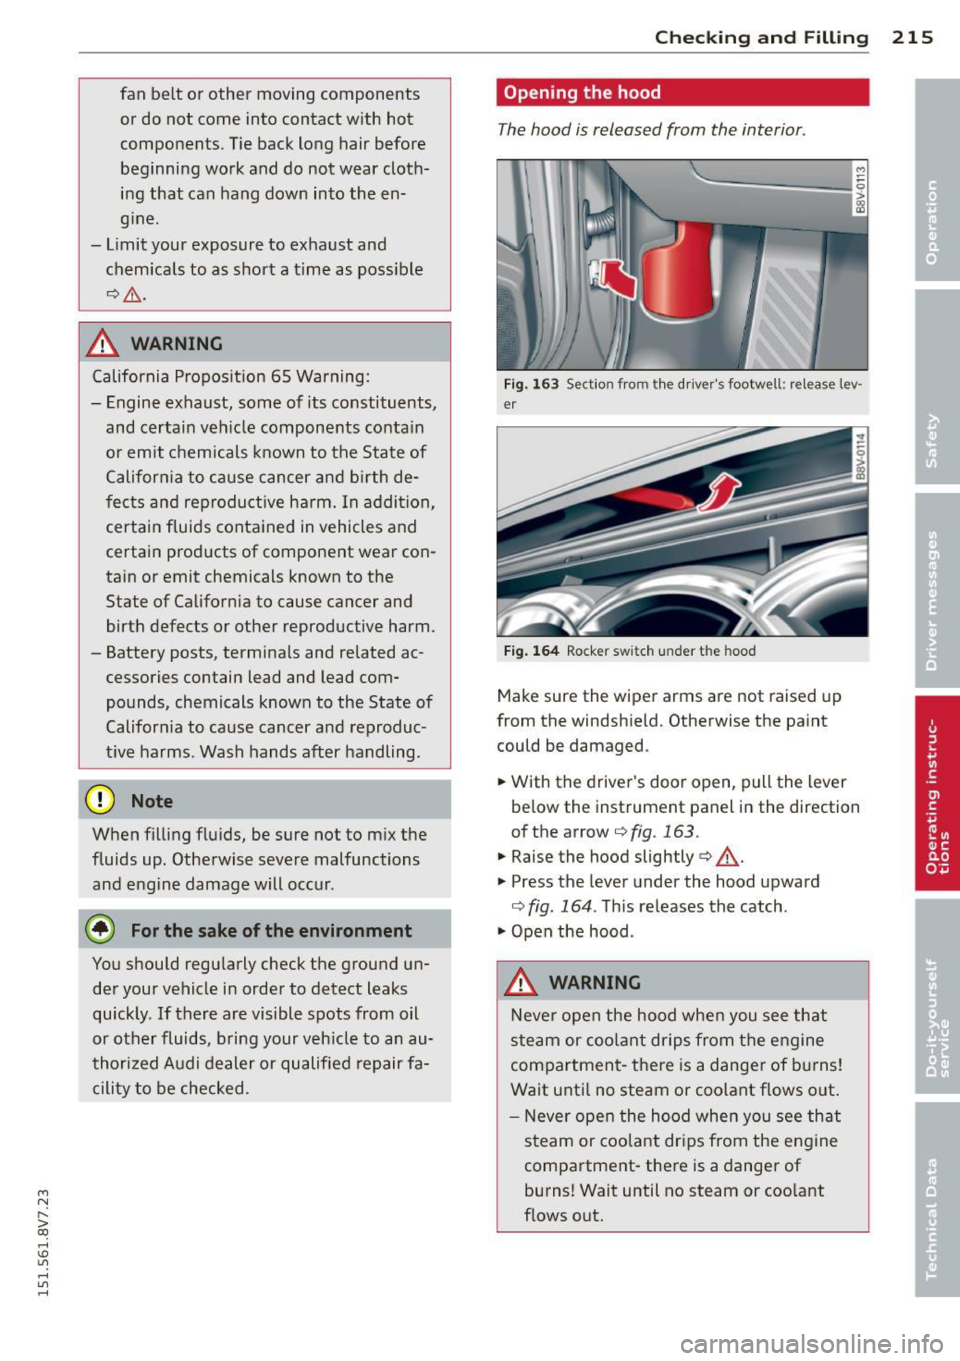
Fig. 163 Se ct io n fro m t he dr iver 's footwell : release Lev ·
er
Fi g. 1 64 Rocke r sw it ch under t he hood
Make sure the wiper arms are not raised up
from the windshield. Otherwise the paint could be damaged .
... With the drive r's door open, pull the lever
be low the instrument panel in the direction
of the arrow
¢ fig. 163.
.,. Raise the hood slightly c::;, ,A .
.,. Press the lever under the hood upward
¢ fig . 164 . This releases the catch .
.,. Open the hood .
& WARNING
Never open the hood whe n you see that
steam or coo lant drips from the engine
compartment -there is a danger of b urns!
Wait unti l no steam or coolant flows o ut.
- Never open the hood when you see that
steam or coolant dr ips from the engine
compartment- there is a danger of burns! Wait until no steam or coo lant
flows out.
-
Page 219 of 302
M N ,....
> co ,...., \!) 1.1'1 ,...., 1.1'1 ,....,
Engine oil
Engine oil specifications
The engine oil used must conform to exact
specifications .
The service interval display in the instrument
cluster of your vehicle w ill inform you when it
is t ime for an oil change. We recommend that
you have your o il changed by an author ized
Aud i Service Advisor .
If you have to top off the oil between oil
changes, use the Aud i oil quality standard
specified in the table .
Audi oil quality standard
G asoline
VW 502 00 or
e ngin e vw 504 00
Using the proper engine o il is important for
the functionality and service life of the en
g ine . Your engine was factory-filled with a
hi gh-quality oil which can usua lly be used
throughout the enti re yea r.
(D Note
Your Limited New Vehicle Warranty does
not cover damage or ma lfun ctions due to
fa ilure to fo llow recommended ma in te
nance and use requ irements as set forth in
the Audi Owner's Manua l and Warranty
&
Maintenance book let.
- U se only a high q uality eng ine oi l that ex
pressly comp lies with the Audi oil quality
standard specified for your vehicle's en
gine. Using any other oil can cause seri
ous engine damage.
- Do not mix any l ubricants or other addi
tives into the eng ine oi l. Doing so can
cause eng ine damage.
(D Tips
I f you need to add oi l and there is none
availab le that meets the Audi oil quality
standard your engine requires, you may
add a total of no more than 0.5 quart/liter
of a high-quality "synthetic"oil that meets
t he follow ing specifica tions.
Checking and Fillin g 217
-Veh icles with gasoline engine : ACEA A3
or AP! SM with a viscosity grade of
SAE O W-30, SAE 5W -30 or SAE SW-40 .
- For more information about engine o il
that has been approved for yo ur vehicle,
please contact either your authorized
Audi dealer or Aud i Customer Relations
at 1 (800) 822-2834 or visit our web site
at www .audiusa.com or
www.a udicanada.ca.
Engine oil consumption
The engine in your vehicle depends on an ade
quate amount of oil to lubricate and cool all
of its moving parts .
In order to provide effective lubrication and
cooling of interna l eng ine components, all in
te rnal combust io n engines consume a certa in
amount of oil. Oil consumpt ion va rie s from
engine to engine and may change sign ifi can tly
ove r th e life of the engine. Typically, engines
wi th a spec ified break -in pe riod (see
¢ page 196) consume more oil during the
break-in pe riod than they cons ume after oi l
consumption has stabilized.
U nder normal cond itions, the rate o f oi l con
s u mption depen ds on the q ual ity and viscos ity
of the oil, the RPM (revolutions per minute) at
which the engine is operated, the ambient
temperature and road conditions. Further fac
tors are the amount of oil dilut ion from water
condensa tion or fuel residue a nd the oxida
tion level of the oil. As any engine is subject to
wea r as m ileage builds up, the oil consump
t ion may incre ase over time until replacement
of wo rn components may be come necessary.
With a ll these va riab les coming into p lay, no
standard rate of oil consumpt io n can be es
tabl is h ed or spec ified. There is no alte rn ative
to regul ar and frequent che cking of the o il lev
el , see
Note.
If the yellow engine o il leve l warning sy mbo l
Ill in the ins trument cl uste r lights up, you
sho uld check the oil leve l as soon as possib le
¢ page 2 18 . Top off the oil at your earliest
convenience
¢ page 218 . ll-
•
•
•
Page 223 of 302
....,
N
r--. > co
rl I.O
"' rl
"' rl
Adding coolant
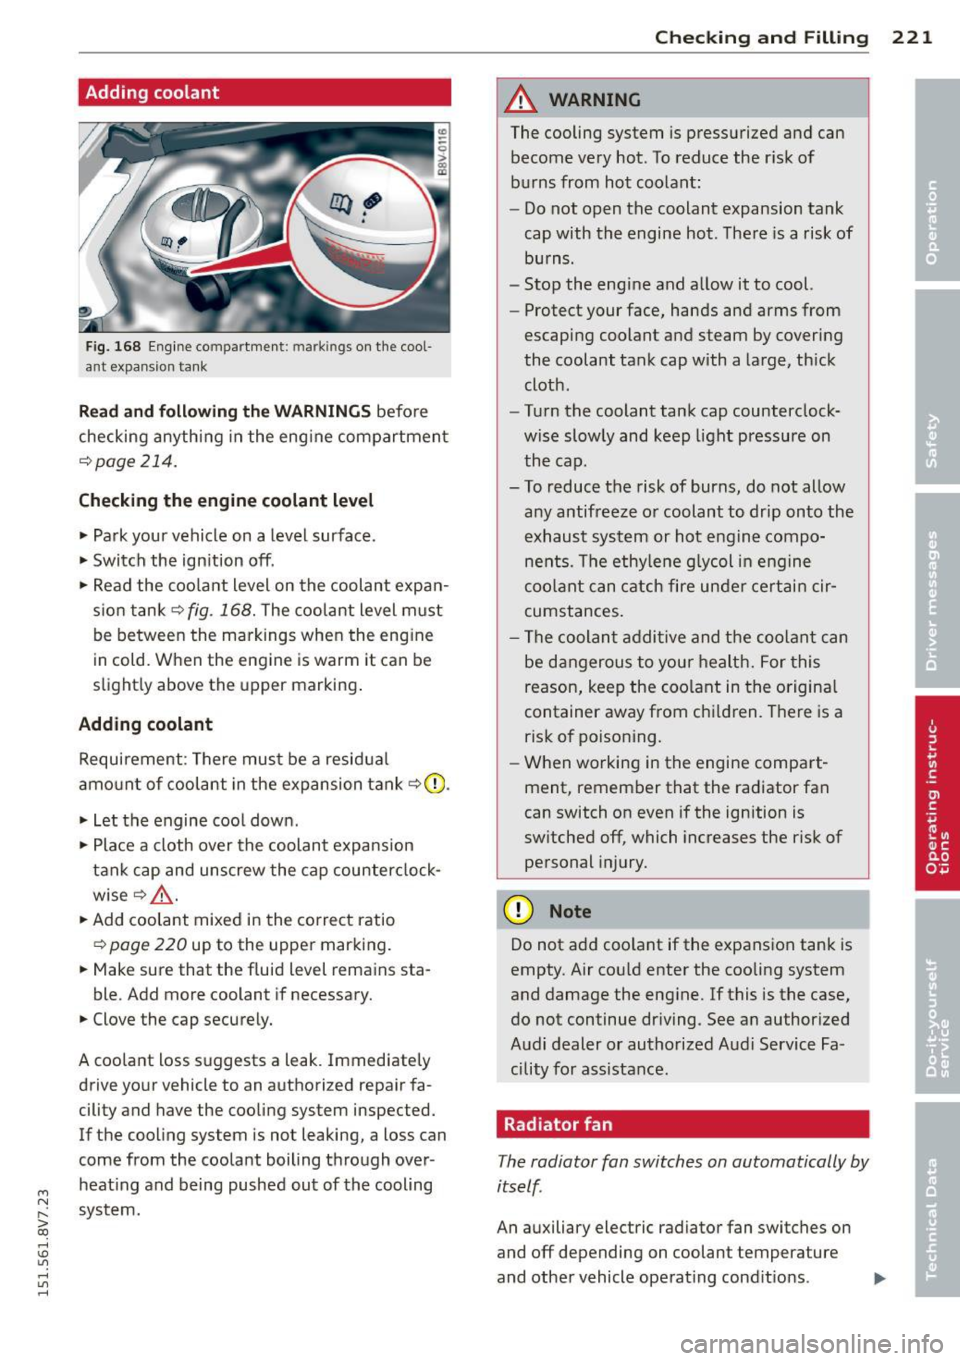
Fig. 168 Eng ine co mpa rtme nt: m ark in gs on the cool
ant expansio n tank
Read and following th e WARNING S before
checking anythi ng in the eng ine compartmen t
c::>page 214.
Checking th e engine coolant leve l
"'Park your vehicle on a level surface .
"' Switch the ign ition off.
"' Read the coo lant level on the coolant expan
s ion tank
c::> fig. 168. The coolant level must
be between the markings whe n the eng ine
in cold. When the eng ine is warm it can be
slight ly above the upper marking .
Adding coolant
Requirement: There must be a residua l
amo unt of coolant in the expansion tank
c::> (D .
"'Let the engine coo l down .
"' Place a cloth over the coolant expa nsion
tank cap and unscrew the cap counter clock
wise <=:>
A.
"'Add coolant mixed in the correct ratio
c::>page 220 up to the upper marking.
"' Make sure that the fluid level remains sta-
ble. Add more coolant if necessary.
"' Clove the cap securely.
A coolant loss suggests a leak. Immediately drive your vehicle to an authorized repair fa
cility and have the cooling system inspected.
If the cooling system is not leaking, a loss can
come from the coolant boiling through over
heat ing and being pushed out of the cooling
system.
Che cking and Fillin g 221
A WARNING
The cooling system is pressurized and can
become very hot. To reduce the r isk of
burns from hot coolant:
- Do not open the coolant expansion tank
cap with the engine hot . The re is a risk of
burns .
- Stop the engine and allow it to cool.
- Protect your face, hands and arms from
escaping coolant and steam by covering
the coolant tank cap with a large, th ick
cloth .
- Tu rn the coolant tank cap counterclock
wise slowly and keep light pressure on
the cap.
- To reduce the risk of burns, do not allow
any antifreeze o r coolant to drip onto the
exhaust system or hot engin e compo
nents . The ethy lene g lycol in eng ine
coo lant can catch fire under certai n cir
cumstances.
- The coolan t addi tive and the coolant can
be dangerous to your health. For this
reason, keep the coo lant in the origina l
container away from ch ildren. There is a
risk of poisoning.
- When working in the engine compart
ment, remember that the radiator fan
can switch on even if the ignition is
sw itched off, which increases the risk of
personal injury.
(D Note
Do not add coolant if the expans ion tank is
empty. Air could enter the cooling system
and damage the eng ine. If this is the case,
do not continue dr iving. See an author ized
Audi dealer or authorized Audi Service Fa
c ility for ass istance.
Radiator fan
The radiator fan switches on automatically by
itself.
An auxiliary electric radiator fan switches on
and off depending on coolant temperature
and other vehicle operat ing condit ions .
IJJ,
Page 224 of 302
222 Checking and Filling
After you switch the engine off, the auxiliary
fan can continue running for up to 10 minutes
- even with the ignition off. It can even switch
on again later by itself
c:> .&. , if
- the temperature of the engine coolant rises
due to the heat build-up from the engine in
the engine compartment, or
- the engine compartment heats up beca use
the vehicle is parked in intense sunlight.
A WARNING
- To reduce the risk of personal injury
nev
er touch the radiator fan.
- The auxiliary electr ic fan is temperature
contro lled and can switch on sudden ly
even when the engine is not running.
- The auxiliary radiator fan switches on au tomatically when the engine coolant
reaches a certain temperature and will
continue to run until the coolant temper
ature drops.
Brake fluid
Checking brake fluid level
N
N
;;;
" 00 co
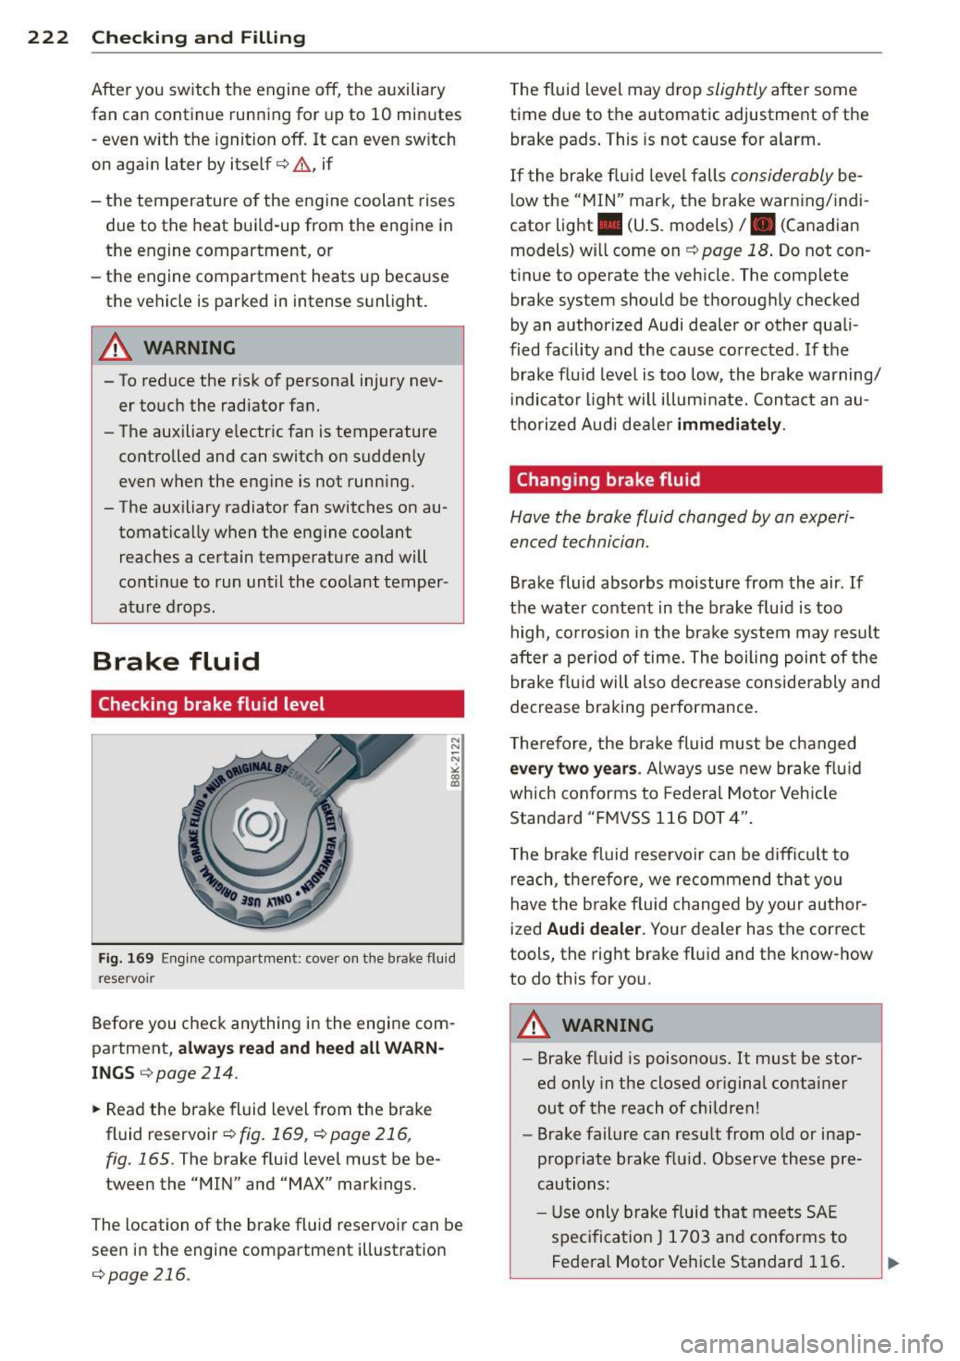
Fig . 169 Engine compartment : cove r on the brake flu id
r eservoir
Before you check anything in the engine com
partment,
always read and heed all WARN ·
INGS c:> page 214.
.. Read the brake fluid level from the brake
fluid reservoir
c:> fig.169, c:>poge216 ,
fig. 165.
The brake f luid level must be be
tween the "MIN" and "MAX" markings.
The location of the brake fluid reservoir can be
seen in the engine compartment illustration
c:> page 216 .
The fluid level may drop slightly after some
time due to the automatic adjustment of the
brake pads . This is not cause for a larm.
If the brake f luid level falls
considerably be
low the "MIN" mark, the brake warning/indi
cator light . (U.S. models)
I. (Canad ian
models) will come on
c:> page 18 . Do not con
tinue to operate the vehicle. The complete brake system should be thoroughly checked
by an authorized Audi dealer or other quali
fied facility and the cause corrected. If the
brake fluid level is too low, the brake warning/
indicator ligh t will illuminate. Contact an au
thorized Audi dea ler
immediately.
Changing brake fluid
Have the broke fluid changed by an experi
enced technician.
Brake fluid absorbs moisture from the air. If
the water content in the brake f luid is too
high, corrosion in the brake system may result
after a period of time. The boiling point of the
brake fluid will also decrease considerably and
decrease braking performance.
T he refo re, the brake fluid must be changed
every two years. Always use new brake fluid
wh ich conforms to Federal Motor Vehicle
Standard "FMVSS 116 DOT 4".
T he brake fluid reservoir can be difficult to
reach, therefore, we recommend that you
have the b rake fluid changed by your author
ized
Audi dealer. Your dealer has the correct
tools, the right brake fluid and the know-how
to do this for you .
A WARNING
---Brake flu id is poisonous. It must be stor
ed only in the closed or iginal container
out of the reach of children!
- Brake failure can resu lt from o ld or inap·
propriate brake flu id. Observe these pre·
cautions:
- Us e only brake fluid that meets SAE
specification
J 1703 and conforms to
Federa l Motor Vehicle Standard 116.
Page 225 of 302
M N
" > co ,...., \!) ..,.,
,...., ..,., ,....,
Always check with your authorized Audi
deale r to make s ure you are using the
correct brake f luid. The correct type of
b rake fluid is a lso indicated on the
b rake fluid reservoir .
- The brake f luid must be new. Heavy use
of the brakes can cause a vapor lock if
the brake fl uid is left in t he system too
long. This ca n ser ious ly aff ect th e effi
ciency of the bra kes a s well as yo ur
safety. This could resul t in an accid ent.
(D Note
Brake fl uid will damage the paint of your
ve hicle .
@ For the sake of the environment
Because of the problem of proper d isposa l
of brake flu id as we ll as the special tools
req uired and the necessa ry expert ise, we
recom mend tha t you have t he b rake fluid
changed by your aut hor ized Audi de aler.
Battery
General information
The batte ry in you r Audi does not need any
maintenance unde r
normal operating condi
tions . Aud i recommends having the elect ro
l y te level check by a n author ized Audi dealer
or author ized A udi Se rv ice F acili ty when there
a re
high outside tempe ra tur es or when dr iv ing
all day. The e lec trolyte level sho uld also be
checked each time the battery is charged
¢ page 225.
Have the bat tery c hecked w hen you br ing yo ur
ve hicl e in for an inspec tion. I t is a good idea
to re place the battery if it is mo re than 5 years
old .
D uring certa in types of a irbag deploymen ts,
t he bat tery is disconnected from the vehi cle
e lectrical system fo r safety reasons ~ &.
in
Repair, care and disposal of the airbags on
page 162.
Checking and Fillin g 223
Disconnecting the battery terminals
Some vehi cle fu nctions (such as power w in
dows) a re not ava ilable when the batte ry is
disco nnected . These fu nctions must be p ro
grammed afte r the battery is reconnected . To
avo id hav ing to do this, only disconnect the
battery from the vehicle electrical system
whe n that is necessary to perform repairs .
To reprogram the functions, proceed as fo l
lows:
Function Reprogramming
Power window one -¢ page 40, Correcting
touch up/down power window ma/-
function functions
Remo te control key If the vehicle does no t
or r
eact to the key, i t
convenience key must be synchronized
¢ page33
Dig ita l cl ock ¢pag e 10
ESC indicator light The indicator light
goes out after driv ing
a few meters
Not running the vehicle for long period s
of time
If you do not drive your vehicle fo r several
days or weeks, elect rical componen ts are
gradua lly reduc ed o r switched off. This re
duces e nergy consumption and maintai ns the
vehicle 's ability to star t ove r a long per iod of
t ime ~
page 193. Some co nvenience func
tions, s uch as in terior lighting or power sea ts*
may not work . These convenience functions
will be ava ilab le again once you switc h the ig
nit ion on and sta rt the engine.
Winter operation
D uring the winte r mon ths, i t is common for
the battery capacity to dec rease as the tem
peratures become lower . This is because more
power is needed to start the vehicle and com
ponents such as the head lights and the rear
window defogger are used more frequently . .,..
•
•
•
Page 227 of 302
....,
N
r--. > co
rl I.O
"' rl
"' rl
-Do not interchange the positive and neg
ative cables .
- When working on the battery , be sure
not to short-circuit the terminals with
tools or other metal objects. This would cause the battery to heat up very quickly,
which could lead to damage or explosion
and personal injury.
- When a battery is charged, it produces
hydrogen gas which is explosive and
could cause personal injury .
- Always keep the battery well out of the reach of children .
- Before work is done on the electrical sys
tem, disconnect the negative ground ca
ble .
- Before performing any work on the elec
trical system , switch off the engine and
ignition as well as any electrical equip
ment. The negative cable on the battery
must be disconnected. If you are just go
ing to replace a light bulb, then it is
enough to switch off the lights.
- Before disconnecting the battery, switch
off the anti-theft alarm system! Other
wise you will set off the alarm.
- When disconnecting the battery, first
disconnect the negative cable and then
the positive cable.
- Before reconnecting the battery, make
sure all electrical consumers are switch
ed off. Reconnect the positive cable first
and then the negative cable. Never inter
change the cables - this could start a fire!
- Never charge a fro zen or a thawed-out
battery. It could explode! If a battery has
fro zen, then it must be replaced. A dead
battery can freeze over at 32°F (O°C) .
- Make sure the vent hose is always attach
ed to the opening on the side of the bat
tery .
- Never use batteries which are damaged.
There is the danger of an explosion ! Al
ways replace a damaged battery .
A WARNING
California Proposition 65 Warning:
Checking and Filling 225
-Battery posts, terminals and related ac
cessories contain lead and lead com
pounds, chemicals known to the State of
California to cause cancer and reproduc
tive problems . Wash hands after han
dling.
(D Note
- Do not disconnect the vehicle battery
when the ignition is on or when the en gine is running, otherwise, you will dam
age electronic components in the electri
cal system.
- If your vehicle is going to stand for a
long period of time without being driven ,
protect the battery from "freezing", oth
erwise it will be damaged and will then
have to be replaced.
Battery charging
Starting the engine requires a well charged
battery.
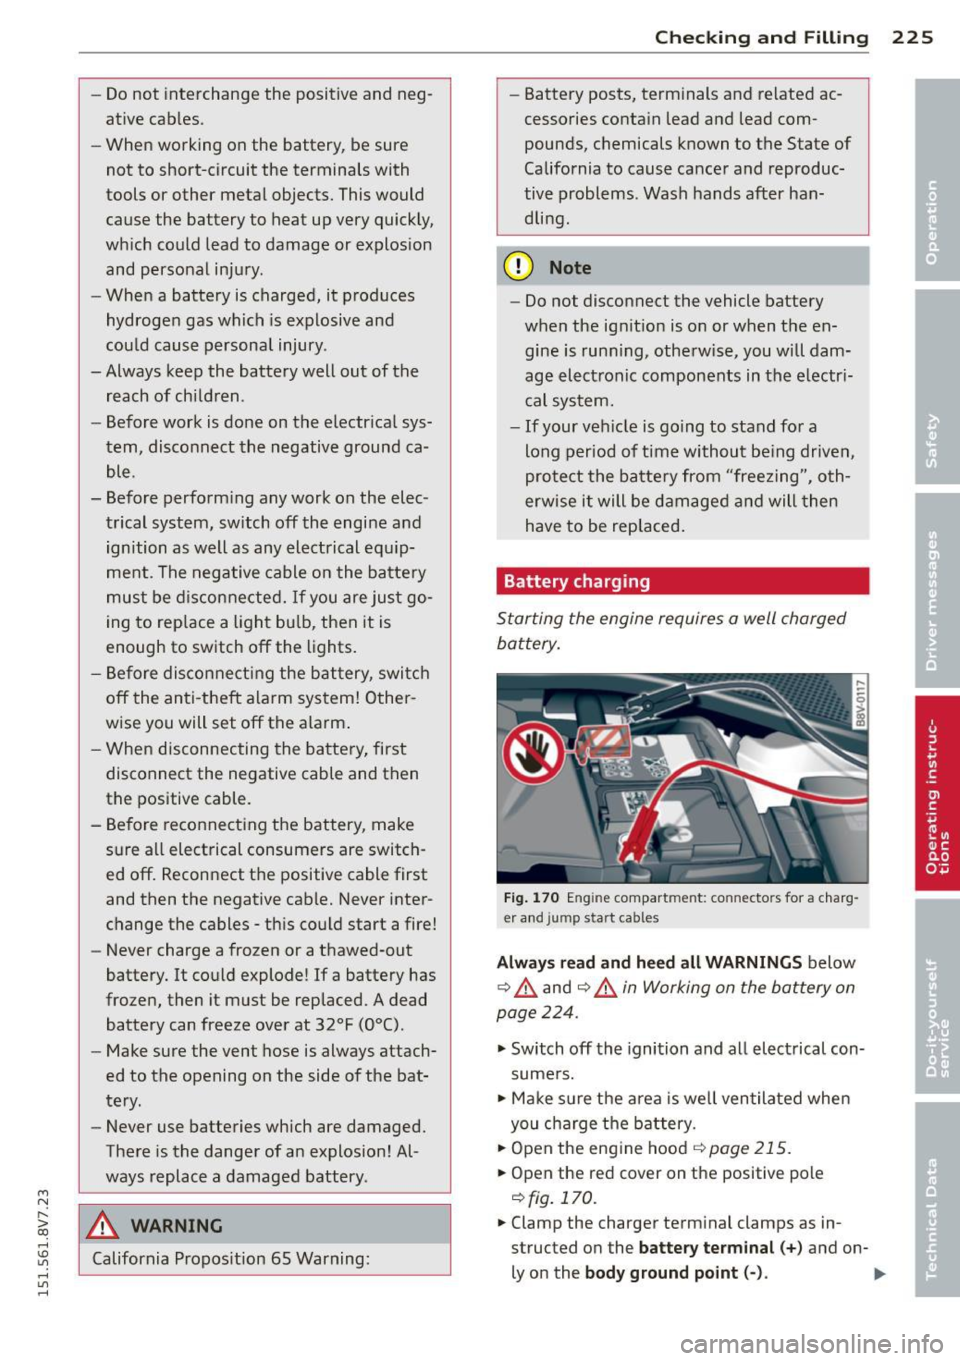
Fig. 170 E ngin e compar tmen t: co nn ecto rs fo r a charg
e r and jump st art ca bles
Always read and heed all WARNINGS below
c:::> ,& and c:::> ,& in Working on the battery on
page
224 .
.,. Switch off the ignition and all electrical con
sumers .
.,. Make sure the area is well ventilated when
you charge the battery.
.,. Open the engine hood
c:::> page 215 .
.,. Open the red cov er on the pos itive pole
c:::> fig. 170.
.,. Clamp the cha rger termin al clamps as in
structed on the
battery terminal(+) and on-
l y on the
body ground point(-) . .,._
Page 275 of 302
M N
" > co ,...., \!) ..,.,
,...., ..,., ,....,
Emergency situations
General
This chapter is intended for trained emer
gency crews and working personnel who have the necessary tools and equipment to
perform these operations.
Starting by pushing or
towing
(D Note
Vehicles with an automatic transmission
cannot be started by pushing or towing.
Starting with jumper
cables
If necessary, the engine can be started by
connecting it to the battery of another vehi
cle.
If the engine should fail to start because of a
discharged or weak battery, the battery can be
connected to the battery of
another vehicle,
using a
pair of jumper cables to start the en
gine.
Jumper cables
Use only jumper cables of sufficiently large
cross section to carry the starter current safe
ly. Refer to the manufacturer's specifications.
Use only jumper cables with
insulated termi
nal clamps which are distinctly marked :
plus(+) cable in most cases colored red
minus(-) cable
in most cases colored black.
A WARNING
Batteries contain electricity, acid, and gas.
Any of these can cause very serious or fatal
injury. Follow the instructions below for
safe handling of your vehicle's battery.
- Always shield your eyes and avoid lean
ing over the battery whenever possible.
- A discharged battery can freeze at tem
peratures just below 32 °F (0 °C). Before
Emergency situations 273
connecting a jumper cable, you must
thaw the frozen battery completely, oth
erwise it could explode.
- Do not allow battery acid to contact eyes
or skin. Flush any contacted area with
water immediately .
- Improper use of a booster battery to start a vehicle may cause an explosion.
- Vehicle batteries generate explosive gas
es. Keep sparks, flame and lighted ciga
rettes away from batteries.
- Do not try to jump start any vehicle with a low acid level in the battery.
- The voltage of the booster battery must
also have a 12-volt rating. The capacity
(Ah) of the booster battery should not be
lower than that of the discharged bat
tery . Use of batteries of different voltage
or substantially different "Ah" rating
may cause an explosion and personal in
JU ry.
- Never charge a frozen battery. Gas trap
ped in the ice may cause an explosion.
-Never charge or use a battery that has
been frozen. The battery case may have
be weakened.
- Use of batteries of different voltage or
substantially different capacity (Ah) rat
ing may cause an explosion and injury.
The capacity (Ah) of the booster battery
should not be lower than that of the dis
charged battery.
- Before you check anything in the engine
compartment, always read and heed all
WARNINGS ¢
page 214.
(D Note
-Applying a higher voltage booster bat
tery will cause expensive damage to sen
sitive electronic components, such as
control units, relays, radio, etc.
- There must be no electrical contact be
tween the vehicles as otherwise current
could already start to flow as soon as the
positive(+) terminals are connected. ..,. •
•
•
Page 290 of 302
288 Index
Centra l indicator light .... .. .. .. .... . . 1 3
Central locking ............. ... .. .... 3 1
Ce ntr al loc king switch ..... .. .. .... .. 35
Conven ience key . . . . . . . . . . . . . . . . . . . . 34
Emergency locking ........ .. .. .. .. .. 37
Folding the exterior mirrors .. .... .. .. 36
Luggage compartment lid .. .. .. .... . . 38
p . d ower win ows ........... ... .... . . 39
Remote control key ....... .. .. .. .. .. 33
Safety central locking . . . . . . . . . . . . . . . 3 7
Setting .. ................. ...... ..
36
Certification ............. ... .. .... . 285
Changing a wheel ................... 263
Changing engine oil ........ .. .. .. .. . 219
Checking
Tire pressure ..... ......... ... .... .
240
Child restra ints
Danger of us ing c hild restra ints in the
front seat . . . . . . . . . . . . . . . . . . . . . . . .
148
Where can I get addit ional information
about child restraints and their use? ..
187
Ch ild restra int system anchors ... .. ... 183
Child safety .... ............. .. .... . 169
Convertible lo cking retractor .. .. .. ... 180
Important safety instructions for using
ch ild safety seats .............. ....
173
Important things to know when driving
with ch ildren .....................
169
Tether anchors .................... 185
Tether straps . ........... .... .... . 185
Child safety lock
Power wi ndows . . . . . . . . . . . . . . . . . . . .
38
Ch ild safety seats ............ .. .. .. . 175
Booster seats ............ .. .. .... . 178
Convertible child seats .......... .. . 176
Convertible locking retractor . . . . . . . . . 180
H ow do I properly install a child safety
seat in my vehicle? ........ .. .. .. .. .
173
Infant seats ...................... 175
Install ing .. .. ... ..... ..... .. .. .. . 180
Installing a child restraint using the
L ATCH system .... ..... ... .. .. .... .
185
LATCH system .. . ...... ... .. .. .... . 185
Lower anchorages ............ .... . 184
Mount ing and releasing the anchorage
hook .. ... ................... ... .
185
Safety instructions . . . . . . . . . . . . . . . . . 173
Unused safety belts on the rea r seat .. 17 5 Cleaning
Cleaning/removing ice from windows
.. .
Cleaning Alcantara . ... .......... .. . .
204
206
207
Cleaning artificial leather ......... .... 20 7
Cleaning carbon parts . . . . . . . . . . 206, 207
Cleaning contro ls .. ... .. ..... ... .. .. 207
Cleaning decorative parts/trim ........ 206
Cleaning displays .. ............. .... 207
Cleaning exhaust tail pipes .... ... .. .. 205
Cleaning plastic pa rts ............... . 206
Cleaning rims ... .. ... .. ..... ... .. .. 205
Cleaning seat covers ............. .. .. 20 7
Cleaning textiles . .. .......... ....... 207
Cleaning the tail lights . .. ..... ... .. .. 205
Cleaning th e wind deflector ........... 206
Climate control system
Key recogni tion . . . . . . . . . . . . . . . . . . . .
70
Climate control system (automatic)
Adjusting air vents . . . . . . . . . . . . . .
73 , 74
Air distrib ution, air vents ..... ... .. .. . 73
Audi drive select .. ... ...... .... .. .. 107
AUTO (climate control system) ....... . 72
B lower ....... .................... 73
Controls . . . . . . . . . . . . . . . . . . . . . . . . . . 72
Defrost ing the windsh ie ld .......... .. 73
Rea r window defogger .......... .... . 74
Recirc ulat ion mode ............ .... . 73
Setting the temperatu re . . . . . . . . . . . . . 73
synchronizing .... .. ... ..... ... .. .. . 73
Climate control system (manual)
Adjusting air vents ... .......... .
71, 7 4
Adjus ting the temperature ........... 71
Air distrib ution, air vents ...... .... .. . 71
B lowe r ... .... .. .. ... ..... ... .. .. . 71
Defrosting windows ..... .... ... .. .. . 71
Operation . . . . . . . . . . . . . . . . . . . . . . . . . 71
Rear window defogger .......... .. .. . 74
Recirculation mode ............ .... . 72
Clock . ... .. .... .. .. ... ..... ... .. .. . 10
Clos ing
Hood . .... .... .. ............. ....
216
Windows . .. .. .. .... ......... .... . 38
Closing/opening
by remote control . . . . . . . . . . . . . . . . . . 33
with the central locking switch ..... .. .
35
with the conven ience key . . . . . . . . . . . . . 34
with the door lock ........... .... .. . 35