AUDI A4 1995 B5 / 1.G 01A Transmission Assembly Owner's Manual
Manufacturer: AUDI, Model Year: 1995,
Model line: A4,
Model: AUDI A4 1995 B5 / 1.G
Pages: 27, PDF Size: 0.63 MB
AUDI A4 1995 B5 / 1.G 01A Transmission Assembly Owner's Manual
A4 1995 B5 / 1.G
AUDI
AUDI
https://www.carmanualsonline.info/img/6/1260/w960_1260-0.png
AUDI A4 1995 B5 / 1.G 01A Transmission Assembly Owner's Manual
Trending: transmission oil, light, ECU, service, lock, oil, tow
Page 21 of 27
34-61
Installing
Note:
If the input shaft ball bearing, the input shaft or
the transmission housing are replaced, it is
necessary to re-determine the thickness of the
circlips for the input shaft first, input shaft,
adjusting Page 35
-17
.
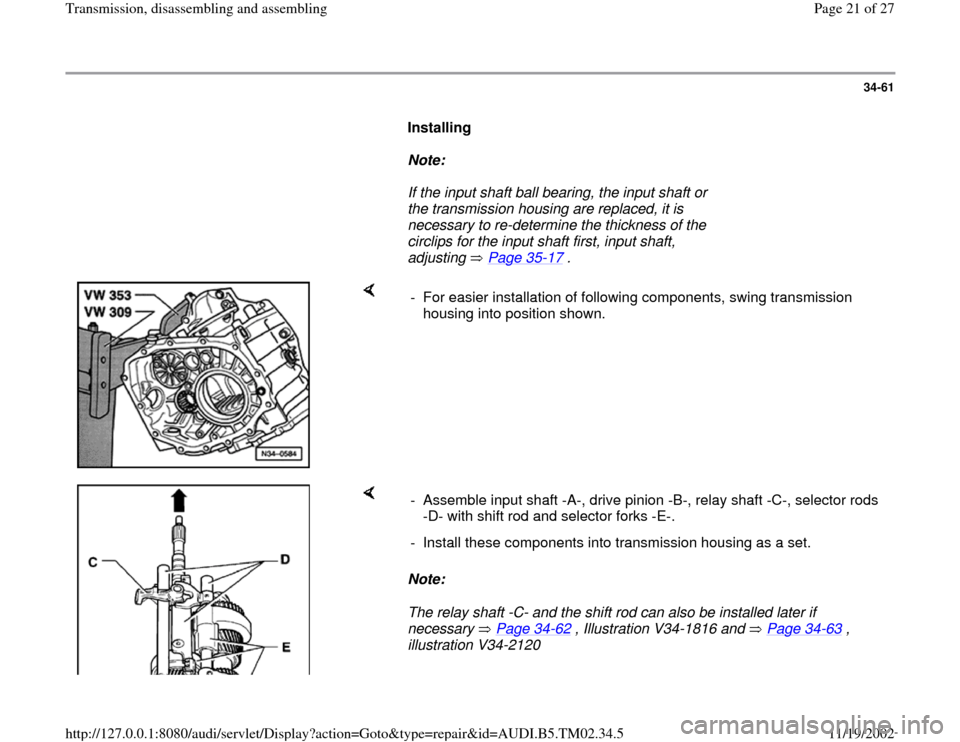
- For easier installation of following components, swing transmission
housing into position shown.
Note:
The relay shaft -C- and the shift rod can also be installed later if
necessary Page 34
-62
, Illustration V34-1816 and Page 34
-63
,
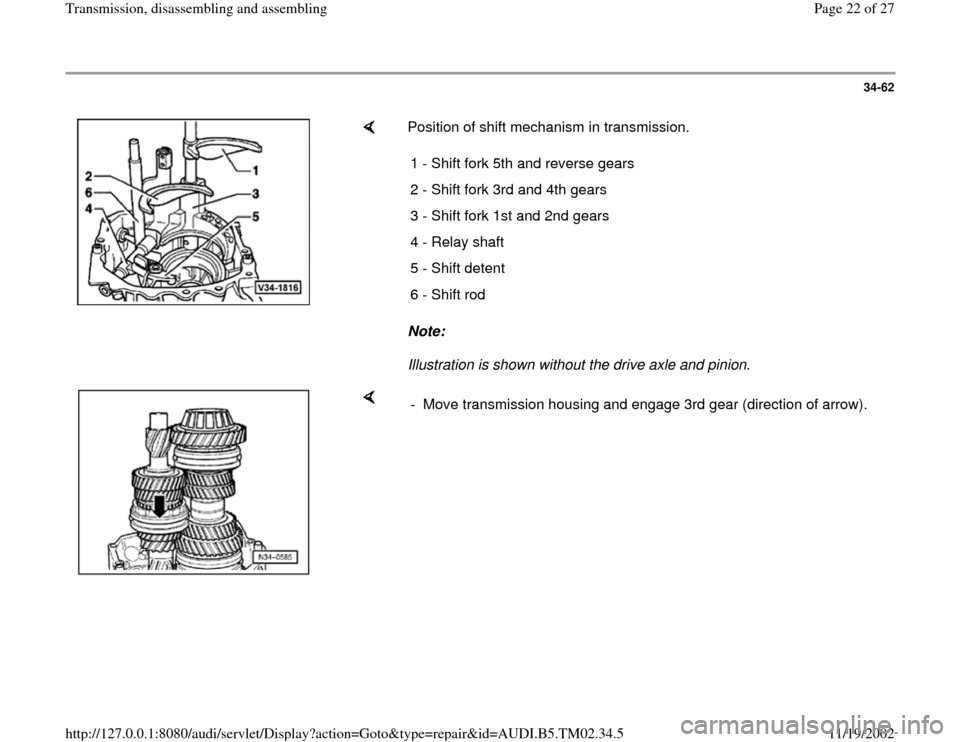
illustration V34-2120 - Assemble input shaft -A-, drive pinion -B-, relay shaft -C-, selector rods
-D- with shift rod and selector forks -E-.
- Install these components into transmission housing as a set.
Pa
ge 21 of 27 Transmission, disassemblin
g and assemblin
g
11/19/2002 htt
p://127.0.0.1:8080/audi/servlet/Dis
play?action=Goto&t
yp
e=re
pair&id=AUDI.B5.TM02.34.5
Page 22 of 27
34-62
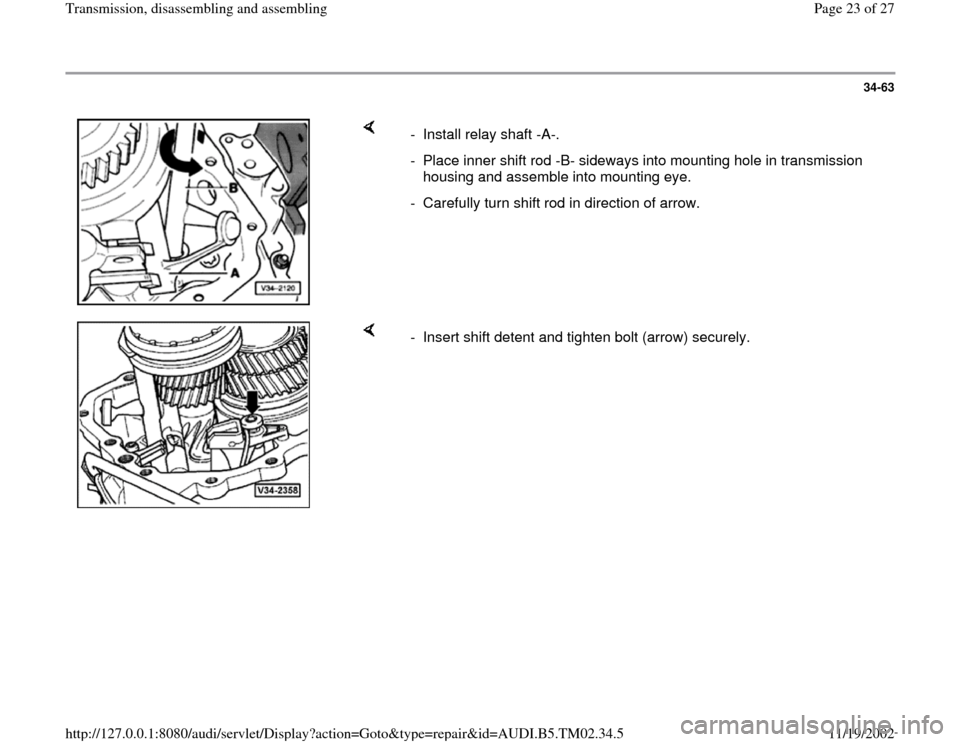
Position of shift mechanism in transmission.
Note:
Illustration is shown without the drive axle and pinion. 1 - Shift fork 5th and reverse gears
2 - Shift fork 3rd and 4th gears
3 - Shift fork 1st and 2nd gears
4 - Relay shaft
5 - Shift detent
6 - Shift rod
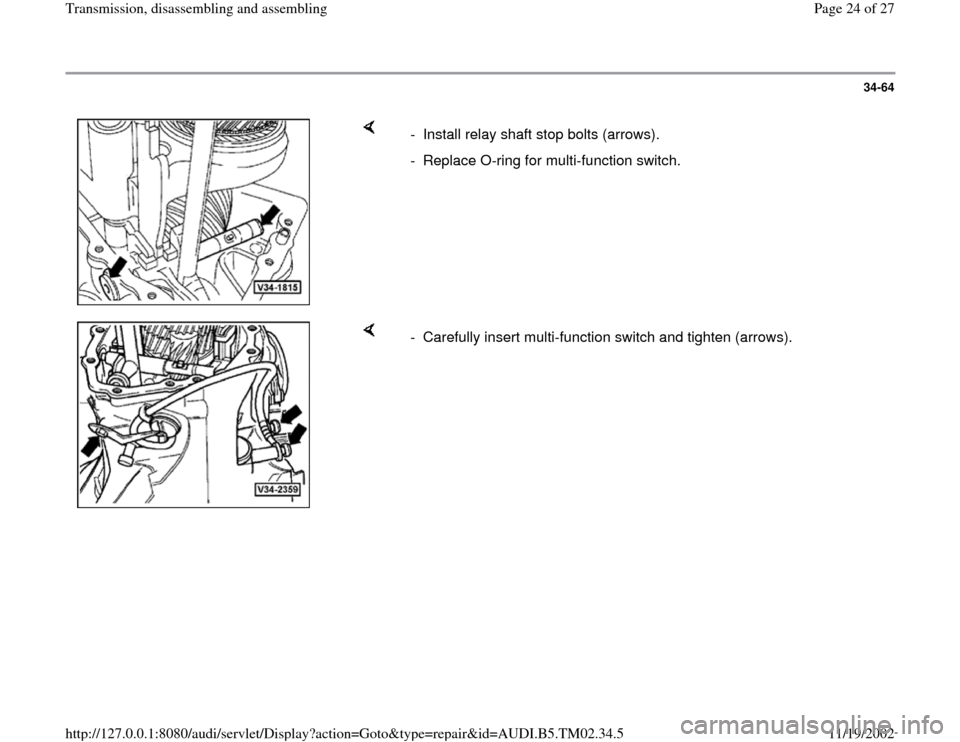
- Move transmission housing and engage 3rd gear (direction of arrow).
Pa
ge 22 of 27 Transmission, disassemblin
g and assemblin
g
11/19/2002 htt
p://127.0.0.1:8080/audi/servlet/Dis
play?action=Goto&t
yp
e=re
pair&id=AUDI.B5.TM02.34.5
Page 23 of 27
34-63
- Install relay shaft -A-.
- Place inner shift rod -B- sideways into mounting hole in transmission
housing and assemble into mounting eye.
- Carefully turn shift rod in direction of arrow.
- Insert shift detent and tighten bolt (arrow) securely.
Pa
ge 23 of 27 Transmission, disassemblin
g and assemblin
g
11/19/2002 htt
p://127.0.0.1:8080/audi/servlet/Dis
play?action=Goto&t
yp
e=re
pair&id=AUDI.B5.TM02.34.5
Page 24 of 27
34-64
- Install relay shaft stop bolts (arrows).
- Replace O-ring for multi-function switch.
- Carefully insert multi-function switch and tighten (arrows).
Pa
ge 24 of 27 Transmission, disassemblin
g and assemblin
g
11/19/2002 htt
p://127.0.0.1:8080/audi/servlet/Dis
play?action=Goto&t
yp
e=re
pair&id=AUDI.B5.TM02.34.5
Page 25 of 27
34-65
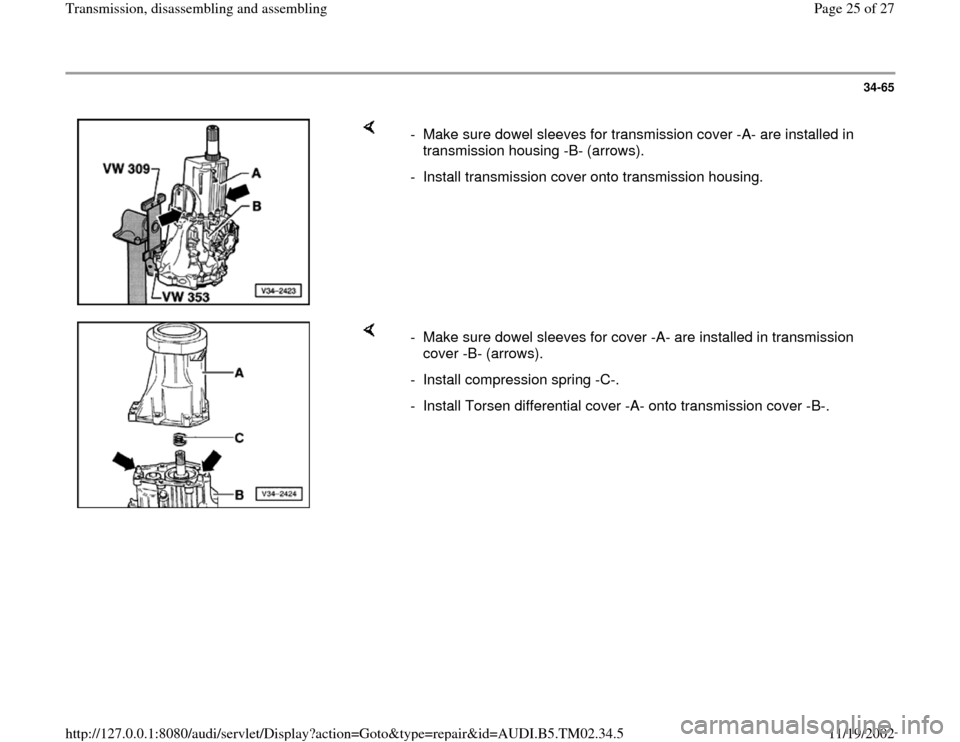
- Make sure dowel sleeves for transmission cover -A- are installed in
transmission housing -B- (arrows).
- Install transmission cover onto transmission housing.
- Make sure dowel sleeves for cover -A- are installed in transmission
cover -B- (arrows).
- Install compression spring -C-.
- Install Torsen differential cover -A- onto transmission cover -B-.
Pa
ge 25 of 27 Transmission, disassemblin
g and assemblin
g
11/19/2002 htt
p://127.0.0.1:8080/audi/servlet/Dis
play?action=Goto&t
yp
e=re
pair&id=AUDI.B5.TM02.34.5
Page 26 of 27
34-66
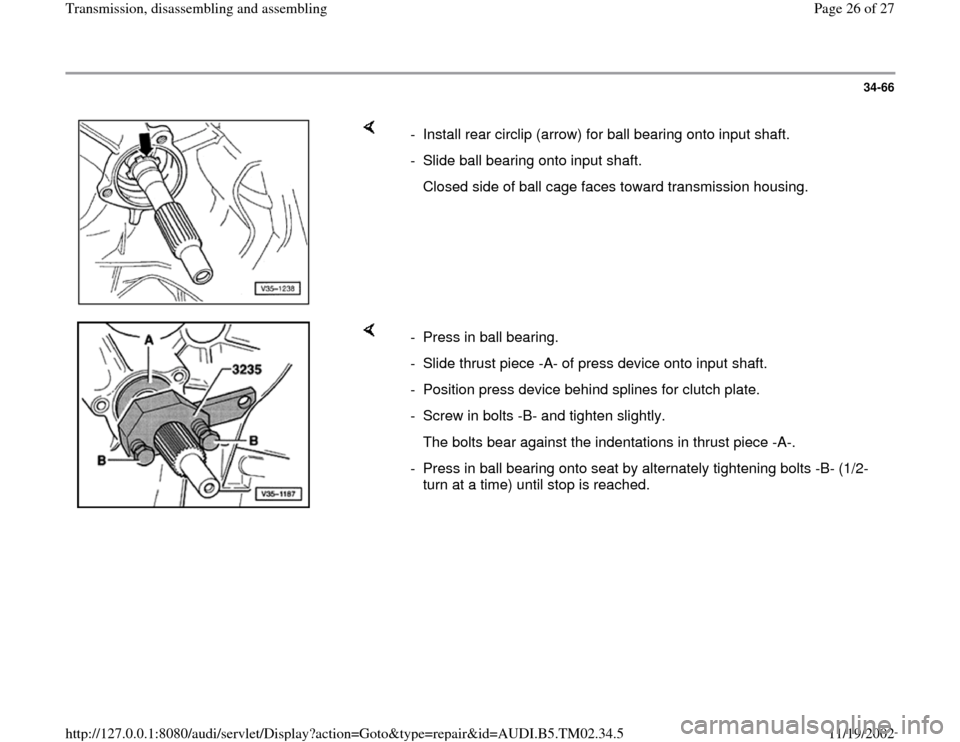
- Install rear circlip (arrow) for ball bearing onto input shaft.
- Slide ball bearing onto input shaft.
Closed side of ball cage faces toward transmission housing.
- Press in ball bearing.
- Slide thrust piece -A- of press device onto input shaft.
- Position press device behind splines for clutch plate.
- Screw in bolts -B- and tighten slightly.
The bolts bear against the indentations in thrust piece -A-.
- Press in ball bearing onto seat by alternately tightening bolts -B- (1/2-
turn at a time) until stop is reached.
Pa
ge 26 of 27 Transmission, disassemblin
g and assemblin
g
11/19/2002 htt
p://127.0.0.1:8080/audi/servlet/Dis
play?action=Goto&t
yp
e=re
pair&id=AUDI.B5.TM02.34.5
Page 27 of 27
34-67
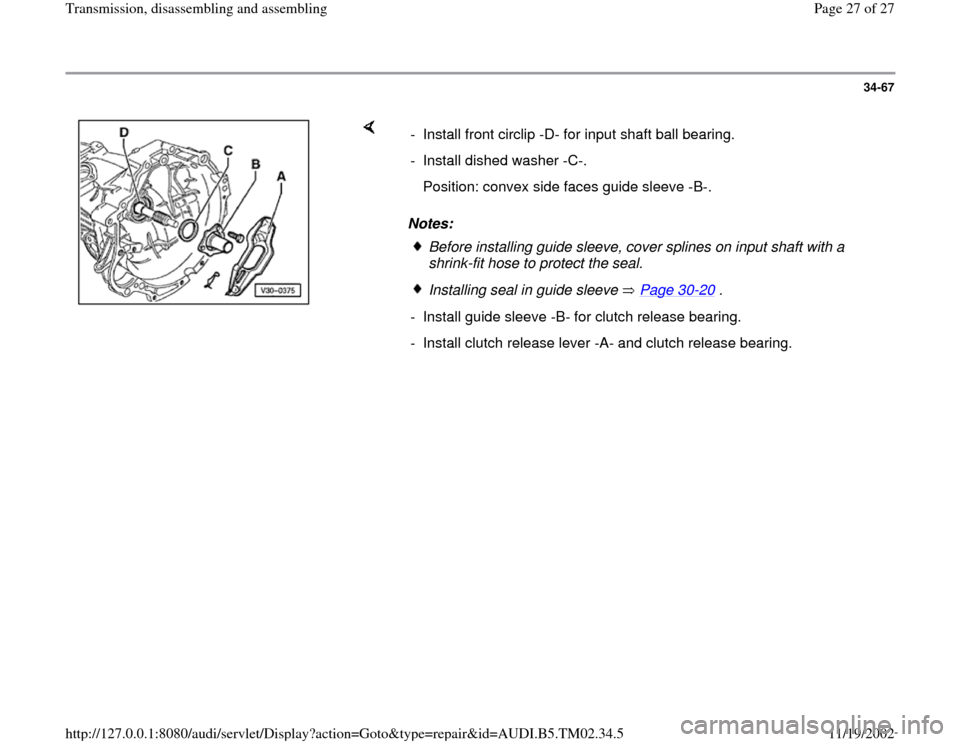
Notes: - Install front circlip -D- for input shaft ball bearing.
- Install dished washer -C-.
Position: convex side faces guide sleeve -B-.
Before installing guide sleeve, cover splines on input shaft with a
shrink-fit hose to protect the seal. Installing seal in guide sleeve Page 30
-20
.
- Install guide sleeve -B- for clutch release bearing.
- Install clutch release lever -A- and clutch release bearing.
Pa
ge 27 of 27 Transmission, disassemblin
g and assemblin
g
11/19/2002 htt
p://127.0.0.1:8080/audi/servlet/Dis
play?action=Goto&t
yp
e=re
pair&id=AUDI.B5.TM02.34.5
Trending: oil, lock, light, differential, transmission oil, sensor, relay
