AUDI A4 1995 B5 / 1.G 01W Transmission Disassemble And Assemble User Guide
Manufacturer: AUDI, Model Year: 1995,
Model line: A4,
Model: AUDI A4 1995 B5 / 1.G
Pages: 26, PDF Size: 0.61 MB
AUDI A4 1995 B5 / 1.G 01W Transmission Disassemble And Assemble User Guide
A4 1995 B5 / 1.G
AUDI
AUDI
https://www.carmanualsonline.info/img/6/1267/w960_1267-0.png
AUDI A4 1995 B5 / 1.G 01W Transmission Disassemble And Assemble User Guide
Trending: clutch, differential, oil, tow, ECU, sensor, relay
Page 11 of 26
34-47
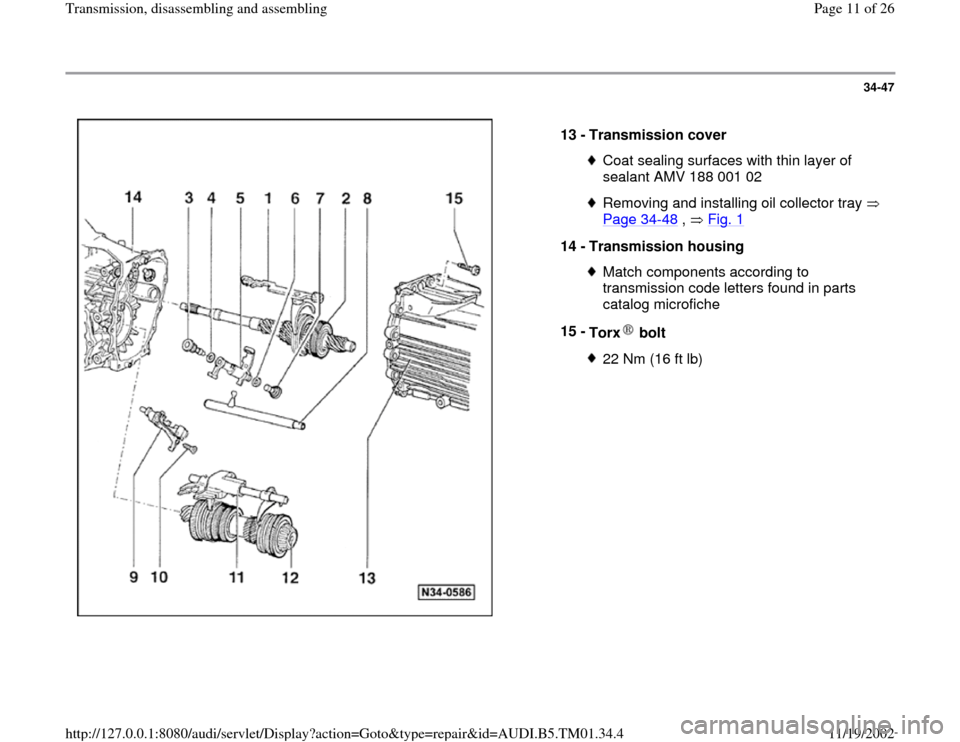
13 -
Transmission cover
Coat sealing surfaces with thin layer of
sealant AMV 188 001 02 Removing and installing oil collector tray
Page 34
-48
, Fig. 1
14 -
Transmission housing
Match components according to
transmission code letters found in parts
catalog microfiche
15 -
Torx bolt 22 Nm (16 ft lb)
Pa
ge 11 of 26 Transmission, disassemblin
g and assemblin
g
11/19/2002 htt
p://127.0.0.1:8080/audi/servlet/Dis
play?action=Goto&t
yp
e=re
pair&id=AUDI.B5.TM01.34.4
Page 12 of 26
34-48
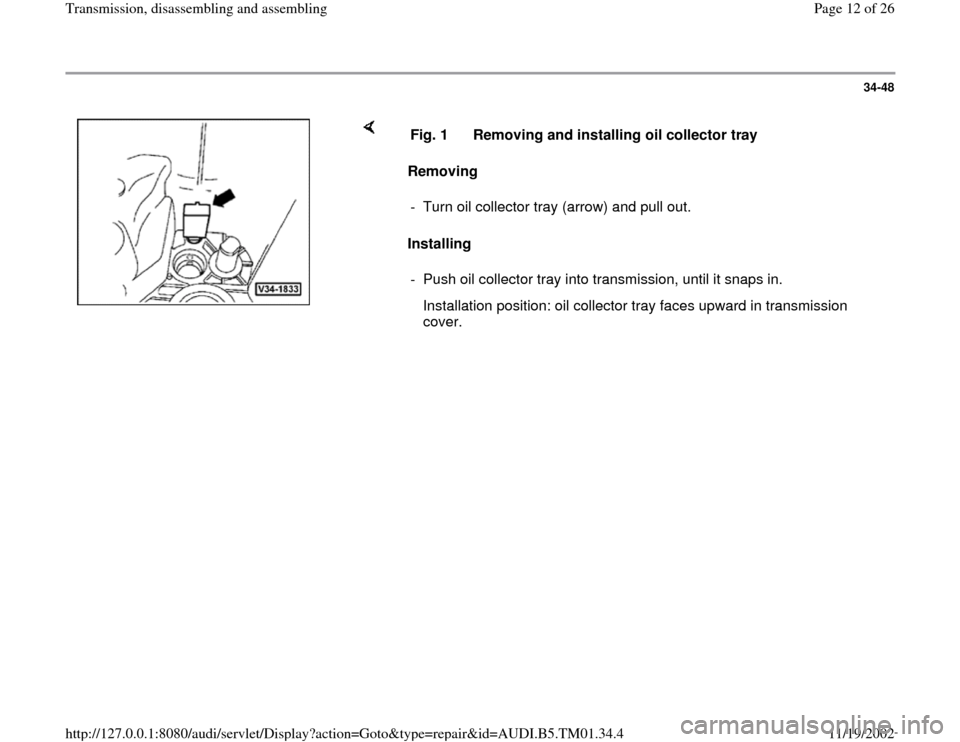
Removing
Installing Fig. 1 Removing and installing oil collector tray
- Turn oil collector tray (arrow) and pull out.
- Push oil collector tray into transmission, until it snaps in.
Installation position: oil collector tray faces upward in transmission
cover.
Pa
ge 12 of 26 Transmission, disassemblin
g and assemblin
g
11/19/2002 htt
p://127.0.0.1:8080/audi/servlet/Dis
play?action=Goto&t
yp
e=re
pair&id=AUDI.B5.TM01.34.4
Page 13 of 26
34-49
Input shaft ball bearing, multi-function
switch, input shaft, pinion shaft, shift
rods and transmission cover, removing
and installing
Notes:
To remove the above-mentioned components, it
is not necessary to remove the differential.
Removal is only necessary when adjustments
have to be performed Page 39
-33
, list of
adjustments
Special tools and equipment
VW309 holding plate
VW353 transmission support
3235 press device
VAG1306 drip tray
VAG1582 taper roller bearing puller
VAG1582/2 gripping piece
Pa
ge 13 of 26 Transmission, disassemblin
g and assemblin
g
11/19/2002 htt
p://127.0.0.1:8080/audi/servlet/Dis
play?action=Goto&t
yp
e=re
pair&id=AUDI.B5.TM01.34.4
Page 14 of 26
AMV 188 001 02 sealant
Pa
ge 14 of 26 Transmission, disassemblin
g and assemblin
g
11/19/2002 htt
p://127.0.0.1:8080/audi/servlet/Dis
play?action=Goto&t
yp
e=re
pair&id=AUDI.B5.TM01.34.4
Page 15 of 26
34-50
Removing
- Place VAG1306 drip tray under transmission.
- Drain transmission oil.
- Secure transmission to assembly stand Page
34
-29
.
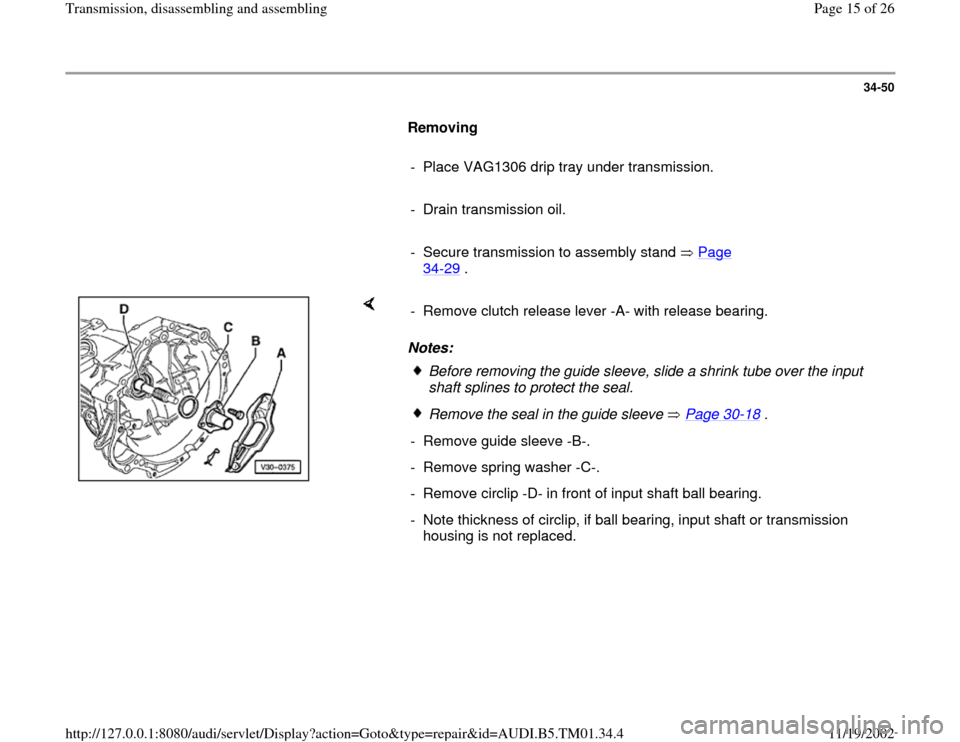
Notes: - Remove clutch release lever -A- with release bearing.
Before removing the guide sleeve, slide a shrink tube over the input
shaft splines to protect the seal. Remove the seal in the guide sleeve Page 30
-18
.
- Remove guide sleeve -B-.
- Remove spring washer -C-.
- Remove circlip -D- in front of input shaft ball bearing.
- Note thickness of circlip, if ball bearing, input shaft or transmission
housing is not replaced.
Pa
ge 15 of 26 Transmission, disassemblin
g and assemblin
g
11/19/2002 htt
p://127.0.0.1:8080/audi/servlet/Dis
play?action=Goto&t
yp
e=re
pair&id=AUDI.B5.TM01.34.4
Page 16 of 26
34-51
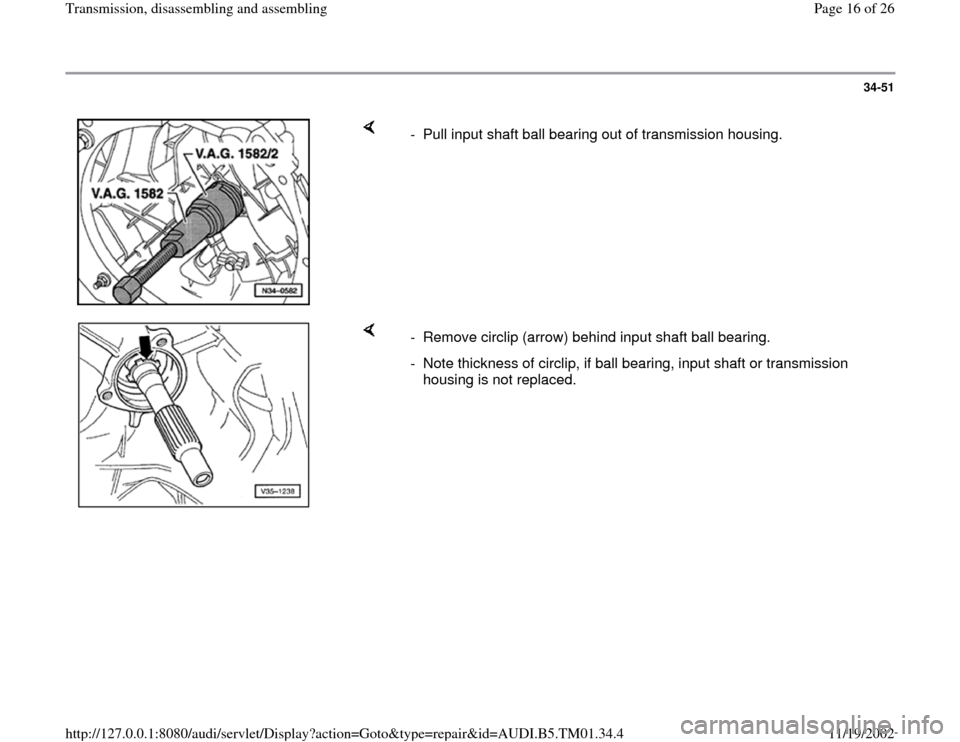
- Pull input shaft ball bearing out of transmission housing.
- Remove circlip (arrow) behind input shaft ball bearing.
- Note thickness of circlip, if ball bearing, input shaft or transmission
housing is not replaced.
Pa
ge 16 of 26 Transmission, disassemblin
g and assemblin
g
11/19/2002 htt
p://127.0.0.1:8080/audi/servlet/Dis
play?action=Goto&t
yp
e=re
pair&id=AUDI.B5.TM01.34.4
Page 17 of 26
34-52
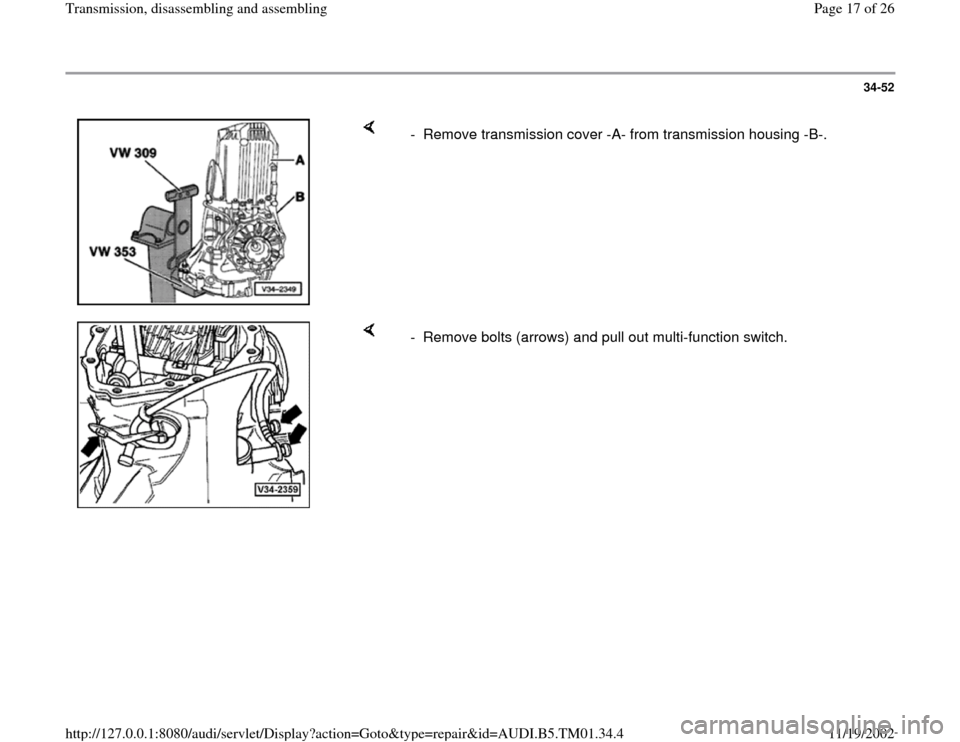
- Remove transmission cover -A- from transmission housing -B-.
- Remove bolts (arrows) and pull out multi-function switch.
Pa
ge 17 of 26 Transmission, disassemblin
g and assemblin
g
11/19/2002 htt
p://127.0.0.1:8080/audi/servlet/Dis
play?action=Goto&t
yp
e=re
pair&id=AUDI.B5.TM01.34.4
Page 18 of 26
34-53
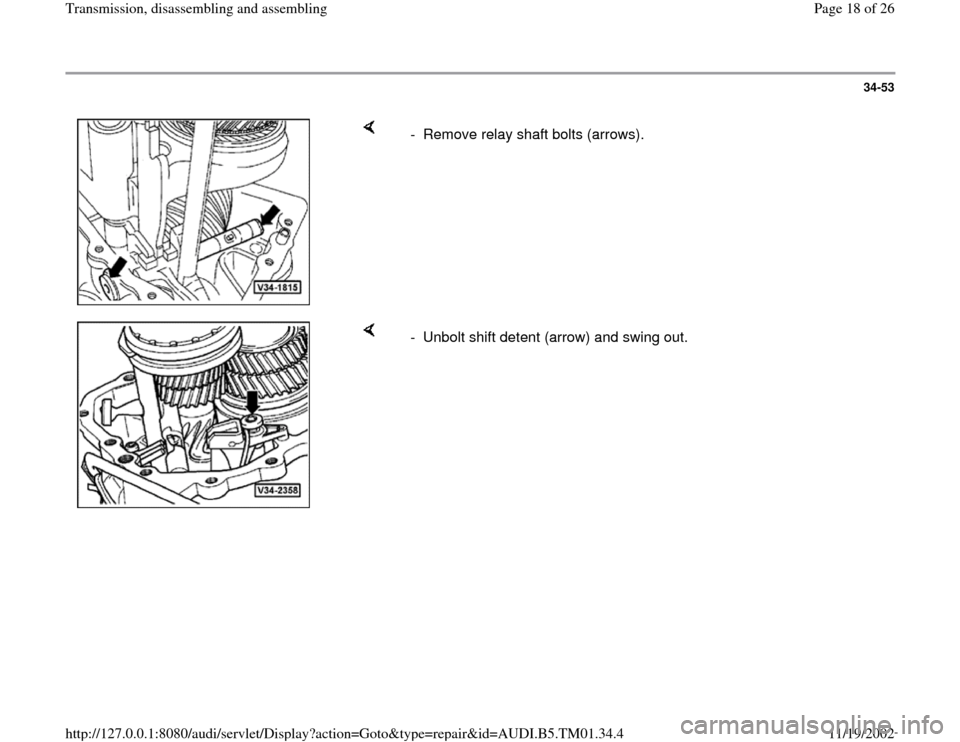
- Remove relay shaft bolts (arrows).
- Unbolt shift detent (arrow) and swing out.
Pa
ge 18 of 26 Transmission, disassemblin
g and assemblin
g
11/19/2002 htt
p://127.0.0.1:8080/audi/servlet/Dis
play?action=Goto&t
yp
e=re
pair&id=AUDI.B5.TM01.34.4
Page 19 of 26
34-54
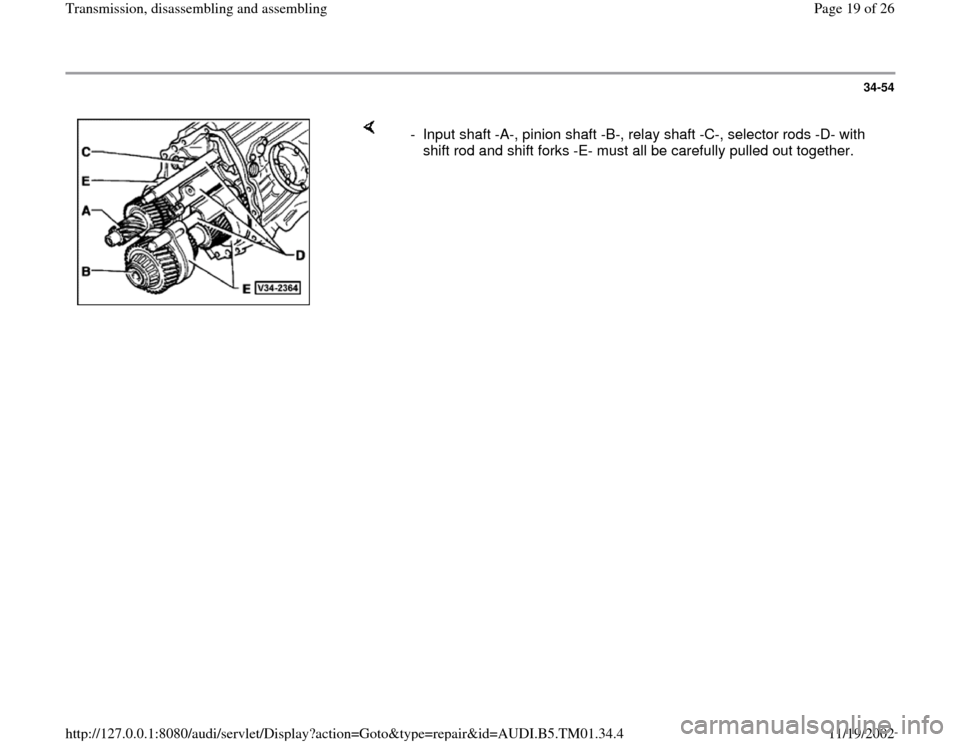
- Input shaft -A-, pinion shaft -B-, relay shaft -C-, selector rods -D- with
shift rod and shift forks -E- must all be carefully pulled out together.
Pa
ge 19 of 26 Transmission, disassemblin
g and assemblin
g
11/19/2002 htt
p://127.0.0.1:8080/audi/servlet/Dis
play?action=Goto&t
yp
e=re
pair&id=AUDI.B5.TM01.34.4
Page 20 of 26
34-55
Installing
Note:
If the input shaft ball bearing, the input shaft or
the transmission housing is replaced, it is
necessary to re-determine the thickness of the
circlips for the input shaft first Page 35
-17
,
input shaft adjusting.
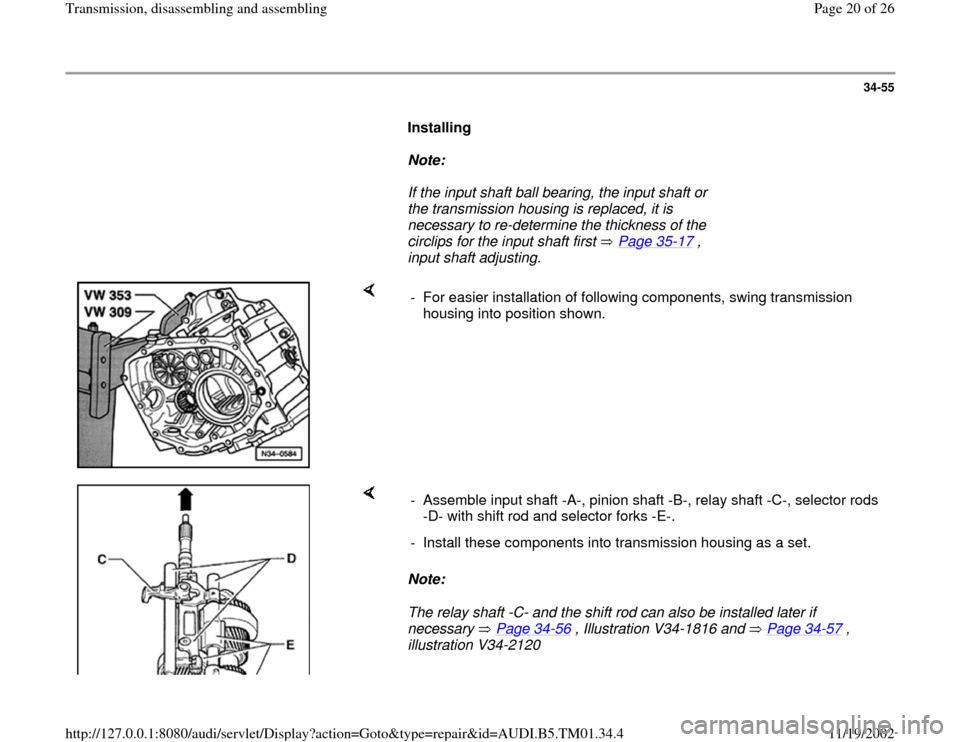
- For easier installation of following components, swing transmission
housing into position shown.
Note:
The relay shaft -C- and the shift rod can also be installed later if
necessary Page 34
-56
, Illustration V34-1816 and Page 34
-57
,
illustration V34-2120 - Assemble input shaft -A-, pinion shaft -B-, relay shaft -C-, selector rods
-D- with shift rod and selector forks -E-.
- Install these components into transmission housing as a set.
Pa
ge 20 of 26 Transmission, disassemblin
g and assemblin
g
11/19/2002 htt
p://127.0.0.1:8080/audi/servlet/Dis
play?action=Goto&t
yp
e=re
pair&id=AUDI.B5.TM01.34.4
Trending: differential, sensor, transmission oil, tow, light, lock, relay
