tow AUDI A4 1995 B5 / 1.G AWM Engine Valve Gear Service Workshop Manual
[x] Cancel search | Manufacturer: AUDI, Model Year: 1995, Model line: A4, Model: AUDI A4 1995 B5 / 1.GPages: 58, PDF Size: 1.06 MB
Page 31 of 58
15-66
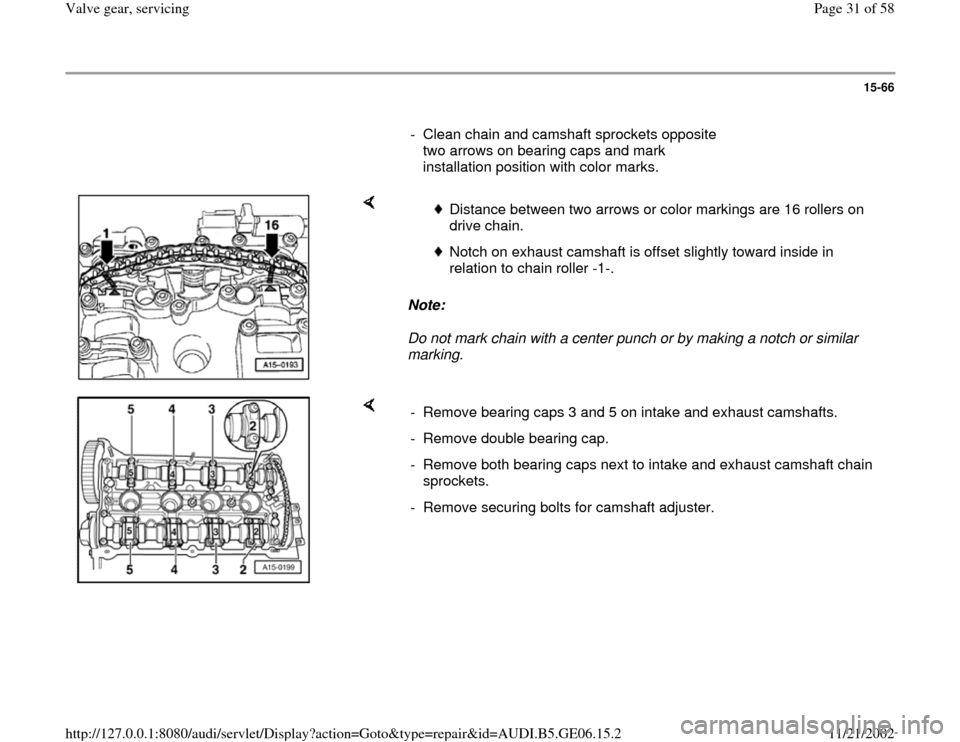
- Clean chain and camshaft sprockets opposite
two arrows on bearing caps and mark
installation position with color marks.
Note:
Do not mark chain with a center punch or by making a notch or similar
marking.
Distance between two arrows or color markings are 16 rollers on
drive chain.
Notch on exhaust camshaft is offset slightly toward inside in
relation to chain roller -1-.
- Remove bearing caps 3 and 5 on intake and exhaust camshafts.
- Remove double bearing cap.
- Remove both bearing caps next to intake and exhaust camshaft chain
sprockets.
- Remove securing bolts for camshaft adjuster.
Pa
ge 31 of 58 Valve
gear, servicin
g
11/21/2002 htt
p://127.0.0.1:8080/audi/servlet/Dis
play?action=Goto&t
yp
e=re
pair&id=AUDI.B5.GE06.15.2
Page 33 of 58
15-68
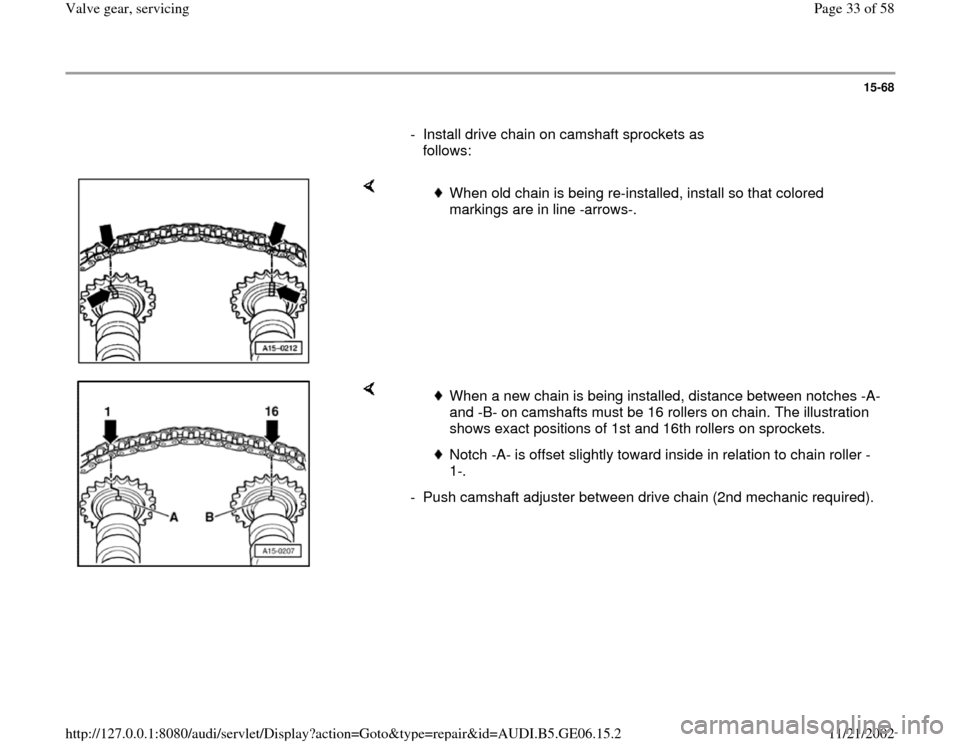
- Install drive chain on camshaft sprockets as
follows:
When old chain is being re-installed, install so that colored
markings are in line -arrows-.
When a new chain is being installed, distance between notches -A-
and -B- on camshafts must be 16 rollers on chain. The illustration
shows exact positions of 1st and 16th rollers on sprockets.
Notch -A- is offset slightly toward inside in relation to chain roller -
1-.
- Push camshaft adjuster between drive chain (2nd mechanic required).
Pa
ge 33 of 58 Valve
gear, servicin
g
11/21/2002 htt
p://127.0.0.1:8080/audi/servlet/Dis
play?action=Goto&t
yp
e=re
pair&id=AUDI.B5.GE06.15.2
Page 35 of 58
15-70
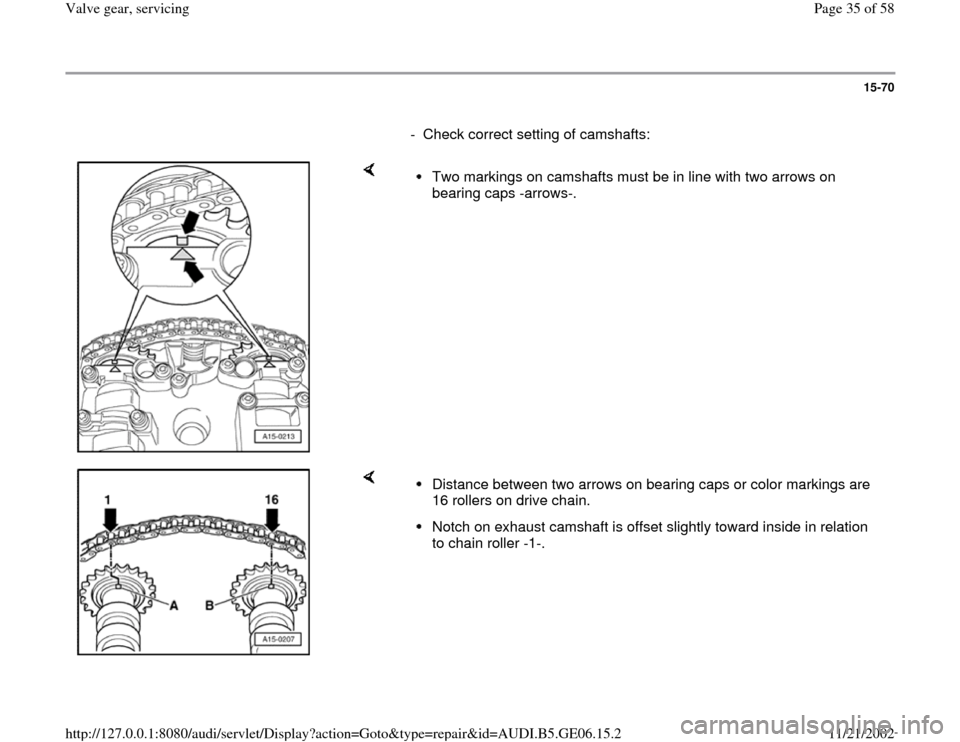
- Check correct setting of camshafts:
Two markings on camshafts must be in line with two arrows on
bearing caps -arrows-.
Distance between two arrows on bearing caps or color markings are
16 rollers on drive chain. Notch on exhaust camshaft is offset slightly toward inside in relation
to chain roller -1-.
Pa
ge 35 of 58 Valve
gear, servicin
g
11/21/2002 htt
p://127.0.0.1:8080/audi/servlet/Dis
play?action=Goto&t
yp
e=re
pair&id=AUDI.B5.GE06.15.2
Page 46 of 58
15-80
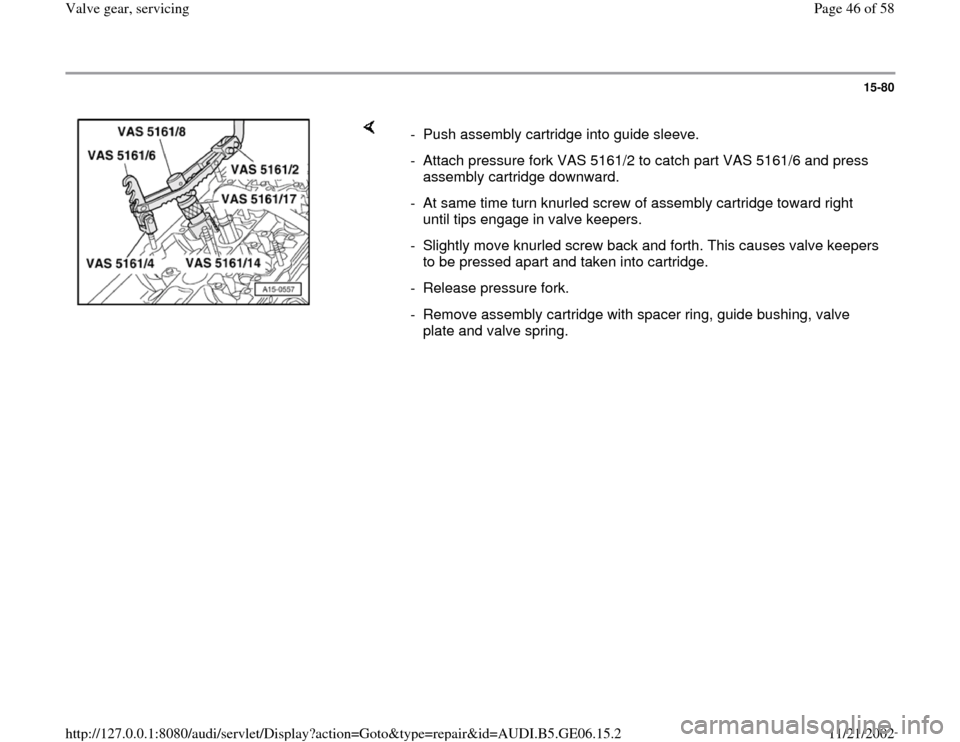
- Push assembly cartridge into guide sleeve.
- Attach pressure fork VAS 5161/2 to catch part VAS 5161/6 and press
assembly cartridge downward.
- At same time turn knurled screw of assembly cartridge toward right
until tips engage in valve keepers.
- Slightly move knurled screw back and forth. This causes valve keepers
to be pressed apart and taken into cartridge.
- Release pressure fork.
- Remove assembly cartridge with spacer ring, guide bushing, valve
plate and valve spring.
Pa
ge 46 of 58 Valve
gear, servicin
g
11/21/2002 htt
p://127.0.0.1:8080/audi/servlet/Dis
play?action=Goto&t
yp
e=re
pair&id=AUDI.B5.GE06.15.2
Page 47 of 58
15-81
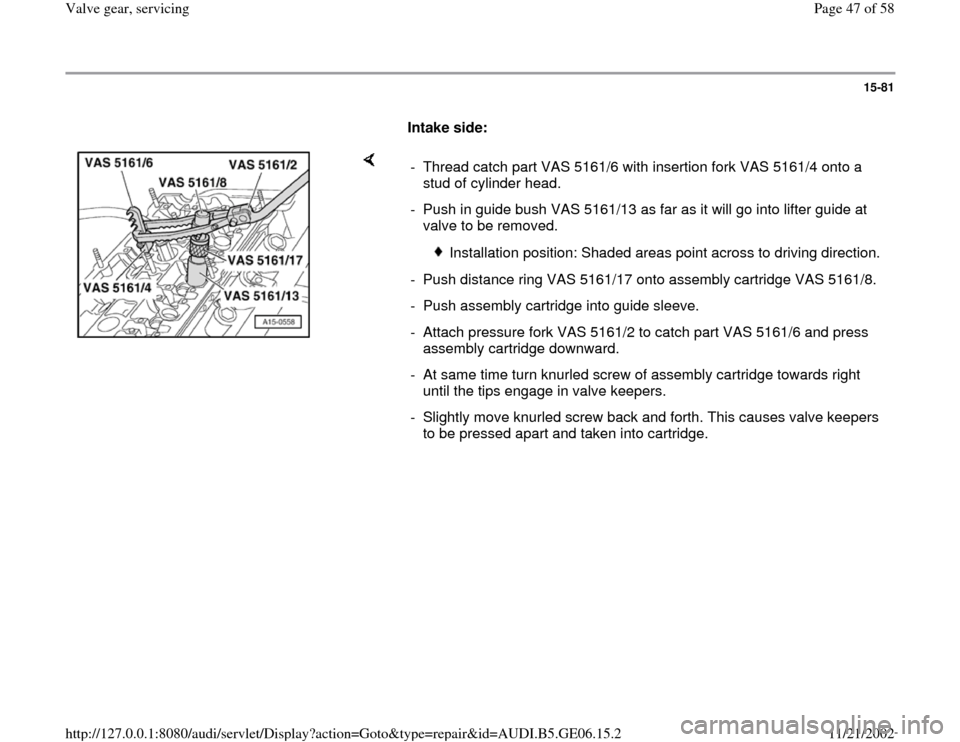
Intake side:
- Thread catch part VAS 5161/6 with insertion fork VAS 5161/4 onto a
stud of cylinder head.
- Push in guide bush VAS 5161/13 as far as it will go into lifter guide at
valve to be removed.
Installation position: Shaded areas point across to driving direction.
- Push distance ring VAS 5161/17 onto assembly cartridge VAS 5161/8.
- Push assembly cartridge into guide sleeve.
- Attach pressure fork VAS 5161/2 to catch part VAS 5161/6 and press
assembly cartridge downward.
- At same time turn knurled screw of assembly cartridge towards right
until the tips engage in valve keepers.
- Slightly move knurled screw back and forth. This causes valve keepers
to be pressed apart and taken into cartridge.
Pa
ge 47 of 58 Valve
gear, servicin
g
11/21/2002 htt
p://127.0.0.1:8080/audi/servlet/Dis
play?action=Goto&t
yp
e=re
pair&id=AUDI.B5.GE06.15.2