wheel alignment AUDI A4 1995 B5 / 1.G Engine Oil Level Checking Workshop Manual
[x] Cancel search | Manufacturer: AUDI, Model Year: 1995, Model line: A4, Model: AUDI A4 1995 B5 / 1.GPages: 111, PDF Size: 1.26 MB
Page 33 of 111
38
6-spd. manual transmission 01E all wheel
drive
Note:
For checking oil level the vehicle must be
stationary and on a level surface (e.g engine
off, standing on an alignment lift).
The oil level must be kept at the specified level.
The transmission may be damaged by over-
filling.
CAUTION!
If the oil level is too low, the transmission must be checked for leaks
and repaired. It is not sufficient to just top off oil.
CAUTION!
Part numbers are for reference only. Always check with your Parts
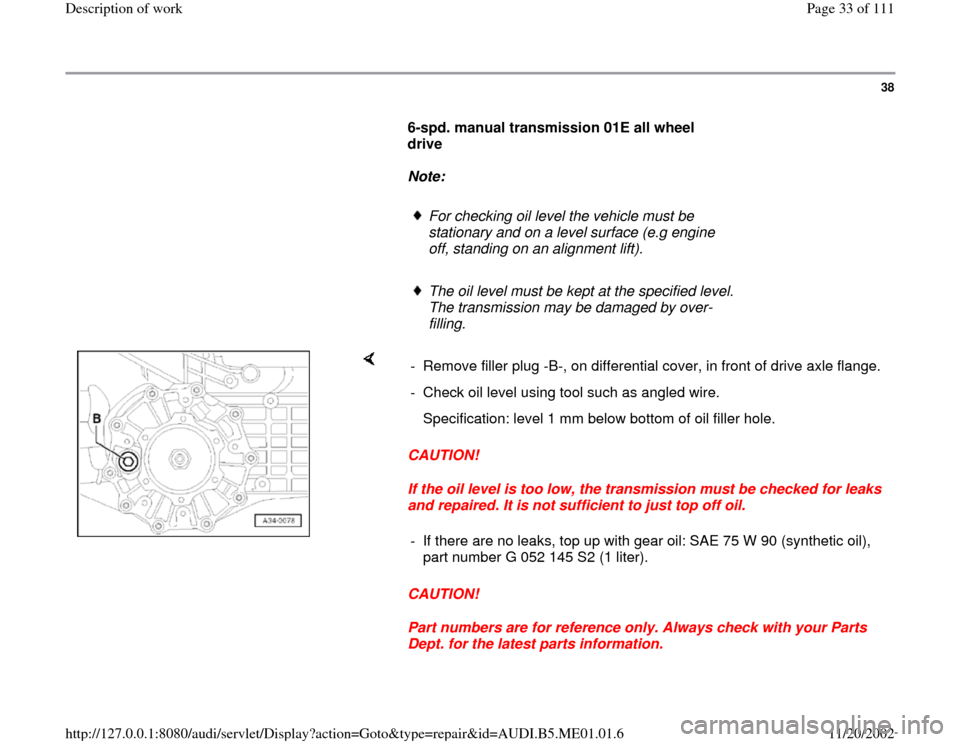
Dept. for the latest parts information. - Remove filler plug -B-, on differential cover, in front of drive axle flange.
- Check oil level using tool such as angled wire.
Specification: level 1 mm below bottom of oil filler hole.
- If there are no leaks, top up with gear oil: SAE 75 W 90 (synthetic oil),
part number G 052 145 S2 (1 liter).
Pa
ge 33 of 111 Descri
ption of wor
k
11/20/2002 htt
p://127.0.0.1:8080/audi/servlet/Dis
play?action=Goto&t
yp
e=re
pair&id=AUDI.B5.ME01.01.6
Page 47 of 111
47
CAUTION!
Tires of same type and tread pattern must be
used on cars with All Wheel Drive (otherwise
risk of damage to central differential).
- Check tread wear pattern:
Tread wear pattern on front tires is an indication
of whether toe and camber settings need to be
checked:
"Feathering" on tread indicates incorrect toe.
If tread is worn on one side, this is usually
caused by incorrect camber.
If wear of this nature is noticed, check wheel
alignment.
Pa
ge 47 of 111 Descri
ption of wor
k
11/20/2002 htt
p://127.0.0.1:8080/audi/servlet/Dis
play?action=Goto&t
yp
e=re
pair&id=AUDI.B5.ME01.01.6
Page 71 of 111
70
Note:
Try using corners of the headlight housings or
two screws that are the same height and as far
apart as possible on the vehicle.
- Carefully tighten hand wheel without changing
Beamsetter position.
- Find correct State or Province Inclination %
specification for the low beam adjustment (If
there is no local specification use 1.2%).
Note:
DO NOT use the Inclination % molded into the
plastic of the headlight housing near the
headlight adjustment screws; it is for Europe
only!
- Set Beamsetter "Scaled wheel" to the proper low
beam inclination %.
- Adjust height (vertical) alignment first. Turn
headlight height adjuster screw to align the
upper edge of the flat portion of the beam with
the center horizontal line of the grid on the
Beamsetter pattern screen.
Pa
ge 71 of 111 Descri
ption of wor
k
11/20/2002 htt
p://127.0.0.1:8080/audi/servlet/Dis
play?action=Goto&t
yp
e=re
pair&id=AUDI.B5.ME01.01.6
Page 72 of 111
71
Note:
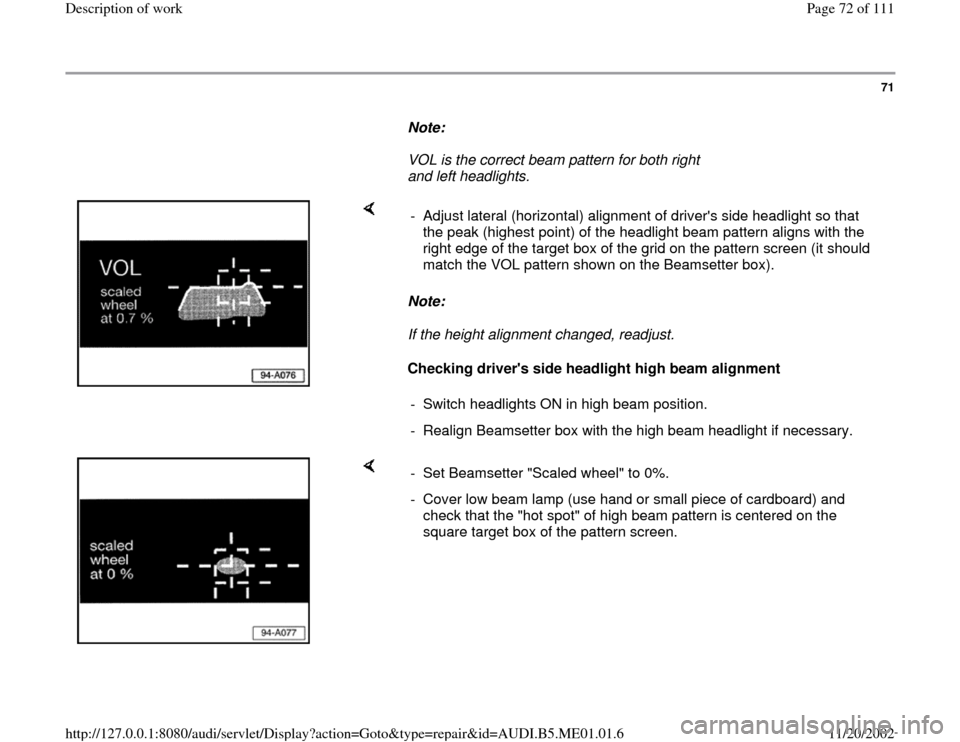
VOL is the correct beam pattern for both right
and left headlights.
Note:
If the height alignment changed, readjust.
Checking driver's side headlight high beam alignment - Adjust lateral (horizontal) alignment of driver's side headlight so that
the peak (highest point) of the headlight beam pattern aligns with the
right edge of the target box of the grid on the pattern screen (it should
match the VOL pattern shown on the Beamsetter box).
- Switch headlights ON in high beam position.
- Realign Beamsetter box with the high beam headlight if necessary.
- Set Beamsetter "Scaled wheel" to 0%.
- Cover low beam lamp (use hand or small piece of cardboard) and
check that the "hot spot" of high beam pattern is centered on the
square target box of the pattern screen.
Pa
ge 72 of 111 Descri
ption of wor
k
11/20/2002 htt
p://127.0.0.1:8080/audi/servlet/Dis
play?action=Goto&t
yp
e=re
pair&id=AUDI.B5.ME01.01.6
Page 74 of 111
73
Passenger's side headlight, alignment
- Move Beamsetter to the passenger side of the
vehicle and follow the same procedures to align
the Beamsetter box to the headlamp.
- Align headlight low beam, check high beam and
align fog lamp.
Note:
Make sure to reset the Beamsetter "Scaled
wheel" to the proper setting each time you
change from low beam to high beam or to fog
lamp.
- Ensure that headlights and vehicle body are
clean and free of fingerprints.
Pa
ge 74 of 111 Descri
ption of wor
k
11/20/2002 htt
p://127.0.0.1:8080/audi/servlet/Dis
play?action=Goto&t
yp
e=re
pair&id=AUDI.B5.ME01.01.6