torque AUDI A4 1996 B5 / 1.G Airbag Service Workshop Manual
[x] Cancel search | Manufacturer: AUDI, Model Year: 1996, Model line: A4, Model: AUDI A4 1996 B5 / 1.GPages: 75, PDF Size: 0.91 MB
Page 20 of 75
69-53
Driver-side airbag unit ( m.y. 1998),
removing and installing
- Disconnect battery Ground (GND) strap.
Note:
Always follow airbag safety precautions when
working on airbag system components ( page
69
-40
).
-
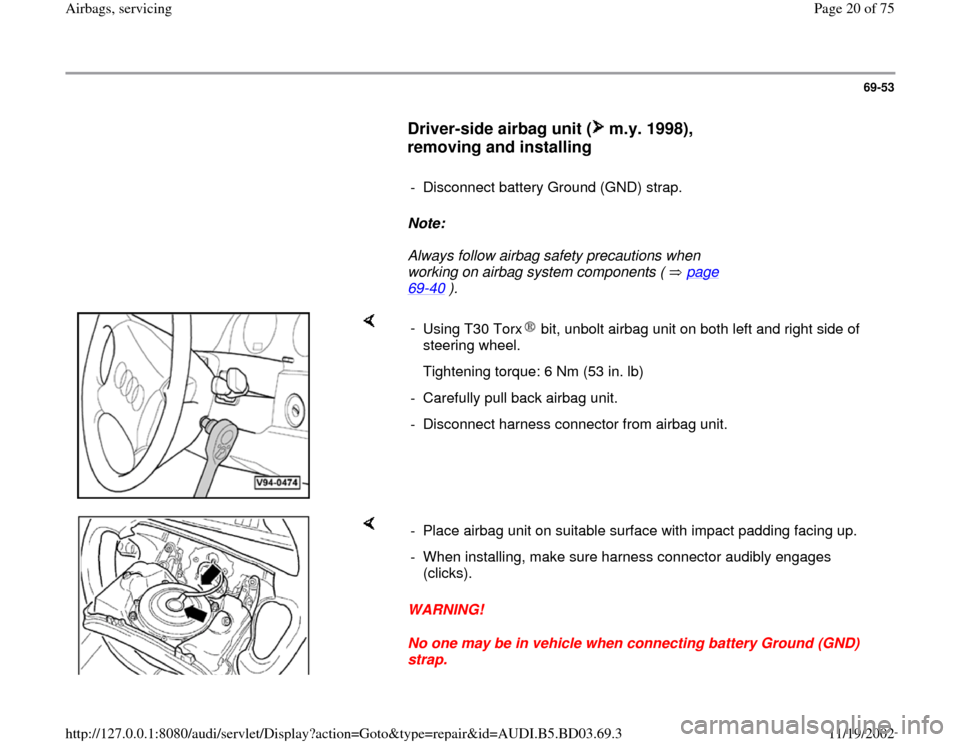
Using T30 Torx bit, unbolt airbag unit on both left and right side of
steering wheel. Tightening torque: 6 Nm (53 in. lb)
- Carefully pull back airbag unit.
- Disconnect harness connector from airbag unit.
WARNING!
No one may be in vehicle when connecting battery Ground (GND)
strap. - Place airbag unit on suitable surface with impact padding facing up.
- When installing, make sure harness connector audibly engages
(clicks).
Pa
ge 20 of 75 Airba
gs, servicin
g
11/19/2002 htt
p://127.0.0.1:8080/audi/servlet/Dis
play?action=Goto&t
yp
e=re
pair&id=AUDI.B5.BD03.69.3
Page 35 of 75
69-67
Sport steering wheel spiral spring ( m.y.
1998), removing and installing
Notes:
Wheels must be facing straight ahead.
Before removing spiral spring, remove airbag
unit and steering wheel.
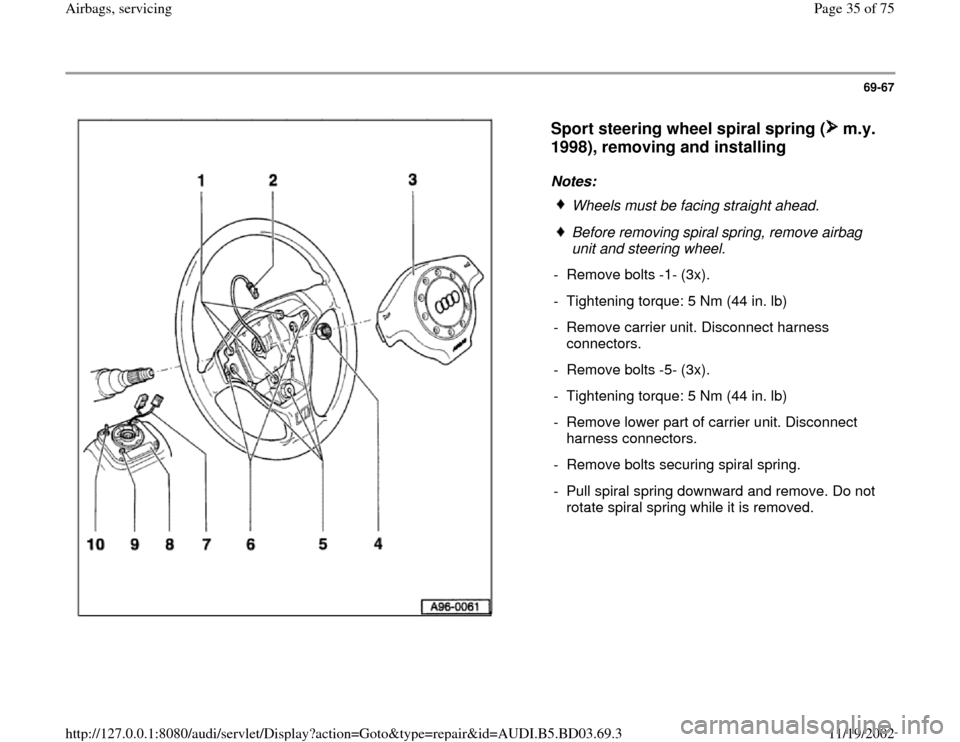
- Remove bolts -1- (3x).
- Tightening torque: 5 Nm (44 in. lb)
- Remove carrier unit. Disconnect harness
connectors.
- Remove bolts -5- (3x).
- Tightening torque: 5 Nm (44 in. lb)
- Remove lower part of carrier unit. Disconnect
harness connectors.
- Remove bolts securing spiral spring.
- Pull spiral spring downward and remove. Do not
rotate spiral spring while it is removed.
Pa
ge 35 of 75 Airba
gs, servicin
g
11/19/2002 htt
p://127.0.0.1:8080/audi/servlet/Dis
play?action=Goto&t
yp
e=re
pair&id=AUDI.B5.BD03.69.3
Page 36 of 75
69-68
Spiral spring, removing and installing
Driver-side airbag unit and steering wheel
removed
- Pull steering column all the way out and down.
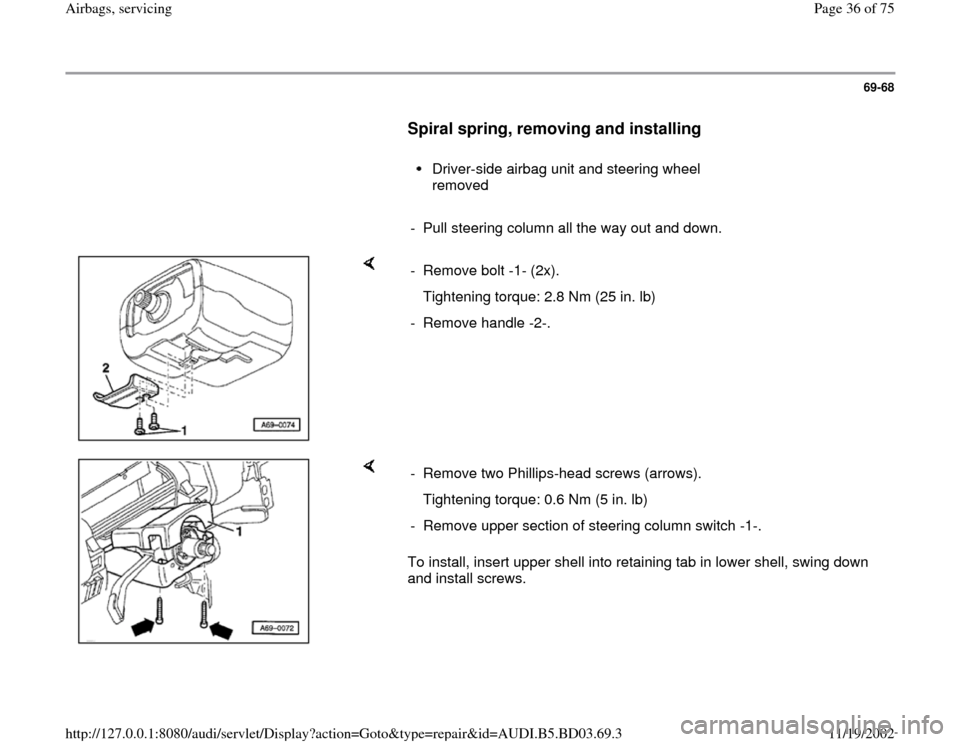
- Remove bolt -1- (2x).
Tightening torque: 2.8 Nm (25 in. lb)
- Remove handle -2-.
To install, insert upper shell into retaining tab in lower shell, swing down
and install screws. - Remove two Phillips-head screws (arrows).
Tightening torque: 0.6 Nm (5 in. lb)
- Remove upper section of steering column switch -1-.
Pa
ge 36 of 75 Airba
gs, servicin
g
11/19/2002 htt
p://127.0.0.1:8080/audi/servlet/Dis
play?action=Goto&t
yp
e=re
pair&id=AUDI.B5.BD03.69.3
Page 37 of 75
69-69
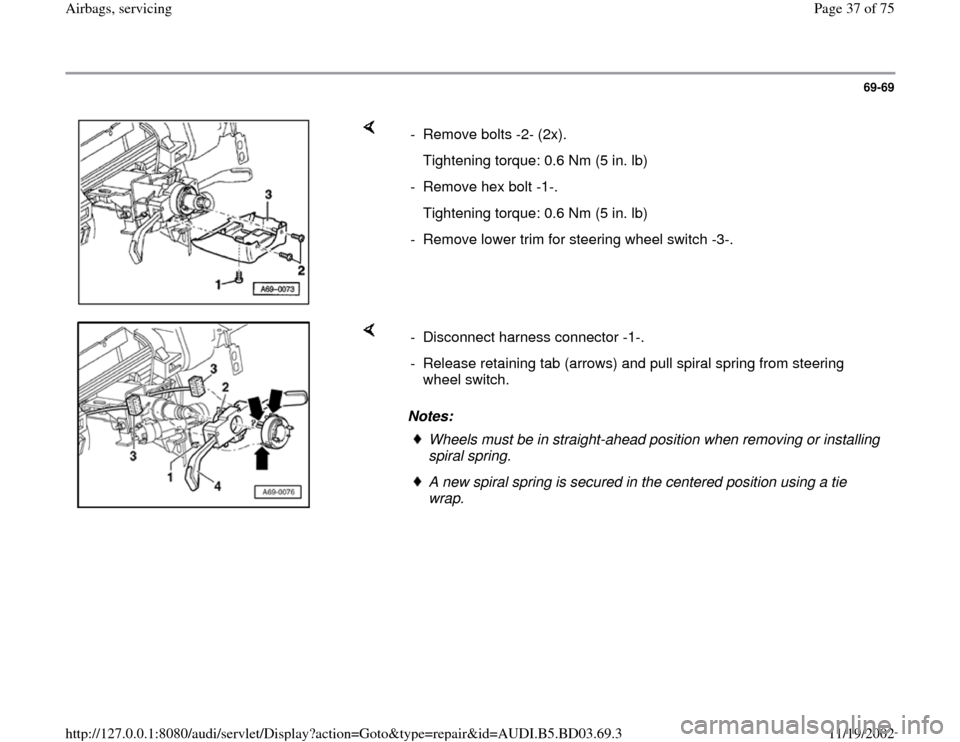
- Remove bolts -2- (2x).
Tightening torque: 0.6 Nm (5 in. lb)
- Remove hex bolt -1-.
Tightening torque: 0.6 Nm (5 in. lb)
- Remove lower trim for steering wheel switch -3-.
Notes: - Disconnect harness connector -1-.
- Release retaining tab (arrows) and pull spiral spring from steering
wheel switch.
Wheels must be in straight-ahead position when removing or installing
spiral spring. A new spiral spring is secured in the centered position using a tie
wrap.
Pa
ge 37 of 75 Airba
gs, servicin
g
11/19/2002 htt
p://127.0.0.1:8080/audi/servlet/Dis
play?action=Goto&t
yp
e=re
pair&id=AUDI.B5.BD03.69.3
Page 43 of 75
69-74
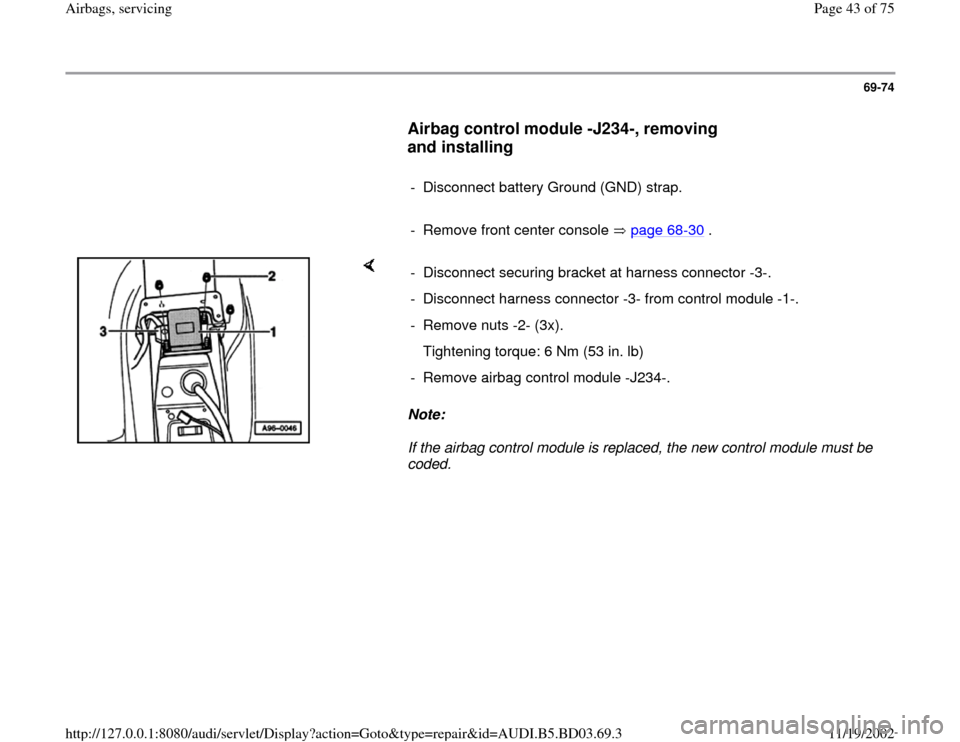
Airbag control module -J234-, removing
and installing
- Disconnect battery Ground (GND) strap.
- Remove front center console page 68
-30
.
Note:
If the airbag control module is replaced, the new control module must be
coded. - Disconnect securing bracket at harness connector -3-.
- Disconnect harness connector -3- from control module -1-.
- Remove nuts -2- (3x).
Tightening torque: 6 Nm (53 in. lb)
- Remove airbag control module -J234-.
Pa
ge 43 of 75 Airba
gs, servicin
g
11/19/2002 htt
p://127.0.0.1:8080/audi/servlet/Dis
play?action=Goto&t
yp
e=re
pair&id=AUDI.B5.BD03.69.3
Page 48 of 75
69-79
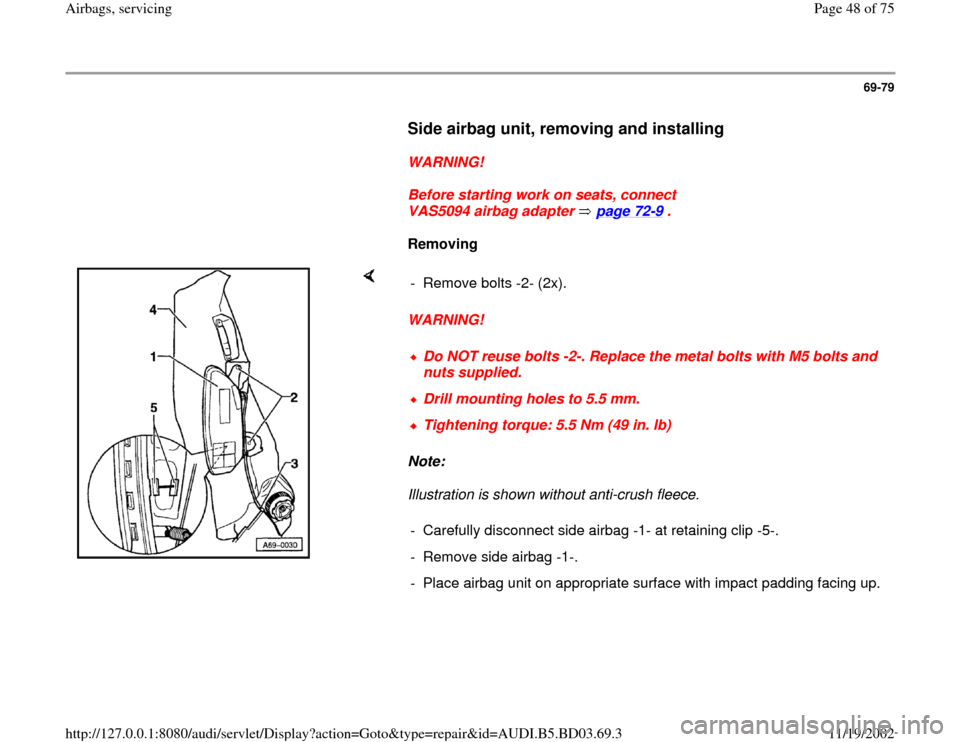
Side airbag unit, removing and installing
WARNING!
Before starting work on seats, connect
VAS5094 airbag adapter page 72
-9 .
Removing
WARNING!
Note:
Illustration is shown without anti-crush fleece. - Remove bolts -2- (2x).
Do NOT reuse bolts -2-. Replace the metal bolts with M5 bolts and
nuts supplied. Drill mounting holes to 5.5 mm.Tightening torque: 5.5 Nm (49 in. lb)
- Carefully disconnect side airbag -1- at retaining clip -5-.
- Remove side airbag -1-.
- Place airbag unit on appropriate surface with impact padding facing up.
Pa
ge 48 of 75 Airba
gs, servicin
g
11/19/2002 htt
p://127.0.0.1:8080/audi/servlet/Dis
play?action=Goto&t
yp
e=re
pair&id=AUDI.B5.BD03.69.3
Page 57 of 75
69-86
Removing
- Disconnect battery Ground (GND) strap.
- Remove front seat page 72
-2 .
- Remove lower A-pillar trim page 70
-72
.
- Unclip sill molding and fold upward.
- Pull up floor mat -4- near sensor.
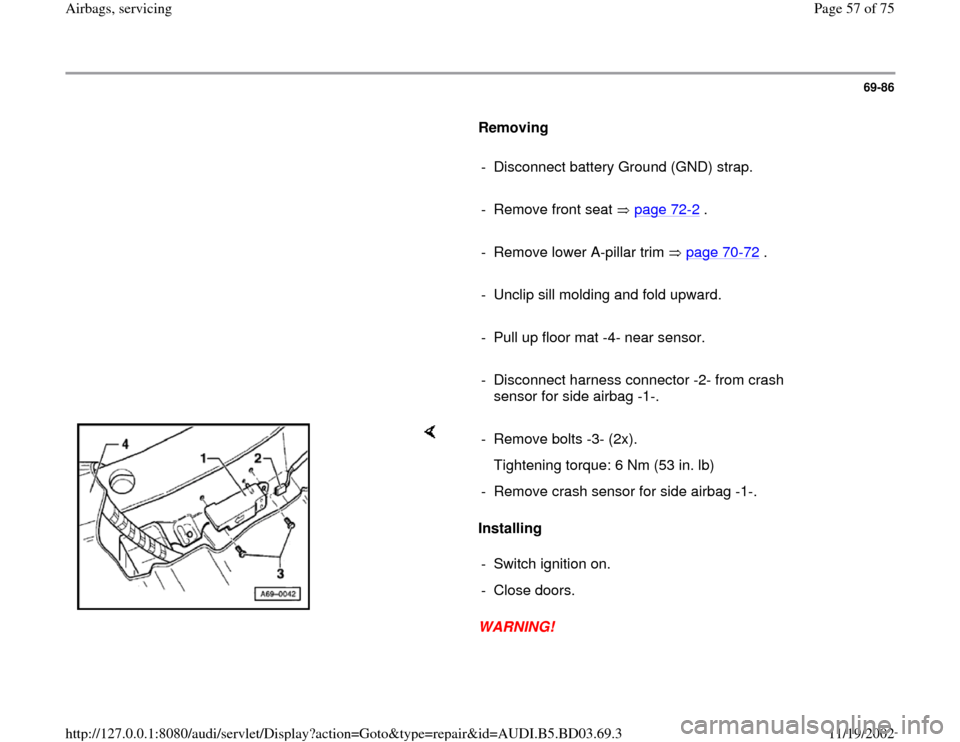
- Disconnect harness connector -2- from crash
sensor for side airbag -1-.
Installing
WARNING! - Remove bolts -3- (2x).
Tightening torque: 6 Nm (53 in. lb)
- Remove crash sensor for side airbag -1-.
- Switch ignition on.
- Close doors.
Pa
ge 57 of 75 Airba
gs, servicin
g
11/19/2002 htt
p://127.0.0.1:8080/audi/servlet/Dis
play?action=Goto&t
yp
e=re
pair&id=AUDI.B5.BD03.69.3
Page 64 of 75
69-91
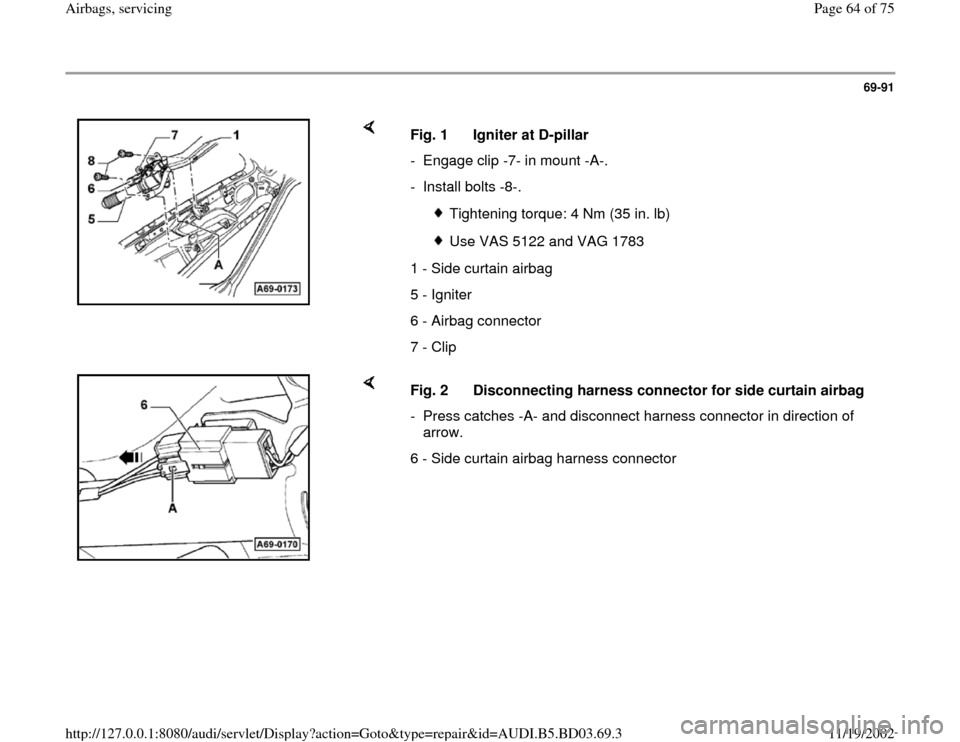
Fig. 1 Igniter at D-pillar
- Engage clip -7- in mount -A-.
- Install bolts -8-.
Tightening torque: 4 Nm (35 in. lb)
Use VAS 5122 and VAG 1783
1 - Side curtain airbag
5 - Igniter
6 - Airbag connector
7 - Clip
Fig. 2 Disconnecting harness connector for side curtain airbag
- Press catches -A- and disconnect harness connector in direction of
arrow.
6 - Side curtain airbag harness connector
Pa
ge 64 of 75 Airba
gs, servicin
g
11/19/2002 htt
p://127.0.0.1:8080/audi/servlet/Dis
play?action=Goto&t
yp
e=re
pair&id=AUDI.B5.BD03.69.3
Page 65 of 75
69-92
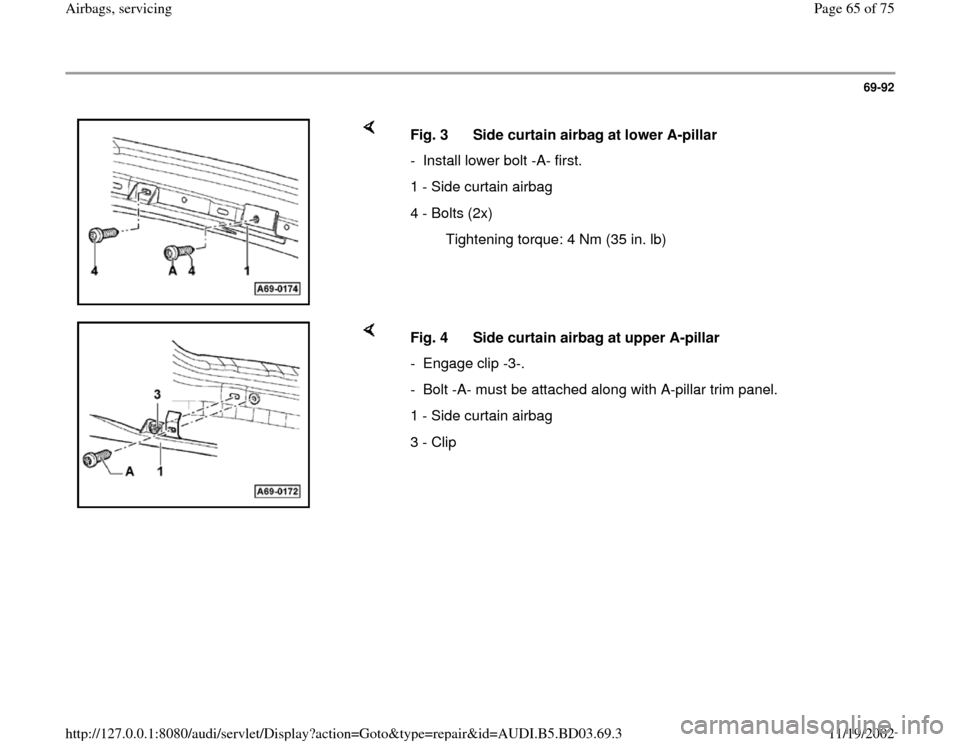
Fig. 3 Side curtain airbag at lower A-pillar
- Install lower bolt -A- first.
1 - Side curtain airbag
4 - Bolts (2x)
Tightening torque: 4 Nm (35 in. lb)
Fig. 4 Side curtain airbag at upper A-pillar
- Engage clip -3-.
- Bolt -A- must be attached along with A-pillar trim panel.
1 - Side curtain airbag
3 - Clip
Pa
ge 65 of 75 Airba
gs, servicin
g
11/19/2002 htt
p://127.0.0.1:8080/audi/servlet/Dis
play?action=Goto&t
yp
e=re
pair&id=AUDI.B5.BD03.69.3
Page 73 of 75
69-98
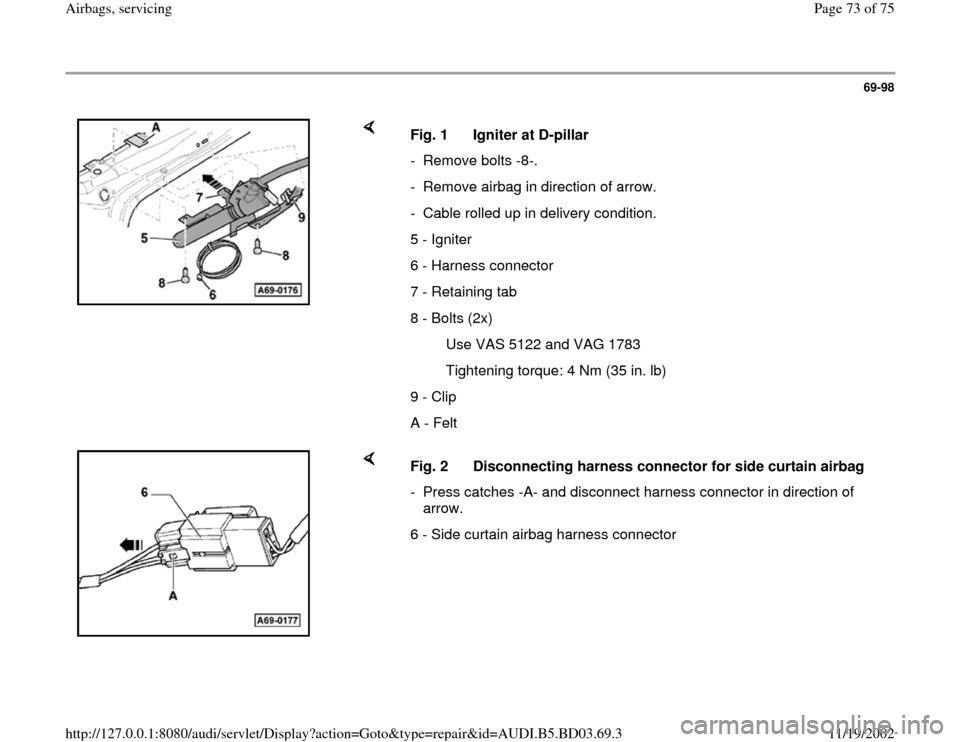
Fig. 1 Igniter at D-pillar
- Remove bolts -8-.
- Remove airbag in direction of arrow.
- Cable rolled up in delivery condition.
5 - Igniter
6 - Harness connector
7 - Retaining tab
8 - Bolts (2x)
Use VAS 5122 and VAG 1783
Tightening torque: 4 Nm (35 in. lb)
9 - Clip
A - Felt
Fig. 2 Disconnecting harness connector for side curtain airbag
- Press catches -A- and disconnect harness connector in direction of
arrow.
6 - Side curtain airbag harness connector
Pa
ge 73 of 75 Airba
gs, servicin
g
11/19/2002 htt
p://127.0.0.1:8080/audi/servlet/Dis
play?action=Goto&t
yp
e=re
pair&id=AUDI.B5.BD03.69.3