AUDI A4 1996 B5 / 1.G Engine Oil Level Checking Workshop Manual
Manufacturer: AUDI, Model Year: 1996,
Model line: A4,
Model: AUDI A4 1996 B5 / 1.G
Pages: 111, PDF Size: 1.26 MB
AUDI A4 1996 B5 / 1.G Engine Oil Level Checking Workshop Manual
A4 1996 B5 / 1.G
AUDI
AUDI
https://www.carmanualsonline.info/img/6/1117/w960_1117-0.png
AUDI A4 1996 B5 / 1.G Engine Oil Level Checking Workshop Manual
Trending: trunk, wheel size, ECU, engine coolant, ECO mode, radio, steering wheel
Page 101 of 111
This swelling will disappear with exposure to
the sun or heat lamps within 2 - 3 hours. Severe
Paint swelling may require 2 - 3 days to
recover.
DO NOT buff or refinish paint for this condition!
Pa
ge 101 of 111 Descri
ption of wor
k
11/20/2002 htt
p://127.0.0.1:8080/audi/servlet/Dis
play?action=Goto&t
yp
e=re
pair&id=AUDI.B5.ME01.01.6
Page 102 of 111
98
Adhesive residue removal
CAUTION!
Always read and follow manufacturer
Cautions and Warnings regarding use of
product.
If RAPGARD adhesive residue remains on
paint finish, remove with a non-abrasive polishing
product such as, (3M Part No. 5995) light colors
or (3M Part No. 5996) dark colors. Thick lines of adhesive residue can be removed
with general purpose adhesive cleaner (3M Part
No. 08987-aerosol, or Part No, 08984-qt. can) or
equivalent.
Note:
Paint discoloration (looks like shaded or dark
magic marker lines) can be removed with a heat
gun using the following procedure:
- Hold heat gun approximately 3 in. away from
affected paint surfaces and apply heat using
slow oscillating motions until discoloration is
gone.
- If discoloration remains, wipe the heated area
with Isopropyl alcohol and repeat procedure to
increase surface drying.
Pa
ge 102 of 111 Descri
ption of wor
k
11/20/2002 htt
p://127.0.0.1:8080/audi/servlet/Dis
play?action=Goto&t
yp
e=re
pair&id=AUDI.B5.ME01.01.6
Page 103 of 111
99
Important!
After inspecting and removing RAPGARD ,
washing vehicle, inspecting and repairing any
defects in paint surfaces, moldings and glass:
- Protect the vehicle paint surface by applying 3M
Perfect-It Paste Wax (3M Part No. 39526) or
equivalent.
RAPGARD Disposal
RAPGARD can be disposed as normal paper
waste. If unsure about proper disposal
procedures in your area, check local regulations.
Pa
ge 103 of 111 Descri
ption of wor
k
11/20/2002 htt
p://127.0.0.1:8080/audi/servlet/Dis
play?action=Goto&t
yp
e=re
pair&id=AUDI.B5.ME01.01.6
Page 104 of 111
100
Transportation wiper blades, removing
at vehicle delivery
From my 2002
Service
For all Models arriving at your dealership with
transportation wiper blades:
Transportation wiper blades (except A6 and A4
Models, see notes below) are shorter than
original equipment wiper blades and colored blue
or yellow.
Note:
Until further notice, A6 Models will be equipped
with a set of original equipment blades (to be
used as transportation blades).
A new set of wiper blades are located in the
trunk and must only be installed at time of
vehicle delivery.
For all Models except A6 and A4, original
equipment blades are temporarily installed then
removed during the Pre-Delivery Inspection
(PDI) to check wiper blade park position only.
Pa
ge 104 of 111 Descri
ption of wor
k
11/20/2002 htt
p://127.0.0.1:8080/audi/servlet/Dis
play?action=Goto&t
yp
e=re
pair&id=AUDI.B5.ME01.01.6
Page 105 of 111
For A4 Models, the transportation wiper blades
(yellow) slide over the original equipment
blades (already installed on the wiper arms).
To ensure customer satisfaction, leave
transportation wiper blades on vehicle until time
of retail vehicle delivery.
Pa
ge 105 of 111 Descri
ption of wor
k
11/20/2002 htt
p://127.0.0.1:8080/audi/servlet/Dis
play?action=Goto&t
yp
e=re
pair&id=AUDI.B5.ME01.01.6
Page 106 of 111
101
Transportation wiper blades, removing
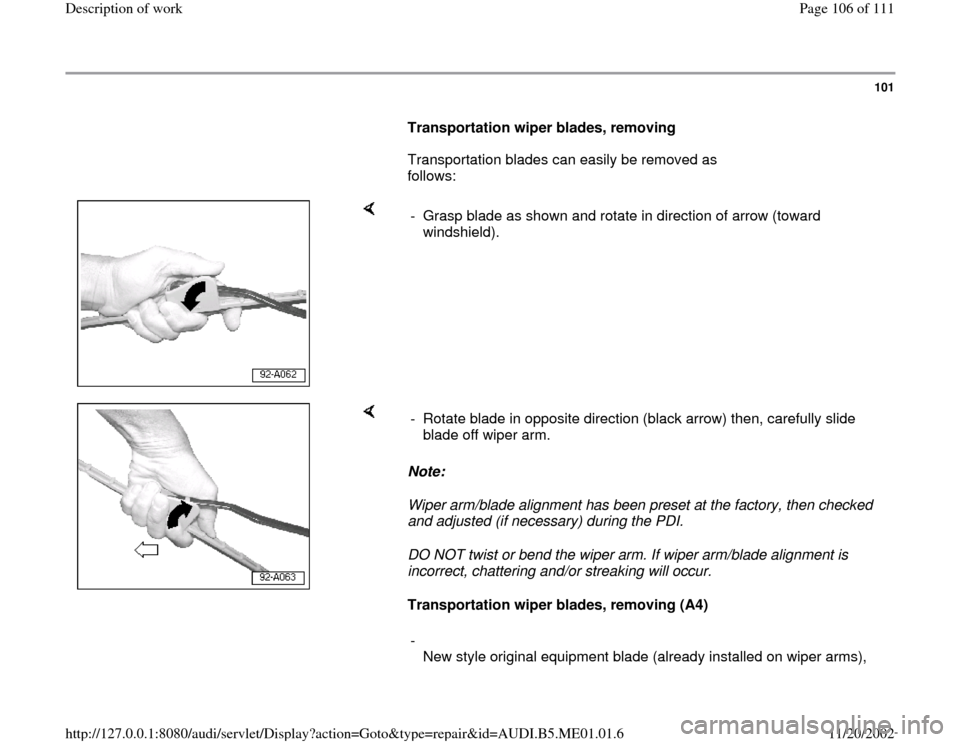
Transportation blades can easily be removed as
follows:
- Grasp blade as shown and rotate in direction of arrow (toward
windshield).
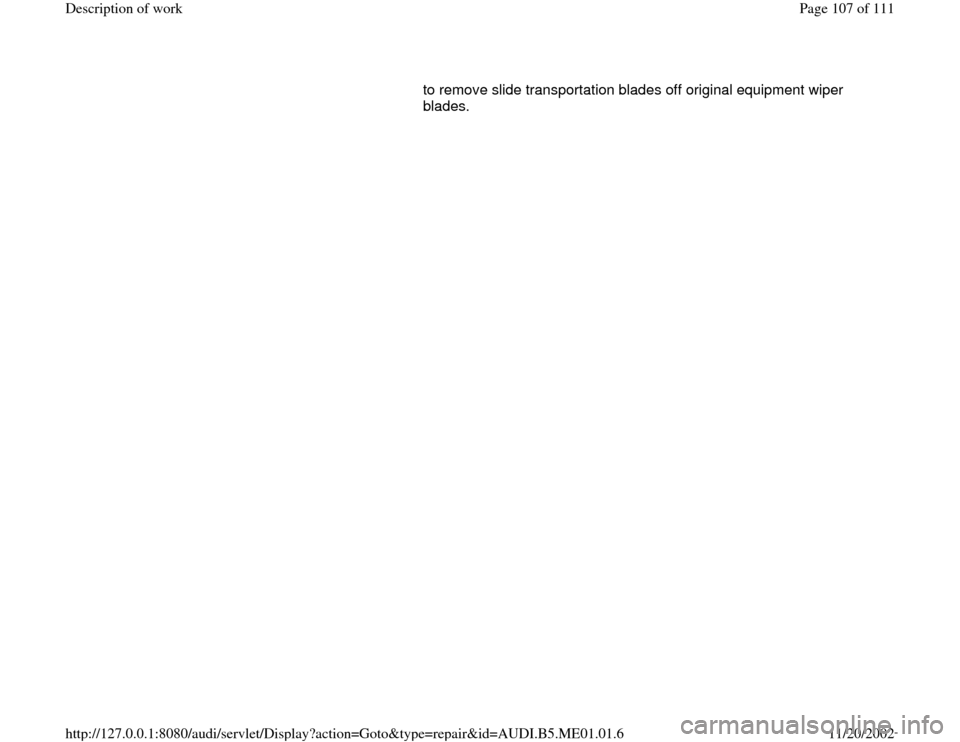
Note:
Wiper arm/blade alignment has been preset at the factory, then checked
and adjusted (if necessary) during the PDI.
DO NOT twist or bend the wiper arm. If wiper arm/blade alignment is
incorrect, chattering and/or streaking will occur.
Transportation wiper blades, removing (A4) - Rotate blade in opposite direction (black arrow) then, carefully slide
blade off wiper arm.
-
New style original equipment blade (already installed on wiper arms),
Pa
ge 106 of 111 Descri
ption of wor
k
11/20/2002 htt
p://127.0.0.1:8080/audi/servlet/Dis
play?action=Goto&t
yp
e=re
pair&id=AUDI.B5.ME01.01.6
Page 107 of 111
to remove slide transportation blades off original equipment wiper
blades.
Pa
ge 107 of 111 Descri
ption of wor
k
11/20/2002 htt
p://127.0.0.1:8080/audi/servlet/Dis
play?action=Goto&t
yp
e=re
pair&id=AUDI.B5.ME01.01.6
Page 108 of 111
102
If arm has been bent:
Repair Manual, Electrical Equipment, Repair
Group 92
- Install original equipment wiper blades (located
in trunk) at the time of retail vehicle delivery.
Note:
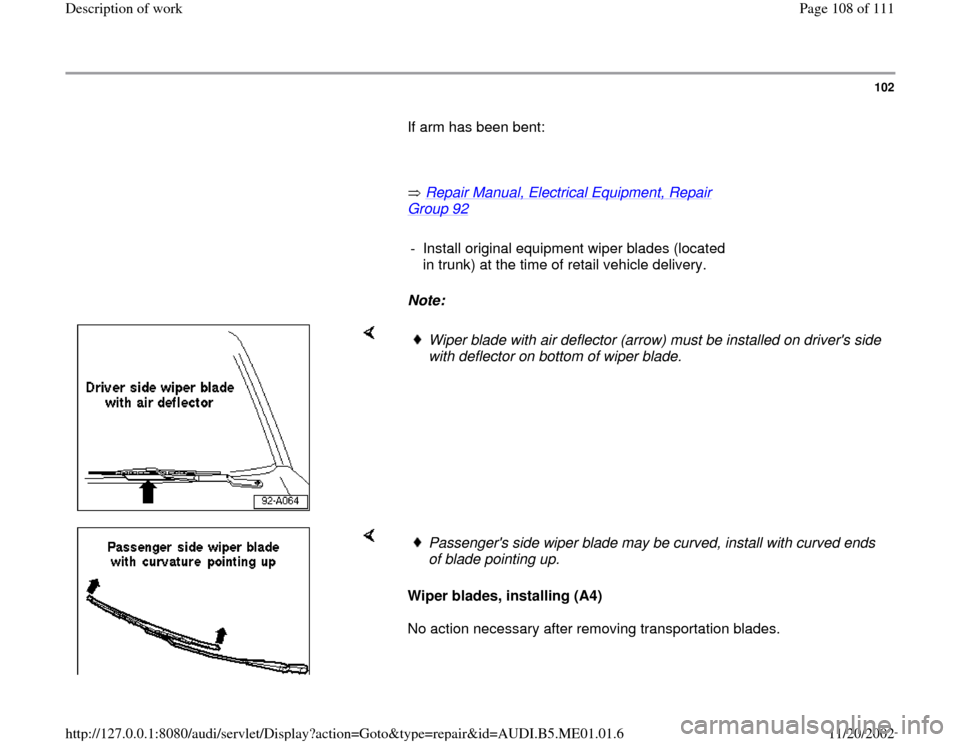
Wiper blade with air deflector (arrow) must be installed on driver's side
with deflector on bottom of wiper blade.
Wiper blades, installing (A4)
No action necessary after removing transportation blades.
Passenger's side wiper blade may be curved, install with curved ends
of blade pointing up.
Pa
ge 108 of 111 Descri
ption of wor
k
11/20/2002 htt
p://127.0.0.1:8080/audi/servlet/Dis
play?action=Goto&t
yp
e=re
pair&id=AUDI.B5.ME01.01.6
Page 109 of 111
103
Underbody closeout cover, installing at
Perfect Delivery Inspection (PDI)
To my 2002
Condition
New vehicles must have the rear under body close-out cover installed
during the PDI.
Covers were removed to access tie down cavities for transportation
purposes.
Production
Beginning Jan. 2002, new close-out covers (with holes for tie down
access) will be installed.
Service
Note:
Due to the vehicle pick up points, to ease installation of the close-out
covers, the use of a drive on hoist (i.e. alignment hoist) may be required.
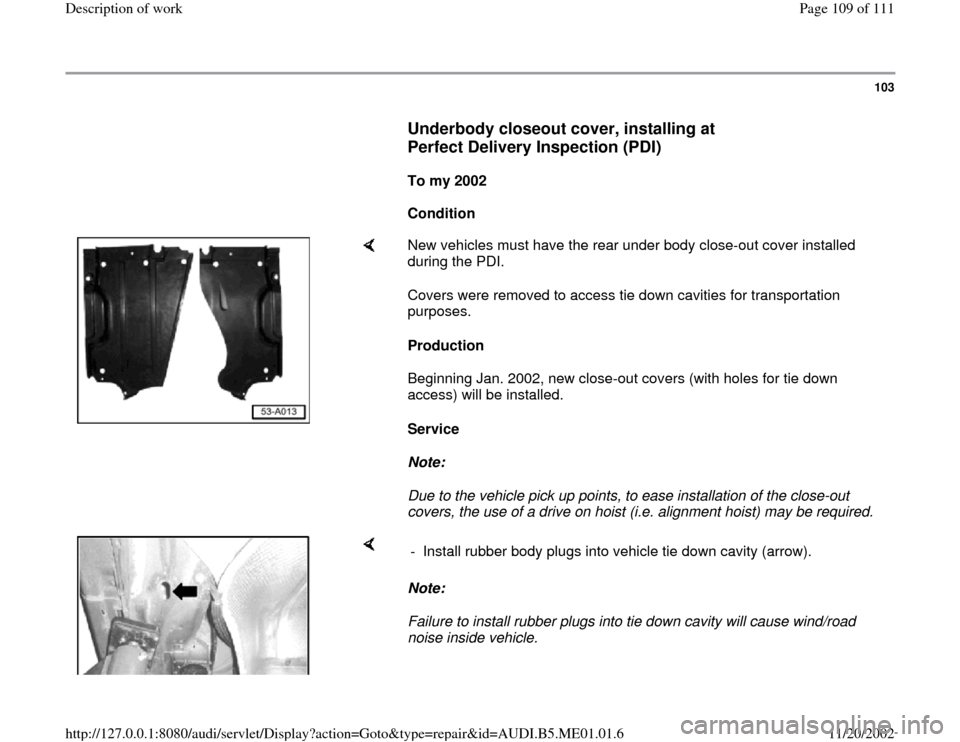
Note:
Failure to install rubber plugs into tie down cavity will cause wind/road
noise inside vehicle. - Install rubber body plugs into vehicle tie down cavity (arrow).
Pa
ge 109 of 111 Descri
ption of wor
k
11/20/2002 htt
p://127.0.0.1:8080/audi/servlet/Dis
play?action=Goto&t
yp
e=re
pair&id=AUDI.B5.ME01.01.6
Page 110 of 111
104
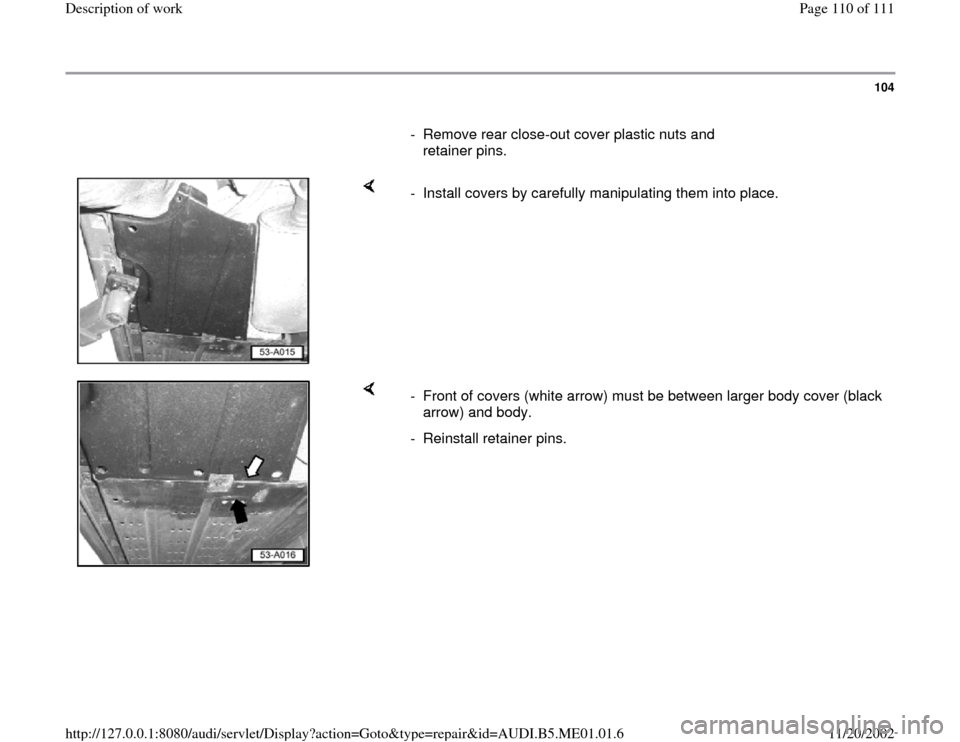
- Remove rear close-out cover plastic nuts and
retainer pins.
- Install covers by carefully manipulating them into place.
- Front of covers (white arrow) must be between larger body cover (black
arrow) and body.
- Reinstall retainer pins.
Pa
ge 110 of 111 Descri
ption of wor
k
11/20/2002 htt
p://127.0.0.1:8080/audi/servlet/Dis
play?action=Goto&t
yp
e=re
pair&id=AUDI.B5.ME01.01.6
Trending: warning light, reset, engine oil capacity, service reset, transmission, air suspension, height
