washer AUDI A4 1997 B5 / 1.G 01A Transmission Assembly Workshop Manual
[x] Cancel search | Manufacturer: AUDI, Model Year: 1997, Model line: A4, Model: AUDI A4 1997 B5 / 1.GPages: 27, PDF Size: 0.63 MB
Page 5 of 27
34-47
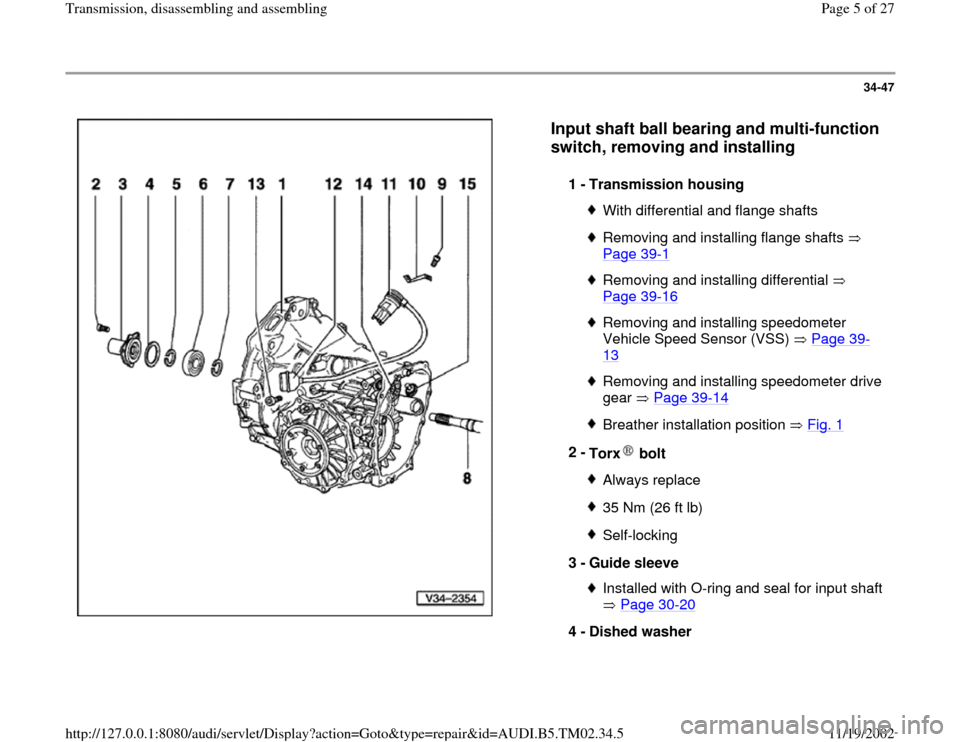
Input shaft ball bearing and multi-function
switch, removing and installing
1 -
Transmission housing
With differential and flange shaftsRemoving and installing flange shafts
Page 39
-1
Removing and installing differential
Page 39
-16
Removing and installing speedometer
Vehicle Speed Sensor (VSS) Page 39
-
13
Removing and installing speedometer drive
gear Page 39
-14
Breather installation position Fig. 1
2 -
Torx bolt
Always replace35 Nm (26 ft lb)Self-locking
3 -
Guide sleeve Installed with O-ring and seal for input shaft
Page 30
-20
4 -
Dished washer
Pa
ge 5 of 27 Transmission, disassemblin
g and assemblin
g
11/19/2002 htt
p://127.0.0.1:8080/audi/servlet/Dis
play?action=Goto&t
yp
e=re
pair&id=AUDI.B5.TM02.34.5
Page 10 of 27
34-51
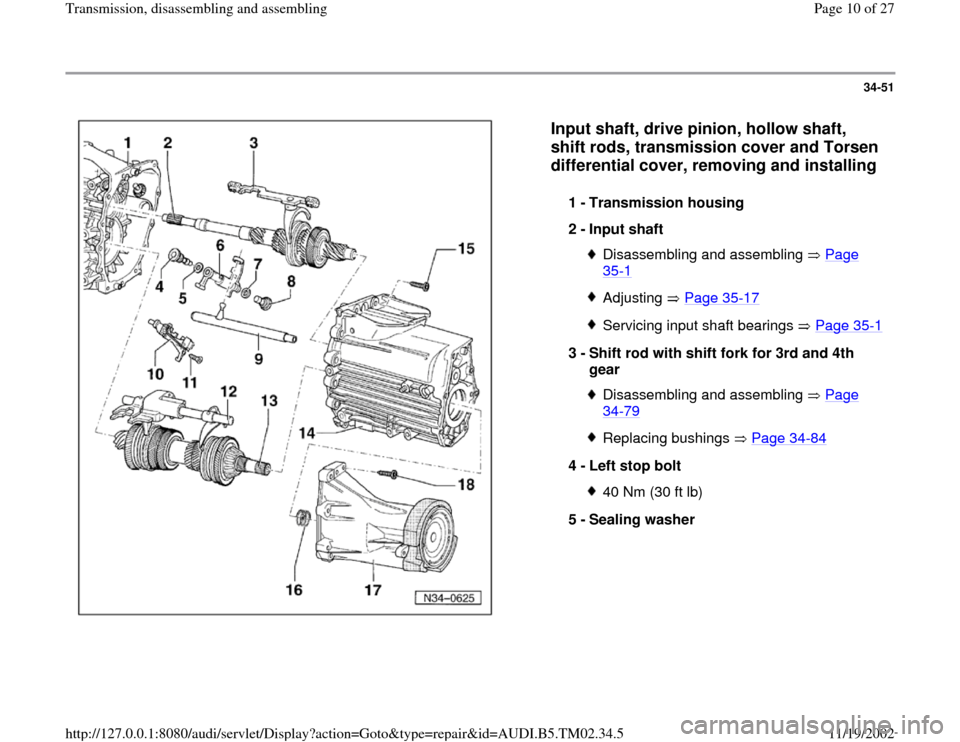
Input shaft, drive pinion, hollow shaft,
shift rods, transmission cover and Torsen
differential cover, removing and installing
1 -
Transmission housing
2 -
Input shaft
Disassembling and assembling Page 35
-1
Adjusting Page 35
-17
Servicing input shaft bearings Page 35
-1
3 -
Shift rod with shift fork for 3rd and 4th
gear
Disassembling and assembling Page 34
-79
Replacing bushings Page 34
-84
4 -
Left stop bolt
40 Nm (30 ft lb)
5 -
Sealing washer
Pa
ge 10 of 27 Transmission, disassemblin
g and assemblin
g
11/19/2002 htt
p://127.0.0.1:8080/audi/servlet/Dis
play?action=Goto&t
yp
e=re
pair&id=AUDI.B5.TM02.34.5
Page 11 of 27
34-52
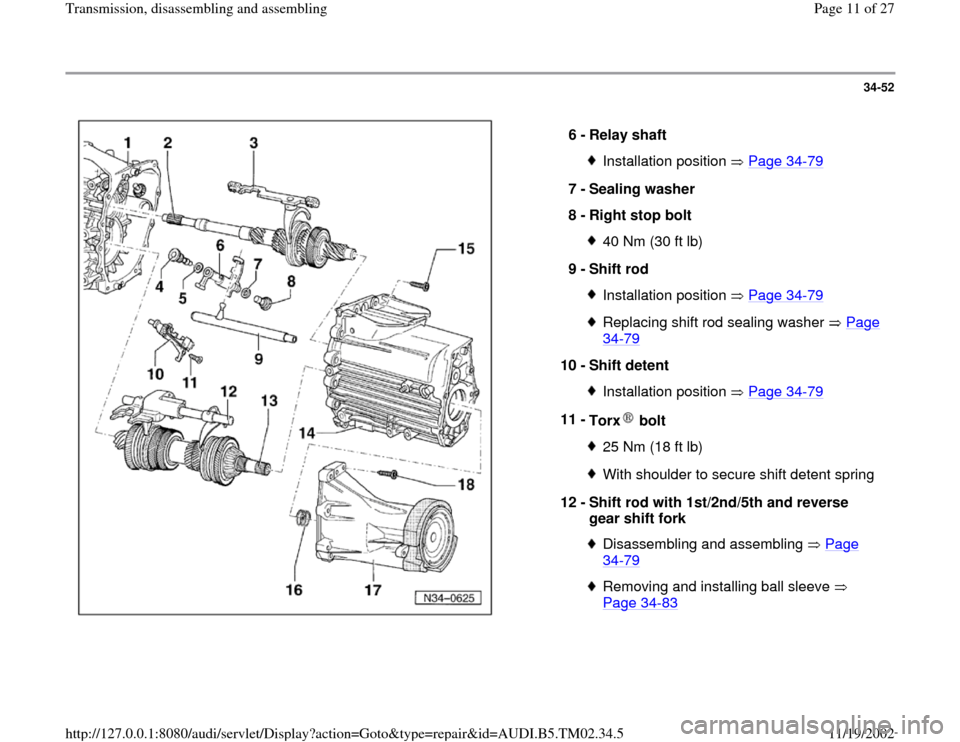
6 -
Relay shaft
Installation position Page 34
-79
7 -
Sealing washer
8 -
Right stop bolt
40 Nm (30 ft lb)
9 -
Shift rod Installation position Page 34
-79
Replacing shift rod sealing washer Page 34
-79
10 -
Shift detent
Installation position Page 34
-79
11 -
Torx bolt
25 Nm (18 ft lb)With shoulder to secure shift detent spring
12 -
Shift rod with 1st/2nd/5th and reverse
gear shift fork Disassembling and assembling Page 34
-79
Removing and installing ball sleeve
Page 34
-83
Pa
ge 11 of 27 Transmission, disassemblin
g and assemblin
g
11/19/2002 htt
p://127.0.0.1:8080/audi/servlet/Dis
play?action=Goto&t
yp
e=re
pair&id=AUDI.B5.TM02.34.5
Page 16 of 27
34-56
Removing
- Place drip tray below transmission.
- Drain gear oil.
- Secure transmission to assembly stand Page
34
-30
.
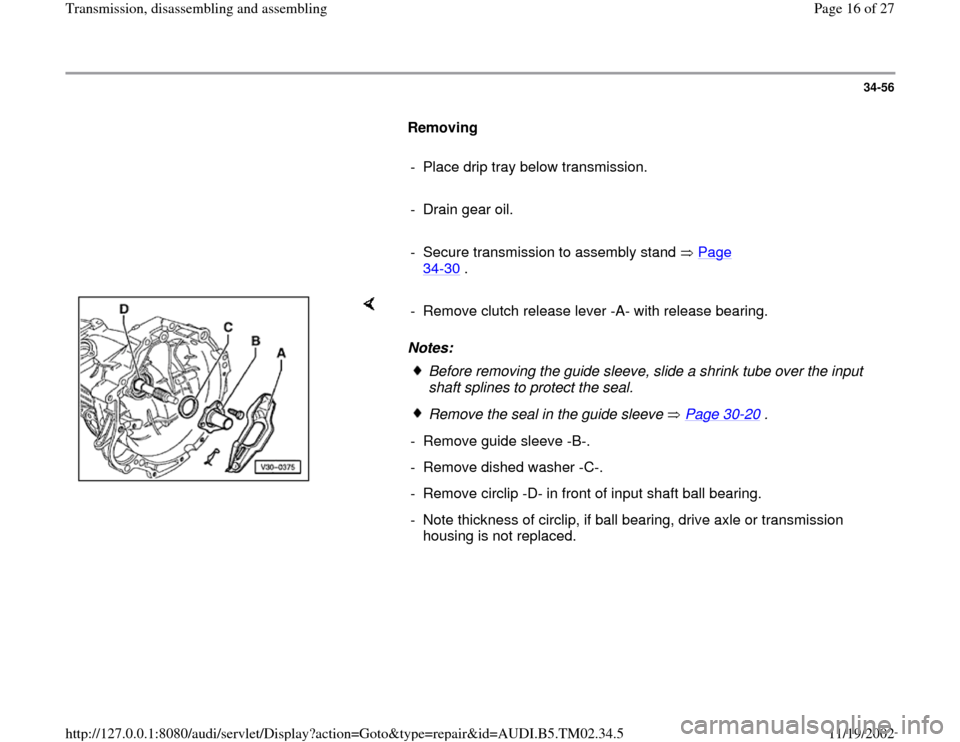
Notes: - Remove clutch release lever -A- with release bearing.
Before removing the guide sleeve, slide a shrink tube over the input
shaft splines to protect the seal. Remove the seal in the guide sleeve Page 30
-20
.
- Remove guide sleeve -B-.
- Remove dished washer -C-.
- Remove circlip -D- in front of input shaft ball bearing.
- Note thickness of circlip, if ball bearing, drive axle or transmission
housing is not replaced.
Pa
ge 16 of 27 Transmission, disassemblin
g and assemblin
g
11/19/2002 htt
p://127.0.0.1:8080/audi/servlet/Dis
play?action=Goto&t
yp
e=re
pair&id=AUDI.B5.TM02.34.5
Page 27 of 27
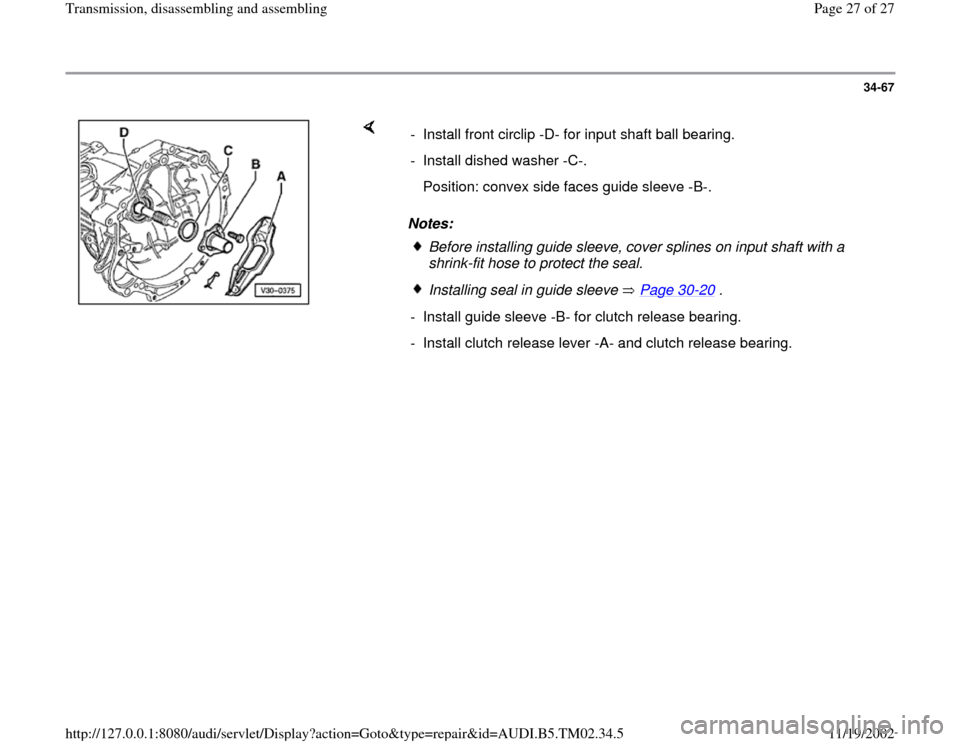
34-67
Notes: - Install front circlip -D- for input shaft ball bearing.
- Install dished washer -C-.
Position: convex side faces guide sleeve -B-.
Before installing guide sleeve, cover splines on input shaft with a
shrink-fit hose to protect the seal. Installing seal in guide sleeve Page 30
-20
.
- Install guide sleeve -B- for clutch release bearing.
- Install clutch release lever -A- and clutch release bearing.
Pa
ge 27 of 27 Transmission, disassemblin
g and assemblin
g
11/19/2002 htt
p://127.0.0.1:8080/audi/servlet/Dis
play?action=Goto&t
yp
e=re
pair&id=AUDI.B5.TM02.34.5