belt AUDI A4 1997 B5 / 1.G AWM Engine Cylinder Head Remove And Install Workshop Manual
[x] Cancel search | Manufacturer: AUDI, Model Year: 1997, Model line: A4, Model: AUDI A4 1997 B5 / 1.GPages: 42, PDF Size: 0.87 MB
Page 20 of 42
15-17
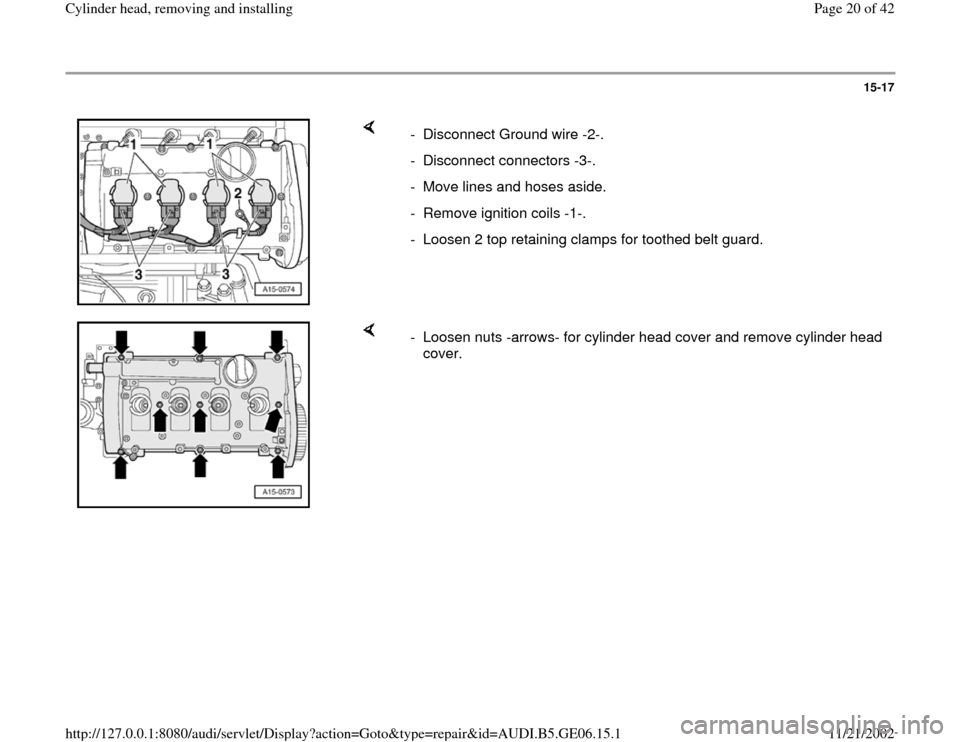
- Disconnect Ground wire -2-.
- Disconnect connectors -3-.
- Move lines and hoses aside.
- Remove ignition coils -1-.
- Loosen 2 top retaining clamps for toothed belt guard.
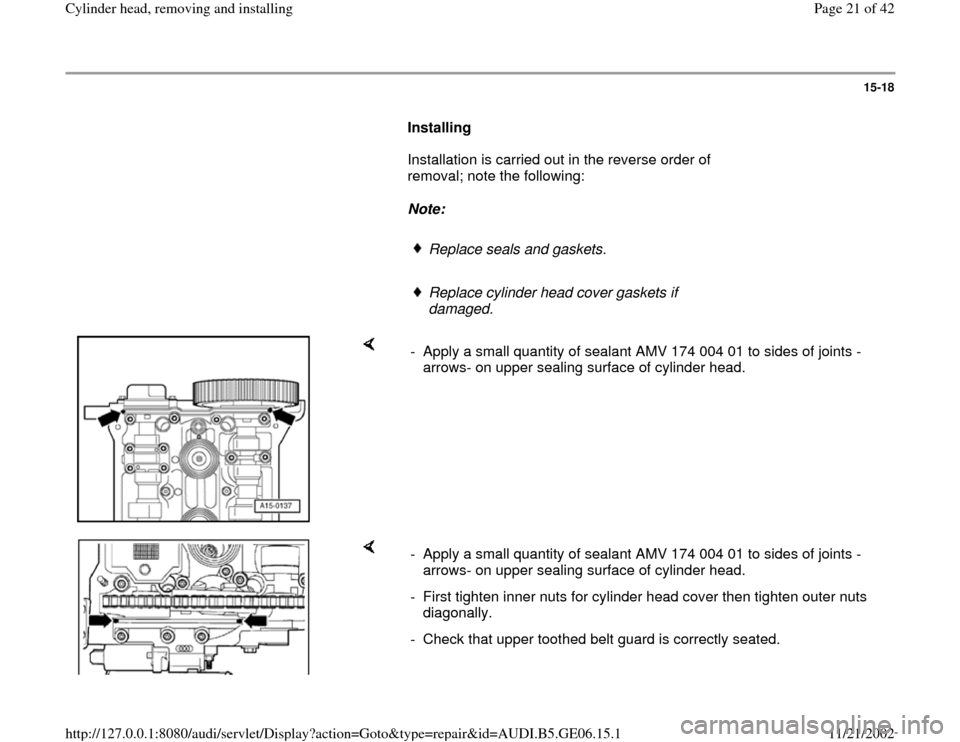
- Loosen nuts -arrows- for cylinder head cover and remove cylinder head
cover.
Pa
ge 20 of 42 C
ylinder head, removin
g and installin
g
11/21/2002 htt
p://127.0.0.1:8080/audi/servlet/Dis
play?action=Goto&t
yp
e=re
pair&id=AUDI.B5.GE06.15.1
Page 21 of 42
15-18
Installing
Installation is carried out in the reverse order of
removal; note the following:
Note:
Replace seals and gaskets.
Replace cylinder head cover gaskets if
damaged.
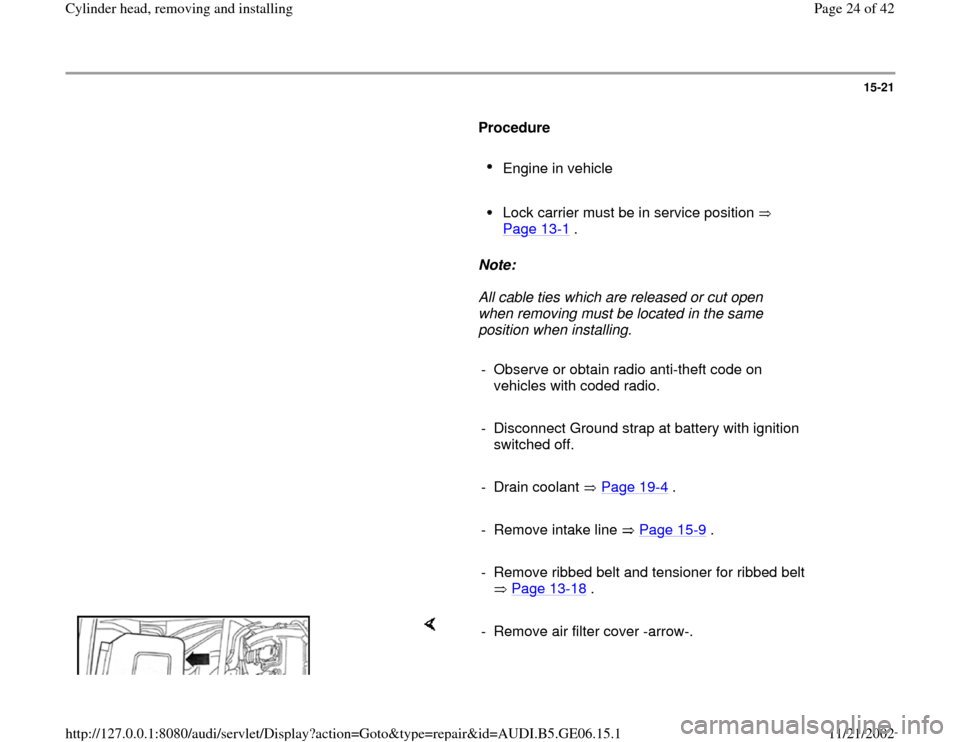
- Apply a small quantity of sealant AMV 174 004 01 to sides of joints -
arrows- on upper sealing surface of cylinder head.
- Apply a small quantity of sealant AMV 174 004 01 to sides of joints -
arrows- on upper sealing surface of cylinder head.
- First tighten inner nuts for cylinder head cover then tighten outer nuts
diagonally.
- Check that upper toothed belt guard is correctly seated.
Pa
ge 21 of 42 C
ylinder head, removin
g and installin
g
11/21/2002 htt
p://127.0.0.1:8080/audi/servlet/Dis
play?action=Goto&t
yp
e=re
pair&id=AUDI.B5.GE06.15.1
Page 24 of 42
15-21
Procedure
Engine in vehicle
Lock carrier must be in service position
Page 13
-1 .
Note:
All cable ties which are released or cut open
when removing must be located in the same
position when installing.
- Observe or obtain radio anti-theft code on
vehicles with coded radio.
- Disconnect Ground strap at battery with ignition
switched off.
- Drain coolant Page 19
-4 .
- Remove intake line Page 15
-9 .
- Remove ribbed belt and tensioner for ribbed belt
Page 13
-18
.
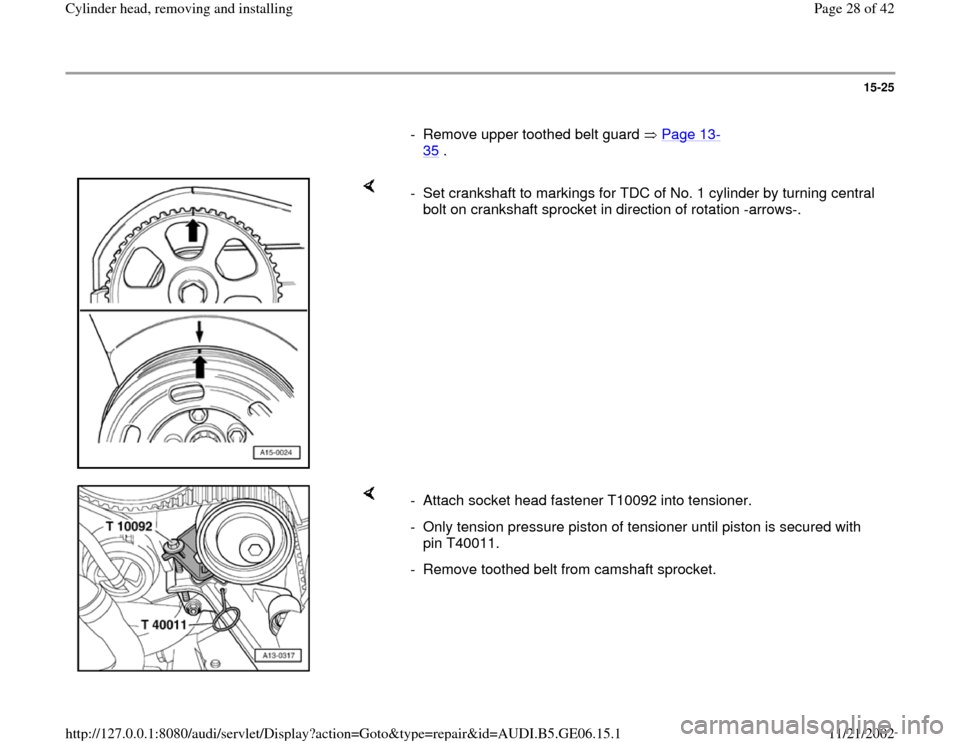
- Remove air filter cover -arrow-.
Pa
ge 24 of 42 C
ylinder head, removin
g and installin
g
11/21/2002 htt
p://127.0.0.1:8080/audi/servlet/Dis
play?action=Goto&t
yp
e=re
pair&id=AUDI.B5.GE06.15.1
Page 28 of 42
15-25
- Remove upper toothed belt guard Page 13
-
35
.
- Set crankshaft to markings for TDC of No. 1 cylinder by turning central
bolt on crankshaft sprocket in direction of rotation -arrows-.
- Attach socket head fastener T10092 into tensioner.
- Only tension pressure piston of tensioner until piston is secured with
pin T40011.
- Remove toothed belt from camshaft sprocket.
Pa
ge 28 of 42 C
ylinder head, removin
g and installin
g
11/21/2002 htt
p://127.0.0.1:8080/audi/servlet/Dis
play?action=Goto&t
yp
e=re
pair&id=AUDI.B5.GE06.15.1
Page 34 of 42
15-30
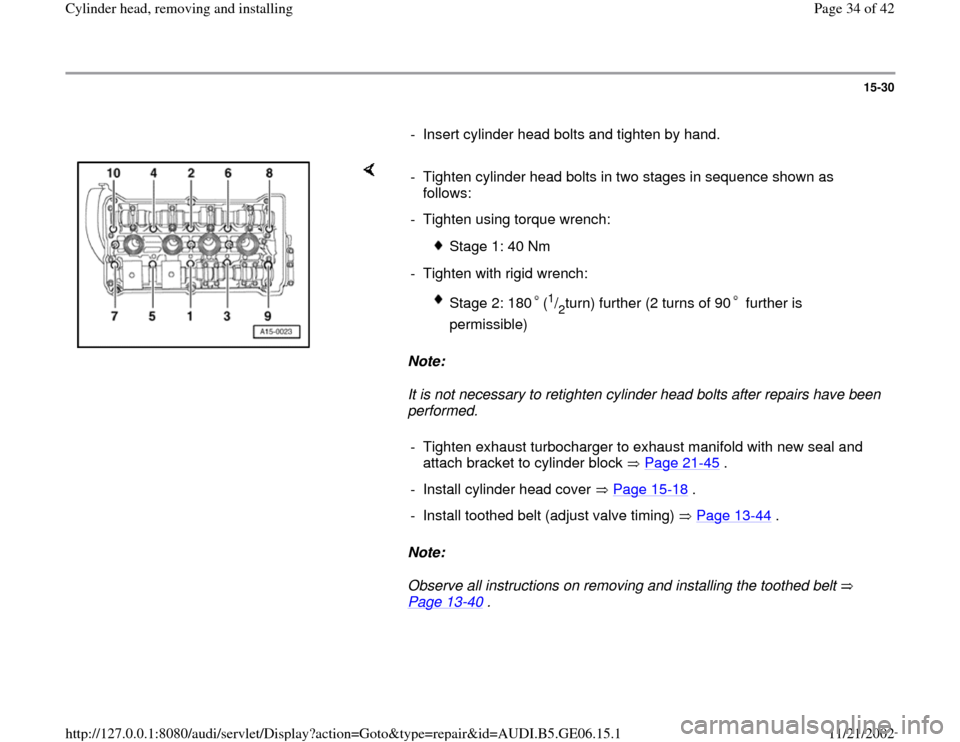
- Insert cylinder head bolts and tighten by hand.
Note:
It is not necessary to retighten cylinder head bolts after repairs have been
performed.
Note:
Observe all instructions on removing and installing the toothed belt
Page 13
-40
. - Tighten cylinder head bolts in two stages in sequence shown as
follows:
- Tighten using torque wrench:
Stage 1: 40 Nm
- Tighten with rigid wrench:
Stage 2: 180 (
1/2turn) further (2 turns of 90 further is
permissible)
- Tighten exhaust turbocharger to exhaust manifold with new seal and
attach bracket to cylinder block Page 21
-45
.
- Install cylinder head cover Page 15
-18
.
- Install toothed belt (adjust valve timing) Page 13
-44
.
Pa
ge 34 of 42 C
ylinder head, removin
g and installin
g
11/21/2002 htt
p://127.0.0.1:8080/audi/servlet/Dis
play?action=Goto&t
yp
e=re
pair&id=AUDI.B5.GE06.15.1
Page 35 of 42
15-31
- Install ribbed belt and tensioner for ribbed belt
Page 13
-20
.
- Install intake line Page 15
-13
.
- Replace coolant Page 19
-7 .
- After connecting battery, enter anti theft code for
radio.
Radio operating instructions
- Close windows fully using window switches.
- Actuate all power window switches again for at
least one second in the "close" direction to
activate the automatic open/close function.
- Set clock to correct time.
- Perform throttle-valve control module
adaption:
Repair Manual, 1.8 Liter 4
-Cyl. 5V Turbo Fuel
Pa
ge 35 of 42 C
ylinder head, removin
g and installin
g
11/21/2002 htt
p://127.0.0.1:8080/audi/servlet/Dis
play?action=Goto&t
yp
e=re
pair&id=AUDI.B5.GE06.15.1