lock AUDI A4 1998 B5 / 1.G AWM Engine Lubrication System Components Workshop Manual
[x] Cancel search | Manufacturer: AUDI, Model Year: 1998, Model line: A4, Model: AUDI A4 1998 B5 / 1.GPages: 35, PDF Size: 0.69 MB
Page 2 of 35
17-2
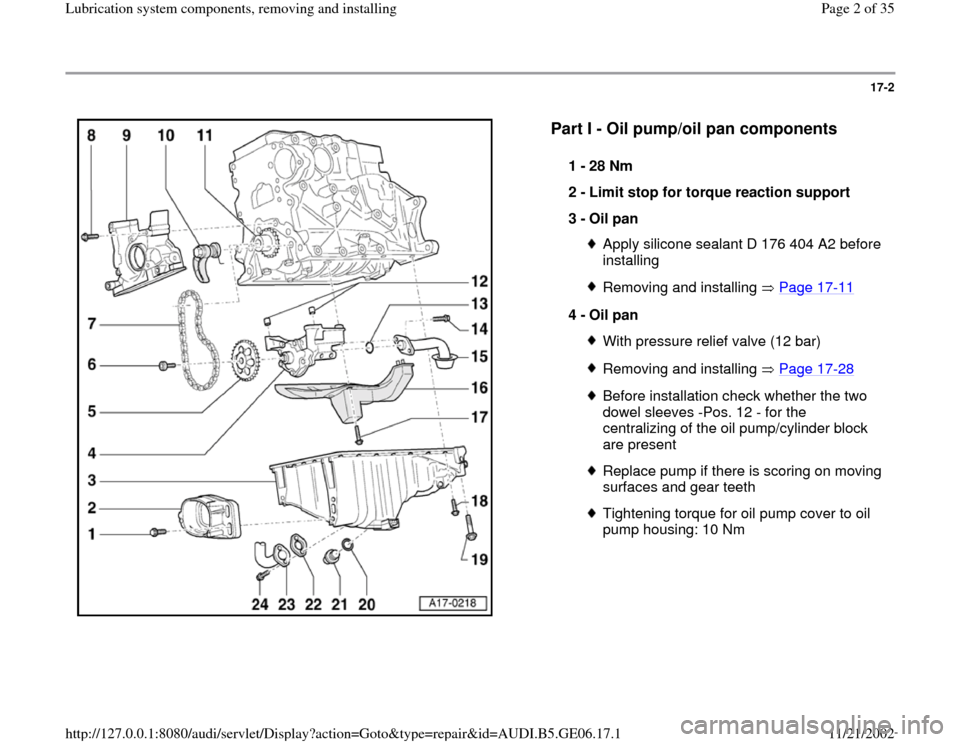
Part I - Oil pump/oil pan components
1 -
28 Nm
2 -
Limit stop for torque reaction support
3 -
Oil pan
Apply silicone sealant D 176 404 A2 before
installing Removing and installing Page 17
-11
4 -
Oil pan
With pressure relief valve (12 bar)Removing and installing Page 17
-28
Before installation check whether the two
dowel sleeves -Pos. 12 - for the
centralizing of the oil pump/cylinder block
are present Replace pump if there is scoring on moving
surfaces and gear teeth Tightening torque for oil pump cover to oil
pump housing: 10 Nm
Pa
ge 2 of 35 Lubrication s
ystem com
ponents, removin
g and installin
g
11/21/2002 htt
p://127.0.0.1:8080/audi/servlet/Dis
play?action=Goto&t
yp
e=re
pair&id=AUDI.B5.GE06.17.1
Page 8 of 35
17-8
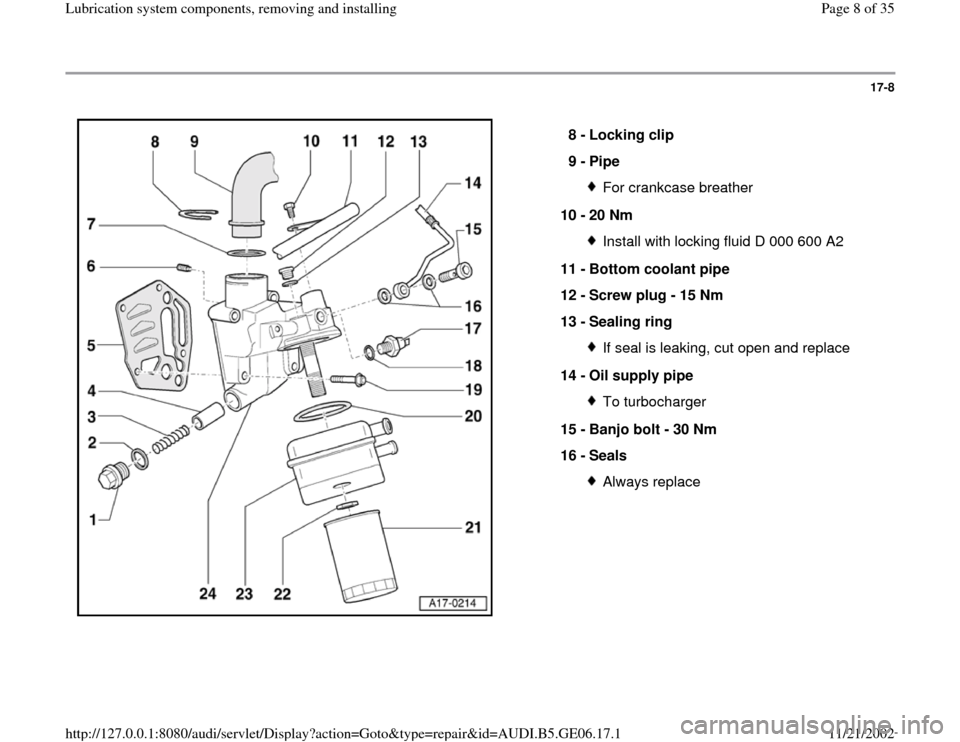
8 -
Locking clip
9 -
Pipe
For crankcase breather
10 -
20 Nm Install with locking fluid D 000 600 A2
11 -
Bottom coolant pipe
12 -
Screw plug - 15 Nm
13 -
Sealing ring If seal is leaking, cut open and replace
14 -
Oil supply pipe To turbocharger
15 -
Banjo bolt - 30 Nm
16 -
Seals Always replace
Pa
ge 8 of 35 Lubrication s
ystem com
ponents, removin
g and installin
g
11/21/2002 htt
p://127.0.0.1:8080/audi/servlet/Dis
play?action=Goto&t
yp
e=re
pair&id=AUDI.B5.GE06.17.1
Page 12 of 35
17-12
Removing
Engine in vehicle
Lock carrier must be in service position
Page 13
-1 .
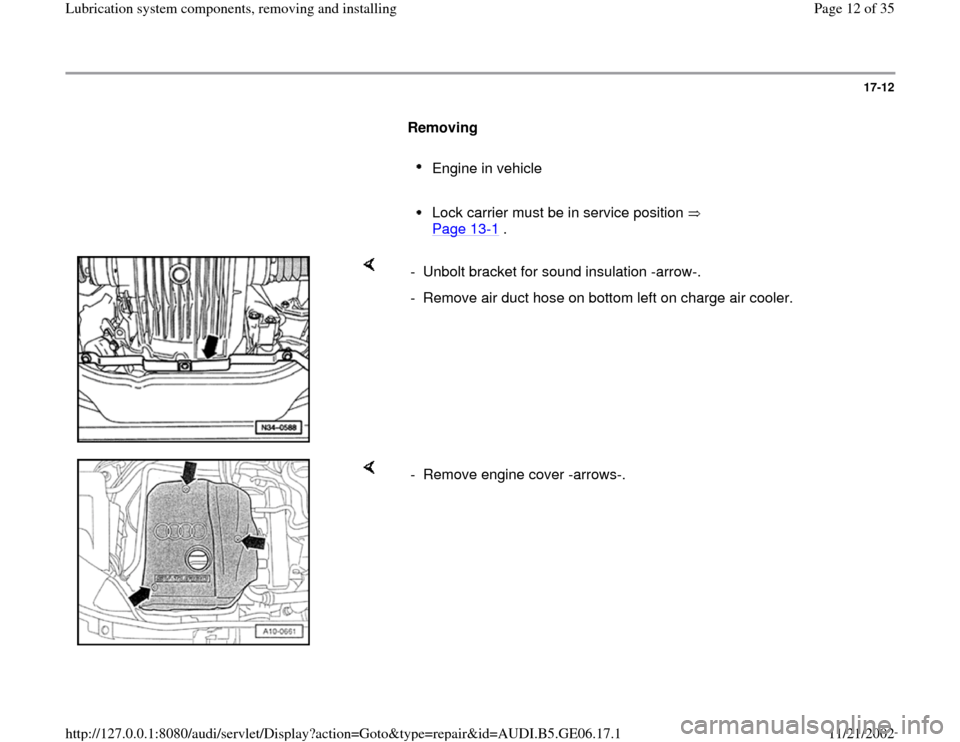
- Unbolt bracket for sound insulation -arrow-.
- Remove air duct hose on bottom left on charge air cooler.
- Remove engine cover -arrows-.
Pa
ge 12 of 35 Lubrication s
ystem com
ponents, removin
g and installin
g
11/21/2002 htt
p://127.0.0.1:8080/audi/servlet/Dis
play?action=Goto&t
yp
e=re
pair&id=AUDI.B5.GE06.17.1
Page 14 of 35
17-14
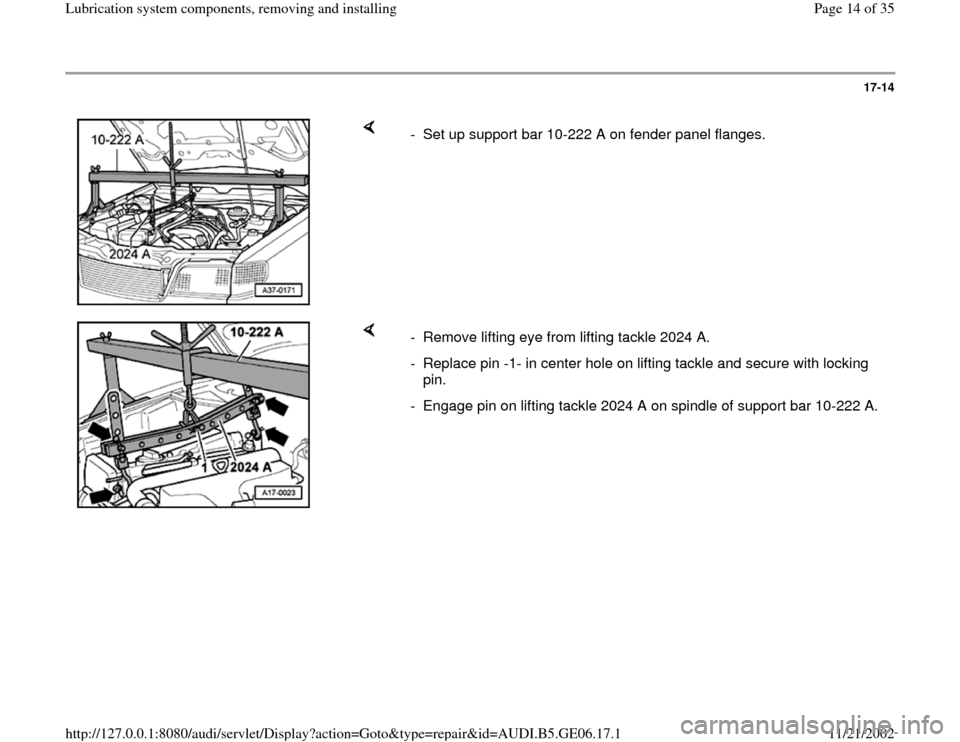
- Set up support bar 10-222 A on fender panel flanges.
- Remove lifting eye from lifting tackle 2024 A.
- Replace pin -1- in center hole on lifting tackle and secure with locking
pin.
- Engage pin on lifting tackle 2024 A on spindle of support bar 10-222 A.
Pa
ge 14 of 35 Lubrication s
ystem com
ponents, removin
g and installin
g
11/21/2002 htt
p://127.0.0.1:8080/audi/servlet/Dis
play?action=Goto&t
yp
e=re
pair&id=AUDI.B5.GE06.17.1
Page 15 of 35
17-15
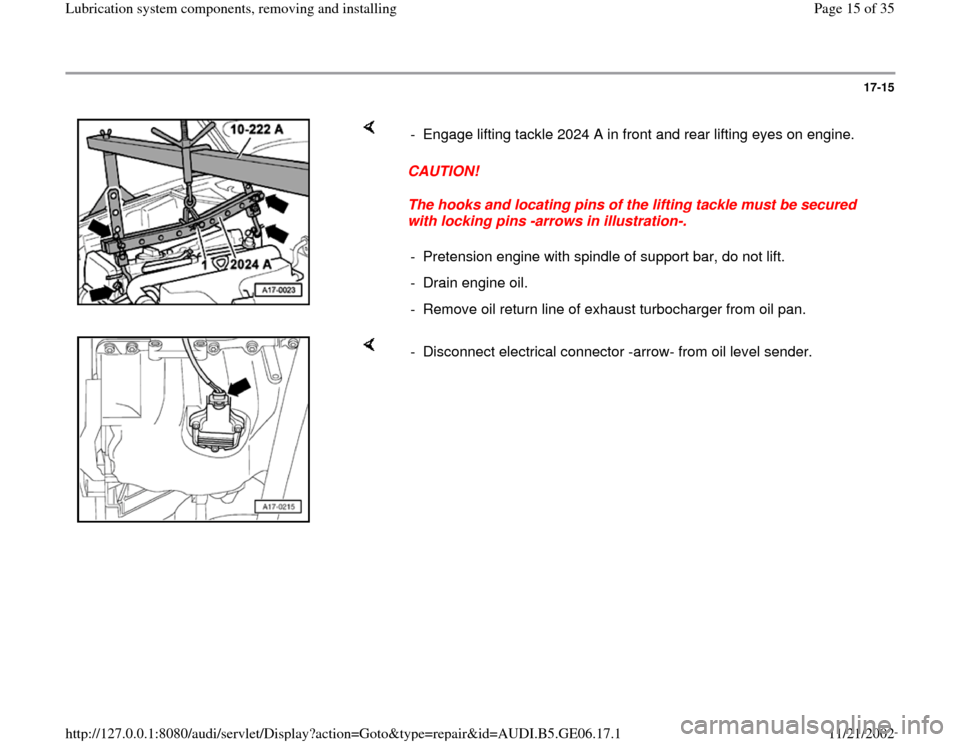
CAUTION!
The hooks and locating pins of the lifting tackle must be secured
with locking pins -arrows in illustration-. - Engage lifting tackle 2024 A in front and rear lifting eyes on engine.
- Pretension engine with spindle of support bar, do not lift.
- Drain engine oil.
- Remove oil return line of exhaust turbocharger from oil pan.
- Disconnect electrical connector -arrow- from oil level sender.
Pa
ge 15 of 35 Lubrication s
ystem com
ponents, removin
g and installin
g
11/21/2002 htt
p://127.0.0.1:8080/audi/servlet/Dis
play?action=Goto&t
yp
e=re
pair&id=AUDI.B5.GE06.17.1
Page 22 of 35
17-22
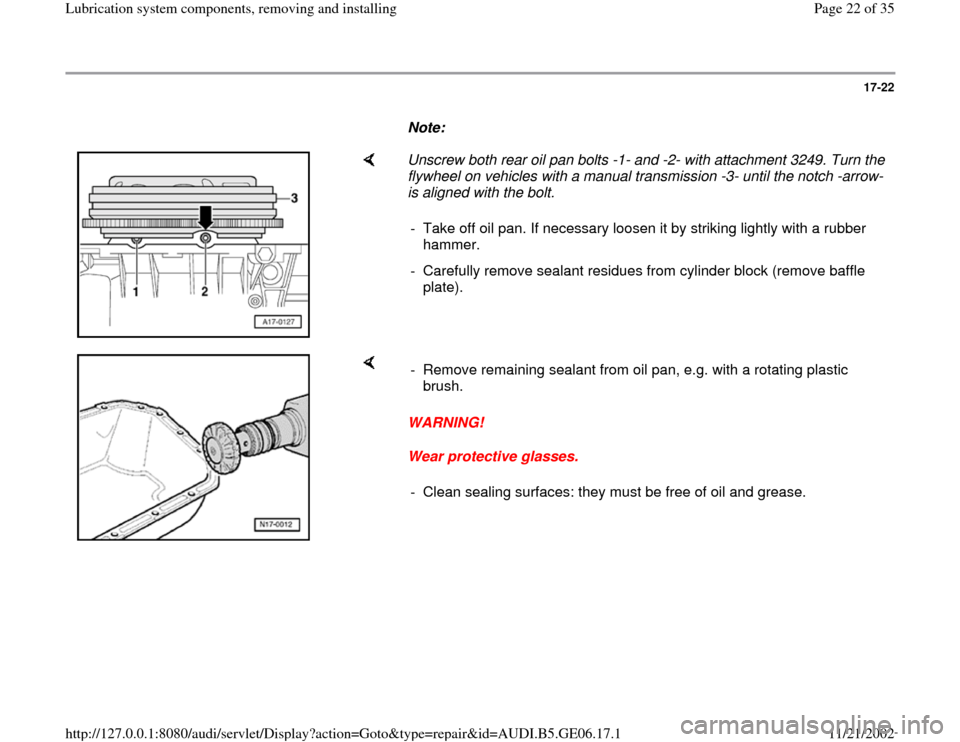
Note:
Unscrew both rear oil pan bolts -1- and -2- with attachment 3249. Turn the
flywheel on vehicles with a manual transmission -3- until the notch -arrow-
is aligned with the bolt.
- Take off oil pan. If necessary loosen it by striking lightly with a rubber
hammer.
- Carefully remove sealant residues from cylinder block (remove baffle
plate).
WARNING!
Wear protective glasses. - Remove remaining sealant from oil pan, e.g. with a rotating plastic
brush.
- Clean sealing surfaces: they must be free of oil and grease.
Pa
ge 22 of 35 Lubrication s
ystem com
ponents, removin
g and installin
g
11/21/2002 htt
p://127.0.0.1:8080/audi/servlet/Dis
play?action=Goto&t
yp
e=re
pair&id=AUDI.B5.GE06.17.1
Page 24 of 35
17-24
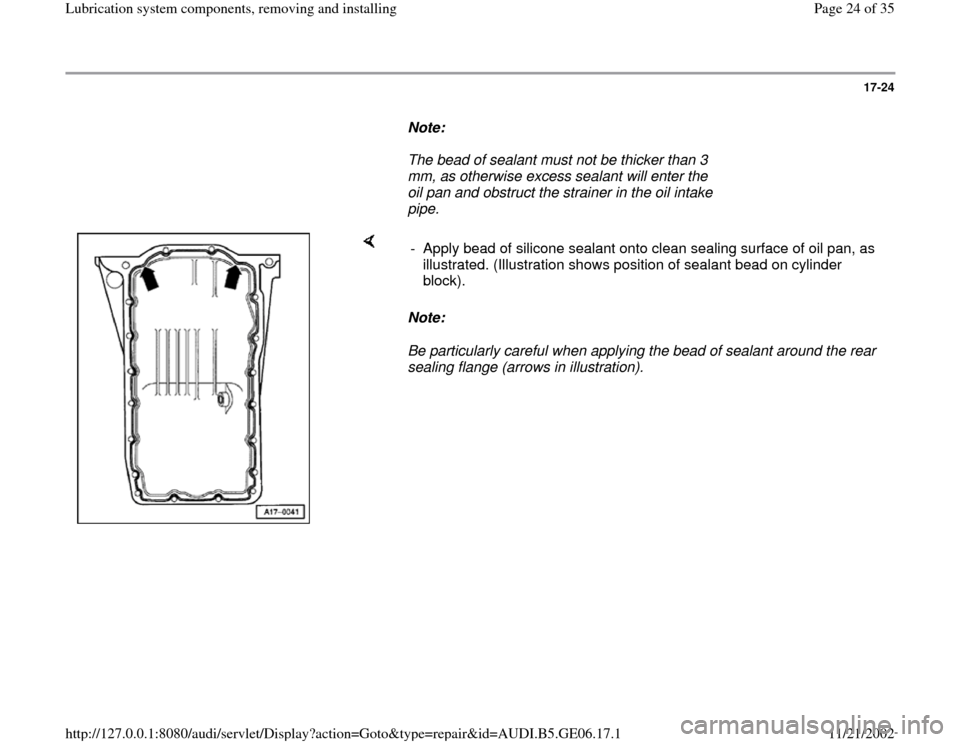
Note:
The bead of sealant must not be thicker than 3
mm, as otherwise excess sealant will enter the
oil pan and obstruct the strainer in the oil intake
pipe.
Note:
Be particularly careful when applying the bead of sealant around the rear
sealing flange (arrows in illustration). - Apply bead of silicone sealant onto clean sealing surface of oil pan, as
illustrated. (Illustration shows position of sealant bead on cylinder
block).
Pa
ge 24 of 35 Lubrication s
ystem com
ponents, removin
g and installin
g
11/21/2002 htt
p://127.0.0.1:8080/audi/servlet/Dis
play?action=Goto&t
yp
e=re
pair&id=AUDI.B5.GE06.17.1
Page 25 of 35
17-25
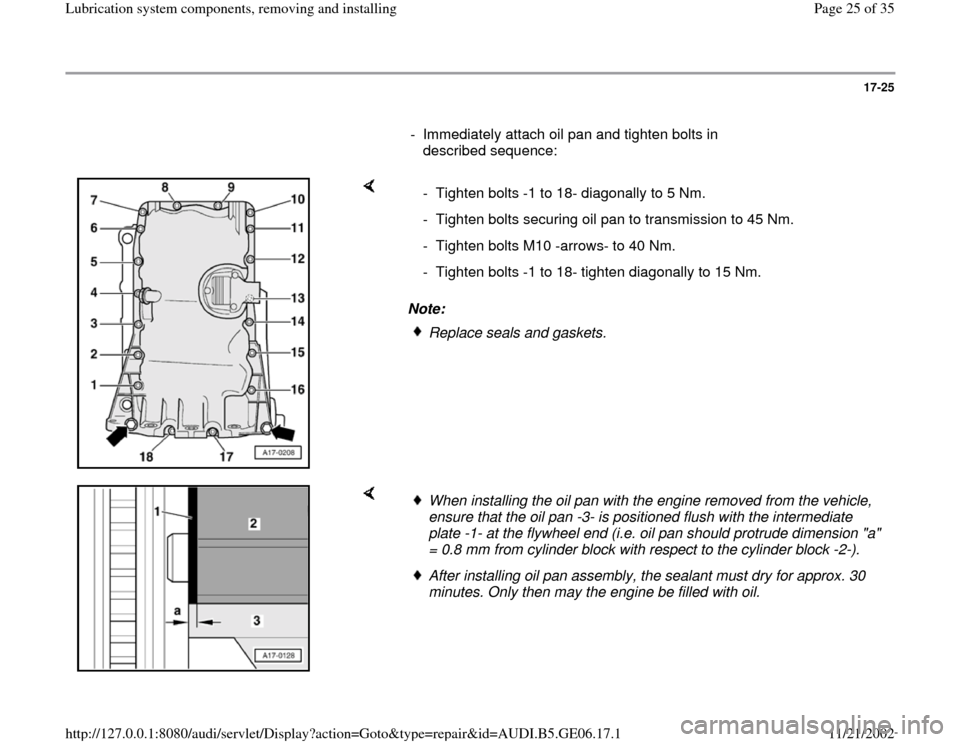
- Immediately attach oil pan and tighten bolts in
described sequence:
Note: - Tighten bolts -1 to 18- diagonally to 5 Nm.
- Tighten bolts securing oil pan to transmission to 45 Nm.
- Tighten bolts M10 -arrows- to 40 Nm.
- Tighten bolts -1 to 18- tighten diagonally to 15 Nm.
Replace seals and gaskets.
When installing the oil pan with the engine removed from the vehicle,
ensure that the oil pan -3- is positioned flush with the intermediate
plate -1- at the flywheel end (i.e. oil pan should protrude dimension "a"
= 0.8 mm from cylinder block with respect to the cylinder block -2-). After installing oil pan assembly, the sealant must dry for approx. 30
minutes. Only then may the engine be filled with oil.
Pa
ge 25 of 35 Lubrication s
ystem com
ponents, removin
g and installin
g
11/21/2002 htt
p://127.0.0.1:8080/audi/servlet/Dis
play?action=Goto&t
yp
e=re
pair&id=AUDI.B5.GE06.17.1
Page 26 of 35
17-26
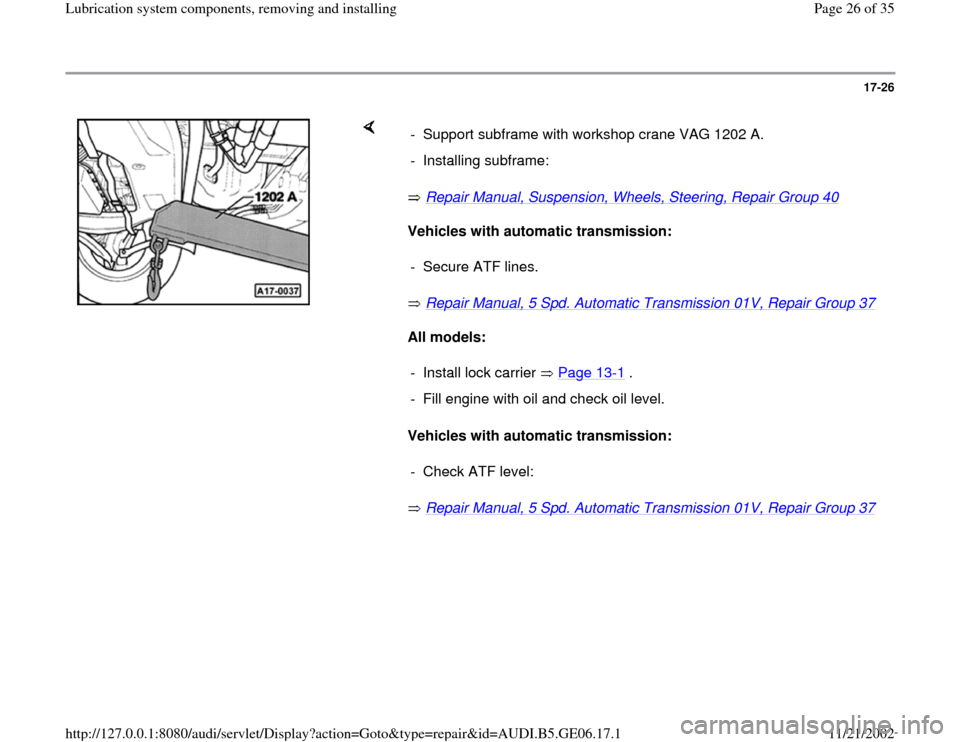
Repair Manual, Suspension, Wheels, Steering, Repair Group 40
Vehicles with automatic transmission:
Repair Manual, 5 Spd. Automatic Transmission 01V, Repair Group 37
All models:
Vehicles with automatic transmission:
Repair Manual, 5 Spd. Automatic Transmission 01V, Repair Group 37 - Support subframe with workshop crane VAG 1202 A.
- Installing subframe:
- Secure ATF lines.- Install lock carrier Page 13
-1 .
- Fill engine with oil and check oil level.
- Check ATF level:
Pa
ge 26 of 35 Lubrication s
ystem com
ponents, removin
g and installin
g
11/21/2002 htt
p://127.0.0.1:8080/audi/servlet/Dis
play?action=Goto&t
yp
e=re
pair&id=AUDI.B5.GE06.17.1
Page 27 of 35
17-27
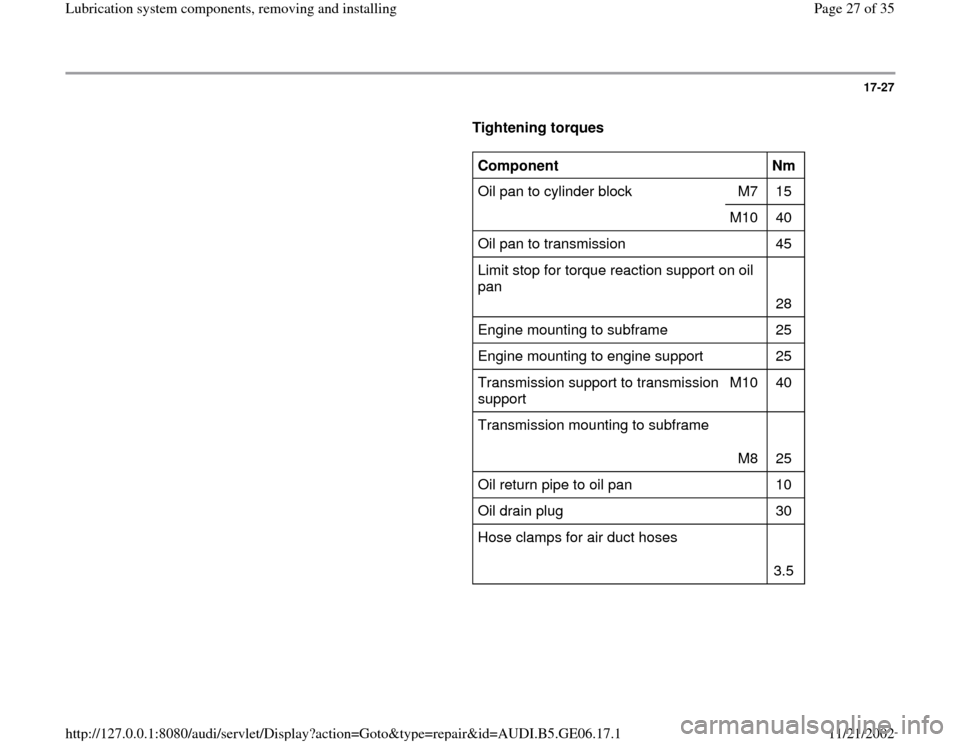
Tightening torques
Component
Nm
Oil pan to cylinder block M7 15
M10 40
Oil pan to transmission 45
Limit stop for torque reaction support on oil
pan
28
Engine mounting to subframe 25
Engine mounting to engine support 25
Transmission support to transmission
support M10 40
Transmission mounting to subframe
M8
25
Oil return pipe to oil pan 10
Oil drain plug 30
Hose clamps for air duct hoses
3.5
Pa
ge 27 of 35 Lubrication s
ystem com
ponents, removin
g and installin
g
11/21/2002 htt
p://127.0.0.1:8080/audi/servlet/Dis
play?action=Goto&t
yp
e=re
pair&id=AUDI.B5.GE06.17.1